
Are you looking to screen record on your iPhone 11? Screen recording can be a handy feature for capturing moments on your device, whether it’s to share a tutorial, showcase gameplay, or save a video for later reference. In this article, we will guide you through the steps to screen record on your iPhone 11, and provide you with some useful tips and tricks along the way. From enabling the screen recording feature to customizing settings and managing your recordings, you’ll soon be able to capture and share your iPhone 11 screen with ease. So, let’s dive in and unlock the power of screen recording on your iPhone 11!
Inside This Article
- Getting Started
- Method 1: Using the Control Center
- Method 2: Using the Screen Recording feature in the Settings
- Method 3: Using third-party screen recording apps
- Conclusion
- FAQs
Getting Started
If you’re eager to capture the action on your iPhone 11 screen, screen recording is a handy feature that allows you to do just that. Whether you want to create a tutorial, capture gameplay, or share your screen with friends, the iPhone 11 has you covered. In this guide, we’ll walk you through the process of enabling and using the screen recording feature on your iPhone 11.
Before you begin, make sure your iPhone 11 is updated to the latest iOS version. This ensures that you have access to all the latest features and improvements.
To get started with screen recording on your iPhone 11, follow these easy steps:
- Enabling the Screen Recording feature: Start by opening the Settings app on your iPhone 11. Scroll down and tap on Control Center. From there, select Customize Controls. Look for the Screen Recording option under the More Controls section and tap the green plus icon next to it to add it to your Control Center.
- Accessing the Control Center: Once you’ve enabled the Screen Recording feature, return to your home screen and swipe down from the top-right corner of your iPhone 11. This action will open the Control Center, where you’ll find various shortcuts and controls.
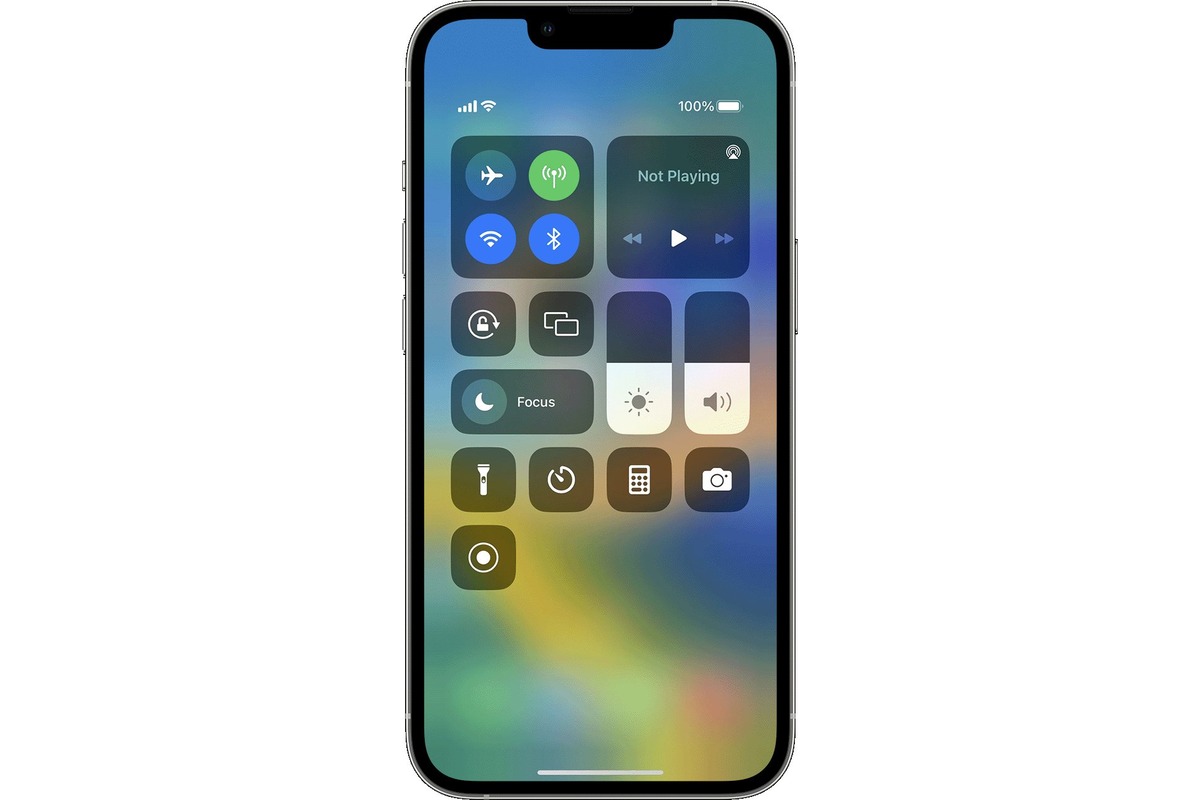
- Initiating the Screen Recording: In the Control Center, you’ll notice a circle-shaped icon representing the Screen Recording feature. Tap this icon to start the recording. A countdown will appear, giving you a few seconds to prepare before the recording begins.
- Saving and managing the recording: Once you’ve finished recording, you can save the video to your Photos app by tapping the red status bar at the top of your screen. Alternatively, you can access the Control Center again and tap the Screen Recording icon to stop the recording. The saved recording can now be found in your Photos app, where you can view, edit, and share it as desired.
That’s it! Now you’re ready to screen record on your iPhone 11 and capture those important moments. Whether it’s for work, entertainment, or simply documenting something memorable, the screen recording feature on your iPhone 11 makes it easy and convenient.
Remember to use this feature responsibly and respect the privacy of others. It’s always a good idea to inform anyone involved if you plan on recording your screen, especially in situations where private information may be displayed.
Method 1: Using the Control Center
Step 1: To begin screen recording on your iPhone 11, you’ll need to access the Control Center. Swipe down from the top-right corner of the screen to bring up the Control Center interface.
Step 2: Once the Control Center is displayed, you’ll notice a variety of icons and settings. Look for the “Screen Recording” icon, which resembles a white circle within a larger circle. If you don’t see the screen recording icon, you may need to add it to your Control Center. To do this, go to “Settings,” then “Control Center,” and select “Customize Controls.”
Step 3: Once you’ve located the screen recording icon, tap on it to initiate the screen recording process. A countdown timer of three seconds will appear, allowing you to prepare your iPhone for recording.
Step 4: Once the countdown is complete, your iPhone 11 will start recording your display and any audio that is being played. During the recording process, a red banner will be displayed at the top of the screen to indicate that the screen recording is in progress.
Step 5: To stop the screen recording, simply tap on the red banner at the top of the screen. A pop-up menu will appear, asking you to confirm the action. Tap “Stop” to end the recording.
Step 6: After stopping the recording, you can find the saved video in the Photos app on your iPhone 11. From there, you can edit and share the recording as desired.
Using the Control Center is a quick and convenient way to initiate a screen recording on your iPhone 11. Give it a try and capture those important moments on your device!
Method 2: Using the Screen Recording feature in the Settings
If you prefer a more direct approach to screen recording on your iPhone 11, you can utilize the built-in Screen Recording feature in the Settings. This method provides a quick and convenient way to capture your device’s screen without the need to access the Control Center.
To enable the Screen Recording feature, follow these simple steps:
- Open the “Settings” app on your iPhone 11.
- Scroll down and tap on “Control Center”.
- Tap on “Customize Controls”.
- Under the “More Controls” section, find “Screen Recording” and tap the green “+” button next to it. This will add the Screen Recording option to your Control Center.
- Once you have added the Screen Recording option to your Control Center, exit the Settings app.
- To start screen recording, swipe down from the top-right corner of your iPhone 11 to open the Control Center.
- Tap on the “Screen Recording” icon, which looks like a solid circle within a circle.
- A countdown of 3 seconds will appear. After the countdown, your iPhone 11 will start recording everything on the screen, including any taps or gestures you make.
- To stop the screen recording, simply tap on the red recording indicator at the top of the screen or swipe up from the bottom and tap on the “Stop Recording” button in the Control Center.
Once you have finished recording, the video will be saved to your Photos app, where you can access and manage it like any other video or media on your device.
The Screen Recording feature in the Settings provides a convenient alternative to using the Control Center. It allows you to directly access the screen recording functionality without the need for additional swiping or gestures. Whether you prefer using the Control Center or the Settings, both methods will enable you to effortlessly capture and share important moments on your iPhone 11.
Method 3: Using third-party screen recording apps
If you’re looking for more advanced screen recording capabilities or additional features, you can explore using third-party screen recording apps available in the App Store. These apps offer a variety of options to enhance your screen recording experience, such as customizable settings, editing tools, and convenient sharing options.
To get started, open the App Store on your iPhone 11 and search for “screen recording apps.” You’ll find a wide range of options to choose from, including both free and paid apps. Take some time to read reviews, check ratings, and compare features before making your selection.
Once you’ve chosen and installed a third-party screen recording app, follow the instructions provided by the app to set it up. Typically, you’ll need to grant the necessary permissions and configure any custom settings according to your preferences.
To initiate a screen recording using a third-party app, launch the app and locate the screen recording feature within the app’s interface. This might be a dedicated button or a menu option, depending on the app you’ve chosen.
When you’re ready to begin recording, tap on the screen recording button and follow any on-screen prompts. You may be asked to choose any additional settings, such as video quality, audio source, or recording duration.
During the recording, navigate to the screen or app you wish to record. The app will capture all the on-screen activity, including any gestures, screen transitions, or interactions you make.
Once you’re finished recording, tap on the designated stop or finish button within the app. The recording will be processed and saved to your device, usually in the app’s designated storage location or camera roll.
After saving the recording, you can access it through the app’s interface or your device’s gallery. From there, you can play, edit, and share the recording as desired.
Keep in mind that third-party screen recording apps may offer a variety of additional features, such as video editing, annotations, or sharing options to popular platforms like social media or cloud storage services.
Remember to review and troubleshoot the app’s settings or contact the app developer if you encounter any technical difficulties or have specific questions about its functionality.
Screen recording on an iPhone 11 is a powerful feature that allows you to capture and share important moments with ease. Whether you want to create tutorials, share gameplay, or capture memorable conversations, the built-in screen recording feature on the iPhone 11 makes it quick and convenient. By following a few simple steps, you can start recording your screen and unleash your creativity. With the ability to customize settings, edit recordings, and share directly from your device, screen recording on the iPhone 11 is a versatile tool that offers endless possibilities. So, go ahead and explore the world of screen recording on your iPhone 11!
FAQs
Q: Can I screen record on my iPhone 11?
A: Absolutely! The iPhone 11 comes with a built-in screen recording feature that allows you to capture what’s happening on your screen.
Q: How do I access the screen recording feature on my iPhone 11?
A: To access the screen recording feature, you need to first enable it in the Control Center. Simply go to Settings, select Control Center, choose Customize Controls, and then add the Screen Recording option. Once this is done, you can access the screen recording feature by swiping down from the top-right corner of your screen and tapping on the screen recording button.
Q: Can I record audio while screen recording on iPhone 11?
A: Yes, you can record both audio from your device and your microphone while screen recording on your iPhone 11. Before you start the screen recording, make sure the microphone is turned on by pressing and holding the screen recording button in the Control Center, and then toggle on the microphone option.
Q: Are there any limitations to screen recording on iPhone 11?
A: While the screen recording feature on the iPhone 11 is quite versatile, there are a few limitations to keep in mind. You cannot use screen recording in certain apps that have DRM protection, such as Netflix and Hulu. Additionally, screen recording will not capture any copyrighted or protected content. It’s important to respect copyright laws and only use screen recording for personal and non-commercial purposes.
Q: How can I stop a screen recording on my iPhone 11?
A: To stop a screen recording on your iPhone 11, you can either tap on the red recording indicator in the top-left corner of your screen and select “Stop,” or you can swipe up from the bottom of your screen and tap on the screen recording button again to end the recording.