
Welcome to our comprehensive guide on how to transfer photos from your iPhone to a flash drive! With the ever-increasing quality and storage capacity of smartphone cameras, we capture countless memories in the form of digital photographs. However, the limited storage space on our devices can quickly fill up, making it necessary to offload our precious photos onto external storage. In this article, we will walk you through the step-by-step process of transferring your iPhone photos onto a flash drive, ensuring that your memories are safely backed up and freeing up valuable space on your device. Whether you are looking to create a backup of your photos, transfer them to a computer, or simply want to keep a copy of your pictures in a secure storage device, we have got you covered. Let’s dive in and get those photos safely transferred!
Inside This Article
- Method 1: Using the Files App
- Method 2: Using the iCloud Photo Library
- Method 3: Using AirDrop
- Method 4: Using a Third-Party App
- Conclusion
- FAQs
Method 1: Using the Files App
Transferring photos from your iPhone to a flash drive can be easily done using the Files app. The Files app comes pre-installed on iPhones and offers a convenient way to manage and organize your files.
Follow these simple steps to transfer your photos:
- Connect your flash drive to your computer.
- Open the Files app on your iPhone.
- Navigate to the folder where your photos are stored. This could be the Photos app, iCloud Drive, or any other location.
- Select the photos you want to transfer by tapping on them. You can select multiple photos by tapping and dragging your finger across the screen.
- Click on the share button at the bottom of the screen. It looks like a square with an arrow pointing up.
- Scroll down and select “Save to Files” from the list of options.
- In the “Save to” menu, choose the location of your flash drive. This will typically be listed under “Locations” and may have a name like “USB Drive” or “External Storage.”
- Tap “Save” to begin transferring the selected photos to your flash drive.
Once the transfer is complete, you can disconnect your flash drive from your computer and access your photos directly from the drive. This method allows you to easily backup and free up storage space on your iPhone, ensuring your precious memories are safe and accessible.
Method 2: Using the iCloud Photo Library
If you are an iPhone user and have enabled iCloud Photo Library on your device, transferring photos to a flash drive becomes a breeze. iCloud Photo Library allows you to store your photos and videos in the cloud, making them accessible from any device, including your computer. Here’s how you can transfer photos from your iPhone to a flash drive using the iCloud Photo Library:
Step 1: Enable iCloud Photo Library:
First, you need to make sure that the iCloud Photo Library feature is turned on. To do this, go to the Settings app on your iPhone, tap on your name at the top, then select “iCloud.” From there, tap on “Photos” and toggle on the “iCloud Photo Library” option. This will automatically upload your photos and videos to iCloud.
Step 2: Access iCloud Photos on your computer:
Once your photos are uploaded to iCloud, you can easily access them on your computer. Open a web browser and go to the iCloud website. Sign in with your Apple ID and password. Click on the “Photos” icon to open the iCloud Photo Library.
Step 3: Select and download photos:
In the iCloud Photo Library, you can browse through your photos and select the ones you want to transfer. You can use the shift key to select multiple photos at once or use the “Select All” option to choose all photos. Once you have selected the desired photos, click on the download icon to save them to your computer.
Step 4: Transfer photos to the flash drive:
Connect your flash drive to your computer. Open the File Explorer (Windows) or Finder (Mac) and navigate to the location where your downloaded photos are saved. Simply drag and drop the selected photos to the flash drive’s folder. Wait for the transfer to complete and safely eject the flash drive from your computer. Now you have successfully transferred your iPhone photos to the flash drive using the iCloud Photo Library.
By using the iCloud Photo Library, you can easily back up your photos and access them from multiple devices. It provides a convenient way to transfer your iPhone photos to a flash drive without the need for any additional apps or cables. Start utilizing this feature to free up space on your iPhone and ensure your precious memories are safely stored.
Method 3: Using AirDrop
One convenient way to transfer photos from your iPhone to a flash drive is by using AirDrop. AirDrop allows you to wirelessly share files between Apple devices with just a few simple steps. Here’s how you can transfer your photos using AirDrop:
Step 1: Ensure that both your iPhone and the receiving device, which in this case is the flash drive, have AirDrop enabled and are in close proximity to each other.
Step 2: On your iPhone, go to the Photos app and select the photos you want to transfer. You can tap on the ‘Select’ option at the top right corner of the screen and then choose the desired photos.
Step 3: Once you have selected the photos, tap on the ‘Share’ option, which is represented by a square with an upward arrow at the bottom left corner of the screen. This will bring up a list of sharing options.
Step 4: Look for the AirDrop icon within the sharing options and tap on it. Your iPhone will now search for nearby AirDrop-enabled devices, including the flash drive.
Step 5: Once the flash drive appears as an available device, tap on its name to initiate the transfer. A prompt may appear on the receiving device asking for permission to accept the files.
Step 6: Confirm the transfer on both devices. The selected photos will now be sent from your iPhone to the flash drive via AirDrop.
It’s important to note that AirDrop requires both devices to be on the same Wi-Fi network or have Bluetooth turned on. Additionally, the flash drive must support AirDrop functionality.
AirDrop provides a quick and easy way to transfer photos from your iPhone to a flash drive without the need for cables or additional software. It’s a great option if you want to quickly offload photos from your iPhone to create more storage space or share them with others.
Method 4: Using a Third-Party App
If you are looking for an alternative solution to transfer photos from your iPhone to a flash drive, you can consider using a third-party app. These apps are designed specifically for managing and transferring files between your iPhone and external storage devices, such as flash drives.
There are several third-party apps available on the App Store that can help you accomplish this task. One popular option is the “iBridge” app, which allows you to easily transfer files, including photos, between your iPhone and external storage.
Here’s how you can use a third-party app to transfer photos from your iPhone to a flash drive:
- First, open the App Store on your iPhone and search for the third-party app of your choice. Once you find the app, download and install it on your device.
- Launch the app and follow the app’s instructions to set it up. Typically, you’ll need to grant the necessary permissions to access your iPhone’s photos.
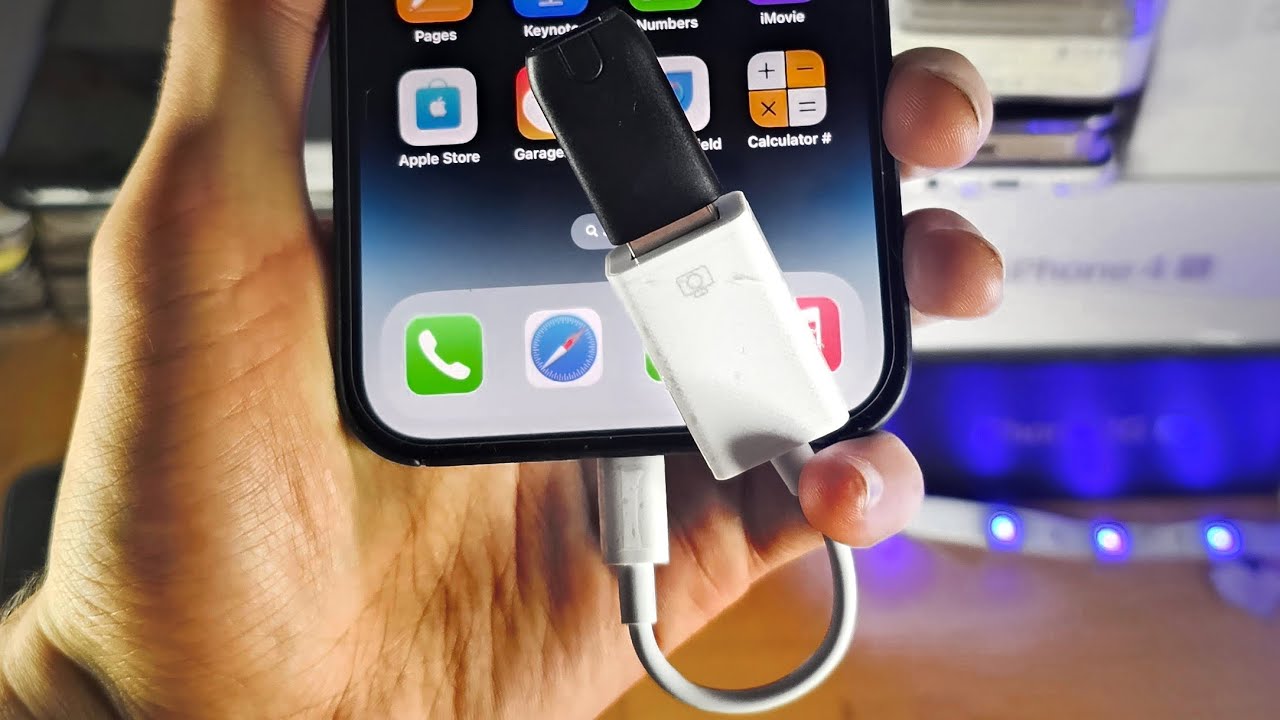
- Connect your flash drive to your iPhone using a compatible adapter. Some apps may require you to use a specific adapter or cable for this step, so make sure to check the app’s instructions or documentation.
- Once your flash drive is connected, open the app and navigate to the “Photos” section or a similar option.
- Select the photos you want to transfer by tapping on them. You can choose multiple photos or select all of them.
- After selecting the photos, look for an option to export or move them to external storage. This option may vary depending on the app you are using, but it is usually easily accessible within the app’s user interface.
- Tap on the export or move option and choose the connected flash drive as the destination for the transfer.
- Wait for the transfer process to complete. The time it takes will depend on the size of the photos and the speed of your flash drive.
- Once the transfer is finished, safely disconnect your flash drive from your iPhone. You can do this by following the proper ejecting procedure within the app or by disconnecting the adapter or cable.
Using a third-party app can provide more flexibility and additional features compared to built-in methods. However, it’s important to choose a reputable app from the App Store and ensure that it is compatible with your iPhone and flash drive.
By following these steps, you can easily transfer photos from your iPhone to a flash drive using a third-party app. This method is particularly useful if you frequently need to transfer large numbers of photos or if you prefer a more intuitive and customizable file management experience.
Conclusion
Transferring photos from your iPhone to a flash drive is a convenient and practical solution for freeing up space on your device and keeping your precious memories safe. With the help of a lightning to USB adapter or a dedicated flash drive with a Lightning connector, you can easily and quickly backup your photos. Alternatively, you can utilize cloud storage services or third-party apps like Google Photos or Dropbox for seamless photo syncing across multiple devices.
Remember to follow the step-by-step instructions mentioned in this article to ensure a smooth and successful transfer process. By keeping your photos organized and backed up, you can have peace of mind knowing that your memories are safe and easily accessible whenever you need them.
So, go ahead and make use of these methods to transfer your photos from your iPhone to a flash drive, and enjoy the freedom of more storage space on your device!
FAQs
1. Can I transfer photos from my iPhone to a flash drive?
Yes, you can transfer photos from your iPhone to a flash drive. There are several methods you can use to accomplish this, including using a computer, using a lightning-to-USB adapter, or using external storage devices specifically designed for iPhones.
2. What do I need to transfer photos from my iPhone to a flash drive?
To transfer photos from your iPhone to a flash drive, you will need the following:
– An iPhone with the Lightning port
– A flash drive or USB storage device
– A lightning-to-USB adapter (if your flash drive does not have a Lightning connector)
– A computer (if you prefer to transfer the photos using a computer)
3. How do I transfer photos from my iPhone to a flash drive using a computer?
To transfer photos from your iPhone to a flash drive using a computer, follow these steps:
1. Connect your iPhone to the computer using a USB cable.
2. Unlock your iPhone and trust the computer if prompted.
3. Open the default file explorer on your computer (such as Windows Explorer or Finder on Mac).
4. Locate your iPhone under the list of connected devices and open it to access the internal storage.
5. Navigate to the “DCIM” folder, where your photos are stored.
6. Select the photos you want to transfer and copy them to a folder on your computer.
7. Disconnect your iPhone and connect the flash drive to the computer.
8. Open the flash drive on the computer and create a new folder (if desired).
9. Copy the photos from the computer folder and paste them into the flash drive folder.
10. Eject the flash drive safely from the computer and disconnect it.
4. Can I transfer photos directly from my iPhone to a flash drive without using a computer?
Yes, you can transfer photos directly from your iPhone to a flash drive without using a computer. To do this, you will need a lightning-to-USB adapter or an external storage device that is compatible with iPhones. Connect the adapter or storage device to your iPhone’s Lightning port and follow the instructions provided by the device manufacturer to transfer the photos.
5. Are there any specific flash drives or storage devices recommended for transferring photos from an iPhone?
Yes, there are several flash drives and storage devices specifically designed for iPhones that make it easier to transfer photos. Some popular options include SanDisk iXpand Flash Drive, Kingston DataTraveler Bolt Duo, and HooToo iPhone Flash Drive. These devices often come with dedicated apps that allow you to manage and transfer photos between your iPhone and the flash drive with ease.