
Are you tired of running out of storage space on your Android phone? Or perhaps you want an easy way to transfer files between your phone and computer? Look no further – using a flash drive on your Android phone can solve all your storage and file transfer woes! In this article, we will guide you on how to use a flash drive on your Android phone, so you can expand your storage capacity and enjoy a seamless file transfer experience. Whether you want to back up important documents, store media files, or quickly transfer files between devices, using a flash drive is a convenient and hassle-free solution. So, let’s dive in and explore how you can make the most of your Android phone’s storage capabilities with a flash drive!
Inside This Article
- Overview
- Step 1: Check Compatibility
- Step 2: Connect the Flash Drive to Your Android Phone
- Step 3: Access the Flash Drive on Your Android Phone
- Step 4: Transfer Files to and from the Flash Drive
- Tips and Tricks
- Troubleshooting Common Issues
- Conclusion
- FAQs
Overview
Using a flash drive on your Android phone can be incredibly convenient, allowing you to quickly and easily transfer files between devices. Whether you want to transfer documents, photos, videos, or other files, a flash drive can serve as a portable and reliable storage solution.
Before you get started, it’s important to check the compatibility of your Android phone with a flash drive. Not all Android devices support USB OTG (On-The-Go) functionality, which is necessary for connecting a flash drive. Make sure to consult your phone’s user manual or do a quick internet search to confirm if your device is compatible.
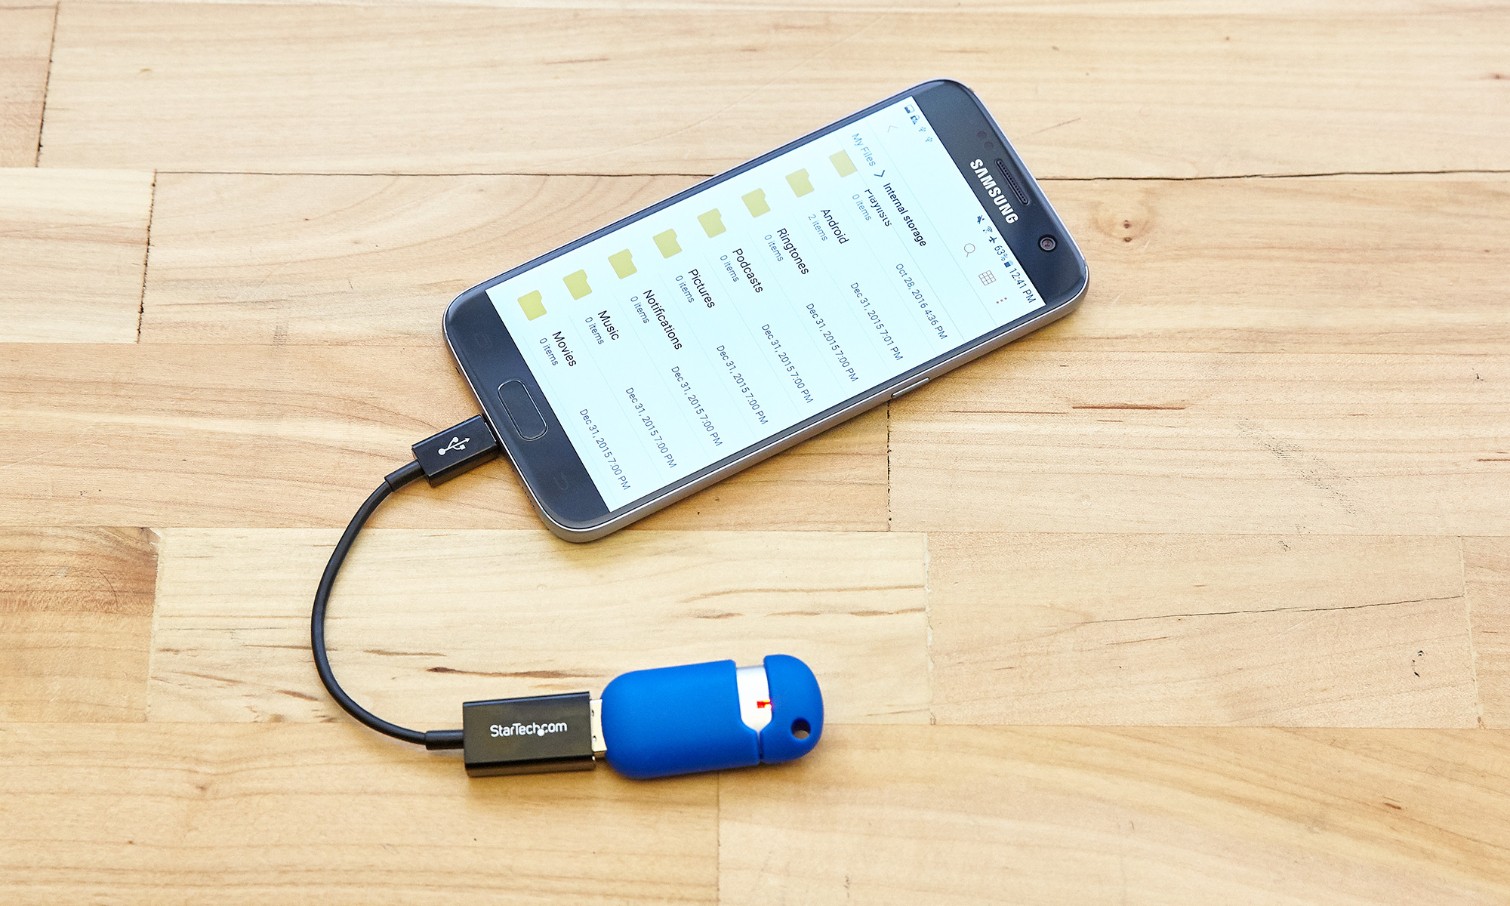
If your Android phone is compatible, the next step is to connect the flash drive to your device. Most Android devices use a micro USB or USB-C port for charging and data transfer. You will need a USB OTG adapter or cable to connect the flash drive to your phone. These adapters are readily available online or at electronics stores.
Once you have connected the flash drive to your Android phone, you can easily access the contents of the drive. Your phone’s file manager app should automatically detect the flash drive and display it as a removable storage device. Simply tap on the flash drive icon to open it and view the files stored on it.
Transferring files to and from the flash drive is a breeze. You can use the file manager app to copy or move files between your phone’s internal storage and the flash drive. Simply select the file(s) you want to transfer, tap on the appropriate option (copy or move), and choose the destination folder, which can be the flash drive or your phone’s internal storage.
Here are a few tips and tricks to get the most out of using a flash drive on your Android phone:
- Make sure to safely eject the flash drive from your phone when you’re done using it to prevent data corruption or loss.
- Consider formatting the flash drive in a file system compatible with both Android and other devices you frequently use to ensure seamless file transfer.
- If your Android phone’s storage is running low, you can free up space by moving files to the flash drive instead of deleting them.
If you encounter any issues while using a flash drive on your Android phone, don’t worry. Common issues like the flash drive not being recognized or files not transferring properly can often be resolved by restarting the device, reconnecting the flash drive, or using a different USB OTG adapter.
Step 1: Check Compatibility
Before connecting a flash drive to your Android phone, it’s essential to ensure compatibility between the two devices. Not all Android phones have built-in support for connecting external storage devices like flash drives.
The first thing you need to do is check if your Android phone supports USB On-The-Go (OTG) functionality. USB OTG allows your phone to act as a host and connect to other USB devices such as flash drives.
To check if your Android phone has USB OTG support, you can refer to the user manual or research online. Additionally, you can download USB OTG Checker apps from the Google Play Store, which will quickly determine if your phone is compatible.
Keep in mind that even if your Android phone supports OTG, there might be certain limitations based on the Android version or the phone’s hardware specifications. Therefore, it’s always a good idea to verify the specific compatibility requirements for your device.
Step 2: Connect the Flash Drive to Your Android Phone
Connecting a flash drive to your Android phone opens up a whole new world of possibilities for transferring and accessing files on the go. Here are the steps to connect a flash drive to your Android phone:
1. Check USB OTG Support: First, you need to ensure that your Android phone supports USB On-The-Go (OTG) functionality. Most modern Android phones come with this feature, but it’s always a good idea to double-check. You can check your phone’s specifications or do a quick Google search to see if it supports OTG.
2. Get a USB OTG Adapter: If your phone supports USB OTG, the next step is to get a USB OTG adapter. This adapter allows you to connect your flash drive to your phone through the micro-USB or USB-C port. You can easily find USB OTG adapters online or at your local electronics store.
3. Connect the Flash Drive: Once you have the USB OTG adapter, insert the male end of the adapter into your phone’s micro-USB or USB-C port. Then, insert the USB end of the adapter into the flash drive. Make sure the flash drive is securely connected to the adapter.
4. Grant Permissions: After connecting the flash drive, your Android phone may prompt you to grant permissions to access the USB device. Follow the on-screen instructions and allow the necessary permissions for the connection to be established.
5. Open File Manager: Once the flash drive is connected and permissions are granted, open the file manager app on your Android phone. This app allows you to browse and manage files stored on your phone as well as external storage devices like the flash drive.
6. Access the Flash Drive: In the file manager app, navigate to the “External Storage” or “USB Storage” section. You should see the flash drive listed as a storage option. Tap on it to access the contents of the flash drive.
7. Disconnect Safely: When you are done using the flash drive, it’s important to disconnect it safely. To do this, go to the notification panel on your Android phone and tap on the “USB connected” notification. Then, select the option to safely disconnect the flash drive. This ensures that no data is lost or corrupted during the disconnection process.
That’s it! You have successfully connected the flash drive to your Android phone and can now easily transfer and access files between your phone and the flash drive. Keep in mind that the steps may vary slightly depending on the make and model of your Android phone, but the general process remains the same.
Step 3: Access the Flash Drive on Your Android Phone
Once you have successfully connected the flash drive to your Android phone, the next step is to access the files stored on it. Here’s how to do it:
1. Open the File Manager app on your Android phone. This app is usually pre-installed on most Android devices and can be found in the app drawer or on the home screen.
2. In the File Manager, locate the “USB Storage” or “External Storage” folder. The name may vary slightly depending on your phone’s manufacturer or the version of Android you’re using.
3. Tap on the “USB Storage” or “External Storage” folder to open it. This folder contains all the files and folders stored on your flash drive.
4. Navigate through the folders to find the specific file or folder you want to access. You can tap on a folder to open it, or tap on a file to view its contents.
5. To open a file, simply tap on it, and your Android phone will launch the appropriate app to handle that file type. For example, if you tap on a music file, your default music player will open and start playing the file.
6. To copy or move files from the flash drive to your Android phone, long-press on the file or folder you want to transfer, then tap on the copy or move icon in the menu that appears. Choose the destination folder on your phone where you want the files to be copied or moved.
7. To transfer files from your Android phone to the flash drive, follow the same process. Long-press on the file or folder you want to transfer, tap on the copy or move icon, and select the flash drive as the destination.
Once you have finished accessing the files on your flash drive, don’t forget to safely eject the drive from your Android phone. This helps prevent data loss or corruption.
Overall, accessing a flash drive on your Android phone is a simple and convenient way to manage and transfer files on the go. Whether you need to view photos, listen to music, or transfer important documents, you can easily do it with the help of your Android phone and a compatible flash drive.
Step 4: Transfer Files to and from the Flash Drive
Once you have successfully connected the flash drive to your Android phone, you can now start transferring files to and from the device. Here’s a step-by-step guide on how to do it:
1. Open the file manager app on your Android phone. Most Android phones come with a built-in file manager, but if you don’t have one, you can download a file manager app from the Google Play Store.
2. In the file manager app, navigate to the location where the files you want to transfer are located. This could be in the internal storage of your phone or on your SD card.
3. Tap and hold on the file or files you want to transfer. This will bring up a menu with various options.
4. From the menu, select the “Copy” or “Cut” option, depending on whether you want to keep a copy of the file on your phone or move it entirely to the flash drive.
5. Go back to the file manager’s main screen and navigate to the location where the flash drive is mounted. You should see it listed as a separate storage option.
6. Once you’re in the flash drive’s location, tap on it to open it. If you have created any folders on the flash drive, navigate to the appropriate folder where you want to transfer the files.
7. Once inside the folder, tap on the “Paste” option from the menu. This will paste the files you copied or cut from your phone to the flash drive.
8. Wait for the transfer process to complete. The time it takes will depend on the size of the files and the speed of the flash drive.
9. To transfer files from the flash drive back to your phone, simply repeat the steps above but in reverse. Instead of copying or cutting files from your phone, copy or cut them from the flash drive and paste them into the desired location on your phone.
Congratulations! You have successfully transferred files to and from the flash drive on your Android phone. Remember to safely eject the flash drive from your phone once you’re done to avoid any data corruption or loss.
Tips and Tricks
Using a flash drive on your Android phone can be a convenient way to expand your storage and transfer files between devices. To make the most out of this feature, here are some useful tips and tricks:
- Format the flash drive: Before using a flash drive on your Android phone, it’s recommended to format it to a compatible file system like FAT32 or exFAT. This ensures compatibility and smooth transfer of files.
- Use a USB OTG adapter: Some Android phones may require a USB On-The-Go (OTG) adapter to connect the flash drive. This small and inexpensive accessory allows you to connect the USB drive to your phone’s micro USB or USB-C port.
- Keep your flash drive clean: It’s important to keep your flash drive clean and free from debris or dust. Regularly wipe it with a soft cloth and be gentle when inserting or removing it from your Android phone.
- Organize your files: Create folders and organize your files on the flash drive to keep things tidy and easily accessible. This makes it easier to find specific files and prevents them from getting lost in a cluttered drive.
- Use file management apps: In addition to the built-in file manager on your Android phone, third-party file management apps can provide more advanced features for managing and transferring files to and from the flash drive.
- Encrypt sensitive files: If you have sensitive files stored on your flash drive, consider encrypting them for added security. There are various encryption apps available on the Play Store that can help protect your files from unauthorized access.
- Backup your files: It’s always a good practice to regularly backup the files on your flash drive. This can be done by transferring the files to your computer or using cloud storage services like Google Drive or Dropbox.
- Be cautious with file types: While most file types can be transferred to and from a flash drive, some Android phones may have limitations on supporting certain file formats. Double-check the compatibility of file types to ensure smooth transfers.
- Safely eject the flash drive: Before removing the flash drive from your Android phone, make sure to properly eject it. This helps prevent data corruption and ensures that all file transfers are complete.
- Keep your phone and flash drive secure: Just like your phone, it’s important to keep your flash drive safe and secure. Avoid exposing it to extreme temperatures or physical damage to ensure the longevity of your data.
By following these tips and tricks, you can maximize the use of your flash drive on your Android phone. Whether you need extra storage for your files or a convenient way to transfer data between devices, using a flash drive is an excellent solution.
Troubleshooting Common Issues
While using a flash drive on your Android phone can be convenient, sometimes you may encounter some common issues. Here are some troubleshooting tips to help you resolve them:
1. Flash Drive Not Recognized: If your Android phone does not recognize the flash drive when connected, try the following steps:
- Ensure that the USB OTG (On-The-Go) feature is supported by your phone.
- Check if the flash drive is securely connected to the USB port.
- Try connecting the flash drive to a different USB port on your phone.
- Restart your phone and try connecting the flash drive again.
2. File Transfer Issues: If you are unable to transfer files to or from the flash drive, follow these steps:
- Check if the flash drive has enough storage space.
- Ensure that the file you are trying to transfer is not corrupted or in an unsupported format.
- Try using a different file manager app to transfer the files.
- Restart your phone and try transferring the files again.
3. Slow Transfer Speed: If you are experiencing slow transfer speeds, consider the following:
- Check if the flash drive and USB port on your phone are compatible with the desired transfer speed.
- Ensure that there are no other apps running in the background that may be consuming resources and affecting transfer speeds.
- Try connecting the flash drive to a different USB port on your phone.
- Use a high-quality USB OTG cable for better connectivity.
4. Flash Drive Compatibility: In some cases, certain flash drives may not be compatible with your Android phone due to different file systems or storage capacities. Ensure that the flash drive you are using is compatible with your phone’s specifications.
5. File System Compatibility: Android phones generally support the FAT32 and exFAT file systems. If your flash drive is formatted using a different file system, you may need to reformat it to be compatible with your Android phone.
6. Security Restrictions: Some Android phones may have security restrictions that prevent the use of external storage devices like flash drives. Check your phone’s settings and permissions to ensure that external storage access is allowed.
7. Unsupported USB OTG: If your Android phone does not support USB OTG, you won’t be able to use a flash drive directly. In such cases, you can explore alternative methods such as using a file transfer app or utilizing cloud storage to transfer files between your phone and computer.
By following these troubleshooting tips, you can address common issues when using a flash drive on your Android phone and ensure a smooth and hassle-free experience.
Conclusion
In conclusion, using a flash drive on your Android phone can greatly enhance your mobile experience. With the ability to transfer and access files on the go, you can easily share, backup, and organize your data with the convenience of a portable storage device. Whether you need to transfer photos, videos, documents, or other files, a flash drive provides a simple and efficient solution.
By following the steps outlined in this article, you can effortlessly connect and use a flash drive on your Android phone. From selecting the right type of flash drive to using the appropriate adapters or OTG cables, all the necessary information has been provided to ensure a smooth and seamless experience.
Now, you can enjoy the freedom of easily transferring and accessing files between your Android phone and a flash drive. So go ahead, expand your storage capabilities, and unlock the full potential of your Android device with the power of a flash drive at your fingertips. Happy file sharing!
FAQs
Q: Can I connect a flash drive to my Android phone?
Yes, you can connect a flash drive to your Android phone by using an OTG (On-The-Go) cable. This cable allows you to connect USB devices, such as flash drives, to your Android phone’s micro-USB or USB Type-C port.
Q: How do I connect a flash drive to my Android phone?
To connect a flash drive to your Android phone, follow these steps:
1. Get an OTG (On-The-Go) cable, which has a USB Type-A female port on one end and a micro-USB or USB Type-C male connector on the other end.
2. Connect the flash drive to the USB Type-A female port of the OTG cable.
3. Connect the micro-USB or USB Type-C male connector of the OTG cable to your Android phone.
4. Your Android phone will detect the flash drive, and you can access its contents using a file manager app.
Q: Can I transfer files to and from the flash drive on my Android phone?
Yes, once you have connected the flash drive to your Android phone, you can transfer files to and from it. Open a file manager app on your Android phone, navigate to the flash drive, and then you can copy, move, delete, or transfer files between the flash drive and your Android phone’s internal storage or SD card.
Q: What file formats are supported by Android phones when using a flash drive?
Android phones support a wide range of file formats when using a flash drive. You can access and use files in commonly used formats such as documents (e.g., PDF, Word, Excel), images (e.g., JPEG, PNG), videos (e.g., MP4, AVI), music (e.g., MP3, AAC), and more. The specific file formats supported may vary depending on the apps installed on your Android phone.
Q: Are there any limitations to using a flash drive on Android phones?
While using a flash drive on Android phones offers great convenience, there may be some limitations to keep in mind. One limitation is that not all Android devices support USB OTG functionality, so it’s essential to check if your phone is compatible before purchasing an OTG cable. Additionally, some Android phones may have limited power output through their USB ports, which can impact the performance of certain high-power-consuming devices like external hard drives. Finally, file system compatibility is another factor to consider, as some Android phones may have restricted support for certain file system formats.