
Are you looking to transfer data from one iPad to another? Whether you’re upgrading to a newer model, sharing files with a friend, or even replacing a broken device, transferring data can seem like a daunting task. But fear not! In this article, we’ll guide you through the process step-by-step, making it easier than ever to transfer all your important files, photos, and apps seamlessly. So, whether you’re a tech-savvy guru or a casual user, we’ve got you covered. By the end of this article, you’ll be able to effortlessly transfer your data and enjoy a smooth transition to your new iPad. Let’s dive in!
Inside This Article
- Methods of Transferring Data from One iPad to Another
- Using iCloud
- Using iTunes
- Using Quick Start
- Using Third-Party Applications
- Conclusion
- FAQs
Methods of Transferring Data from One iPad to Another
When you get a new iPad, one of the first things you’ll want to do is transfer your data from your old device. Luckily, there are several methods available to make this process seamless and efficient. In this article, we will explore four different methods for transferring data from one iPad to another, including using iCloud, iTunes, Quick Start, and third-party applications.
1. Using iCloud:
iCloud is Apple’s cloud storage service that allows you to backup and restore your data wirelessly. To transfer your data using iCloud, make sure both your old and new iPads are connected to Wi-Fi and signed in to the same Apple ID. Then, on your old iPad, go to Settings, tap on your name, and select iCloud. From there, choose the types of data you want to transfer, such as contacts, photos, and apps. Once you’ve selected your desired data, tap on “Back Up Now” to initiate the backup process. Next, on your new iPad, go through the setup process until you reach the “Apps & Data” screen. Select “Restore from iCloud Backup” and sign in to your Apple ID. Finally, choose the most recent backup that contains your data and let the restore process complete.
2. Using iTunes:
If you prefer to transfer your data using a wired connection, iTunes is a reliable option. Firstly, connect your old iPad to your computer and open iTunes. Select your device, go to the “Summary” tab, and click on “Back Up Now” to create a backup. After the backup is complete, disconnect your old iPad and connect your new iPad to the computer. During the initial setup process, choose “Restore from iTunes Backup,” and select the backup you just created. iTunes will then transfer your data to the new iPad, including apps, photos, contacts, and more. Keep in mind that this method requires a computer with the latest version of iTunes installed.
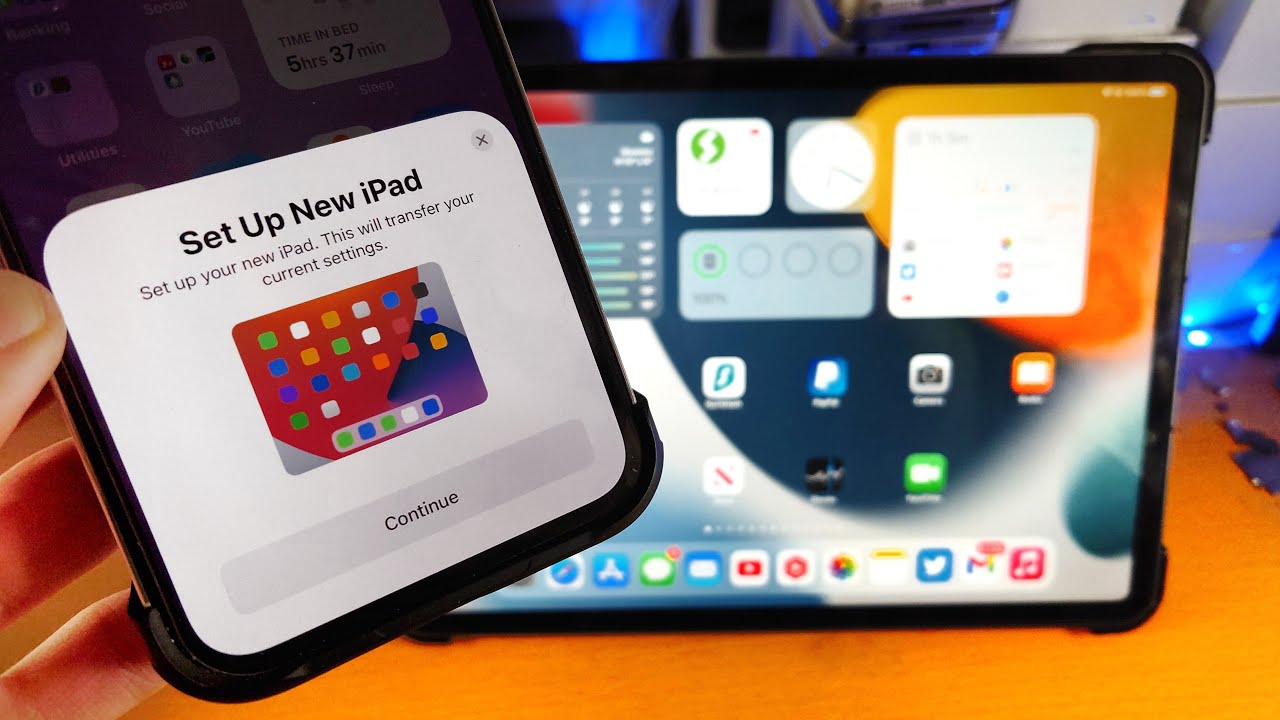
3. Using Quick Start:
Quick Start is a convenient feature introduced in iOS 11 that allows you to transfer data directly from one iPad to another. To use Quick Start, place your old and new iPads near each other. On your new iPad, a pop-up message will appear asking if you want to use your Apple ID to set up your new device. Tap “Continue” and follow the on-screen instructions. Your new iPad will display a pattern that you need to scan with your old iPad’s camera. Once scanned, the devices will establish a connection, and you can choose to transfer your data, settings, and preferences from your old iPad to your new one.
4. Using Third-Party Applications:
In addition to Apple’s own methods, there are third-party applications available on the App Store that can assist in transferring data from one iPad to another. These applications offer additional features and flexibility compared to iCloud or iTunes. Some popular options include iMazing, AnyTrans, and Dr.Fone. Simply download and install the preferred third-party app on both iPads, follow the instructions provided by the app, and transfer your data with ease.
Using iCloud
If you are looking for a convenient and hassle-free way to transfer data from one iPad to another, using iCloud is an excellent option. iCloud is an Apple cloud storage service that allows you to securely store and sync your data across multiple devices. By following a few simple steps, you can easily transfer your data from one iPad to another.
To begin the transfer process, ensure that both of your iPads are connected to a stable Wi-Fi network. This is crucial as the data transfer will take place over the internet and requires a reliable connection.
Once connected, follow these steps:
- On your old iPad, go to “Settings” and tap on your name at the top of the settings menu.
- Select “iCloud” from the menu options.
- Scroll down and tap on “iCloud Backup”.
- Make sure the “iCloud Backup” toggle is switched on.
- Tap on “Back Up Now” to initiate a backup of your old iPad’s data to iCloud.
- Wait for the backup process to complete. This may take some time, depending on the amount of data being backed up and the speed of your internet connection.
- On your new iPad, turn it on and go through the initial setup process, following the on-screen instructions.
- When prompted, select “Restore from iCloud Backup” and sign in to your iCloud account.
- Choose the backup you created earlier from the list of available backups.
- Allow the restore process to complete, and soon you’ll find all your data transferred to your new iPad.
It’s important to note that using iCloud for data transfer is a comprehensive method, meaning it transfers all your settings, app data, photos, videos, contacts, and other essential data from your old iPad to your new one. However, it’s essential to ensure you have enough iCloud storage to accommodate the backup and transfer process.
By utilizing iCloud, you can seamlessly transfer your data from one iPad to another, saving you time and effort. The synchronization provided by iCloud ensures that your new iPad will have the same content and settings as your old one, creating a seamless transition.
Using iTunes
If you prefer using your computer to transfer data from one iPad to another, iTunes can be a convenient option. iTunes allows you to create backups of your iPad’s data and restore them onto another device. Here’s how you can use iTunes to transfer data:
1. Connect your first iPad to your computer using a USB cable. Launch the iTunes application on your computer.
2. Once iTunes detects your iPad, click on the device icon located on the top left corner of the iTunes window.
3. In the left sidebar, under the “Backups” section, select “This Computer” and click on the “Back Up Now” button. This will initiate a backup of your first iPad’s data on your computer.
4. Once the backup is complete, disconnect your first iPad and connect your second iPad to the computer using the same USB cable.
5. In iTunes, click on the device icon again, and this time, select your second iPad from the list of devices.
6. Under the “Backups” section, click on the “Restore Backup” button.
7. A pop-up window will appear, showing a list of available backups. Select the backup of your first iPad that you created earlier and click “Restore”.
8. iTunes will begin transferring your data from the backup onto your second iPad. This process may take some time, depending on the size of the backup and the speed of your computer.
9. Once the transfer is complete, disconnect your second iPad from the computer. You can now explore your second iPad and find all the data and settings from your first device.
Using iTunes to transfer data provides a straightforward method for copying your data from one iPad to another. However, keep in mind that this process will overwrite the data on your second iPad with the content from the backup of your first device. Therefore, it’s important to ensure you have a recent backup and are willing to replace the existing data on your second iPad.
Using Quick Start
If you have both iPads running on iOS 11 or newer versions, you can take advantage of the Quick Start feature. This feature allows you to transfer data wirelessly from one iPad to another, making it a convenient option for those who don’t want to use cloud services or cables.
To use Quick Start, follow these steps:
- Make sure that both iPads have Wi-Fi and Bluetooth turned on.
- Place both iPads close to each other.
- When the Quick Start screen appears on the new iPad, hold your existing iPad over the new one.
- A message will appear on the existing iPad asking if you want to use your Apple ID to set up the new iPad. Tap “Continue.”
- Follow the on-screen instructions to complete the setup process.
- Select whether you want to transfer settings, Apple ID, and Wi-Fi settings, or customize the settings manually.
- Wait for the transfer process to complete. The time it takes will depend on the amount of data being transferred.
- Once the transfer is complete, you can use your new iPad with all the data from your previous device.
It’s important to note that the Quick Start feature requires both iPads to be running on compatible versions of iOS. Make sure that you have updated both devices to the latest software before attempting the transfer. Additionally, ensure that you have enough battery life on both iPads or connect them to a power source to prevent any interruptions during the process.
Using Quick Start is a fast and efficient way to transfer data from one iPad to another without the need for cables or online backups. It’s especially useful if you’re upgrading to a new iPad and want to seamlessly transition to your new device while preserving all your important files and settings.
Using Third-Party Applications
Aside from using iCloud, iTunes, and Quick Start, another option to transfer data from one iPad to another is by utilizing third-party applications. These apps provide a convenient and efficient way to transfer various types of data, including photos, videos, documents, contacts, and more.
Here are some popular third-party applications that you can consider:
- AnyTrans: AnyTrans is a comprehensive file management tool that allows you to transfer data between iOS devices with ease. It supports transferring photos, videos, music, contacts, messages, and more. Simply install AnyTrans on both iPads, connect them to your computer, and follow the on-screen instructions to transfer your desired data.
- iMazing: iMazing is another powerful application that enables you to transfer data between iPads seamlessly. It offers a straightforward interface and supports a wide range of data types, including media files, messages, call logs, and even app data. Connect both iPads to your computer, launch iMazing, and select the data you want to transfer.
- SHAREit: SHAREit is a popular cross-platform file-sharing application. It enables you to transfer files wirelessly without the need for any cables or internet connection. Install SHAREit on both iPads, open the app, and follow the instructions to establish a connection. Then, select the files you want to transfer and initiate the transfer process.
- Xender: Xender is similar to SHAREit and provides a simple and efficient way to transfer various files between iPads. It supports transferring photos, videos, documents, and more. Install Xender on both iPads, launch the app, create a group connection, and start transferring your desired files.
Keep in mind that these third-party applications may have different features, limitations, and compatibility requirements. It is recommended to thoroughly research and read user reviews before deciding which application to use for your specific data transfer needs.
Remember to backup your data before initiating any transfer process, especially when using third-party applications. This ensures that your data is safe and can be restored in case of any unforeseen issues during the transfer.
Conclusion
Transferring data from one iPad to another can seem like a daunting task, but with the right knowledge and tools, it can be a breeze. Whether you want to move your apps, photos, videos, contacts, or any other important files, there are several methods you can use to accomplish this. From using iCloud and iTunes to third-party applications, the options are plentiful.
Remember to back up your data before you start the transfer process to avoid any potential data loss. Take your time to explore and choose the method that suits your needs and preferences the most. By following the steps provided in this guide, you’ll be able to successfully transfer data from one iPad to another and have all your files and settings ready to go on your new device.
With the transfer complete, you can now enjoy the convenience of having all your important data and settings readily accessible on your new iPad. So go ahead and start the transfer process to ensure a smooth transition between devices. Happy transferring!
FAQs
Q: How can I transfer data from one iPad to another?
A: Transferring data from one iPad to another can be done using various methods such as iCloud, iTunes, or using third-party applications. These methods allow you to transfer apps, photos, videos, contacts, and other data seamlessly from one device to another.
Q: Can I transfer data between iPads wirelessly?
A: Yes, you can transfer data wirelessly between iPads. Using iCloud, you can backup your data from one iPad and then restore it on another iPad. This method eliminates the need for physical connections and makes the transfer process more convenient.
Q: Do I need an internet connection to transfer data between iPads?
A: Yes, you will need an internet connection to transfer data between iPads, especially if you are using iCloud for the transfer. iCloud relies on an internet connection to back up and restore data. However, if you are using methods like iTunes or third-party applications, an internet connection may not be necessary.
Q: Can I transfer all types of data between iPads?
A: Yes, you can transfer a wide range of data types between iPads. This includes apps, photos, videos, music, contacts, calendars, messages, and more. However, it’s important to note that some data, such as purchased apps or media, may require you to sign in with the same Apple ID on both iPads for seamless transfer.
Q: Are there any limitations or restrictions when transferring data between iPads?
A: While transferring data between iPads is generally straightforward, there are a few limitations and restrictions to be aware of. For example, some apps or media may not be transferable if they are no longer available in the App Store or iTunes Store. Additionally, the storage capacity of the destination iPad may affect the amount of data you can transfer.