
Are you wondering how to enable Guided Access on your new iPhone 13? Look no further! In this comprehensive guide, we will walk you through the process of utilizing Guided Access, a powerful feature that allows you to limit the functionality of your iPhone to a single app and control specific areas of the screen. Whether you want to restrict certain features for your child’s safety or need to focus on a particular app without any distractions, Guided Access is the perfect solution. We will provide step-by-step instructions, along with tips and tricks to make the most of this feature. So, let’s dive in and discover how to unlock the potential of Guided Access on your iPhone 13!
Inside This Article
- Enabling Guided Access on iPhone 13
- Customizing Guided Access Settings on iPhone 13
- Exiting Guided Access Mode on iPhone 13
- Conclusion
- FAQs
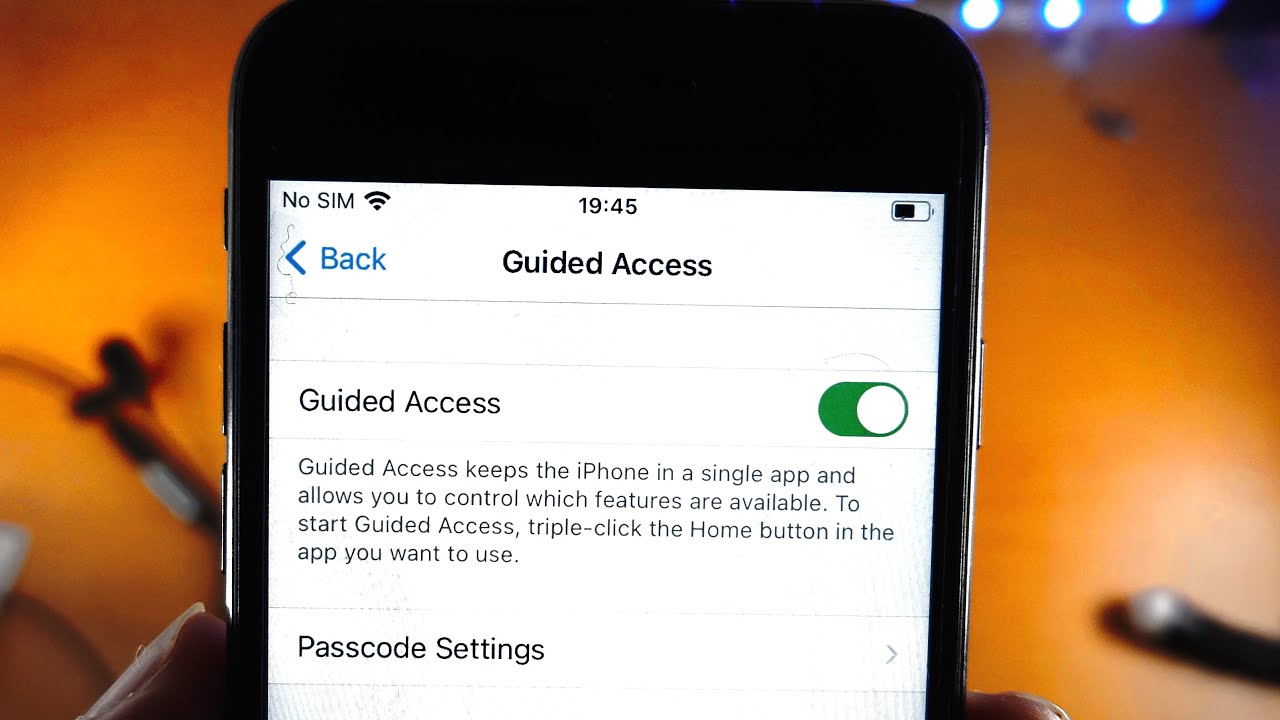
Enabling Guided Access on iPhone 13
Guided Access is a useful feature on the iPhone 13 that allows you to lock your device into a single app and restrict access to certain features. This can be particularly helpful when handing your iPhone over to someone else, such as a child or a colleague, and you want to ensure that they only use specific apps or functionalities.
To enable Guided Access on your iPhone 13, follow these simple steps:
1. Open the “Settings” app on your iPhone 13.
2. Scroll down and tap on “Accessibility.
3. From the Accessibility menu, tap on “Guided Access.
4. Toggle the switch next to “Guided Access” to turn it on.
Once Guided Access is enabled, you can now set it up for a specific app or limit access to certain areas of the screen. To do this:
1. Open the desired app that you want to set up for Guided Access.
2. Triple-click the side button (on iPhone with no Home button) or the Home button (on iPhone with a Home button) to activate Guided Access.
3. Adjust the settings according to your preference. You can disable touch input, disable certain areas of the screen, and even set a time limit.
4. Once you’re done customizing the settings, tap on “Start” in the top-right corner of the screen.
Your iPhone 13 is now locked into Guided Access mode, allowing you to use the app without worrying about accidental tapping or access to other apps.
Remember, to exit Guided Access mode, simply triple-click the side button or the Home button (depending on your iPhone model) and enter your passcode (if prompted).
Enabling Guided Access on your iPhone 13 provides you with control and peace of mind when sharing your device with others. Whether it’s for educational purposes, restricting access to certain apps, or preventing accidental touches, Guided Access is a powerful feature that enhances your iPhone experience.
Customizing Guided Access Settings on iPhone 13
If you’re using Guided Access on your iPhone 13, you’ll love the ability to customize its settings to best suit your needs. By customizing Guided Access settings, you can make the experience even more tailored and personalized. Here’s a step-by-step guide on how to customize Guided Access settings on your iPhone 13.
1. Open the Settings app on your iPhone 13. It’s the gear-shaped icon on your home screen.
2. Scroll down and tap on “Accessibility.”
3. In the Accessibility settings menu, scroll down and select “Guided Access.”
4. You’ll now see the Guided Access settings page. Here, you can make several customizations.
5. Tap on “Time Limits” to set a time limit for how long Guided Access can be used. This is helpful if you want to limit access to certain apps or features for a specific duration.
6. Under “Accessibility Shortcut,” you can choose to enable or disable the use of the Accessibility Shortcut to start and end Guided Access mode quickly. Enabling this option allows you to triple-click the side or home button to activate Guided Access instead of going through the Settings app.
7. By tapping on “Sound,” you can choose whether or not you want Guided Access to play audio while it’s enabled. This can be useful in certain situations where audio prompts are necessary.
8. “Mirror Display” allows you to toggle whether or not the display is mirrored on external screens when Guided Access is active. Turning this on ensures that everything displayed on your iPhone screen is also shown on external displays.
9. Finally, under “Auto-Lock,” you can choose to enable or disable the Auto-Lock feature during Guided Access mode. Enabling this option allows your iPhone to stay active for an extended period, ensuring uninterrupted use of the apps within Guided Access.
Once you’ve made all the desired customizations, you can exit the Settings app. The changes you’ve made will now be applied to Guided Access on your iPhone 13.
Customizing Guided Access settings on your iPhone 13 gives you more control and flexibility over how it works. Whether you want to set time limits, enable shortcuts, control audio output, or manage external display mirroring, customizing these settings ensures that Guided Access works exactly the way you want it to.
Exiting Guided Access Mode on iPhone 13
Guided Access is a fantastic feature that allows users to restrict access to specific apps or features on their iPhone 13. However, once you no longer need to use Guided Access mode, you’ll want to know how to exit it and return to normal functionality. Exiting Guided Access mode on your iPhone 13 is a simple process that can be done in a few easy steps.
To exit Guided Access mode on your iPhone 13, simply follow these steps:
- Triple-press the Side button or the Home button, depending on the model of your iPhone 13.
- Enter your passcode or use Face ID or Touch ID, if enabled.
- Tap on “End” in the top-right corner of the screen.
By triple-pressing the Side button or the Home button, you will be prompted to authenticate your exit from Guided Access mode. This provides an extra layer of security to ensure that only authorized users can exit the restricted mode.
In case you have forgotten your passcode, you can still exit Guided Access mode by following these steps:
- Triple-press the Side button or the Home button, depending on the model of your iPhone 13.
- Tapping on “Options” in the bottom-left corner of the screen.
- Enter your iCloud password to disable Guided Access.
Once you have successfully entered your passcode or iCloud password, you will see a confirmation message on the screen, letting you know that Guided Access mode has been ended. You will then be able to access all the apps and features on your iPhone 13 without any restrictions.
Remember, don’t forget to disable Guided Access mode when you no longer need it to ensure seamless, unrestricted use of your iPhone 13.
In conclusion, guided access on iPhone 13 is a powerful feature that provides users with enhanced control and accessibility options. Whether you want to limit access to certain apps or create a focused environment for learning or work, guided access can be a valuable tool. By following the simple steps outlined in this article, you can easily enable and customize guided access settings to suit your specific needs.
With guided access, you can now enjoy a more focused and productive experience on your iPhone 13, ensuring that distractions are minimized and accessibility is maximized. Whether you are a student, a professional, or simply someone seeking better control over their iPhone usage, guided access offers a range of functionalities to fulfill those needs.
Take advantage of the guided access feature on your iPhone 13 today and unlock a world of enhanced productivity, focus, and accessibility.
FAQs
1. Can I use Guided Access on my iPhone 13?
Yes, Guided Access is a feature available on all iPhone models, including the iPhone 13. It allows you to restrict your device to a specific app and control the access to certain features or areas of the screen.
2. How do I enable Guided Access on my iPhone 13?
To enable Guided Access on your iPhone 13, follow these steps:
– Open the Settings app.
– Scroll down and tap on “Accessibility”.
– Tap on “Guided Access”.
– Toggle the switch next to “Guided Access” to turn it on.
– Set a passcode that will be required to exit Guided Access mode.
3. How do I start Guided Access on a specific app?
To start Guided Access on a specific app, follow these steps:
– Open the app you want to use with Guided Access.
– Triple-click the side button (or the home button, if your iPhone has one) quickly.
– Tap on “Guided Access” from the options that appear.
– Set any specific restrictions or options you want for the session, and then tap “Start” in the top right corner.
4. How do I exit Guided Access mode on my iPhone 13?
To exit Guided Access mode on your iPhone 13, follow these steps:
– Triple-click the side button (or the home button, if your iPhone has one) quickly.
– Enter the passcode you set for Guided Access.
– Tap on “End” in the top left corner.
– You will then be prompted to confirm the exit. Tap “End” again to confirm and exit Guided Access mode.
5. Can I set time limits for Guided Access sessions?
Yes, you can set time limits for Guided Access sessions on your iPhone 13. To do so, follow these steps:
– Triple-click the side button (or the home button, if your iPhone has one) quickly.
– Enter the passcode you set for Guided Access.
– Tap on “Options” in the bottom left corner.
– Enable the “Time Limits” option.
– Set the desired duration for the session.
– Tap “Done” in the top right corner to save the settings.