
Welcome to our comprehensive guide on how to transfer your phone number to a new iPhone 14! Transferring your phone number is an essential step when upgrading to a new device, ensuring that you can stay connected with friends, family, and colleagues without any interruption. The exciting release of the iPhone 14 has brought a range of innovative features and enhanced performance, making it a highly sought-after device. In this article, we will walk you through the seamless process of transferring your phone number to your new iPhone 14. Whether you’re switching from an older iPhone or another smartphone brand, we’ve got you covered! So, let’s dive in and discover how easy it is to ensure a smooth transition between devices while keeping your precious phone number intact.
Inside This Article
- Preparing for Phone Number Transfer
- # 1. Back up your old iPhone
- # 2. Update your old iPhone’s operating system
- Transferring Phone Number to New iPhone 14
- # 1. Using Quick Start
- # 2. Using iCloud Backup
- # 3. Using iTunes or Finder
- Troubleshooting Phone Number Transfer Issues
- # 1. Checking network connection
- Verifying SIM card compatibility
- # 3. Contacting your network provider for assistance
- Finalizing Phone Number Transfer
- # 1. Testing the transferred phone number
- # 2. Updating your contacts and settings on the new iPhone 14
- Conclusion
- FAQs
Preparing for Phone Number Transfer
If you’re getting ready to transfer your phone number to a new iPhone 14, it’s important to take a few steps to ensure a smooth transition. By properly preparing your old iPhone and updating its operating system, you can minimize any potential issues and make the transfer process as seamless as possible.
Here are two key steps to follow:
- Back up your old iPhone: Before transferring your phone number, it’s crucial to create a backup of your old iPhone. This will ensure that all your contacts, messages, photos, and other important data are safely stored. You can back up your device using iCloud or iTunes. Simply connect your iPhone to a Wi-Fi network and follow the backup instructions.
- Update your old iPhone’s operating system: To avoid compatibility issues during the phone number transfer, make sure your old iPhone’s operating system is up to date. Go to the “Settings” app, tap on “General,” and then select “Software Update.” If there’s an available update, download and install it. This will ensure that both your old and new iPhones are running the latest software versions.
By taking these preparatory steps, you’ll be ready to transfer your phone number to your brand-new iPhone 14 smoothly and effortlessly.
# 1. Back up your old iPhone
Before transferring your phone number to a new iPhone 14, it is crucial to create a backup of your old iPhone to ensure that none of your important data is lost during the transition. Follow these steps to back up your old iPhone:
- Step 1: Connect your old iPhone to a Wi-Fi network.
- Step 2: Open the Settings app on your old iPhone.
- Step 3: Tap on your name at the top of the Settings menu.
- Step 4: Select “iCloud” from the options.
- Step 5: Scroll down and tap on “iCloud Backup.”
- Step 6: Toggle the “iCloud Backup” switch to turn it on.
- Step 7: Tap on “Back Up Now” to initiate the backup process.
It is important to ensure that your iPhone is connected to a stable Wi-Fi network during the backup process. Depending on the size of your data, the backup process may take some time. Once the backup is complete, you can proceed with transferring your phone number to the new iPhone 14 confidently.
# 2. Update your old iPhone’s operating system
Before transferring your phone number to a new iPhone 14, it is crucial to update the operating system of your old iPhone. This ensures compatibility and smooth transition between devices.
Updating the operating system on your old iPhone is a straightforward process. Here’s how you can do it:
- Connect your iPhone to a stable Wi-Fi network.
- Go to the “Settings” app on your iPhone’s home screen and tap on “General.”
- Scroll down and tap on “Software Update.”
- If an update is available, tap on “Download and Install” to start the update process. Make sure your iPhone has sufficient battery life or connect it to a power source during the update.
- Follow the on-screen instructions to complete the update. Your iPhone may restart several times during the process.
It is essential to have a stable internet connection and enough available storage space for the update. The update process may take some time, depending on the size of the update and the speed of your internet connection.
By updating your old iPhone to the latest operating system version, you ensure that it is optimized for the transfer of your phone number to the new iPhone 14. This step helps prevent any potential compatibility issues that may arise during the transfer process.
Once you have successfully updated the operating system on your old iPhone, you are ready to proceed with transferring your phone number to the new iPhone 14.
Transferring Phone Number to New iPhone 14
When you get a new iPhone 14, one of the first tasks you’ll need to do is transfer your phone number to the new device. This ensures that you can continue making calls, sending texts, and accessing your contacts without any interruption. In this article, we will walk you through the steps to transfer your phone number to the new iPhone 14, ensuring a smooth transition.
1. Using Quick Start
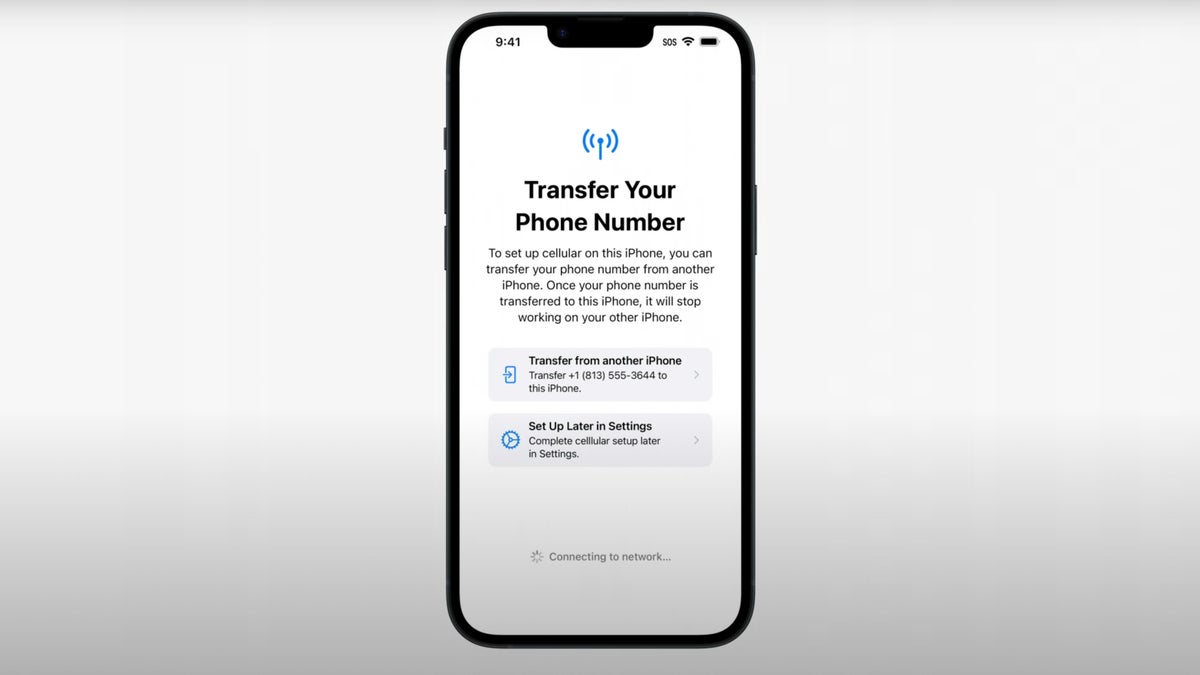
One of the easiest ways to transfer your phone number to the new iPhone 14 is by using the Quick Start feature. This feature allows you to transfer data, including your phone number and other settings, directly from your old iPhone to the new one. Simply follow the on-screen instructions to set up your new iPhone 14 and select the option to transfer your phone number when prompted.
2. Using iCloud Backup
If you already have an iCloud backup of your old iPhone, transferring your phone number to the new iPhone 14 is a breeze. During the setup process, choose the “Restore from iCloud Backup” option and sign in to your iCloud account. Select the most recent backup that contains your phone number and wait for the transfer to complete. Once finished, your new iPhone 14 will have your phone number and other data from the backup.
3. Using iTunes or Finder
If you prefer to transfer your phone number using iTunes or Finder, start by connecting your old iPhone to your computer. Open iTunes or Finder, select your device, and choose the option to back up your iPhone. Once the backup is complete, disconnect your old iPhone and connect your new iPhone 14. Follow the instructions to set up your new device and select the option to restore from the backup you just created. This will transfer your phone number and other data from your old iPhone to the new one.
4. Troubleshooting Phone Number Transfer Issues
In some cases, you may encounter issues when transferring your phone number to the new iPhone 14. If you experience any problems, here are a few troubleshooting steps to try:
- Check your network connection: Ensure that both your old and new iPhones have a stable internet connection for the transfer process to work properly.
- Verify SIM card compatibility: Make sure that your SIM card is compatible with the new iPhone 14. If not, contact your network provider to obtain a compatible SIM card.
- Contact your network provider for assistance: If you’re still facing issues, reach out to your network provider for further guidance and support. They can help troubleshoot any network-related problems that might be affecting the transfer process.
5. Finalizing Phone Number Transfer
Once you have successfully transferred your phone number to the new iPhone 14, it’s important to test the number by making a call or sending a text message. This ensures that your phone number is active and functioning correctly on the new device. Additionally, take some time to update your contacts and settings on the new iPhone 14 to personalize the device to your liking.
By following these steps, you’ll be able to transfer your phone number to your new iPhone 14 seamlessly. Enjoy your new device and keep in touch with friends, family, and colleagues without any disruptions.
# 1. Using Quick Start
If you’re excited about getting your new iPhone 14 up and running with your existing phone number, Quick Start is the fastest and easiest way to do it. This feature allows you to transfer all your data, settings, and even your phone number from your old iPhone to your new iPhone 14 seamlessly.
To use Quick Start, make sure that both your old iPhone and the new iPhone 14 have Wi-Fi and Bluetooth enabled. Place the two devices close to each other and follow these steps:
- Turn on your new iPhone 14 and hold it near your old iPhone.
- You should see a “Set up New iPhone” prompt on your old iPhone. Tap “Continue” to initiate the transfer process.
- Use your old iPhone to scan the pattern displayed on your new iPhone 14’s screen. Alternatively, you can manually enter the passcode displayed on your new iPhone 14 into your old iPhone.
- Agree to the terms and conditions, choose whether to transfer your Apple ID and iCloud data, and continue with the setup process.
- You will then be prompted to set up Face ID or Touch ID on your new iPhone 14. Follow the on-screen instructions to complete this step.
- Once you’ve finished setting up Touch ID or Face ID, you will see a “Transfer Complete” message on your new iPhone 14, indicating that the phone number transfer was successful.
Using Quick Start not only transfers your phone number to your new iPhone 14 but also moves your photos, videos, apps, and other data. It’s a convenient way to ensure a seamless transition to your new device without any hassle.
Note that the availability of the Quick Start feature may vary depending on the iPhone models and operating systems. Make sure to check if your devices support this feature before attempting to use it.
# 2. Using iCloud Backup
One of the easiest ways to transfer your phone number to your new iPhone 14 is by using iCloud Backup. This method allows you to securely back up all of your data, including your phone number, to the cloud. Here’s how you can do it:
1. Make sure that your old iPhone is connected to a Wi-Fi network and plugged into a power source.
2. On your old iPhone, go to “Settings” and tap on your name at the top of the screen.
3. Tap on “iCloud” and then select “iCloud Backup”.
4. Toggle on the “iCloud Backup” switch, and then tap on “Back Up Now”. This will initiate the backup process, which may take some time depending on the amount of data on your device. It is important not to disconnect your old iPhone during this process.
5. Once the backup is complete, turn on your new iPhone 14 and go through the initial set-up steps until you reach the “Apps & Data” screen.
6. Tap on “Restore from iCloud Backup” and sign in to your iCloud account using the same Apple ID that you used on your old iPhone.
7. Select the most recent backup that contains your phone number and other data, and then tap on “Restore”. The restore process will begin, and you will need to stay connected to a Wi-Fi network until it is complete.
8. After the restore is finished, you can continue setting up your new iPhone 14 and your phone number will be transferred along with all of your other data.
Using iCloud Backup is a convenient and reliable method for transferring your phone number to a new iPhone 14. It ensures that all of your important data, including contacts, messages, and settings, are seamlessly transferred to your new device. Just make sure that you have an active iCloud backup before starting the transfer process, and that you stay connected to Wi-Fi during the restore process.
# 3. Using iTunes or Finder
If you prefer a wired transfer method or if you don’t have access to Quick Start or iCloud backup, you can use iTunes or Finder to transfer your phone number to your new iPhone 14. Follow the steps below:
1. Make sure you have the latest version of iTunes installed on your computer, or if you have a Mac running macOS Catalina or later, use Finder instead.
2. Connect your old iPhone to your computer using a Lightning to USB cable.
3. If prompted on your iPhone, enter your passcode or trust this computer.
4. Launch iTunes or Finder on your computer, and your old iPhone should appear as a device in the interface.
5. Select your iPhone from the list of devices in iTunes or Finder.
6. Go to the “Summary” tab in iTunes or “General” tab in Finder.
7. Under the “Backups” section, click on the “Back Up Now” button. This will create a backup of your old iPhone, including your phone number.
8. Once the backup is complete, disconnect your old iPhone from the computer.
9. Connect your new iPhone 14 to the computer using the same Lightning to USB cable.
10. If prompted on your new iPhone, enter your passcode or trust this computer.
11. In iTunes or Finder, select your new iPhone from the list of devices.
12. Go to the “Summary” tab in iTunes or “General” tab in Finder.
13. Under the “Backups” section, click on the “Restore Backup” button.
14. A list of available backups will be displayed. Choose the backup that contains your phone number.
15. Click “Restore” to begin transferring the backup to your new iPhone 14.
16. Once the transfer is complete, your new iPhone 14 will restart.
17. Follow the on-screen instructions to set up your new iPhone, including signing in with your Apple ID and configuring your preferences.
18. After the setup process, you should see your phone number transferred to your new iPhone 14.
Note: Using iTunes or Finder to transfer your phone number will also transfer your other data, such as apps, photos, and settings from your old iPhone to your new iPhone 14.
Remember to keep your old iPhone backup until you are sure that all your data, including your phone number, has been successfully transferred to your new iPhone 14.
Troubleshooting Phone Number Transfer Issues
While transferring your phone number to a new iPhone 14 is usually a seamless process, there can be certain issues that may arise. If you encounter any problems during the transfer, here are some troubleshooting steps to help you resolve them:
1. Checking network connection: Ensure that both your old iPhone and new iPhone 14 are connected to a stable Wi-Fi or cellular network. A weak or intermittent connection can result in transfer issues. Restarting your devices and verifying network settings can also help resolve connectivity problems.
2. Verifying SIM card compatibility: Make sure that the SIM card you are using is compatible with your new iPhone 14. Different iPhone models may require specific SIM card types. You can check the Apple website or contact your network provider to confirm the compatibility and obtain the appropriate SIM card if needed.
3. Contacting your network provider for assistance: If you are still unable to transfer your phone number successfully, it is recommended to reach out to your network provider for assistance. They have the expertise to troubleshoot network-related issues and can guide you through the necessary steps to complete the transfer.
By following these troubleshooting steps, you should be able to overcome any obstacles that may arise during the phone number transfer process. Remember to be patient and persistent, as resolving these issues may require some time and effort. Once the transfer is completed successfully, you can enjoy the convenience of having your phone number on your new iPhone 14.
# 1. Checking network connection
One of the crucial steps in transferring your phone number to a new iPhone 14 is to ensure a stable network connection. Here are some important points to check:
1. Wi-Fi connection: Make sure your old iPhone and new iPhone 14 are connected to a Wi-Fi network. A stable and strong Wi-Fi connection is essential for a smooth transfer process.
2. Cellular network: Check if your old iPhone and new iPhone 14 have a working cellular connection. If you are in an area with poor network coverage, consider moving to a location with better signal strength to avoid any interruptions during the transfer process.
3. Disable airplane mode: Turn off airplane mode on both your old iPhone and new iPhone 14. Airplane mode disables all wireless connections, including Wi-Fi and cellular networks, which can hinder the transfer process.
4. Restart your devices: Sometimes, a simple restart can solve network connection issues. Restart both your old iPhone and new iPhone 14 to refresh the network settings and establish a stable connection.
5. Reset network settings: If you are still experiencing network connection issues, you may consider resetting the network settings on your old iPhone and new iPhone 14. This action will remove saved Wi-Fi networks and cellular settings, so you will need to reconfigure them after the transfer process is complete.
By following these steps and ensuring a strong network connection, you can avoid any potential obstacles during the phone number transfer process to your new iPhone 14.
Verifying SIM card compatibility
When transferring your phone number to a new iPhone 14, it’s essential to ensure that the SIM card in your old device is compatible with the new one. Here are a few key points to consider when verifying SIM card compatibility:
1. SIM card size: The iPhone 14 requires a specific SIM card size, so it’s important to check whether your current SIM card matches the required size. The iPhone 14 typically uses a nano-SIM card, which is the smallest SIM card size available.
2. SIM card type: In addition to matching the size, you should also verify that your SIM card is compatible with the network technology used by the iPhone 14. The iPhone 14 supports both GSM and CDMA networks, so ensure that your SIM card is compatible with either or both of these network types.
3. Carrier restrictions: Different carriers have specific requirements for SIM card compatibility. Some carriers may lock their devices to their network or require specific SIM cards to work properly. Before transferring your phone number, it’s a good idea to check with your carrier to ensure that your SIM card is compatible with the iPhone 14.
4. SIM card activation: If you are using a new SIM card or a different carrier, you may need to activate the SIM card before transferring your phone number. Follow the instructions provided by your carrier to activate the SIM card, if necessary.
By verifying SIM card compatibility and ensuring that your SIM card meets the necessary requirements, you can ensure a smooth and successful transfer of your phone number to your new iPhone 14.
# 3. Contacting your network provider for assistance
If you are facing difficulties transferring your phone number to your new iPhone 14, contacting your network provider can help resolve the issue. They have the expertise and resources to assist you in troubleshooting and ensuring a successful transfer.
Here are a few steps you can follow when reaching out to your network provider:
- Gather information: Before contacting your network provider, gather all the necessary information, such as your account details, phone number, and any error messages you encountered during the transfer process.
- Choose the right channel: Determine the most convenient way to get in touch with your network provider. This can be through their customer support hotline, live chat, or visiting a physical store.
- Explain the issue: Clearly explain the problem you’re facing with transferring your phone number to the new iPhone 14. Mention any troubleshooting steps you have already taken, such as restarting your devices or checking for updates.
- Follow their guidance: Listen to the instructions provided by the network provider’s representative. They may ask you to perform certain actions on your new iPhone 14 or provide you with specific settings to configure. Follow their guidance diligently to resolve the issue.
- Ask for documentation: If the issue persists or requires further investigation, ask the network provider to provide you with documentation of the troubleshooting process undertaken. This can be useful in case you need to follow up or escalate the matter.
Remember, patience is key when reaching out to your network provider for assistance. They are there to help you navigate any issues you may encounter during the phone number transfer process.
By contacting your network provider, you can ensure that you receive the necessary support and guidance to successfully transfer your phone number to your new iPhone 14.
Finalizing Phone Number Transfer
Once you have successfully transferred your phone number to your new iPhone 14, there are a few final steps you can take to ensure a smooth transition and make the most out of your new device.
1. Testing the transferred phone number: After completing the transfer process, it’s essential to test your new iPhone to ensure that your phone number is functioning correctly. Make a test call or send a text message to confirm that incoming and outgoing calls and messages are working as expected.
2. Updating your contacts and settings on the new iPhone 14: It’s important to update your contacts and settings on your new iPhone to reflect any changes or updates that may have occurred during the transfer process. This ensures that all your contacts are up to date and any personalized settings or preferences are retained.
To update your contacts, open the Contacts app on your iPhone 14 and check if all your contacts have synced properly. If any contacts are missing, you can manually add them or sync them from your iCloud or other accounts.
Additionally, take a moment to review your iPhone’s settings and customize them to your preferences. This includes adjusting notification settings, privacy preferences, display settings, and any other options that enhance your overall user experience.
Remember to explore the features and capabilities of your new iPhone 14. Apple constantly introduces new features with each update, so it’s worthwhile to familiarize yourself with the device’s functionality and discover new ways to enhance your productivity and enjoyment.
By following these steps, you can ensure that the transfer of your phone number to your new iPhone 14 is complete and that you are ready to fully utilize your new device. Enjoy your upgraded iPhone experience!
# 1. Testing the transferred phone number
Once you have successfully transferred your phone number to your new iPhone 14, it’s important to test it to ensure that everything is functioning correctly. This will help you avoid any surprises or inconvenience in the future.
To test the transferred phone number, follow these steps:
- Make a test call: Dial a phone number using your new iPhone 14 and check if the call goes through. Verify that the phone number displayed on the recipient’s phone matches the transferred phone number.
- Send a text message: Compose a text message and send it to a recipient. Confirm that the text message is sent and received using the transferred phone number.
- Check data connectivity: Open a web browser or a messaging app that requires an internet connection. Ensure that your new iPhone 14 can connect to the internet using cellular data. You can also perform a speed test to check the data speed.
- Test voicemail: Call your voicemail and listen to any recorded messages. Ensure that your voicemail is set up properly and that you can access it using the transferred phone number.
If any issues arise during the testing process, it’s recommended to contact your network provider for assistance. They will be able to troubleshoot and resolve any network or phone number-related issues that you may encounter.
Remember, testing the transferred phone number will give you peace of mind and ensure that you can seamlessly make calls, send messages, and access data on your new iPhone 14 using your existing phone number.
# 2. Updating your contacts and settings on the new iPhone 14
Once you have successfully transferred your phone number to your new iPhone 14, it’s important to update your contacts and customize your settings to ensure a seamless transition. Here are some steps to follow:
1. Sync your contacts: To ensure that all of your contacts are transferred to your new iPhone 14, make sure that you have enabled contact syncing with your iCloud account. Go to Settings, tap your name at the top of the screen, and select iCloud. Toggle the Contacts switch to enable syncing. This will ensure that all of your contacts are automatically updated on your new device.
2. Organize and manage your contacts: Take the opportunity to clean up and organize your contacts on your new iPhone 14. Delete any outdated or duplicate contacts to keep your address book tidy. You can also create contact groups or add relevant notes to your contacts for easy reference.
3. Configure your settings: Customize your settings on the new iPhone 14 according to your preferences. This includes adjusting display brightness, selecting wallpaper, setting up notifications, and configuring privacy and security settings. Explore the settings menu to personalize your device and make it work best for you.
4. Set up email and messaging accounts: If you use email or messaging apps, make sure to add your accounts to your new iPhone 14. Go to Settings and navigate to the respective sections to add your accounts. This will ensure that you can easily send and receive emails and messages on your new device.
5. Install and update your apps: Visit the App Store and download your favorite apps on your new iPhone 14. You can also use the “Purchased” section to reinstall apps that you previously downloaded on your old device. Make sure to keep your apps updated to benefit from the latest features and security patches.
6. Customize your Home Screen: Take advantage of the new widgets and app organization features in iOS 15 to personalize your Home Screen. Arrange your apps, create custom app stacks, and add widgets to stay informed and access your most-used apps with ease.
7. Enable Face ID or Touch ID: If your new iPhone 14 supports Face ID or Touch ID, set it up for secure and convenient device unlocking and app authentication. Go to Settings, navigate to Face ID & Passcode or Touch ID & Passcode, depending on your device, and follow the on-screen instructions to set it up.
8. Explore additional features: The new iPhone 14 comes with a range of exciting features and capabilities. Take some time to explore the device and discover functionalities such as enhanced camera capabilities, advanced AR experiences, improved battery life, and more. Familiarize yourself with the device to make the most of your iPhone 14 experience.
With these steps, you can now fully enjoy your new iPhone 14 with your updated contacts and customized settings. Take the time to personalize your device and make it work seamlessly for you.
Conclusion
Transferring your phone number to a new iPhone 14 can be a seamless process, thanks to the advancements in technology. Whether you are upgrading to a newer model or switching to an iPhone from a different device, the steps outlined in this article provide a comprehensive guide to help you transfer your phone number effortlessly.
By following the recommended methods such as using iCloud, iTunes, or contacting your carrier, you can ensure that all your important contacts, messages, and call history are transferred to your new iPhone without any hassle. Taking the time to backup your data and properly activate your new device is crucial to a smooth transition.
Remember, if you encounter any difficulties during the transfer process, do not hesitate to reach out to Apple support or your carrier for assistance. With the right information and guidance, you can quickly transfer your phone number to your new iPhone 14 and enjoy the enhanced features and performance it offers.
FAQs
Q: How do I transfer my phone number to a new iPhone 14?
A: Transferring your phone number to a new iPhone 14 is a straightforward process. All you need to do is follow these steps:
1. Make sure your new iPhone 14 is turned on and connected to a Wi-Fi or cellular network.
2. Go to the “Settings” app on your new iPhone 14 and tap on “Phone.”
3. Tap on “Change Phone Number” and select “Transfer an Existing Number.
4. You will be prompted to enter your current phone number and account details. Follow the on-screen instructions to complete the transfer process.
5. Once the transfer is complete, your phone number will be activated on the new iPhone 14.
Remember to contact your carrier or service provider if you encounter any issues during the transfer process.
Q: Will transferring my phone number to a new iPhone 14 affect my contract or plan?
A: Transferring your phone number to a new iPhone 14 should not affect your contract or plan. The transfer process simply moves your existing phone number from one device to another. However, it is always a good idea to check with your carrier or service provider to ensure that there will be no changes to your contract or plan.
Q: Can I transfer my phone number myself, or do I need assistance from my carrier?
A: In most cases, you can transfer your phone number to a new iPhone 14 yourself. The process can typically be done through the “Settings” app on your iPhone. However, if you encounter any difficulties or if your carrier requires additional steps, it is recommended to contact your carrier for assistance. They will be able to guide you through the process and ensure a smooth transfer of your phone number.
Q: Will transferring my phone number to a new iPhone 14 delete any of my data?
A: No, transferring your phone number to a new iPhone 14 should not delete any of your data. The transfer process is focused on moving your phone number and account details from one device to another. However, it is always advised to back up your data before performing any major changes to your phone, such as transferring your number. This will ensure that you have a copy of your important data in case of any unforeseen circumstances.
Q: How long does it take to transfer a phone number to a new iPhone 14?
A: The time it takes to transfer a phone number to a new iPhone 14 can vary depending on your carrier and network. In most cases, the transfer process is completed within a few minutes to a few hours. However, there may be cases where it takes longer, especially if there are any technical issues or if your carrier requires additional verification steps. It is recommended to follow the on-screen instructions and contact your carrier if the transfer process takes longer than expected.