
Knowing the best ways to sync iPhone contacts to Gmail is a very rewarding accomplishment. This is because doing so allows you to have your contacts stored on two different platforms. So, in case your iPhone gets damaged or stolen, you still have all the contact information of the people in your circle.
Unfortunately, a lot of the brand’s mobile phone owners don’t know the proper way to sync iPhone contacts to Gmail. Due to their lack of proper knowledge, most of them end up losing such a valuable chunk of information.
So, to prevent the undesirable ending from happening, try to conduct comprehensive research that will help you learn how to sync iPhone contacts to Gmail. You start this by checking the methods listed below.
Method 1: Sync iPhone Contacts To Gmail Using iCloud
One of the most effective methods to sync iPhone contacts to Gmail is by using the iCloud. Although this method usually involves many steps, many iPhone users prefer to use this since it is proven to be the most convenient way. The syncing process is best done using the following steps.
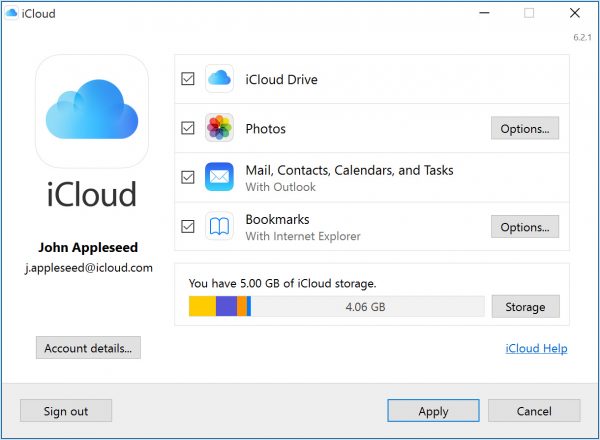
Step 1: Access iCloud on your device
The first step involved when you sync iPhone contacts to Gmail is to access the iCloud app in your device. To do this, you need to go to the phone’s “Settings” then to your name and then to “iCloud.” After this, you need to toggle on the “contacts” icon and proceed to the next step.
Step 2: Access the iCloud site
The second step used to sync iPhone contacts to Gmail via iCloud is to access the iCloud website. This step will require you to log in. Thus, it is best that you prepare your Apple ID and password. When prompted, make sure to provide this information.
Step 3: Export contacts
The third step that must be done to sync iPhone contacts to Gmail involves the actual export of contacts. To do this, you need to access the contacts option and select the contact information of the person that you wish to sync from your iPhone to Gmail. As soon as this is done, tap the gear icon then click the “ExportvCard” button.
Step 4: Access your Google Account
Upon completing the export contact procedure from your iPhone, make sure to access your Google account to complete your sync iPhone contacts to Gmail task. To do this, sign in to your Google account and go to contacts. Look for the “Import Contacts” icon on the left panel and click the “Choose File” prompt found in a new window. Make sure to select the vCard that you have exported from the iPhone’s iCloud service and hit the “Import” icon.
Many iPhone users prefer to sync using iCloud since it is proven secure. Also, this method assures that all the contacts exported will be 100% imported into your Gmail account.
Method 2: Sync iPhone Contacts To Gmail Using The Settings Function
In the absence of iCloud, iPhone users could still sync iPhone contacts to Gmail by simply using the settings function of the device, and this is done using the steps below.
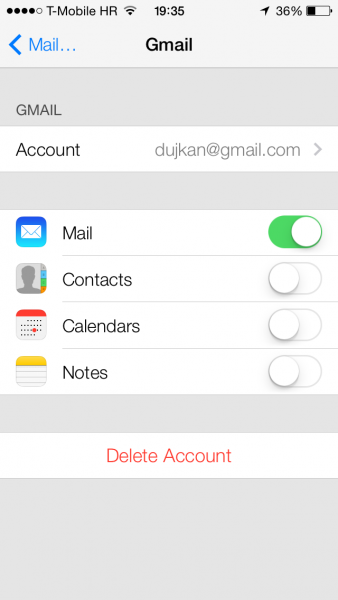
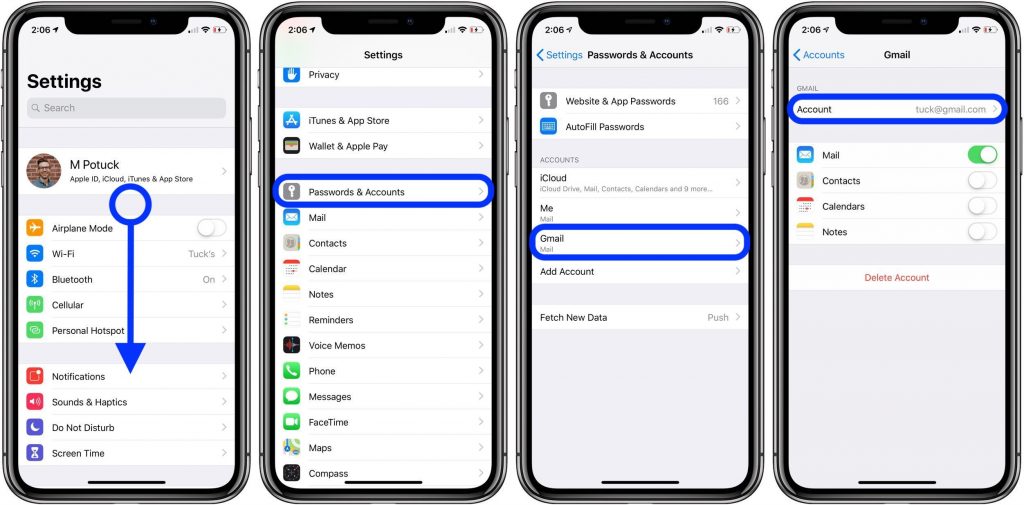
Step 1: Access your iPhone’s Settings
The first step involved is to access the settings menu. After this, navigate into the “Passwords & Accounts” icon and select the “Add Account” then tap on the “Google” icon.
Step 2: Supply the needed information
The second step involved is to provide the relevant information that will allow you to add your Gmail account then click the “Next” icon. Make sure that your account is verified and then hit the “Save” button.
Step 3: Complete the sync process
Upon hitting the save button mentioned in the previous step, your contacts will be automatically synced into the Google account. To complete the entire process, make sure to complete the procedures by hitting the “Save” button as soon as the process is finished.
Method 3: Sync iPhone Contacts To Gmail Using iTunes
Another method is to use iTunes. Just like using iCloud, this technique involves several steps, as well as the need to turn off the iCloud app during the actual syncing process. In reality, the procedure can be accomplished using the steps below.
Step 1: Download/install the latest iTunes version
The first step involved is to download the latest version of iTunes. It is also required that the app will be installed properly to prevent possible errors during the syncing process.
Step 2: Establish a connection between your iPhone and computer
As soon as the installation is done, start connecting your iPhone to your computer. This can be done using a USB cable. Make sure to run the iTunes app when it fails to open automatically. When all these are ready, you can now proceed to the actual syncing process.
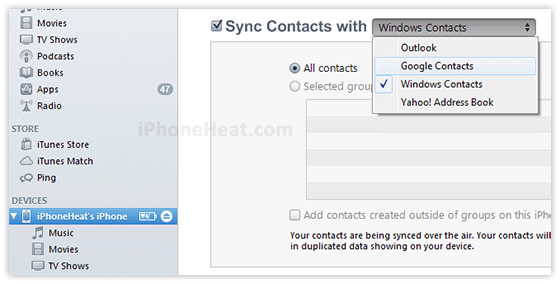
Step 3: Access the iTunes app and resume the syncing
As soon as the iTune app opens, look for the “device” icon and click it. Tap the “Info” button and select the “Sync Contacts with” option. Make sure to select the Google Contacts found on the drop-down menu. The app will then provide a set of onscreen instructions that must be followed on how to sync the iPhone contacts to Google. Follow these instructions one by one to achieve the best result.
Step 4: Check your Google Contacts
Check if the syncing process you did was successfully accomplished. This can be done by checking your Google contacts. Make sure that all the contact information you wish to save on the Gmail account is there in case you need them in the future.
Given the abundance of methods that can be used to sync iPhone contacts to Gmail, you have all the reasons to duplicate the information you wish to keep in various devices. The good thing is that these methods are convenient to use and free.
For more useful guides, check out our dedicated section on Cellular News right here.