
In today’s era of connectivity, being able to create a hotspot using your computer can be a real game-changer. Whether you’re on the go and need to connect your phone or tablet to the internet, or you’re in a location where Wi-Fi is limited or unavailable, turning your computer into a hotspot can provide a convenient and reliable solution. In this article, we will guide you on how to make your computer a hotspot on Windows 10, allowing you to share your internet connection with other devices. From setting up the hotspot to connecting devices and managing your network, we’ve got you covered. So, let’s dive in and explore the steps to transform your computer into a hotspot effortlessly.
Inside This Article
- Setting Up a Hotspot on Windows 10
- Step 1: Check Compatibility and Requirements
- Step 2: Enable Mobile Hotspot on Windows 10
- Step 3: Configure Hotspot Settings
- Step 4: Connect Devices to Your Hotspot
- Troubleshooting Common Hotspot Issues
- Conclusion
- FAQs
Setting Up a Hotspot on Windows 10
With Windows 10, you have the ability to turn your computer into a hotspot, allowing you to share your internet connection with other devices. This can be incredibly useful when you’re in a location without Wi-Fi or if you want to connect multiple devices to the internet using a single connection. In this article, we’ll guide you through the process of setting up a hotspot on Windows 10.
Before we begin, it’s important to check the compatibility and requirements for setting up a hotspot on your Windows 10 computer. First and foremost, you need to ensure that your computer has a Wi-Fi adapter. Most modern laptops and desktops come with built-in Wi-Fi adapters, but if yours doesn’t, you may need to purchase an external Wi-Fi adapter.
In addition, your computer must be running Windows 10 version 1607 or later. To check your Windows 10 version, simply press the Windows key + R on your keyboard to open the Run dialog box. Then, type “winver” (without quotes) and hit Enter. A window will appear showing your Windows 10 version.
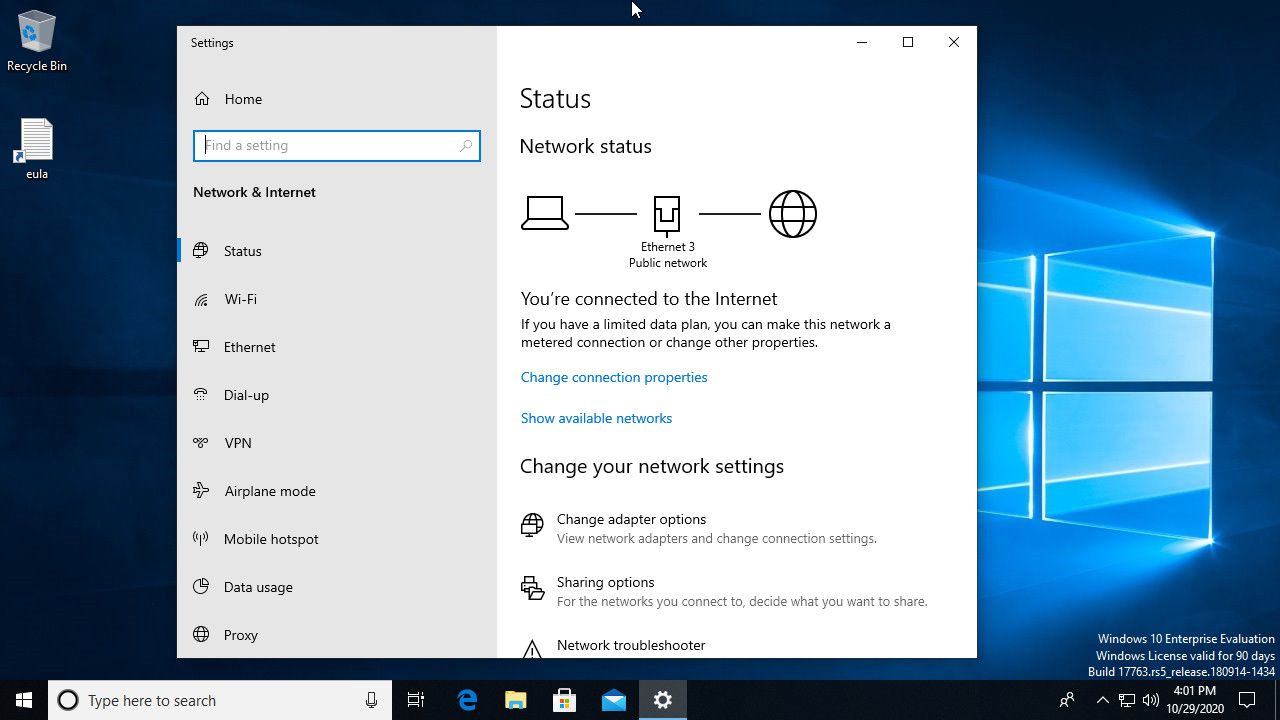
Once you’ve confirmed that your computer meets the compatibility and requirements, you can proceed with enabling the mobile hotspot feature. To do this, go to the Start menu and click on the “Settings” icon. In the Settings window, click on the “Network & Internet” option.
In the Network & Internet settings, select the “Mobile hotspot” tab from the left-hand menu. On the right-hand side, you’ll see the option to toggle the “Share my Internet connection with other devices” switch. Turn it on to enable the mobile hotspot feature.
Now that the mobile hotspot feature is enabled, you can configure your hotspot settings. Click on the “Edit” button to personalize your hotspot name (SSID) and password. You can choose any name for your hotspot and set a strong password to secure your connection.
Once you’ve customized your hotspot settings, you’re ready to connect other devices to your hotspot. On the device you want to connect, open the Wi-Fi settings and look for your hotspot’s name in the list of available networks. Select your hotspot and enter the password you set earlier.
That’s it! You’ve successfully set up a hotspot on your Windows 10 computer. You can now enjoy seamless internet connectivity on your other devices using your computer’s internet connection.
If you encounter any issues while setting up or using the hotspot feature on Windows 10, here are some common troubleshooting tips:
- Ensure that the Wi-Fi adapter on your computer is turned on.
- Restart your computer and try enabling the hotspot feature again.
- Double-check that you entered the correct password when connecting to the hotspot.
- Update the drivers for your computer’s Wi-Fi adapter.
- If these troubleshooting steps don’t solve the issue, you may need to contact your computer manufacturer or Microsoft support for further assistance.
Step 1: Check Compatibility and Requirements
Before setting up a hotspot on Windows 10, it is essential to ensure that your computer meets the necessary compatibility and system requirements. This will help ensure a smooth and hassle-free hotspot setup process. Here are the key things to consider:
1. Operating System: Make sure your computer is running on Windows 10. Hotspot functionality is built into this version of the operating system.
2. Hardware Requirements: Verify that your computer has a wireless network adapter. Most modern laptops and desktop computers have this built-in, but if not, you may need to purchase and install a compatible Wi-Fi adapter.
3. Internet Connectivity: Your computer must have an active and stable internet connection in order to share it with other devices via the hotspot. Connect your computer to a reliable network source, such as a wired Ethernet connection or a Wi-Fi connection from another network.
4. Administrative Access: To set up a hotspot on Windows 10, you need administrative access to your computer. Ensure that you have the necessary permissions and login credentials to make changes to your system settings.
5. Battery Life: Using your computer as a hotspot can consume a significant amount of battery power. If you are relying on a laptop or tablet, make sure it is connected to a power source to avoid draining the battery too quickly.
By checking these compatibility and requirements, you can ensure that your computer is ready to create a hotspot and share your internet connection with other devices seamlessly. Now that you have verified your computer’s compatibility, you can move on to the next step: enabling the mobile hotspot feature on Windows 10.
Step 2: Enable Mobile Hotspot on Windows 10
Enabling the mobile hotspot feature on Windows 10 allows you to share your computer’s internet connection with other devices such as smartphones, tablets, and laptops. It is a convenient way to stay connected on the go or when you don’t have access to a stable Wi-Fi network.
To enable the mobile hotspot feature, follow these simple steps:
1. Open the Settings
Click on the “Start” button in the bottom left corner of your screen and select the “Settings” icon. Alternatively, you can use the shortcut “Windows key + I” to open the Settings directly.
2. Go to Network & Internet
Within the Settings menu, locate and click on the “Network & Internet” option. This will open a new window with various network-related settings.
3. Select the Mobile hotspot option
In the Network & Internet window, look for the “Mobile hotspot” tab on the left-hand side and click on it. This will take you to the mobile hotspot settings page.
4. Turn on the Mobile hotspot
On the mobile hotspot settings page, toggle the switch for “Share my Internet connection with other devices” to the “On” position.
5. Configure hotspot settings
After enabling the mobile hotspot, you can configure the settings according to your preferences. You can choose a network name (SSID) and password, select a network band, and adjust the maximum number of allowed connections.
6. Connect devices to the hotspot
Once you’ve enabled and configured the mobile hotspot, other devices can connect to it by searching for available Wi-Fi networks and selecting your hotspot’s network name. They will be prompted to enter the password you defined during setup.
That’s it! You have successfully enabled the mobile hotspot feature on your Windows 10 computer. Now you can enjoy internet connectivity on your other devices by connecting them to your computer’s hotspot.
Step 3: Configure Hotspot Settings
After enabling the Mobile Hotspot feature on your Windows 10 computer, it’s time to configure the settings to ensure a seamless and secure connection. The hotspot settings allow you to customize various aspects of your hotspot, including the network name, password, and connection sharing options.
The first setting you’ll want to configure is the network name, also known as the SSID (Service Set Identifier). This is the name that will appear when other devices search for available Wi-Fi networks. It’s recommended to choose a unique and easily identifiable name to avoid confusion.
Next, you’ll need to set a strong password for your hotspot. It’s crucial to use a secure password to prevent unauthorized access to your hotspot and protect your personal information. Aim for a combination of uppercase and lowercase letters, numbers, and special characters to create a robust and difficult-to-guess password.
Some devices may also provide an option to choose the security type for your hotspot. The most common security types are WPA2-Personal or WPA3-Personal, which offer advanced encryption to safeguard your connection. It’s recommended to select the highest available security type for enhanced protection.
In addition to the network name and password, you can also configure the connection sharing options. Windows 10 provides two choices: “Share my Internet connection with other devices” and “Turn on remotely.” The former allows other devices to connect to your hotspot and share your internet connection, while the latter allows you to turn on and off the hotspot remotely using a Windows 10 machine.
Once you’ve configured all the necessary settings, don’t forget to click on the “Save” or “Apply” button to apply the changes. This will ensure that your hotspot is set up according to your preferences and ready to be used by other devices.
Remember, it’s important to periodically review and update your hotspot settings to maintain optimal security and performance. You can access the hotspot settings at any time by navigating to the Network & Internet settings on your Windows 10 computer.
By taking the time to configure the hotspot settings accurately, you can create a secure and reliable hotspot that is tailored to your requirements. This will enable you to connect and share your internet connection with other devices effortlessly.
Step 4: Connect Devices to Your Hotspot
Now that you have set up your hotspot on Windows 10, it’s time to connect your devices and enjoy the benefits of internet access on the go. Follow these simple steps to connect devices to your hotspot:
1. Enable Wi-Fi on the Device
Make sure the Wi-Fi feature is enabled on the device you want to connect to your hotspot. On most devices, you can find this option in the settings menu under Wi-Fi or network connections.
2. Search for Available Networks
Once Wi-Fi is enabled, the device will start scanning for available networks. In the list of available networks, you should see the name of your hotspot. It will be displayed with the name you assigned during the hotspot setup process.
3. Select Your Hotspot
Tap or click on the name of your hotspot from the list of available networks. Ensure that you choose the correct hotspot to avoid accidentally connecting to another nearby hotspot.
4. Enter the Password
When prompted, enter the password you set during the hotspot setup. This password is essential for ensuring the security of your hotspot and preventing unauthorized access.
5. Connect and Enjoy
Once you have entered the password, your device will attempt to connect to the hotspot. If the password is correct, the device will establish a connection, and you will be able to enjoy internet access on your device via your Windows 10 hotspot.
6. Repeat for Other Devices
If you have more than one device that you want to connect to the hotspot, simply repeat the above steps for each device. Each device will require the password to establish a connection.
7. Monitor Connected Devices
You can monitor the devices connected to your hotspot from the hotspot settings menu on your Windows 10 device. This allows you to keep an eye on the devices using your hotspot and manage their access if necessary.
8. Disconnect Devices
If you want to disconnect a device from your hotspot, go to the hotspot settings menu and look for the list of connected devices. From there, you can select the device and choose the option to disconnect it from your hotspot.
By following these steps, you can easily connect multiple devices to your Windows 10 hotspot and enjoy internet access wherever you go. Remember to secure your hotspot with a strong password to prevent unauthorized access.
Troubleshooting Common Hotspot Issues
While setting up a mobile hotspot on Windows 10 can be a convenient way to share your internet connection, it’s not uncommon to encounter some issues along the way. Let’s take a look at some common hotspot problems and how to troubleshoot them.
1. No internet connection: If devices are connected to your hotspot but can’t access the internet, check if your computer is connected to the internet itself. Ensure that the Wi-Fi or Ethernet connection is active and functional. Additionally, confirm that your cellular data plan allows personal hotspot functionality.
2. Limited connectivity: Sometimes, devices connected to your hotspot may display a “Limited Connectivity” message. This can occur if the device doesn’t have proper IP configuration or if there’s an issue with the network adapter driver on your computer. Try restarting both the device and the computer to see if it resolves the issue.
3. Slow internet speed: If your hotspot connection seems sluggish, the issue may lie with the cellular network or congestion in your area. Check the signal strength indicator on your device and try moving closer to a window or a different location where the signal is stronger. Additionally, limit the number of connected devices as too many can affect the speed.
4. Unable to connect: If devices are unable to connect to the hotspot, make sure you’ve entered the correct hotspot password. Double-check the password on your Windows 10 settings and try reconnecting. If the issue persists, try restarting your computer and the device you’re trying to connect.
5. Hotspot not visible: In some cases, other devices may not be able to see your hotspot in the available Wi-Fi networks list. Ensure that your hotspot is enabled and visible by going to the Windows 10 settings and checking the “Mobile hotspot” section. You can also try disabling and re-enabling the hotspot to refresh the visibility.
6. Hotspot automatically turns off: If your hotspot automatically turns off after a period of inactivity, check the power management settings on your computer. Go to the Device Manager, locate your network adapter, and disable the “Allow the computer to turn off this device to save power” option.
7. Connection drops frequently: If your hotspot connection drops frequently, it could be due to interference from other nearby devices or networks. Try changing the Wi-Fi channel on your router or mobile hotspot settings to minimize interference. Additionally, ensure that your computer’s network adapter drivers are up to date.
By following these troubleshooting steps, you can quickly resolve common hotspot issues and enjoy seamless internet connectivity on your devices. Remember to double-check your settings, restart the devices if needed, and always stay up to date with the latest drivers and software updates.
Conclusion
Creating a hotspot on your Windows 10 computer is a convenient way to share your internet connection with other devices. Whether you’re traveling, have limited Wi-Fi options, or simply need to connect multiple devices, turning your computer into a hotspot is a simple and effective solution.
By following the steps outlined in this guide, you can easily configure your computer as a hotspot and provide internet access to your smartphones, tablets, or any other Wi-Fi-enabled device. Remember to enable a strong password to secure your hotspot and prevent unauthorized access.
Having the ability to make your computer a hotspot not only offers convenience, but it can also save you from using expensive mobile data plans. So, the next time you’re in need of a Wi-Fi connection, don’t forget that your trusty Windows 10 computer can become a reliable hotspot with just a few clicks.
FAQs
Q: Can I turn my computer into a hotspot on Windows 10?
Yes, you can. Windows 10 has a built-in feature that allows you to turn your computer into a hotspot and share your internet connection with other devices. It can be a convenient option when you don’t have access to a traditional Wi-Fi network.
Q: How do I set up a hotspot on Windows 10?
To set up a hotspot on Windows 10, follow these steps:
- Open the Settings app by pressing Windows key + I.
- Click on “Network & Internet.”
- In the left-hand menu, click on “Mobile hotspot.”
- Toggle the “Share my Internet connection with other devices” switch to the “On” position.
- Customize the network name and password if desired.
- Connect your other devices to the newly created hotspot network using the network name and password you set.
Q: What are the system requirements for setting up a hotspot on Windows 10?
To set up a hotspot on Windows 10, your computer must meet the following requirements:
- A wireless adapter or Wi-Fi card that supports hosted network.
- A stable internet connection.
- Windows 10 operating system (version 1607 or later).
Q: Can I connect multiple devices to my Windows 10 hotspot?
Yes, you can connect multiple devices to your Windows 10 hotspot. The number of devices that can connect simultaneously may vary depending on factors such as your computer’s hardware capabilities and the bandwidth available from your internet connection. Keep in mind that connecting multiple devices may affect the overall performance and speed of the hotspot.
Q: How secure is a hotspot created on Windows 10?
The built-in hotspot feature in Windows 10 provides WPA2 encryption to secure the network and protect your data. It is generally considered to be a secure method for sharing your internet connection. However, to ensure maximum security, it is always recommended to use a strong password and keep your computer’s operating system and security software up to date.