
Are you tired of cluttered desktops and overflowing inboxes on your iPhone? Look no further than the Files app to help you organize and store your important items seamlessly. Whether it’s photos, documents, music, or any other digital belongings, the Files app provides a convenient and efficient solution to manage everything in one place. With just a few simple steps, you can easily save items to the Files app on your iPhone, making it easier to access and share them whenever you need. In this article, we will walk you through the process of saving items to the Files app, offering you a hassle-free way to declutter your phone and keep everything in order. So, grab your iPhone and let’s dive into the world of efficient file management!
Inside This Article
- How to Save Items to the Files App on Your iPhone
- # 2. iCloud Drive
- # 3. Third-party cloud storage services
- Local storage on your iPhone
- Conclusion
- FAQs
How to Save Items to the Files App on Your iPhone
With the Files app on your iPhone, you have a convenient way to organize and access your files and documents in one place. Whether you want to save photos, videos, PDFs, or any other type of file, the Files app can help you keep everything organized. In this article, we will explore different methods to save items to the Files app on your iPhone.
1. iCloud Drive
iCloud Drive is Apple’s cloud storage service that seamlessly integrates with the Files app. It allows you to save and access files across all your Apple devices. Here’s how you can save items to iCloud Drive:
- Open the app that contains the file you want to save.
- Select the file and tap the Share button.
- In the Share sheet, choose the “Save to Files” option.
- Select the desired location in iCloud Drive where you want to save the file.
- Tap “Save” to store the file in iCloud Drive.
By saving files to iCloud Drive, you can access them from any device with your Apple ID, making it a convenient option for seamless file management.
2. Third-party cloud storage services
If you use cloud storage services like Google Drive, Dropbox, or OneDrive, you can easily save files from these services to the Files app on your iPhone. Here’s how:
- Install the corresponding cloud storage app on your iPhone and sign in to your account.
- Open the cloud storage app and navigate to the file you want to save.
- Tap the file and select the option to export or share the file.
- In the sharing options, choose the “Save to Files” option.
- Select the location in the Files app where you want to save the file.
- Tap “Save” to save the file to the selected location in the Files app.
By utilizing third-party cloud storage services, you can easily access and manage your files across different platforms and devices.
3. Local storage on your iPhone
In addition to cloud storage, the Files app also allows you to save files directly to your iPhone’s local storage. This is useful when you want to save files that you may not need to access from other devices. Here’s how to save items to your iPhone’s local storage:
- Open the app that contains the file you want to save.
- Select the file and tap the Share button.
- In the Share sheet, choose the “Save to Files” option.
- Select the “On My iPhone” option to save the file locally.
- Choose the desired folder or create a new one to save the file in.
- Tap “Save” to store the file locally on your iPhone.
By saving files locally, you can access them even without an internet connection and have full control over their storage and privacy.
Now you know how to save items to the Files app on your iPhone. Whether you choose to use iCloud Drive, third-party cloud storage services, or local storage, the Files app provides a versatile and efficient solution for managing your files and documents.
# 2. iCloud Drive
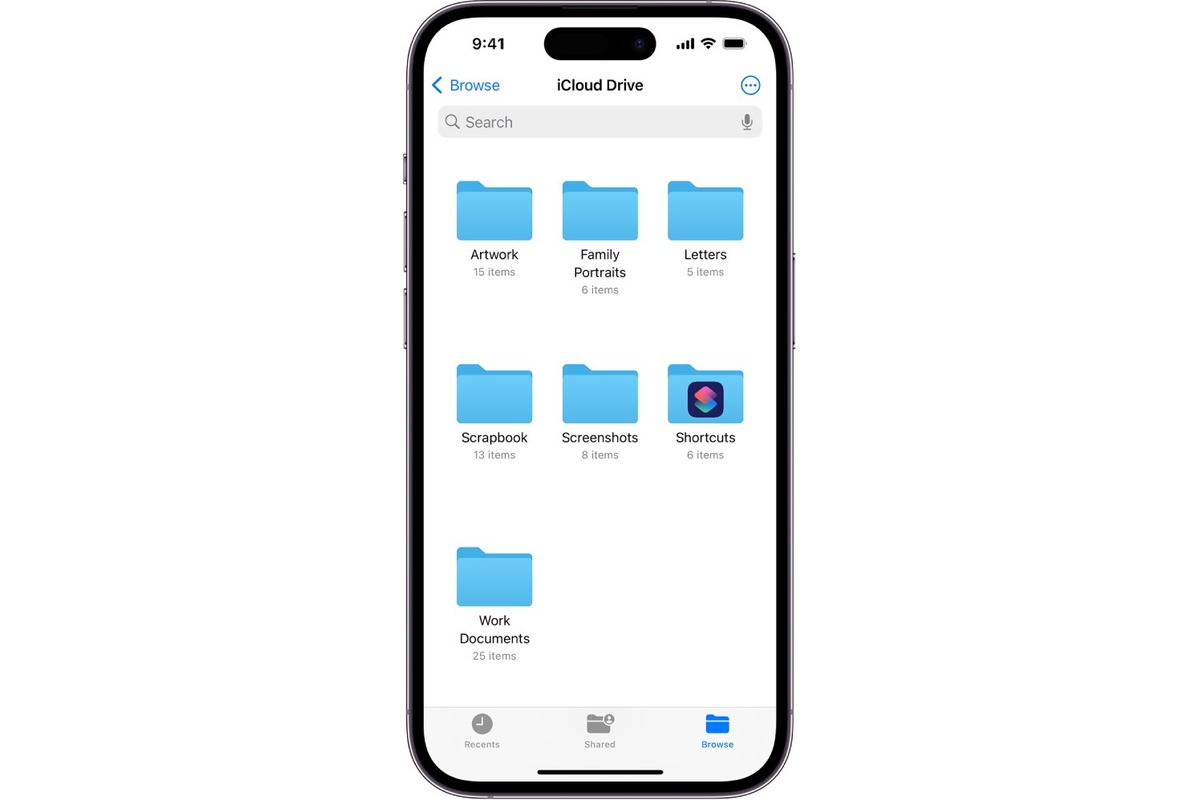
If you own an iPhone, chances are you’re already familiar with iCloud. iCloud Drive is Apple’s cloud storage service that allows you to securely store and access your files across all your Apple devices. The best part? It seamlessly integrates with the native Files app on your iPhone, making it incredibly easy to save items and access them later.
Here’s how you can save items to the iCloud Drive using your iPhone:
- Open the app from which you want to save a file. It could be the Photos app, Safari, or even a third-party app like Pages or Keynote.
- Find the file you want to save and tap on the Share button. It typically looks like a square with an arrow pointing upwards.
- In the Share sheet that appears, scroll down and find the “Save to Files” option. Tap on it.
- You’ll now see a folder view of your iCloud Drive. You can choose to save the file directly in the iCloud Drive root folder or select a specific folder to organize your files. Tap on the desired location.
- Once you’ve chosen the location, tap on the “Save” button in the top right corner of the screen.
That’s it! The file is now saved to your iCloud Drive and can be accessed from any of your Apple devices using the Files app. You can even access it from a web browser by visiting iCloud.com and signing in with your Apple ID.
It’s worth noting that iCloud Drive offers 5 GB of free storage for every Apple ID. If you require more storage, you can choose from various storage plans offered by Apple. Now you can store your documents, photos, videos, and more safely in the cloud and access them whenever you need them!
# 3. Third-party cloud storage services
Aside from iCloud Drive, there are a plethora of third-party cloud storage services available for your iPhone. These services offer additional flexibility, features, and storage options to help you save and access your files on the go. Let’s explore some popular third-party cloud storage options for your iPhone:
1. Dropbox: Dropbox is a widely-used cloud storage service that allows you to store, share, and access your files from anywhere. With its easy-to-use interface and cross-platform compatibility, you can seamlessly sync and access your files across multiple devices, including your iPhone.
2. Google Drive: Google Drive is not just for Android users. It’s also available for iPhone users, offering generous free storage space and seamless integration with Google’s suite of productivity apps, such as Google Docs, Sheets, and Slides. With Google Drive, you can easily store, organize, and collaborate on your files.
3. Microsoft OneDrive: If you’re already using Microsoft Office apps, then Microsoft OneDrive is a great cloud storage option. With OneDrive, you can automatically back up your photos and access your Word, Excel, and PowerPoint files from your iPhone. It also offers integration with other Microsoft services like Outlook and SharePoint.
4. Box: Box is another popular cloud storage service that offers a robust set of features for businesses and individuals alike. It provides secure file storage, content collaboration, and advanced security features. Box integrates with various apps and platforms, making it easy to access and share your files on your iPhone.
5. Amazon Drive: For those who are already Amazon Prime members, Amazon Drive offers unlimited photo storage and 5GB of free storage for other files. It also provides an easy way to back up and access your files on your iPhone. Plus, if you have an Amazon Fire device, you get additional benefits like free photo storage and access to your files on Fire devices.
These are just a few examples of third-party cloud storage services available for your iPhone. Each service has its own unique features and storage options, so it’s worth exploring to find the one that best suits your needs. With third-party cloud storage services, you can save items to the Files app on your iPhone and have the flexibility to access them whenever and wherever you need.
Local storage on your iPhone
Aside from using cloud storage services, your iPhone also provides the option to save items directly to its local storage. This can be useful when you want to quickly access certain files without relying on an internet connection or when you simply prefer to keep your data offline.
There are a few different ways you can save items to the local storage on your iPhone:
- Photos and Videos: To save photos and videos to your iPhone’s local storage, simply open the Photos app and select the desired image or video. Then, tap on the “Share” button and choose the option “Save Image” or “Save Video.” The file will be saved to your iPhone’s Camera Roll or Photo Library.
- Documents and Files: If you have documents or files that you want to save locally on your iPhone, you can use the Files app. This app acts as a central hub for all your files and allows you to organize and manage them efficiently. To save a document or file, open the Files app, navigate to the desired location (such as “On My iPhone” or a specific folder), and tap on the “+” button. Select the option to create a new folder or choose an existing folder. Once you’re inside the folder, tap on the “+” button again and select the option to add a file from your iPhone or an external source like iCloud Drive or a third-party cloud storage service.
- Offline Reading: If you enjoy reading articles or webpages offline, you can save them to your iPhone’s local storage using the Safari browser. When you’re on a webpage that you want to save, tap on the Share button and select “Save to Files.” Choose a location to save the webpage, such as “On My iPhone” or a specific folder in the Files app. You can then access the saved webpage even without an internet connection.
By utilizing the local storage on your iPhone, you can ensure that your important files and data are readily available even when you’re not connected to the internet. This can be particularly useful when traveling or in situations where accessing the cloud storage might not be feasible.
Conclusion
In conclusion, the Files app on your iPhone is a powerful tool that allows you to organize and manage your files and documents with ease. Whether you’re saving files from other apps or downloading attachments from emails, the Files app provides a central hub for all your important documents.
By following the steps outlined in this article, you can quickly and efficiently save items to the Files app on your iPhone. Remember to use descriptive filenames and create folders to keep your files organized. With the help of the Files app, you can access your documents from anywhere, making it a convenient and essential feature for any iPhone user.
So, go ahead and start using the Files app to save and manage your files on your iPhone. With just a few taps, you’ll be able to keep your documents organized and easily accessible, enhancing your productivity on the go.
FAQs
1. How do I save items to the Files app on my iPhone?
To save items to the Files app on your iPhone, follow these steps:
- Open the app that contains the file or item you want to save.
- Tap on the Share icon, which is usually represented by a square with an arrow pointing upwards.
- From the options presented, choose “Save to Files.”
- A window will appear displaying your file locations. Select the desired storage location or create a new folder by tapping on the “New Folder” option.
- Once you’ve chosen the location, tap “Save.”
Your file or item will now be saved to the Files app on your iPhone.
2. Can I organize my saved items into folders within the Files app?
Absolutely! The Files app allows you to create folders to organize your saved items. To create a folder, follow these steps:
- Open the Files app on your iPhone.
- Tap on the “Browse” or “Locations” tab, depending on your iOS version.
- Tap on “Edit” at the top-right corner of the screen.
- Tap on “New Folder.”
- Enter a name for your folder and tap “Done.”
Your new folder will now appear in the Files app, and you can move or save items into it by selecting the items and choosing the folder as the destination.
3. Can I access my saved items in the Files app offline?
Yes, you can access your saved items in the Files app offline. When you save files or items to the Files app, they are stored locally on your device, allowing you to access them even when you don’t have an internet connection. However, keep in mind that some files, such as documents or media files stored in cloud services like iCloud or Dropbox, may require an internet connection to sync any updates made to them.
4. How do I delete files or items from the Files app?
To delete files or items from the Files app on your iPhone, follow these steps:
- Open the Files app.
- Navigate to the folder where the file or item is located.
- Long-press on the file or item you want to delete.
- Tap on the “Delete” option from the menu that appears.
- Confirm the deletion by tapping “Delete” once again.
The file or item will now be deleted from the Files app, and it will be moved to the “Recently Deleted” folder where it will be permanently deleted after 30 days.
5. Can I open files in other apps from the Files app?
Yes, you can open files in other apps from the Files app on your iPhone. Here’s how:
- Open the Files app.
- Navigate to the folder where the file is located.
- Tap on the file you want to open.
- From the file preview screen, tap on the Share icon, represented by a square with an arrow pointing upwards.
- Choose the app you want to open the file in from the options presented.
The selected app will now open the file, allowing you to view or edit it according to the app’s capabilities.