
Are you running out of storage space on your iPhone? Creating a zip file can be a great solution to compress multiple files into a single, more manageable archive. Whether you want to free up space or send a group of files as a single attachment, learning how to create a zip file on your iPhone can come in handy.
In this guide, we will walk you through the step-by-step process of creating a zip file on your iPhone. From using built-in features to exploring third-party apps, we will cover all the options available to you. So, let’s dive in and discover how to compress files on your iPhone with ease!
Inside This Article
- Creating a Zip File on iPhone
- Method 1: Using a File Management App
- Method 2: Using the Files App
- Method 3: Using a Third-Party App
- Conclusion
- FAQs
Creating a Zip File on iPhone
Knowing how to create a zip file on your iPhone can be a useful skill, especially when you want to compress multiple files into a single, easily shareable package. Fortunately, there are several methods available that allow you to create zip files directly on your iPhone, no matter which version of iOS you’re using. In this article, we will explore three different methods to help you zip your files conveniently.
Method 1: Using a File Management App
One of the simplest ways to create a zip file on your iPhone is by using a file management app available on the App Store. There are several options to choose from, such as Documents by Readdle, File Manager & Browser by TapMedia Ltd., or iZip – Zip Unzip Unrar by ComcSoft Corporation. These apps provide you with a user-friendly interface and a variety of features, including the ability to create zip files.
To create a zip file using a file management app, follow these steps:
- Download and install a file management app from the App Store.
- Launch the app and navigate to the folder containing the files you want to zip.
- Select the files by tapping on them.
- Look for the options menu, often represented by three dots or a gear icon, and tap it.
- Choose the “Zip” or “Archive” option to create the zip file.
- Give the zip file a name and select the destination folder where you want to save it.
- Tap “Create” or “Save” to complete the process.
Method 2: Using the Files App
If you have iOS 11 or later, you can take advantage of the built-in Files app to create zip files on your iPhone. The Files app allows you to manage files and folders from various storage services, including iCloud Drive, Dropbox, and Google Drive.
Follow these steps to create a zip file using the Files app:
- Open the Files app on your iPhone by tapping on its icon.
- Navigate to the folder containing the files you want to zip.
- Select the files by tapping on them. You can select multiple files by tapping and dragging your finger across the screen.
- Tap the ellipsis (…) button at the bottom-right corner of the screen.
- From the options menu, choose “Compress” to create the zip file.
- The zip file will be created in the current folder.
Method 3: Using a Third-Party App
If you prefer more advanced features or need additional functionalities, using a dedicated third-party app might be the best choice for you. There are many zip file creator apps available on the App Store, such as WinZip, Zip Viewer, or ZArchiver, that offer extensive capabilities for creating and managing zip files.
To create a zip file using a third-party app, follow these general steps:
- Download and install a third-party zip file creator app from the App Store.
- Launch the app and explore its features and interface to familiarize yourself with the app’s functionalities.
- Locate the option to create a new zip file or archive within the app.
- Select the files you want to include in the zip file.
- Follow the app’s instructions to create the zip file, including naming it and choosing the destination folder.
- Complete the zip file creation process by tapping the appropriate button or confirming the action.
Creating a zip file on your iPhone can help you organize your files, save storage space, and make sharing multiple files much more convenient. Whether you use a file management app, the built-in Files app, or a dedicated third-party app, the process is relatively straightforward. Choose the method that suits your needs and preferences, and enjoy the benefits of having your files zipped and compressed.
Method 1: Using a File Management App
Creating a zip file on your iPhone can be easily done by utilizing a file management app. Here’s a step-by-step guide on how to do it:
Step 1: Open the file management app of your choice. There are several popular options available on the App Store, such as Documents by Readdle, iZip, and WinZip. Install and launch the app on your iPhone.
Step 2: Navigate to the location where the files you want to include in the zip file are stored. This could be your iPhone’s internal storage, iCloud Drive, or any other linked cloud storage services that the app supports.
Step 3: Select the files you wish to include in the zip file. Most file management apps allow you to select multiple files by tapping on them. You can also select an entire folder if you want to compress multiple files together.
Step 4: Once you have selected the files, look for an option or icon that represents creating a zip file. This can vary depending on the app you’re using. It may be labeled as “Compress,” “Zip,” or represented by a zipper icon. Tap on it.
Step 5: Wait for the app to compress the selected files into a zip file. The time it takes can depend on the size and number of files you’ve selected. Once the process is complete, you’ll be notified or redirected to the location where the zip file is saved.
Step 6: You can now access and share the created zip file from within the file management app. You can send it via email, messaging apps, or upload it to cloud storage platforms.
Using a file management app is a convenient method for creating zip files on your iPhone. It provides flexibility in managing files, selecting specific items to include, and easy sharing options.
Remember to explore different file management apps on the App Store to find the one that best suits your needs and preferences. With a reliable app, managing and compressing files on your iPhone becomes a breeze.
Method 2: Using the Files App
If you’re an iPhone user, you’re probably already familiar with the built-in Files app. This app provides a convenient way to manage your files and documents on your device. But did you know that you can also use the Files app to create a zip file? In this method, we’ll walk you through the steps to zip files using the Files app on your iPhone.
1. Begin by opening the Files app on your iPhone. You can find it on your home screen or by swiping down and using the search bar.
2. Once in the Files app, navigate to the location where your files are stored. This can be your iCloud Drive, On My [Device], or any other connected cloud storage providers.
3. Select the files you want to zip by tapping on them. You can choose multiple files by selecting each file individually or by using the select option in the top-right corner of the app.
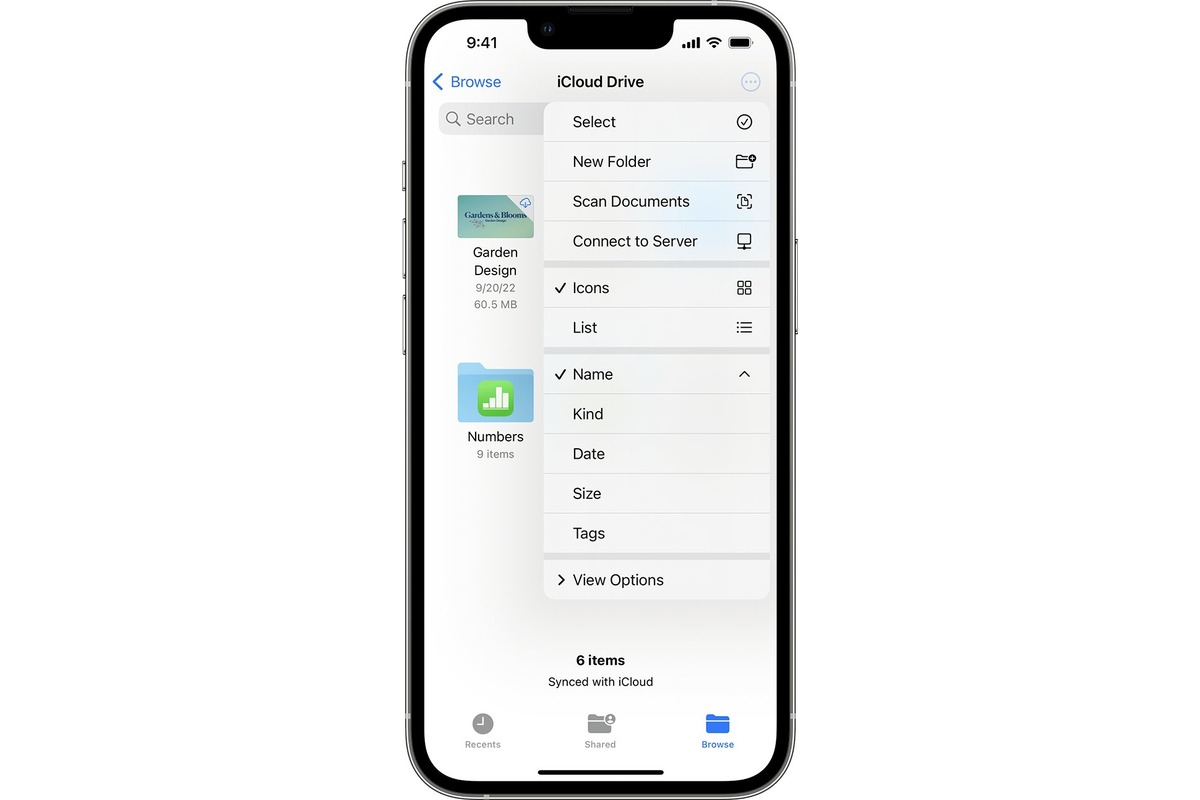
4. After selecting the files, tap on the ellipsis (…) icon at the bottom of the screen. This will open a menu of options.
5. From the menu, select the “Compress” option. This will start the process of creating a zip file with the selected files.
6. Give your zip file a name. You can do this by typing in the text field that appears or by accepting the suggested name. Once you’ve entered a name, tap “Save” or “Done” depending on your device.
7. The Files app will now create the zip file containing your selected files. The time it takes to complete this process will vary depending on the size and number of files being compressed.
8. Once the zip file is created, it will appear in the same location where your original files were stored. You can now share, move, or delete the zip file as needed.
That’s it! You have successfully created a zip file using the Files app on your iPhone. This method is quick, straightforward, and doesn’t require any third-party apps.
It’s also worth noting that the Files app allows you to unzip or extract files from a zip file. Simply locate the zip file in the Files app, tap on it, and select the “Uncompress” option. This will extract the contents of the zip file and make them available for use.
Using the Files app is a convenient and efficient way to manage and organize your files on your iPhone. Whether you’re looking to compress multiple files into a single zip file or extract files from an existing zip file, the Files app has got you covered.
Method 3: Using a Third-Party App
If you prefer using a third-party app to create a zip file on your iPhone, there are several options available on the App Store. These apps offer advanced features and a user-friendly interface to make the process quick and easy.
One popular choice is the “iZip” app, which can be downloaded for free from the App Store. To create a zip file using iZip, follow these steps:
- Download and install the iZip app from the App Store.
- Launch the iZip app on your iPhone.
- Tap on the “+” button to create a new zip file.
- Choose the files and folders you want to include in the zip file. You can select multiple items by tapping on them.
- Once you have selected all the files and folders, tap on the “Zip” button to create the zip file.
- Wait for the app to process the files and create the zip file. The time taken may vary depending on the size of the files.
- Once the zip file is created, you can choose to share it via email, messaging apps, or save it to cloud storage platforms like Dropbox or Google Drive.
There are also other third-party apps available that offer similar functionality, such as “WinZip” and “Documents by Readdle”. These apps provide additional features like password protection and encryption for your zip files.
Remember to choose a reputable app with positive reviews and ensure that it is compatible with your iPhone’s operating system. Always be cautious when granting access to your files and data to third-party apps, and only download apps from trusted sources.
Using a third-party app can provide you with more flexibility and control over the process of creating zip files on your iPhone. It allows you to easily organize and compress multiple files and folders, making it convenient to share or transfer them.
Conclusion
Creating a Zip file on your iPhone is a valuable skill that can save you time and storage space. With the help of third-party apps like iZip or Documents by Readdle, you can easily compress files and folders into a single Zip file right from your iPhone device.
By creating a Zip file, you can conveniently organize and share a collection of files or folders without having to deal with multiple attachments or storage limitations.
Remember to choose a reliable and user-friendly app, such as iZip or Documents, to ensure a smooth and hassle-free experience. Whether you need to compress files for work, school, or personal use, the ability to create a Zip file on your iPhone will undoubtedly come in handy.
So don’t wait any longer; download the app of your choice, follow the steps outlined in this article, and start creating Zip files on your iPhone today!
FAQs
Here are some frequently asked questions regarding creating a zip file on iPhone:
1. Can I create a zip file natively on my iPhone?
Yes, you can create a zip file on your iPhone using third-party apps available on the App Store. These apps allow you to compress multiple files and folders into a single zip file.
2. Which app should I use to create a zip file on my iPhone?
There are several apps available on the App Store that allow you to create zip files on your iPhone. Some popular options include iZip, WinZip, and Files by Google. These apps provide a user-friendly interface and essential features for zip file creation.
3. How do I create a zip file using iZip on my iPhone?
To create a zip file using iZip on your iPhone, follow these steps:
- Install the iZip app from the App Store and launch it.
- Navigate to the location where the files or folders you want to zip are stored.
- Select the files or folders by tapping on them.
- Tap the “Zip” button or option, usually represented by a zipper icon.
- Choose the destination folder and specify the name for the zip file.
- Tap “Create Zip” to create the zip file.
4. Can I password protect a zip file on my iPhone?
Yes, some zip file creation apps on the App Store offer the option to password protect your zip files. This adds an extra layer of security to your compressed files, preventing unauthorized access. Make sure to choose an app that supports password protection if this feature is important to you.
5. Can I share a zip file created on my iPhone with others?
Absolutely! Once you have created a zip file on your iPhone, you can share it with others through various means. You can send it as an email attachment, upload it to cloud storage services such as Dropbox or Google Drive, or use file-sharing apps like AirDrop or WhatsApp. The recipient will need a compatible device or app to unzip the file.
Remember to check the documentation of the specific app you choose to use for creating zip files on your iPhone, as the exact steps and functionalities may vary.