
Do Not Disturb mode is a handy feature that allows you to silence incoming calls and notifications on your cell phone. It’s perfect for those times when you need some peace and quiet or simply want to focus on a task without being interrupted. However, there may be certain cases where you still want to be accessible to specific contacts, such as family members, close friends, or important work-related contacts.
In this article, we will explore how to let individual contacts reach you even when Do Not Disturb mode is turned on for all contacts. We will dive into the tips and tricks that will help you customize this feature to ensure that you never miss an important phone call or message, while still enjoying the benefits of a distraction-free environment. So, let’s get started and learn how to make Do Not Disturb mode work for you in the most personalized way possible.
Inside This Article
- How to Let Individual Contacts Reach You When Do Not Disturb Is Turned On for All Contacts
- # 1. Adding Contacts to the Allow Calls From List
- # 2. Setting Up Emergency Bypass for Chosen Contacts
- # 3. Using the Repeated Calls feature
- Conclusion
- FAQs
How to Let Individual Contacts Reach You When Do Not Disturb Is Turned On for All Contacts
When you have the Do Not Disturb feature enabled on your phone, it can be a great way to avoid interruptions and focus on important tasks. However, there might be certain contacts that you want to have the ability to reach you even when Do Not Disturb is turned on for all contacts. Thankfully, there are several ways to allow individual contacts to bypass the Do Not Disturb settings. In this article, we will walk you through the steps to let specific contacts reach you when Do Not Disturb is turned on for all contacts.
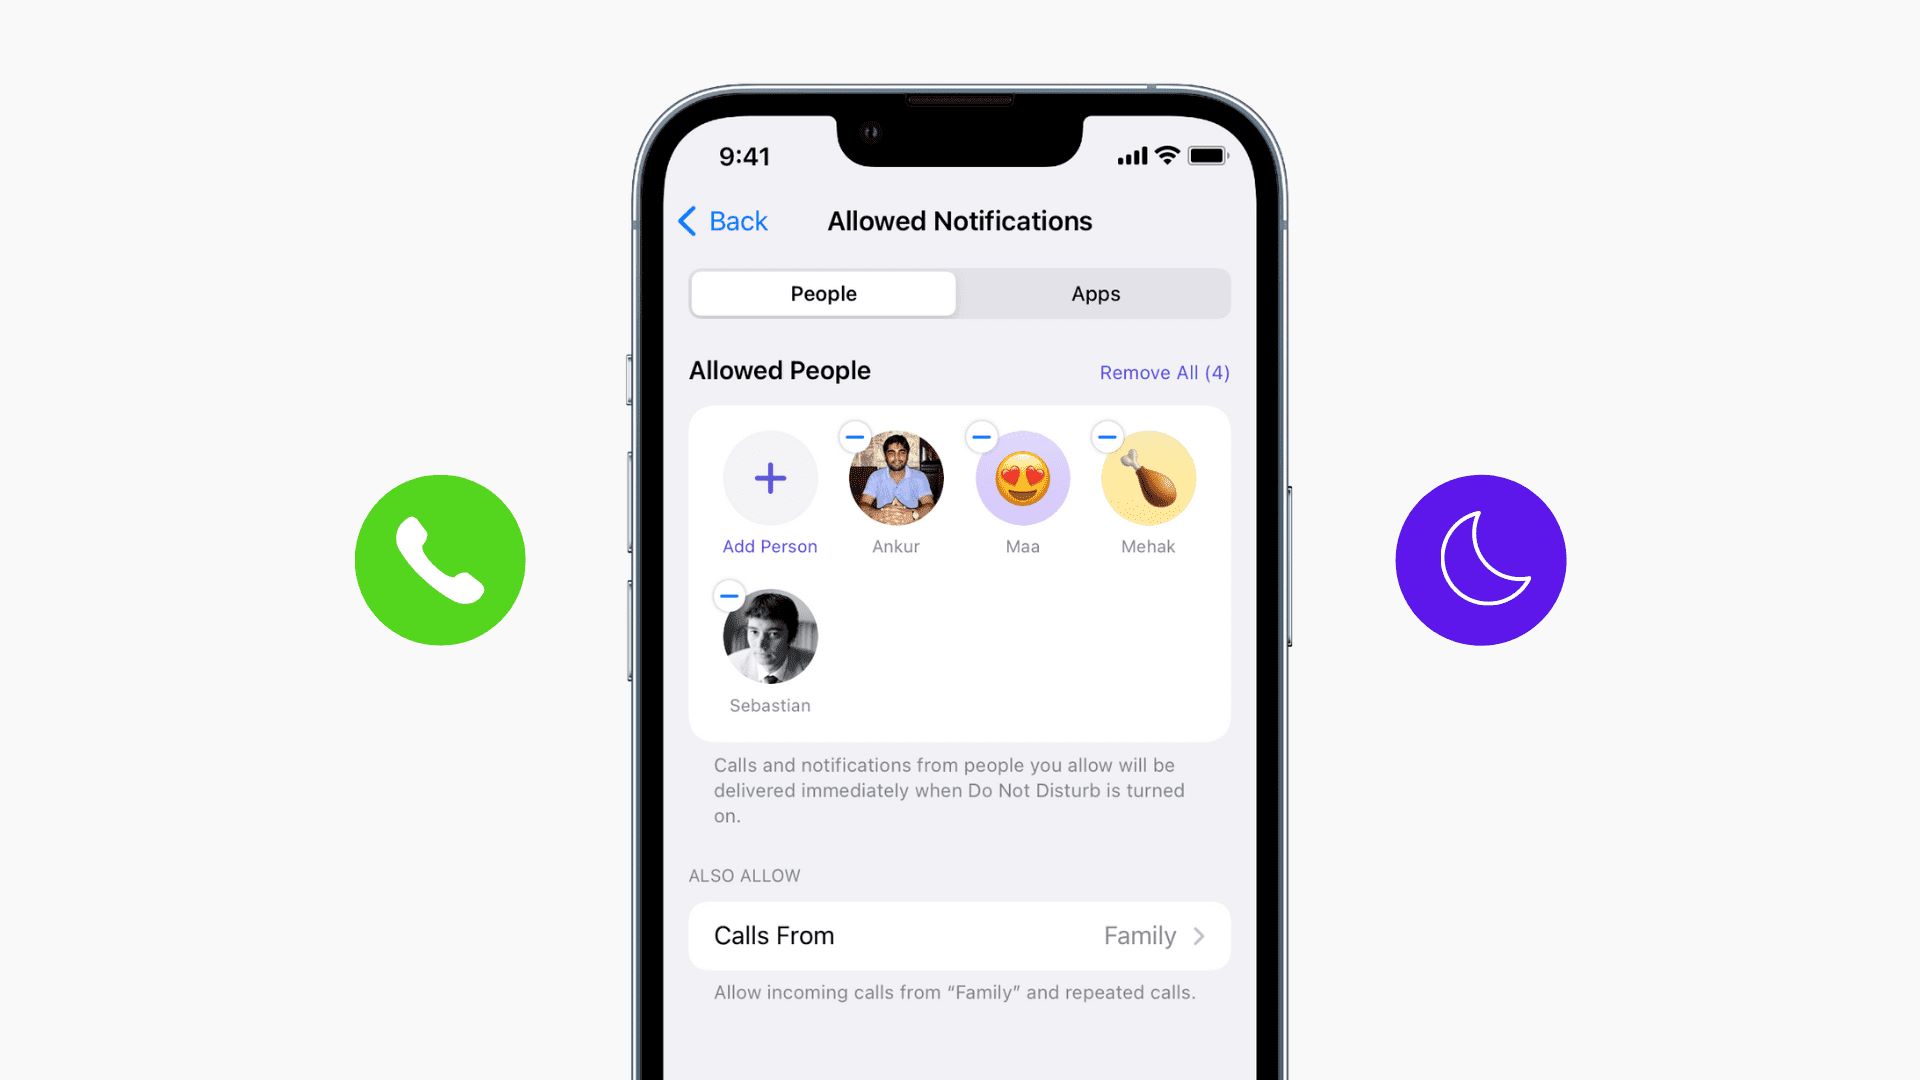
1. Adding Contacts to the Allow Calls From List
The first method involves adding specific contacts to the “Allow Calls From” list. This list includes contacts that will be able to reach you even when Do Not Disturb is turned on. To add a contact to the list, follow these steps:
- Explore the Do Not Disturb settings on your phone. These settings can usually be found in the “Sounds & Haptics” or “Sound” section of your phone’s settings.
- Access the Contacts app on your phone.
- Select the contact that you want to grant access to, and open their details.
- Look for an option to “Allow Calls From” or a similar setting, and enable it for the selected contact.
2. Setting Up Emergency Bypass for Chosen Contacts
Another way to allow specific contacts to reach you during Do Not Disturb is by using the Emergency Bypass feature. This feature allows calls and notifications from chosen contacts to bypass the Do Not Disturb settings. Here’s how to set it up:
- Understand the Emergency Bypass feature and its implications. Enabling it will allow calls and notifications from the selected contact to bypass the Do Not Disturb settings.
- Go to the contact details of the person you want to grant access to.
- Find the option for Emergency Bypass and enable it.
3. Using the Repeated Calls feature
The Repeated Calls feature is a built-in capability that allows someone to reach you if they call you multiple times within a short timeframe, even if Do Not Disturb is turned on. To use this feature, follow these steps:
- Learn about the Repeated Calls function and its purpose.
- Go to the Do Not Disturb settings on your phone.
- Look for the option to enable Repeated Calls and make sure it is turned on.
4. Utilizing the “Favorites” or “VIP” Contacts
Both “Favorites” and “VIP” contacts serve as a way to prioritize certain contacts and grant them access during Do Not Disturb. Here’s how to utilize these features:
- Understand the concept of “Favorites” or “VIP” contacts on your phone. These are usually contacts that you mark as important or frequently communicate with.
- Add the desired contacts to the Favorites or VIP list on your phone.
- Ensure that Do Not Disturb is set to allow calls and notifications from Favorites or VIP contacts.
By following these methods, you can ensure that specific contacts can reach you even when Do Not Disturb is turned on for all contacts. Whether it’s adding contacts to the Allow Calls From list, setting up Emergency Bypass, using the Repeated Calls feature, or utilizing the Favorites or VIP contacts, these options give you the flexibility to manage your incoming calls and notifications effectively.
# 1. Adding Contacts to the Allow Calls From List
When you have the Do Not Disturb feature enabled on your device, it can be quite frustrating to miss important calls from specific contacts. Fortunately, there is a way to allow certain contacts to reach you even when Do Not Disturb is turned on for all contacts. Here’s how you can add contacts to the Allow Calls From list:
1. Exploring the Do Not Disturb settings: Start by opening the settings on your device and locating the Do Not Disturb option. This is usually found in the Sound or Notifications section of the settings menu. Tap on Do Not Disturb to access the settings.
2. Accessing the Contacts app: Once you are in the Do Not Disturb settings, you need to access your device’s Contacts app. You can typically find this app on your home screen or in the app drawer. Tap on the Contacts app to open it.
3. Selecting and adding specific contacts to the Allow Calls From list: In the Contacts app, browse through your contact list or use the search function to find the specific contacts you want to allow calls from. Once you’ve found a contact, tap on their name to open their details. Look for an option that allows you to add them to the Allow Calls From list. This option may be labeled differently depending on your device, but it is usually located in the contact’s details or settings. Tap on this option to add the contact to the Allow Calls From list.
By adding contacts to the Allow Calls From list, you are giving them the privilege to reach you even when Do Not Disturb is enabled. This ensures that you do not miss important calls from specific individuals while still enjoying the peace and quiet that Do Not Disturb provides.
# 2. Setting Up Emergency Bypass for Chosen Contacts
When you have Do Not Disturb turned on for all contacts, it’s still possible to allow certain individuals to reach you in case of an emergency or important communication. The Emergency Bypass feature in your phone settings allows you to specify which contacts are exempt from the Do Not Disturb restrictions. This ensures that you never miss important calls or messages from those chosen contacts.
To enable Emergency Bypass for specific contacts, follow these simple steps:
- Open your phone’s settings and navigate to the Contacts or Phone settings.
- Find and select the contact for which you want to enable Emergency Bypass.
- Scroll down to the contact details and look for the Emergency Bypass option.
- Toggle the Emergency Bypass switch to enable it for that contact.
Now that you have Emergency Bypass enabled for a particular contact, you can further customize its settings. To configure the Emergency Bypass settings for the contact:
- Go back to the contact details and locate the Emergency Bypass settings.
- Tap on the settings option to reveal additional options.
- Here, you can choose whether to allow calls, messages, or both to bypass the Do Not Disturb mode for that specific contact.
- Additionally, you can set the contact’s calls or messages to always come through, even if your phone is in silent mode.
By setting up Emergency Bypass for chosen contacts, not only can you ensure that you won’t miss any critical communication, but you also have the flexibility to decide which contacts can reach you even when Do Not Disturb is turned on for all contacts. It’s a powerful feature that strikes a balance between maintaining your peace of mind and staying connected when it matters the most.
# 3. Using the Repeated Calls feature
When you have your phone’s Do Not Disturb mode turned on to silence calls and notifications, you may still want to allow certain important contacts to reach you in case of an emergency or urgent situation. The Repeated Calls feature can be a useful tool in such situations.
Learning about the Repeated Calls function:
The Repeated Calls feature in your phone allows you to specify a timeframe within which a contact’s repeated calls will bypass the Do Not Disturb mode. This helps prevent you from missing urgent calls from your important contacts, while still maintaining the peace and quiet that Do Not Disturb offers.
Allowing repeated calls from the same contact within a certain timeframe:
To enable a contact’s repeated calls to bypass the Do Not Disturb mode, you need to make sure the contact calls you within a specific timeframe. By default, if the same contact calls you within three minutes of their initial call, it will be considered a repeated call.
Enabling Repeated Calls in the Do Not Disturb settings:
To configure the Repeated Calls feature, you need to access the Do Not Disturb settings on your phone. Here’s how:
- Open the Settings app on your phone.
- Select “Do Not Disturb” from the list of options.
- Scroll down and find the “Repeated Calls” section.
- Toggle the switch next to “Allow Calls From” to enable the feature.
Once you have enabled the Repeated Calls feature, you can now rest assured that if someone calls you repeatedly within the specified timeframe, their calls will not be silenced by Do Not Disturb, allowing you to receive important calls when you need them the most.
In conclusion, learning how to allow individual contacts to reach you when “Do Not Disturb” mode is turned on for all contacts is a useful feature for managing your phone’s notifications. By customizing your “Do Not Disturb” settings, you can ensure that important calls and messages can still reach you even when you want to minimize distractions.
Whether you’re in a meeting, sleeping, or simply need some uninterrupted time, being able to grant access to specific contacts can be a lifesaver. It provides you with the flexibility to prioritize certain individuals and allows for a more personalized approach to managing your phone calls and notifications.
With this feature, you can strike a balance between staying connected and enjoying periods of uninterrupted focus. So, the next time you need to silence your phone, don’t worry about missing that important call—just enable the option to let individual contacts reach you, and you’ll never have to worry about missing out on urgent matters again.
FAQs
**Q: Can I allow individual contacts to reach me when I have Do Not Disturb turned on for all contacts?**
A: Absolutely! Most mobile devices have a feature that allows you to whitelist specific contacts so that they can still reach you even when you have enabled Do Not Disturb for all contacts. This allows you to maintain your privacy and keep unwanted distractions at bay while still ensuring that important people can reach you when needed.
**Q: How do I enable this feature on my mobile device?**
A: The process may vary slightly depending on your device and operating system. Generally, you can follow these steps:
1. Open the Phone or Contacts app on your device.
2. Navigate to the contact that you want to allow to reach you during Do Not Disturb mode.
3. Open the contact’s details and look for an option like “Allow Calls From” or “Emergency Bypass.”
4. Enable this option to allow calls from the contact even when Do Not Disturb is turned on for all contacts.
Keep in mind that specific terminology and the exact steps may differ, so it’s best to consult your device’s user manual or search online for instructions tailored to your particular device.
**Q: Can I set this feature up for messaging apps as well?**
A: Yes, many messaging apps have similar options to allow individual contacts to bypass the silent mode or Do Not Disturb settings. Depending on the app, you may need to open the contact’s details within the app and enable a specific option to ensure that you receive notifications or messages from that contact, even when you have enabled Do Not Disturb mode.
**Q: Will enabling this feature override other settings, such as custom notification tones?**
A: Enabling this feature typically does not override other settings such as custom notification tones or vibration patterns. When you receive a call or message from the whitelisted contact, it should still follow the notification settings you have defined for that particular contact or app. Therefore, you can have personalized notifications for important contacts while maintaining the benefits of Do Not Disturb mode for all other contacts.
**Q: Is there a limit to the number of contacts I can whitelist?**
A: The specific limit, if any, for whitelisting contacts can vary depending on the device or operating system you are using. However, most devices allow you to add multiple contacts to the whitelist, ensuring that you can prioritize communication with important individuals while still enjoying the peace and quiet that Do Not Disturb mode provides.