
It isn’t common but it happens that some iPhone users would get Cellular Update Failed message pop-ups right after updating their iOS. This particular issue has been widely reported in iPhone 7 units and can come as a result of hardware malfunction. It’s hard to believe considering Apple arguably has some of the best software support out of all the mobile manufacturers in the market.
It is clear continuous software support doesn’t mean that it is free of flaws. You may sometimes encounter the dreaded Cellular Update Failed notification on your iPhone. Fortunately, there’s no reason to worry because there is a solution that will get your cellular connection up and running. Here are the best ways we’ve found to fix this error on your iPhone.
Related: Mobile Network Not Available: What Does It Mean?
Inside This Article
- What Does the Cellular Update Failed Error Mean?
- How to Fix Cellular Update Failed on iPhone
- Takeaway
What Does the Cellular Update Failed Error Mean?
Put simply, the Cellular Update Failed error means that your cellular service has failed and you can’t use anything related to it. When you get this error, you won’t be able to receive and send texts, make phone calls, and use your mobile data. One possible reason for this is an apparently failed iOS update concerning the upgrade of the cellular communication features.
This will no doubt be a major inconvenience for you. Fortunately, there are fixes you can try to resolve the problem. And better this than running out to get a replacement phone — after all, your iPhone costs a pretty penny and it should last you a good long while!
How to Fix Cellular Update Failed on iPhone
We’ve found you a few methods to fix the Cellular Update Failed issue in your iPhone. Let’s get through them one by one:
A. iPhone 7 Cellular Update Failed
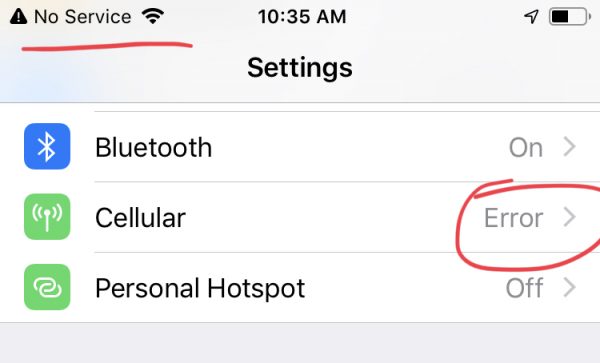
“Help, my iPhone 7 cellular update failed error is driving me crazy! What do I do?” If you’re still using an old iPhone 7, there’s a higher chance for you to receive the Cellular Update Failed notification. That’s because some iPhone 7 devices have had issues with this in the past. While not all iPhone 7s have this problem, some do have a hardware defect that affects their cellular usage. These defective iPhones will also show “No Service” in the top-left corner of their screens.
Thankfully, Apple knows about this particular problem in the iPhone 7 and they’re willing to fix affected iPhones for free. If your iPhone 7 has this problem, just pop by the nearest Apple Store to get it fixed. If you’ve already paid for your iPhone 7 to be fixed because of this issue, Apple will reimburse you.
Do keep in mind that Apple has listed which iPhone 7 models are eligible for the free fix. Only model numbers A1660 & A1780 (China), A1660 (Hong Kong, Macao, and the US), and A1779 (Japan) are eligible. If you’re not sure about your iPhone 7’s eligibility, bring it to the Apple store and they’ll verify your iPhone.
B. Update Your iOS Version
Apple is always trying to improve its software and user experience through software updates. Major OS updates come yearly (moving from iOS 13 to iOS 14, etc) and for free.
However, in between major updates, Apple releases minor updates to fix bugs and tweak settings. It’s important to always keep your iOS up-to-date to make sure you have the best experience with the least bugs. This includes a potential fix to the Cellular Update Failed error.
To check for iOS updates, follow the steps below:
- Launch the Settings app on your phone.
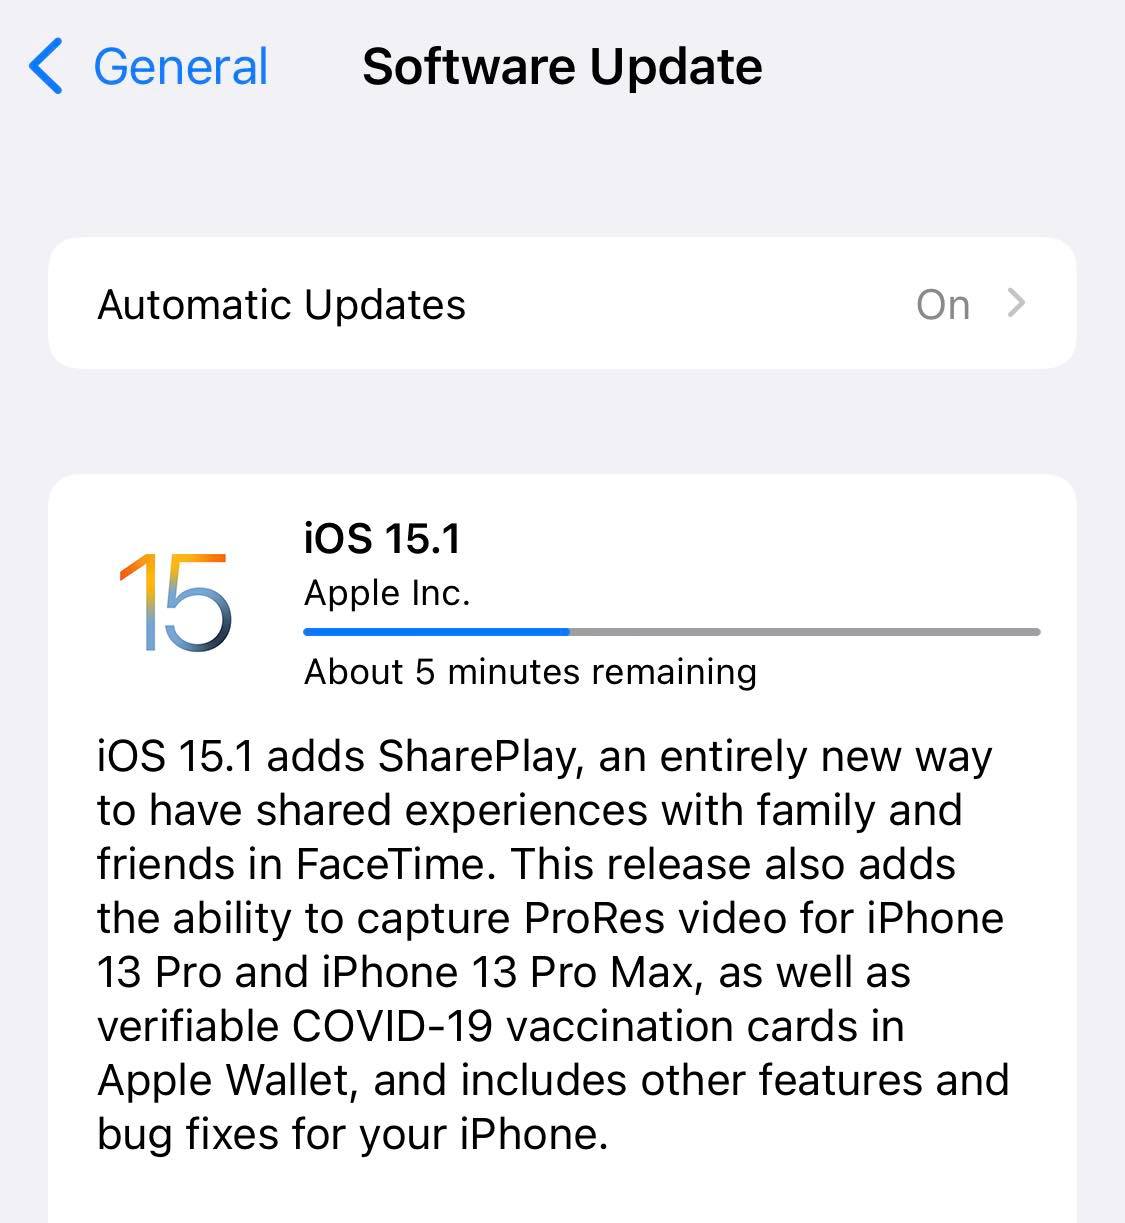
- Navigate to General and tap Software Update to review your iOS version. If an update is available for download, it should show within this setting. You’ll see the iOS version up top and the details of what the update brings below.
- Tap Download and Install to update your iOS. If nothing appears under Software Update, then your iPhone is probably up to date.
C. Turn Off Wi-Fi Calling and Voice LTE
Some users claim that they fixed the error by tinkering with a few settings like Wi-Fi calling and Voice LTE. All you have to do is turn these services off to temporarily fix the problem.
- Go to the Settings app and go to Cellular > Wi-Fi Calling.
- Toggle off the setting for Wi-Fi Calling on This iPhone.
- Go to Settings > Cellular and open Cellular Data Options.
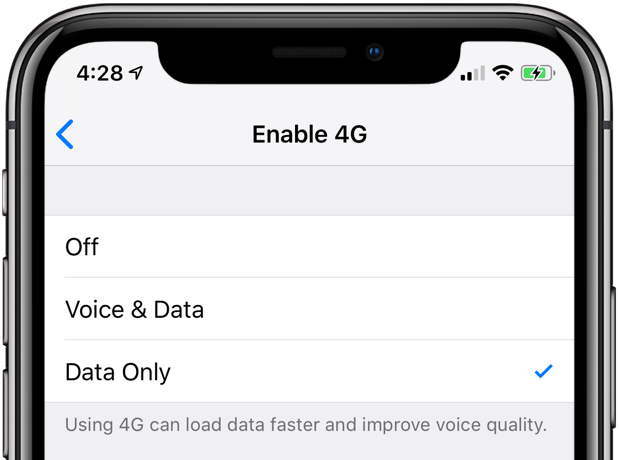
- Tap Enable LTE and select Data Only so you can disable Voice LTE.
While this isn’t a guaranteed fix for the Cellular Update Failed error, it’s worth a shot. It’s especially handy as a band-aid solution for when you need to call, text, or use cellular data immediately. However, this is not a permanent solution, and on top of that, not every mobile carrier offers Wi-Fi calling and/or Voice LTE functions.
D. Turn Airplane Mode On and Off
People usually turn on Airplane Mode when they are either on a plane or simply don’t want to be disturbed. That’s not the only function that this mode serves, as toggling it off and on has helped with the Cellular Data Failed error. While it’s not a guaranteed solution, it’s still worth a shot.
To toggle Airplane Mode off and on, you first have to launch the Settings app. You should find Airplane Mode immediately accessible right under your Account settings. Just tap the toggle to turn it on (green) and tap on it again to turn it off (gray/white). Afterward, check whether or not you can access cellular services by quickly sending a text message.
E. Turn Cellular Data On and Off
This method is pretty simple: simply toggle off and on your cellular data. This is again not a guaranteed solution, but it’s worth a try if all else fails.
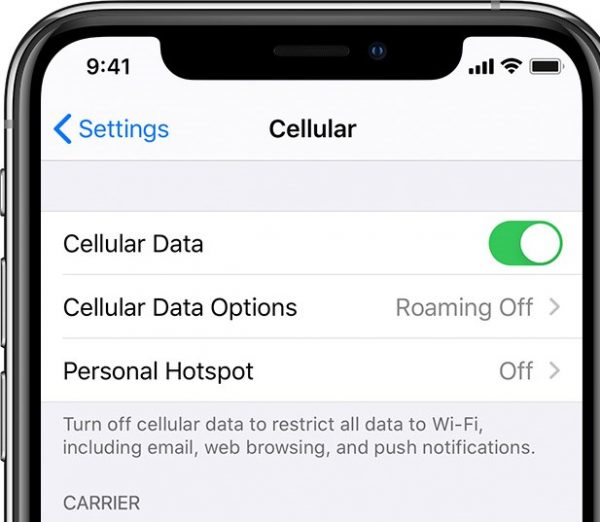
Simply go to the Settings app and tap on Cellular to enter cellular settings. Next, toggle the switch next to Cellular Data off (white/gray) and then tap again to turn it on (green). This should quickly reset the Cellular Data on your phone.
Afterward, check if the Cellular Update Failed error still appears on your phone or test out your cellular service. You can do this by sending a quick text or calling someone with your mobile number.
F. Check Your Carrier for Updates
Sometimes, it’s not always about your phone having problems but your carrier having updates. That’s why it’s always important to make sure that you’re updated with carrier settings as well as iOS settings. These carrier settings updates could be released by your mobile carrier or Apple itself to enhance cellular connection.
To check for carrier updates, open the Settings app and tap About. Here, you’ll see a bunch of metrics about your iPhone’s hardware and software settings. If a carrier update is available, you’ll immediately find a notification pop up saying “Carrier Settings Update.” All you need to do is tap the Update button and you should be ready to go. If no notification like this appears within 10 seconds, then there are no carrier updates available.
G. Reinsert SIM Card
The Cellular Update Failed error is sometimes accompanied by a “No SIM” notification on your iPhone. In this case, it’s best to reset your phone by ejecting and reinserting your SIM card.
Ejecting and reinserting your SIM card may be different for different iPhones. Generally, you’ll need a SIM card ejector pin to open the SIM tray. Use it to poke the hole to eject your SIM card. If you don’t have the specific ejector pin with you, try using a paper clip or a tiny toothpick. Once the tray pops open, just push it back into your iPhone to reinsert it. Afterward, check if the cellular update failed error still pops up or if you can use cellular services.
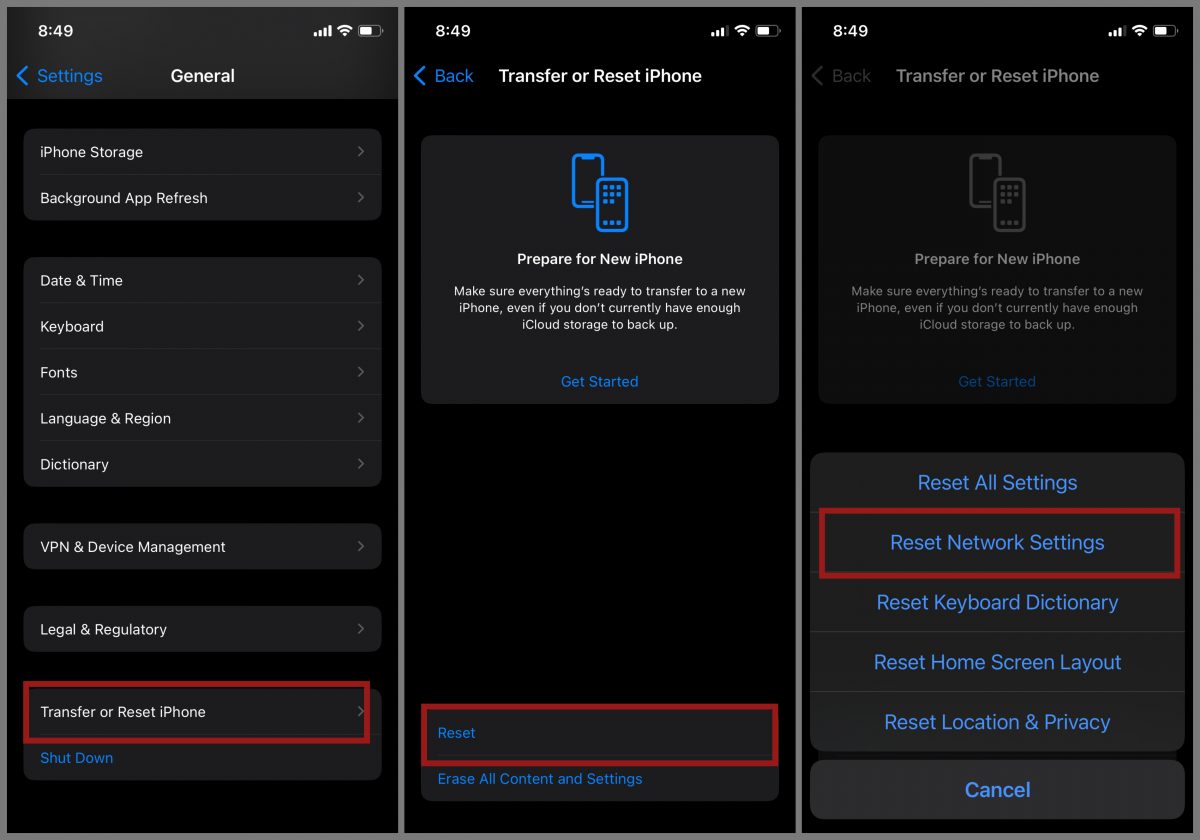
H. Reset Network Settings
If none of the above methods work, then it’s time to move on to reset your iPhone’s network settings. This solution involves resetting a few network settings such as your Bluetooth, Wi-Fi, Cellular, and VPN.
To reset your network settings, follow the steps below:
- Launch your iPhone’s Settings app.
- Go to General then scroll down to Transfer or Reset iPhone.
- Next, Tap on Reset then select Reset Network Settings from the list of options.
- Tap Reset once more to verify the action.
- Check if the cellular update failed error pops up again or if your cellular data is working.
I. Set to DFU Mode (Factory Reset)
The last thing you can do to fix the issue is to set your iPhone to DFU Mode. This is a drastic last resort to take as you’re essentially factory resetting your iPhone. This is what many people do to reset their iPhones when they want to sell them to someone else. Make sure to only do this step once you’ve exhausted all other options.
To put your iPhone in DFU mode, you’ll want to create a backup of all your data first. Save and backup all your photos, videos, files, and app data into your iCloud account right before resetting. After backing up your data, let’s get into how to put your iPhone in DFU mode. First, plug it into your Mac and open iTunes (Mojave 10.14) or Finder (Catalina 10.15 or newer).
iPhone 7 & Older
- Press and hold the sleep/wake button and home button for eight seconds.
- Afterward, release the sleep/wake button while still holding down the home button until iTunes/Finder detects your iPhone.
- Then, let go of the home button and your iPhone will turn completely dark.
- Restore your iPhone with Finder or iTunes.
For the iPhone 7, all steps are the same, except you substitute the home button with the volume down button.
iPhone 8 & Newer
- Quickly hit the volume up button and then the volume down button. Then, press and hold the side button to turn your iPhone screen black.
- Afterward, immediately press and hold the volume down button while the side button is still pressed down.
- Wait five seconds then let go of the side button without letting go of the volume down button.
- Your iPhone should then appear in iTunes or Finder. When this happens, you can release the volume button and the process is finished.

J. Contact Apple
Lastly, if resetting your iPhone still fails, it’s time to contact Apple support or your mobile carrier. You can start by going directly to Apple to see if they can fix the problem. However, sometimes, Apple may not be able to fix the problem and will redirect you to your mobile carrier. If that happens, then you should contact the customer service hotline of your cellular service provider. They should be able to assist you with the Cellular Update Failed error on your iPhone.
Takeaway
While it might seem Apple is hellbent on marketing the iPhone as the best device you can get your hands on, it remains vulnerable in some aspects. Finding an unfamiliar error on your iPhone can be nerve-wracking and frustrating, especially when it interferes with your day-to-day routine. Such is the case when you get the Cellular Update Failed error message. However, there really is no cause for panic when there are ways to fix the error easily. Hence, the existence of this page!
We hope you got the information you need in regard to this particular issue. Additionally, we hope this article shed new insights about Apple and the beloved iPhone.