
Are you obsessed with your Android phone and have a natural knack for creativity and problem-solving? Then Android app development might just be the perfect venture for you! With Android being one of the most popular mobile operating systems in the world, creating your own Android app has never been more rewarding.
In this comprehensive guide, we will walk you through the step-by-step process of creating your own Android app. From understanding the fundamentals of app development to choosing the right tools and resources, we’ve got you covered. Whether you’re a seasoned developer looking to explore the world of Android, or a complete beginner trying to embark on a new journey, this article is designed to help you unleash your creative potential and bring your app ideas to life.
Inside This Article
- Choosing the Right IDE for Android Development
- Setting Up Android Development Environment
- Understanding Android App Components
- Building User Interfaces using XML and Java
- Conclusion
- FAQs
Choosing the Right IDE for Android Development
When it comes to developing Android apps, choosing the right Integrated Development Environment (IDE) is crucial. An IDE is a software application that provides developers with tools and features to streamline the app development process. There are several popular IDEs available for Android development, each with its own unique set of features and advantages.
One of the most widely used IDEs for Android development is Android Studio. Developed by Google, Android Studio offers a comprehensive set of tools and features specifically designed for Android app development. It includes a visual layout editor, code analysis and debugging tools, and integration with the Android SDK. Android Studio also offers seamless integration with other popular developer tools, such as Gradle and Git.
Another popular choice among Android developers is IntelliJ IDEA. While initially developed as a Java IDE, IntelliJ IDEA has extensive support for Android development as well. It offers advanced code analysis, refactoring tools, and intelligent code completion. IntelliJ IDEA also provides excellent plugin support, allowing developers to customize their development environment according to their specific requirements.
Eclipse is another IDE that has been widely used for Android development in the past. Although its popularity has declined in recent years due to the rise of Android Studio, Eclipse still offers a robust set of features for Android development. It provides a plugin called Android Development Tools (ADT) that enables developers to create, test, and debug Android apps. However, as Google no longer actively supports ADT for Eclipse, it may not be the most future-proof choice.
In addition to these IDEs, there are other options available such as Visual Studio Code, which is a lightweight IDE known for its flexibility and extensibility, and Xamarin, a cross-platform development tool that allows developers to write Android apps using C# and .NET framework.
When choosing the right IDE for Android development, it is important to consider factors such as the complexity of your project, your familiarity with the IDE, and the level of support and documentation available. It is also worth keeping in mind that Android Studio, being the official IDE recommended by Google, often receives the most up-to-date features and updates.
Ultimately, the choice of IDE will depend on your personal preference and requirements. It is recommended to try out different IDEs and explore their features before settling on the one that best suits your needs.
Setting Up Android Development Environment
Setting up the Android development environment is the first step towards creating amazing Android apps. With the right tools and configurations, you can unleash your creativity and bring your app ideas to life. Here’s a step-by-step guide on how to set up your Android development environment:
1. Install Java Development Kit (JDK): The Android development environment relies on Java, so you need to install the latest version of JDK. Visit the Oracle website, download the JDK, and follow the installation instructions.
2. Download Android Studio: Android Studio is the official Integrated Development Environment (IDE) for Android app development. It provides all the necessary tools and features to build, test, and debug your apps. Visit the official Android Studio website and download the latest version for your operating system.
3. Install Android Studio: After downloading Android Studio, run the installer and follow the on-screen instructions. The installer will guide you through the installation process, including setting up the Android SDK (Software Development Kit) and other necessary components.
4. Configure Android SDK: Once Android Studio is installed, you need to configure the Android SDK. Launch Android Studio and go to the “Welcome to Android Studio” screen. Click on “Configure” and select “SDK Manager.” Here, you can choose the Android versions and additional components you want to install.
5. Install the necessary SDK platforms: In the SDK Manager, select the desired Android versions you want to target for your app development. It’s recommended to install the latest stable versions and also consider the minimum API level you want to support for wider device compatibility.
6. Set up the Android Virtual Device (AVD): An AVD is an emulator that allows you to test your apps on different virtual Android devices. In the SDK Manager, go to the “AVD Manager” tab and create a new virtual device. Select the device specifications and choose a system image to emulate.
7. Install necessary additional tools and libraries: Depending on your app development requirements, you may need to install additional tools and libraries. Android Studio provides a convenient way to install and manage these dependencies via the SDK Manager.
8. Test your environment: Once you have completed the installation and configuration process, it’s a good idea to test your Android development environment. Create a new project, write a simple “Hello World” program, and run it on the emulator or a connected Android device. This will ensure that everything is set up correctly.
By following these steps, you can successfully set up your Android development environment and start building incredible Android applications. Remember to keep updating your tools and components to stay up to date with the latest features and improvements offered by the Android development ecosystem.
Understanding Android App Components
When developing Android applications, it is crucial to have a clear understanding of the various components that make up an app. These components work together to create the user interface, handle user interactions, and manage the app’s lifecycle.
The key components of an Android app are:
- Activities: Activities are the building blocks of an app’s user interface. Each screen or window in an app is represented by an activity. For example, a weather app may have one activity to display the current weather and another activity to show the 7-day forecast. Activities handle user interactions and can launch other activities.
- Services: Services perform background tasks that don’t require a user interface. For example, a music streaming app may use a service to play music in the background while the user interacts with other parts of the app. Services can run indefinitely, even when the app is not visible.
- Broadcast Receivers: Broadcast receivers listen for system-wide broadcast messages or intents. For example, an app may have a broadcast receiver to listen for incoming SMS messages or network connectivity changes. When a relevant broadcast is received, the receiver can perform some task or trigger another component.
- Content Providers: Content providers manage shared data, allowing other apps to access and manipulate that data. For example, a contacts app may have a content provider that allows other apps to view and edit contact information. Content providers offer a standardized interface for accessing and updating shared data.
Understanding how these components work together is crucial for creating a well-functioning Android app. They allow developers to build complex and interactive apps that provide a seamless user experience.
By utilizing activities, services, broadcast receivers, and content providers effectively, developers can create apps that meet the needs of the users and take advantage of the capabilities of the Android platform.
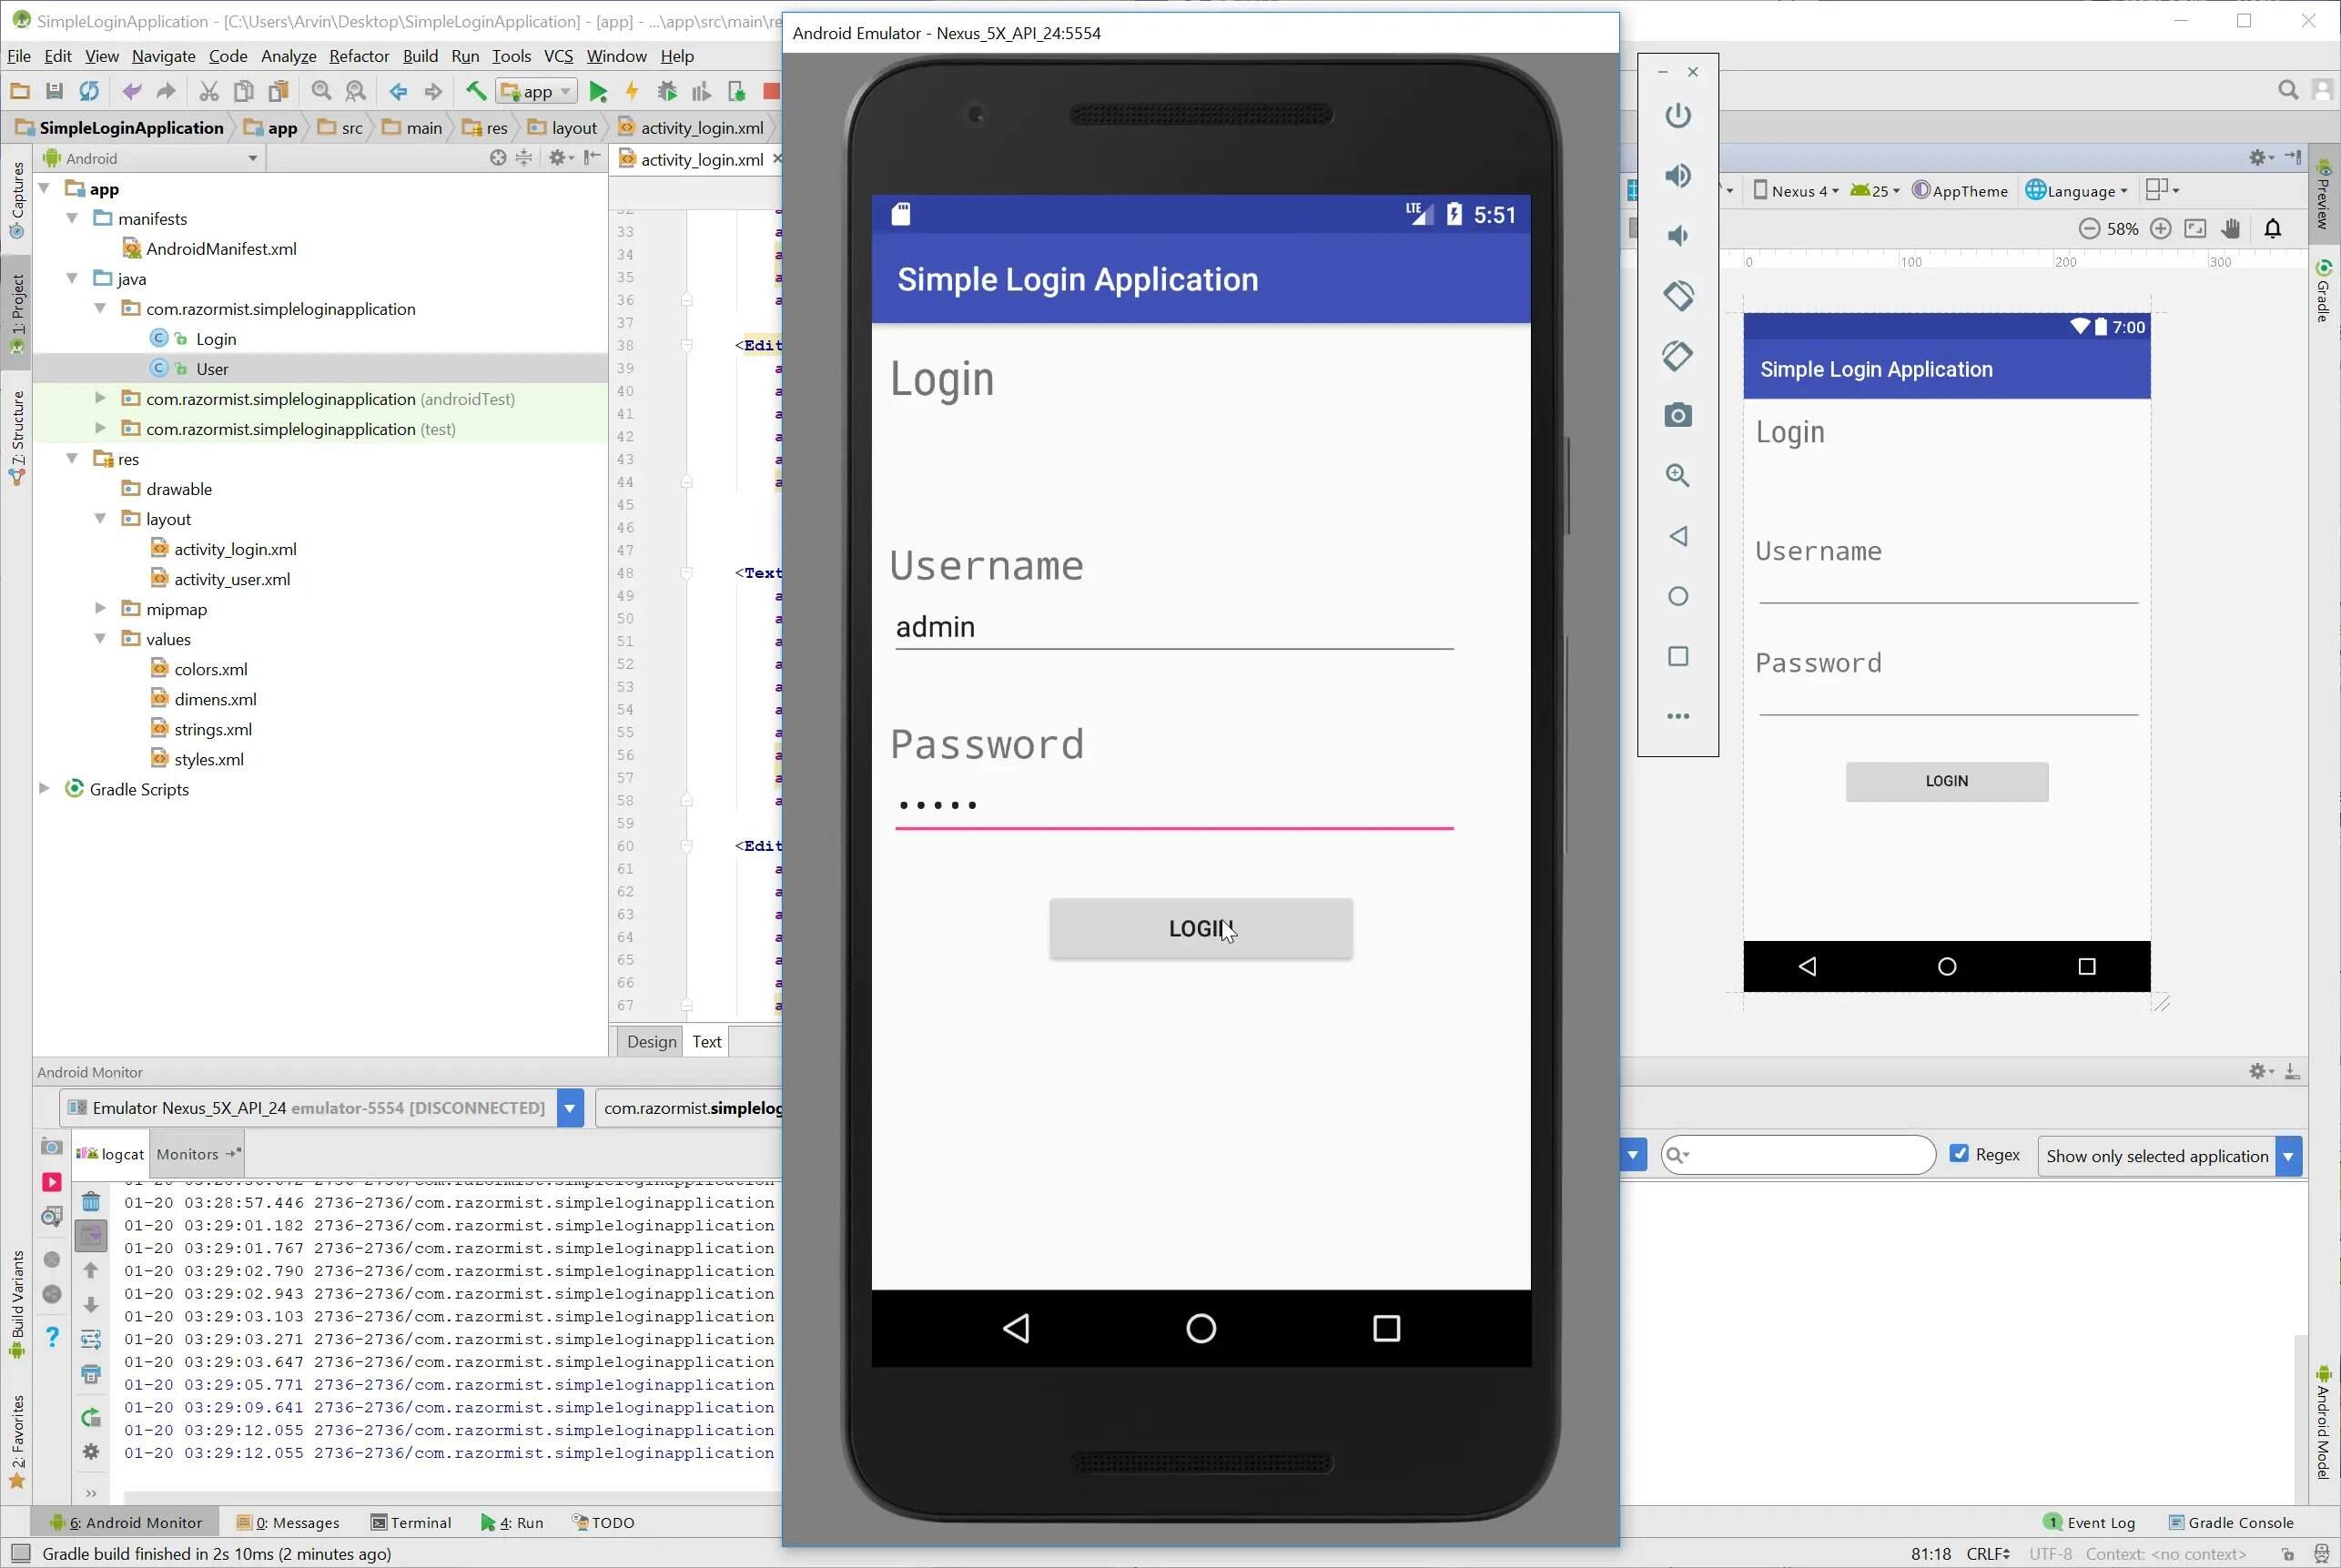
Building User Interfaces using XML and Java
When it comes to creating Android apps, building user interfaces is a crucial step. A well-designed and intuitive user interface can greatly enhance the user experience and make your app stand out. In Android development, user interfaces can be created using a combination of XML and Java.
XML, or Extensible Markup Language, is a markup language that is commonly used to define the structure and content of data. In the context of Android app development, XML is used to define the layout of user interfaces. It allows you to specify the position, size, and appearance of various UI elements such as buttons, text fields, and images.
The XML layout files are stored in the “res/layout” directory of your Android project. You can create XML files manually or use the visual layout editor provided by the Android development tools. The visual editor allows you to drag and drop UI elements onto the layout canvas, making it easier to design your app’s user interface.
Once you have defined the layout in XML, you need to connect it with your Java code. This is done using a process called “inflation”. Inflation is the process of converting an XML layout file into a corresponding View object in Java. This allows you to manipulate and interact with the UI elements programmatically.
In order to interact with UI elements in Java, you need to assign unique IDs to them in the XML layout file. These IDs can then be used to reference the UI elements in your Java code. You can assign IDs manually or let the Android system generate them for you.
Once you have inflated the XML layout and obtained references to the UI elements, you can perform various operations on them. For example, you can change the text of a TextView, set an OnClickListener for a Button, or display an image in an ImageView.
It’s important to note that XML and Java work together in creating user interfaces in Android apps. While XML is used for defining the layout and appearance of UI elements, Java is used for manipulating and interacting with them. This combination of XML and Java allows for a flexible and powerful approach to building user interfaces in Android.
Conclusion
Creating Android apps can be an exciting and rewarding experience. With the right knowledge and tools, you can bring your ideas to life and share them with the world. Throughout this article, we have explored the essential steps and considerations involved in Android app development.
From understanding the fundamentals of Java and XML to mastering the Android Studio development environment, we have covered the key aspects of building Android apps. We have also delved into the importance of user experience, testing, and deploying your app to the Google Play Store.
Now armed with this knowledge, you are well-equipped to embark on your Android app development journey. Remember to stay updated with the latest trends, experiment with new ideas, and continuously improve your skills. With dedication and passion, you can create apps that make a difference in users’ lives and leave a lasting impact in the Android ecosystem.
FAQs
1. Can I create Android apps without coding?
Yes, it is possible to create Android apps without coding. There are various app development platforms, such as Appy Pie, that provide a drag-and-drop interface and pre-built templates to make app creation easier for non-technical users.
2. What programming language should I learn to develop Android apps?
The primary programming language for Android app development is Java. However, with the introduction of Kotlin as an official language for Android development, many developers now prefer Kotlin for its modern syntax and enhanced productivity.
3. Do I need an Android device to develop Android apps?
No, it is not mandatory to have an Android device to develop Android apps. You can use an Android emulator, such as the one provided by Android Studio, to test and preview your app on a virtual device. However, having an Android device is beneficial for real-time testing and optimizing the user experience.
4. How can I monetize my Android app?
There are several ways to monetize your Android app. You can integrate advertising networks, such as Google AdMob, to display ads in your app and earn revenue based on clicks or impressions. Another option is to offer in-app purchases, where users can buy additional features or content within the app.
5. How can I publish my Android app on the Google Play Store?
To publish your Android app on the Google Play Store, you need to follow certain steps. First, create a Google Play Developer account and pay the one-time registration fee. Then, prepare your app’s listing with screenshots, descriptions, and other required information. Finally, upload the APK file of your app, set pricing and availability, and submit your app for review. Once approved, it will be available for users to download and install.