
Welcome to our comprehensive guide on how to add or remove calendars on iPhone and iPad! Calendars are an essential tool for organizing our daily lives, keeping appointments, and staying on top of important events. Whether you want to add a new calendar to stay organized or remove an old one you no longer need, we’ve got you covered.
In this article, we will walk you through the step-by-step process of adding new calendars to your iPhone or iPad, as well as deleting calendars that are no longer relevant. We will also provide answers to frequently asked questions and offer useful tips to optimize your calendar experience. So, let’s dive in and discover how easy it is to manage your calendars on iOS devices!
Inside This Article
- Adding Calendars on iPhone and iPad – Using the Calendar App – Syncing Calendars from Accounts
- Removing Calendars on iPhone and iPad
- Conclusion
- FAQs
Adding Calendars on iPhone and iPad – Using the Calendar App – Syncing Calendars from Accounts
Calendars are an essential tool for organizing your schedule and staying on top of your appointments and events. With your iPhone or iPad, you can easily add calendars to keep track of different activities and sync them across all your devices. In this guide, we will explore two different methods for adding calendars on your iPhone and iPad: using the Calendar app and syncing calendars from accounts.
Using the Calendar App
The Calendar app on your iPhone and iPad allows you to create new calendars directly on your device. To add a calendar using the Calendar app, follow these steps:
- Open the Calendar app on your iPhone or iPad.
- Tap on the “Calendars” tab located at the bottom of the screen.
- Scroll down to the bottom and tap on the “Add Calendar” option.
- Enter a name for your new calendar and choose a color to distinguish it from other calendars.
- If desired, you can also add a description for the calendar.
- Tap “Done” to create the calendar.
Once you have created a new calendar, it will be displayed in the “Calendars” section of the app, and you can start adding events and appointments to it.
Syncing Calendars from Accounts
Another way to add calendars on your iPhone and iPad is by syncing them from accounts such as iCloud, Google, or Microsoft Exchange. By syncing calendars from your accounts, you can access and manage multiple calendars in one place. Here’s how to sync calendars from accounts:
- Open the “Settings” app on your iPhone or iPad.
- Scroll down and tap on “Calendar.”
- Select “Accounts” and choose the account from which you want to sync the calendar.
- Toggle the switch next to “Calendars” to enable syncing for that account.
- Wait for the calendars to sync from the selected account to your device.
Once the sync is complete, the calendars from the selected account will be available in the Calendar app, and any changes made to the synced calendars will be reflected across all your devices connected to that account.
Adding calendars on your iPhone and iPad is a simple and effective way to stay organized and manage your schedule. Whether you choose to create calendars directly within the Calendar app or sync them from your accounts, you’ll have all your important events and appointments at your fingertips.
Removing Calendars on iPhone and iPad
Managing your calendars on your iPhone or iPad is incredibly convenient and allows you to stay organized. However, there may come a time when you no longer need a particular calendar or want to unsubscribe from a shared calendar. Here are the steps to remove calendars on your iPhone or iPad:
Deleting Calendars
To delete a calendar from your iPhone or iPad, follow these simple steps:
- Open the Calendar app on your device.
- Tap on the “Calendars” tab at the bottom center of the screen.
- Scroll through the list of calendars and find the one you want to delete.
- Swipe left on the calendar name to reveal the “Delete” button.
- Tap on “Delete” and then confirm the action by tapping “Delete Event” or “Delete All Events and Reminders,” depending on your preference.
Once you’ve completed these steps, the calendar will be removed from your device, and any associated events or reminders will be deleted as well.
Unsubscribing from Calendars
If you subscribed to a shared calendar but no longer want to receive its updates, you can easily unsubscribe by following these steps:
- Open the Calendar app on your iPhone or iPad.
- Tap on the “Calendars” tab at the bottom center of the screen.
- Scroll down to the “Subscribed” section and tap on the calendar you want to unsubscribe from.
- Tap on the “i” icon next to the calendar name.
- Scroll to the bottom of the screen and tap on “Delete Account.”
- Confirm the action by tapping “Delete from My iPhone” or “Delete from My iPad.”
After completing these steps, you will no longer receive updates from the unsubscribed calendar, and it will be removed from your device.
Conclusion
Managing calendars on your iPhone and iPad is an essential skill for staying organized and keeping track of important events and appointments. Whether you need to add a new calendar, remove an existing one, or simply toggle the visibility of certain calendars, the process is simple and user-friendly.
By following the steps outlined in this guide, you can easily add or remove calendars on your iOS devices with just a few taps. Remember to periodically review and declutter your calendar list to ensure it remains focused and clutter-free.
With your calendars organized and all your important events at your fingertips, you can effectively manage your schedule and never miss a beat. So, take the time to customize your calendars to your needs, and make the most of the powerful calendar functionality on your iPhone and iPad!
FAQs
1. How do I add a calendar to my iPhone or iPad?
To add a calendar to your iPhone or iPad, follow these steps:
- Open the “Settings” app on your device.
- Scroll down and tap on “Calendar”.
- Tap on “Accounts” and then select “Add Account”.
- Choose the type of calendar you want to add, such as iCloud, Google, or Outlook.
- Follow the on-screen prompts to sign in and sync your calendar with your device.
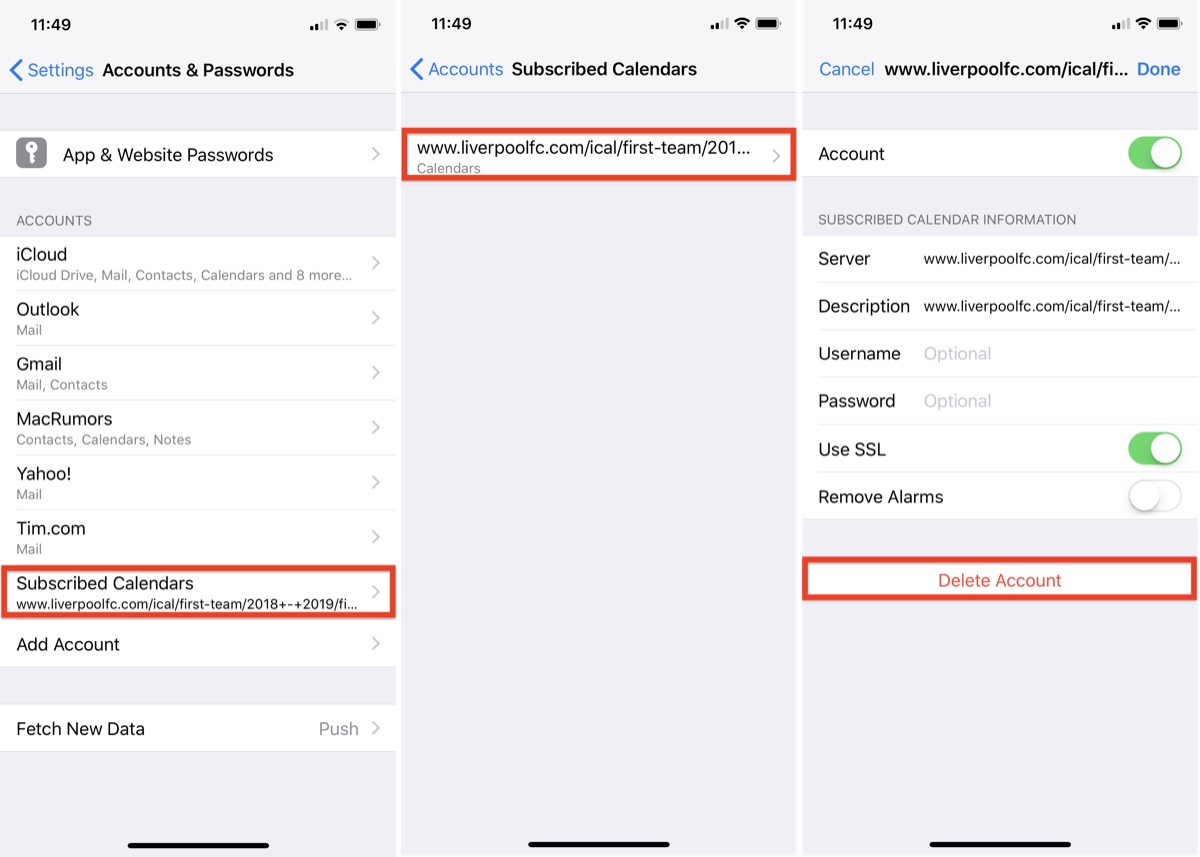
2. How do I remove a calendar from my iPhone or iPad?
To remove a calendar from your iPhone or iPad, here’s what you need to do:
- Open the “Settings” app on your device.
- Scroll down and tap on “Calendar”.
- Tap on “Accounts” and select the calendar account you want to remove.
- Tap on “Delete Account” and confirm your selection.
- The calendar will be removed from your device, and its events will no longer appear.
3. Can I have multiple calendars on my iPhone or iPad?
Yes, you can have multiple calendars on your iPhone or iPad. You can add calendars from different accounts, such as iCloud, Google, or Outlook, and assign different colors to each calendar for easier identification. This allows you to keep personal, work, or other types of calendars separate and organized.
4. How do I switch between calendars on my iPhone or iPad?
To switch between calendars on your iPhone or iPad, follow these steps:
- Open the “Calendar” app on your device.
- Tap on the “Calendars” tab at the bottom of the screen.
- From the list of available calendars, toggle the switch next to each calendar to show or hide its events.
5. Can I share a calendar with someone on my iPhone or iPad?
Yes, you can share a calendar with someone on your iPhone or iPad. If you have a calendar linked to an iCloud, Google, or Outlook account, you can easily share it with others. To do this, open the “Calendar” app, select the calendar you want to share, go to the calendar settings, and choose the option to share the calendar. You can then enter the email address of the person you want to share it with, and they will be able to view and contribute to the shared calendar.