
Do you love photography and editing pictures on your iPhone? Do you often find yourself wanting to compare the edited version of a photo with the original? Well, look no further! In this article, we will guide you step-by-step on how to compare edited photos to their originals on your iPhone. Whether you’re a professional photographer or simply an enthusiast, having the ability to view the changes you’ve made to a photo can greatly enhance your editing process. With the increasing popularity of mobile photography and the advancement of editing tools, it’s essential to know how to compare and assess your edits. So, let’s dive in and discover how you can effectively compare your edited pictures to their original versions right on your iPhone!
Inside This Article
- Why Compare Edited Photos to Originals?
- Method 1: Using the Photos App
- Method 2: Utilizing Third-Party Editing Apps
- Method 3: Using Split View or Slide Over
- Conclusion
- FAQs
Why Compare Edited Photos to Originals?
When it comes to editing photos on your iPhone, it’s always essential to compare the edited version to the original. This comparison is crucial for several reasons:
1. Assessing the Quality: Comparing edited photos to the originals enables you to evaluate the quality of the changes you’ve made. It helps you ensure that the edits have enhanced the photo and not diminished its appeal.
2. Correcting Mistakes: By comparing edited photos to the originals, you can spot any mistakes or unintended alterations. This allows you to make adjustments and ensure that the final result aligns with your vision.
3. Preserving Authenticity: Comparing edited photos to the originals helps you maintain the authenticity of the image. It allows you to retain the original essence and ensure that any edits made do not compromise the integrity of the photo.
4. Learning and Improvement: By regularly comparing your edited photos to the originals, you can track your progress as a photographer or editor. It helps you analyze the changes you’ve made and identify areas where you can further refine your skills.
Overall, comparing edited photos to the originals is a valuable practice that ensures the integrity and quality of your edited images. It allows you to make necessary adjustments, learn from your edits, and achieve the desired outcome.
Method 1: Using the Photos App
If you want to compare edited photos to the originals on your iPhone, the built-in Photos app provides a simple and convenient way to do so. Here’s how:
1. Open the Photos app on your iPhone and navigate to the album or folder where your edited photos are saved.
2. Tap on the edited photo to open it in full-screen view.
3. Swipe left or right to navigate to the original version of the photo.
4. To compare the edited and original versions side-by-side, you can use the “Compare” option. Tap on the photo, then tap on the “Edit” button at the top right corner of the screen.
5. While in the editing interface, you’ll see a “Compare” button at the bottom left corner. Tap on it to toggle between the edited and original versions of the photo.
6. Once you’ve compared the edited and original photos, you can make adjustments or revert to the original if needed.
The Photos app makes it easy to compare and assess the changes you’ve made to your photos. Whether you’ve applied filters, adjusted lighting, or made other edits, you can quickly switch between the edited and original versions to see the difference.
Method 2: Utilizing Third-Party Editing Apps
If you’re looking for more advanced editing features and options, utilizing third-party editing apps is an excellent choice. These apps provide advanced tools and filters to enhance your photos and offer a wider range of editing capabilities compared to the built-in Photos app on your iPhone.
Here are a few popular third-party editing apps that you can use to compare your edited photos to the original:
1. Adobe Lightroom: Adobe Lightroom is a powerful editing app that offers a comprehensive set of tools to enhance your photos. You can easily compare your edited photos to the original by swiping left or right on the screen to toggle between the two versions. In addition, Lightroom allows you to create presets, apply batch edits, and sync your edits across multiple devices.
2. Snapseed: Snapseed is a free editing app developed by Google and is known for its user-friendly interface and advanced editing options. One of its standout features is the “Compare” tool, which allows you to view a side-by-side comparison of your edited photo and the original. This makes it easy to see the changes you’ve made and make further adjustments if needed.
3. VSCO: VSCO is a popular editing app that offers a wide range of filters and editing tools. It also provides a “Compare” feature that enables you to view your edited photo alongside the original. Additionally, VSCO allows you to save your editing steps as a custom preset, making it convenient to apply the same edits to multiple photos.
Using these third-party editing apps not only gives you more control over your editing process but also provides an easy way to compare your edited photos to the original. Whether you want to fine-tune your edits or simply analyze the changes you’ve made, these apps offer the tools and features to help you do so.
Remember to save a separate copy of the original photo before making any edits. This ensures that you always have the unaltered version to compare against. With the help of third-party editing apps, you can take your photo editing skills to the next level and create stunning images that truly stand out.
Method 3: Using Split View or Slide Over
If you want to compare edited photos to the original ones on your iPhone, using the Split View or Slide Over feature can be a handy option. This allows you to view and compare both images side by side, making it easier to identify any changes or enhancements made during the editing process.
To use Split View or Slide Over, follow these steps:
- Open the Photos app and select the original photo you want to compare.
- Swipe up from the bottom of the screen to access the App Switcher.
- Find and select the editing app you used to edit the photo. This will open the app in Split View mode.
- In Split View mode, you can adjust the divider to allocate more or less screen space to each app. Pinch the divider to resize it according to your preference.
- Next, select the edited version of the photo within the editing app.
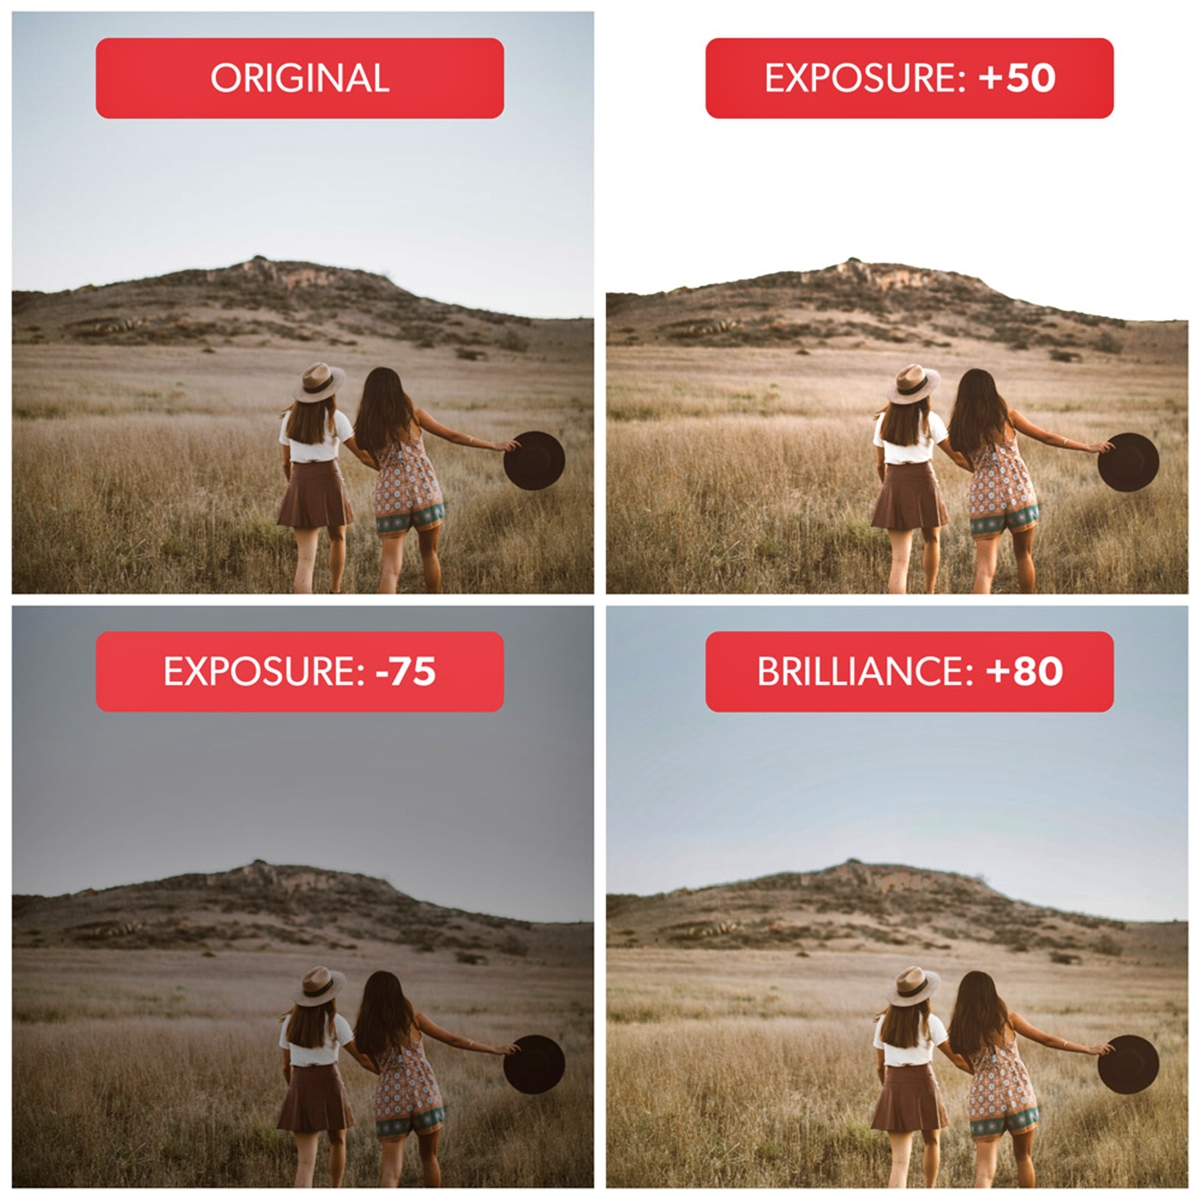
- Now you can easily compare the original and edited photos side by side. Pay attention to the details, such as exposure, colors, and any additional edits you made.
If you prefer to use Slide Over, you can follow a similar process by swiping from the right edge of the screen, instead of using the App Switcher. This will allow you to access the editing app and compare the photos without entering Split View mode.
Using Split View or Slide Over gives you the advantage of seeing the images simultaneously, enabling you to spot even the slightest differences between the original and edited versions. It’s a convenient way to ensure that your edits have achieved the desired outcome.
Remember, the availability of Split View and Slide Over features may depend on your iPhone model and iOS version. So, make sure to check if your device supports these functionalities before attempting to use them for comparing photos.
Conclusion
Editing pictures on your iPhone has never been easier or more convenient. With the wealth of powerful editing tools and apps available, you can transform your ordinary photos into stunning masterpieces with just a few taps. Whether you want to correct minor flaws, enhance colors and contrast, or apply creative filters and effects, your iPhone allows you to unleash your creativity and showcase your photography skills.
One of the key features you can utilize is the ability to compare edited photos to their original versions. This handy feature enables you to see the precise changes you have made, ensuring that you achieve the desired result. By comparing and analyzing the before and after versions, you can fine-tune your editing process and make improvements to your photographic skills.
So, don’t just snap photos and leave them untouched. Take advantage of the editing capabilities on your iPhone and make your pictures truly stand out. With the ability to compare edited photos to the originals, you can refine your editing techniques and create breathtaking visuals that will impress your friends, family, and social media followers.
Get ready to unlock the potential of your iPhone and dive into the world of photo editing. Explore the various editing apps, experiment with different tools and effects, and let your creativity soar. With your iPhone in hand, the possibilities are endless, and your photos will never be the same again.
FAQs
1. Can I edit pictures on my iPhone?
Absolutely! The iPhone offers powerful photo editing capabilities right at your fingertips. With the built-in Photos app, you can crop, enhance, adjust colors, apply filters, and much more to transform your photos.
2. How do I compare edited photos to the original ones on my iPhone?
To compare edited photos to the originals on your iPhone, follow these steps:
1. Open the Photos app and locate the edited photo.
2. Tap on the “Edit” option in the top-right corner.
3. On the right side of the editing toolbar, tap the circle icon with two overlapping squares. This is the “Compare” button.
4. As you tap and hold the compare button, the edited version of the photo will be shown. Release the button to view the original version. This allows you to easily compare the changes made.
3. Can I undo the changes made to my edited photos on my iPhone?
Yes, you can undo the changes made to your edited photos on your iPhone. Simply follow these steps:
1. Open the Photos app and locate the edited photo.
2. Tap on the “Edit” option in the top-right corner.
3. On the editing toolbar, tap the “Revert” button, which looks like a clock in a counterclockwise direction.
4. Confirm the action to revert the photo back to its original state, undoing all the changes made.
4. Can I edit RAW photos on my iPhone?
Yes, you can edit RAW photos on your iPhone. However, you will need to use a third-party app that supports RAW editing functionality. There are several apps available on the App Store, such as Adobe Lightroom, Snapseed, and VSCO, that allow you to edit RAW photos and take full advantage of their unprocessed image data.
5. Will editing photos on my iPhone affect the original image quality?
When you edit photos on your iPhone using the built-in editing tools or third-party apps, the changes are generally applied as non-destructive edits. This means that the original image file remains unchanged, and the edits are stored as instructions or metadata associated with the photo. As a result, the original image quality is preserved, and you can always revert back to the original version if needed.