
Are you looking for a way to delete your Facebook page on your iPhone? Whether you’re tired of managing a page that no longer serves its purpose or you simply want to take a break from social media, deleting a Facebook page can be a straightforward process on your iPhone. In this article, we will guide you through the step-by-step process of deleting a Facebook page directly from your iPhone. We will walk you through the necessary settings and options, ensuring that you have a smooth experience throughout the entire process. So, if you’re ready to bid farewell to your Facebook page, let’s dive in and learn how to delete it on your iPhone.
Inside This Article
Deleting a Facebook Page on iPhone
If you’re ready to remove a Facebook Page that you manage from your iPhone, you’ve come to the right place. Whether you no longer need the page, want to rebrand your business, or simply want to take a break from managing it, deleting a Facebook Page is a straightforward process.
By following a few simple steps, you can delete the Facebook Page on your iPhone and ensure that it’s permanently removed from your account. Let’s dive right in!
Step 1: Accessing the Facebook App
To begin the process, you’ll need to open the Facebook app on your iPhone. Look for the familiar blue icon with the white ‘f’ logo, and tap on it to open the app.
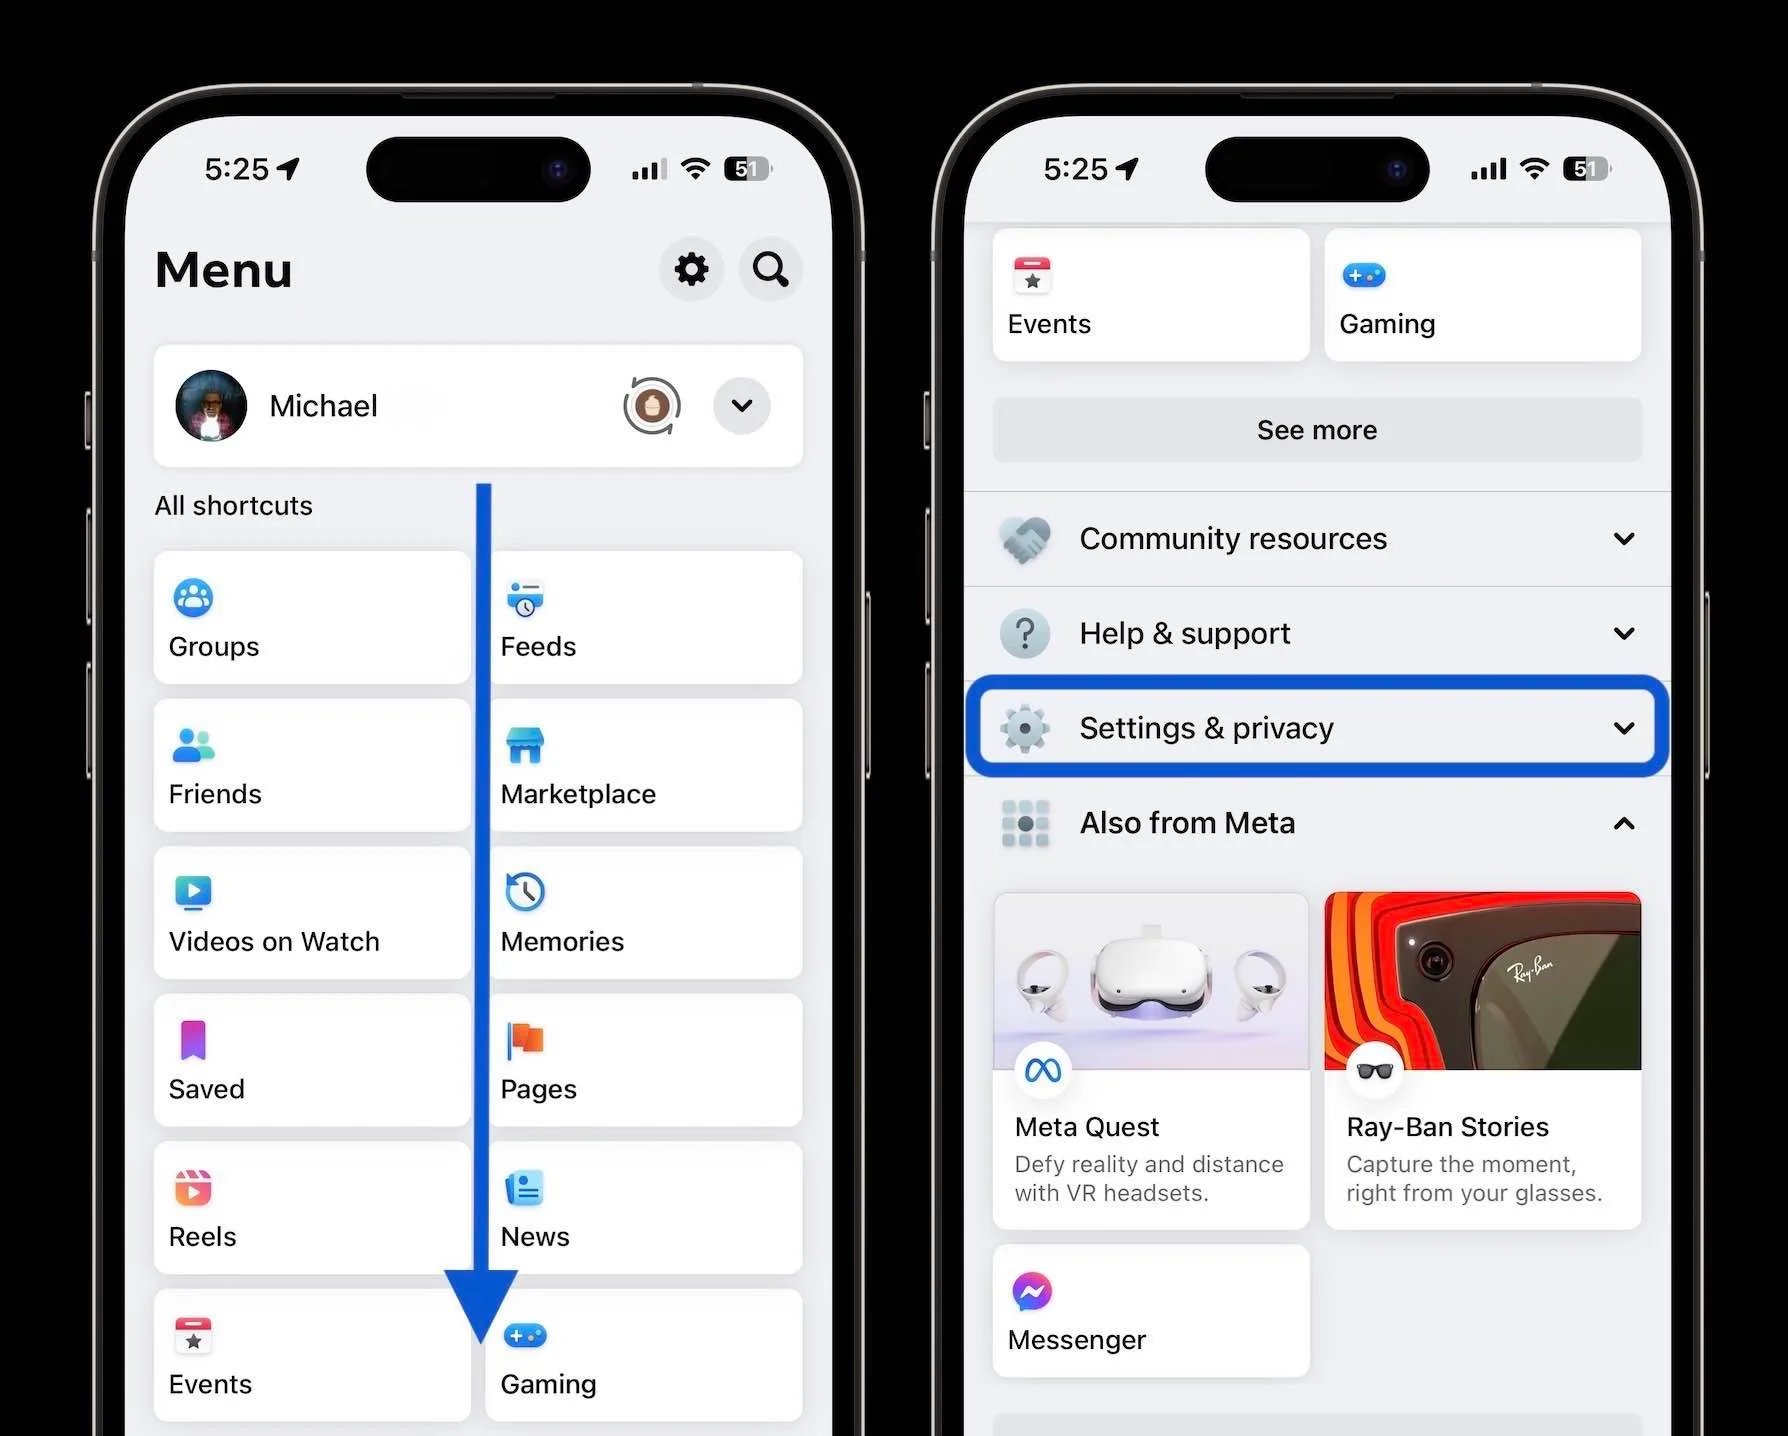
Step 2: Navigating to Your Facebook Page
Once you’re in the Facebook app, tap on the three horizontal lines at the bottom-right corner of the screen to open the menu. Scroll down the menu until you find the “Pages” section, and tap on it.
Step 3: Deleting Your Facebook Page
In the “Pages” section, you will see a list of all the pages you manage. Find the page you want to delete, and tap on it to open the page’s settings.
Next, tap on the “Settings” button located in the top-right corner of the screen. Scroll down the settings menu until you see the “Remove Page” option, and tap on it.
A confirmation window will appear, asking you to confirm the deletion of your Facebook Page. Review the information and make sure you understand the consequences of deleting the page, as this action cannot be undone. If you’re certain about deleting the page, tap on “Delete Page” to proceed.
Step 4: Confirming the Deletion
After tapping on “Delete Page,” another confirmation window will appear. This is the final step before your Facebook Page is permanently deleted. Read the information and once again, confirm that you understand the consequences of deleting the page. If you’re ready to proceed, tap on “Delete” to permanently delete the page.
Congratulations! You have successfully deleted your Facebook Page on your iPhone. The page will be removed from your account, and its content will no longer be accessible to you or anyone else. Remember, this action is irreversible, so make sure you’re certain about your decision before deleting the page.
If you ever change your mind and decide to create a new Facebook Page in the future, you can easily do so using the same Facebook app on your iPhone. Just follow the steps to create a new page, and you’ll be back in the Facebook Page management game.
Now that you know how to delete a Facebook Page on your iPhone, you have the power to manage your digital presence with ease. Whether it’s removing an outdated page or starting fresh with a new one, you’re in control of your Facebook Pages on your iPhone. Happy managing!
Conclusion
In conclusion, deleting a Facebook page on an iPhone is a straightforward process that can be done in just a few steps. By accessing the Facebook app and navigating to the “Pages” section, users can easily find the page they wish to delete. Tapping on the page and selecting “Settings” will present the option to “Delete Page.” It is important to note that deleting a page is permanent and cannot be undone, so it is vital to make sure this is the desired action. By following these steps, individuals can effectively delete their Facebook pages and free up space on their iPhones.
FAQs
1. Can I delete a Facebook Page on my iPhone?
Yes, you can delete a Facebook Page directly from your iPhone. Facebook offers a mobile app that allows you to manage your Pages and perform various actions, including deleting them.
2. How do I delete a Facebook Page on my iPhone?
To delete a Facebook Page on your iPhone, follow these steps:
- Open the Facebook app on your iPhone.
- Tap on the “More” tab at the bottom right corner of the app.
- Scroll down and tap on “Pages”.
- Find the Page you want to delete and tap on it.
- Tap on the three-dot menu icon at the top right corner of the Page.
- Scroll down and tap on “Edit Settings”.
- Scroll down to the bottom and tap on “Delete Page”.
- Confirm the deletion by tapping on “Delete Page” again.
3. Will deleting a Facebook Page delete all its content?
Yes, deleting a Facebook Page will permanently remove all its content, including posts, photos, videos, and comments. It is important to back up any important information or media before deleting the Page.
4. Can I recover a deleted Facebook Page?
No, once you delete a Facebook Page, it cannot be recovered. Facebook does not provide an option to restore deleted Pages, so make sure you are certain before proceeding with the deletion.
5. Are there any alternatives to deleting a Facebook Page?
Instead of deleting a Facebook Page, you can consider unpublishing it. Unpublishing a Page hides it from the public while allowing you to retain control over its content and settings. This can be done by going to the Page’s settings and toggling the “Page Visibility” option.