
Removing an Apple ID from an iPhone is a common concern for many users. Whether you’ve recently bought a used device or simply want to switch to a different Apple ID, it’s important to know the steps involved in this process. An Apple ID is connected to various services, such as iCloud, iTunes, and the App Store, and removing it requires careful attention to prevent any data loss or complications.
In this comprehensive guide, we will walk you through the step-by-step process of removing an Apple ID from your iPhone. We will cover all the necessary details, including the precautions you should take, the settings you need to navigate, and any potential challenges you may encounter along the way. So, if you’re ready to regain control of your iPhone and remove your current Apple ID, let’s dive right in!
Inside This Article
- Introduction
- Prerequisites for Removing Apple ID from iPhone
- Steps to remove Apple ID from iPhone
- Troubleshooting common issues when removing Apple ID from iPhone
- Prerequisites for removing Apple ID from iPhone
- Steps to Remove Apple ID from iPhone
- Troubleshooting Common Issues When Removing Apple ID from iPhone
- Conclusion
- Conclusion
- FAQs
Introduction
Removing an Apple ID from an iPhone is a necessary task when you no longer want to associate the device with a specific Apple account. Whether you’re selling your iPhone, giving it to someone else, or simply want a fresh start, removing your Apple ID ensures that your personal information is no longer linked to the device. In this article, we will guide you through the process of removing an Apple ID from your iPhone, step by step.
Before we dive into the steps, it’s important to note that removing an Apple ID from an iPhone requires some prerequisites and careful considerations. It is crucial to backup your data, ensure that all active subscriptions and services are appropriately handled, and disable any linked features that could cause complications during the removal process. By following the guidelines and precautions provided, you can smoothly and successfully remove an Apple ID from your iPhone.
Prerequisites for removing Apple ID from iPhone:
- Backup your iPhone: Before removing the Apple ID, it is highly recommended to backup your iPhone to prevent the loss of any important data. You can backup your iPhone using iCloud or by connecting it to a computer and using iTunes.
- Deauthorize your iPhone from all services: Make sure to deauthorize your iPhone from any services that are linked to your Apple ID, such as iMessage, FaceTime, and any other third-party apps or accounts.
- Disable two-factor authentication: If you have enabled two-factor authentication for your Apple ID, make sure to disable it before proceeding with the removal process. You can disable this feature by following the instructions provided by Apple.
Now that you have completed the prerequisites and taken the necessary precautions, you are ready to start the process of removing your Apple ID from your iPhone. Follow the steps below to successfully remove the Apple ID from your device.
Prerequisites for Removing Apple ID from iPhone
Before you proceed with removing your Apple ID from your iPhone, there are a few important prerequisites you should keep in mind. These will ensure a smooth and successful process:
- Ensure a Stable Internet Connection: Make sure your iPhone is connected to a stable and reliable Wi-Fi or cellular network. A strong internet connection is essential for the iCloud and Apple ID services to function properly during the removal process.
- Know Your Apple ID Credentials: It is crucial to have the correct Apple ID username and password in order to successfully remove the Apple ID from your iPhone. Ensure that you have the correct login credentials handy before proceeding. If you have forgotten your Apple ID password, you can recover it using the Apple ID account recovery options.
- Backup Your Data: Before removing your Apple ID, it is recommended to back up all your important data. This includes contacts, photos, videos, and any other data that you want to keep safe. You can manually back up your iPhone using iCloud or iTunes, or use a third-party data backup tool.
- Check Activation Lock Status: Activation Lock is a security feature that prevents unauthorized access to your iPhone. Before removing your Apple ID, check if Activation Lock is enabled on your device. To do this, go to Settings > [Your Name] > Find My > Find My iPhone. If Find My iPhone is turned on, you will need to disable it before proceeding with the Apple ID removal.
By ensuring that you meet these prerequisites, you can proceed with confidence and minimize any potential issues that may arise during the process of removing your Apple ID from your iPhone.
Steps to remove Apple ID from iPhone
If you are looking to remove your Apple ID from your iPhone, follow these steps:
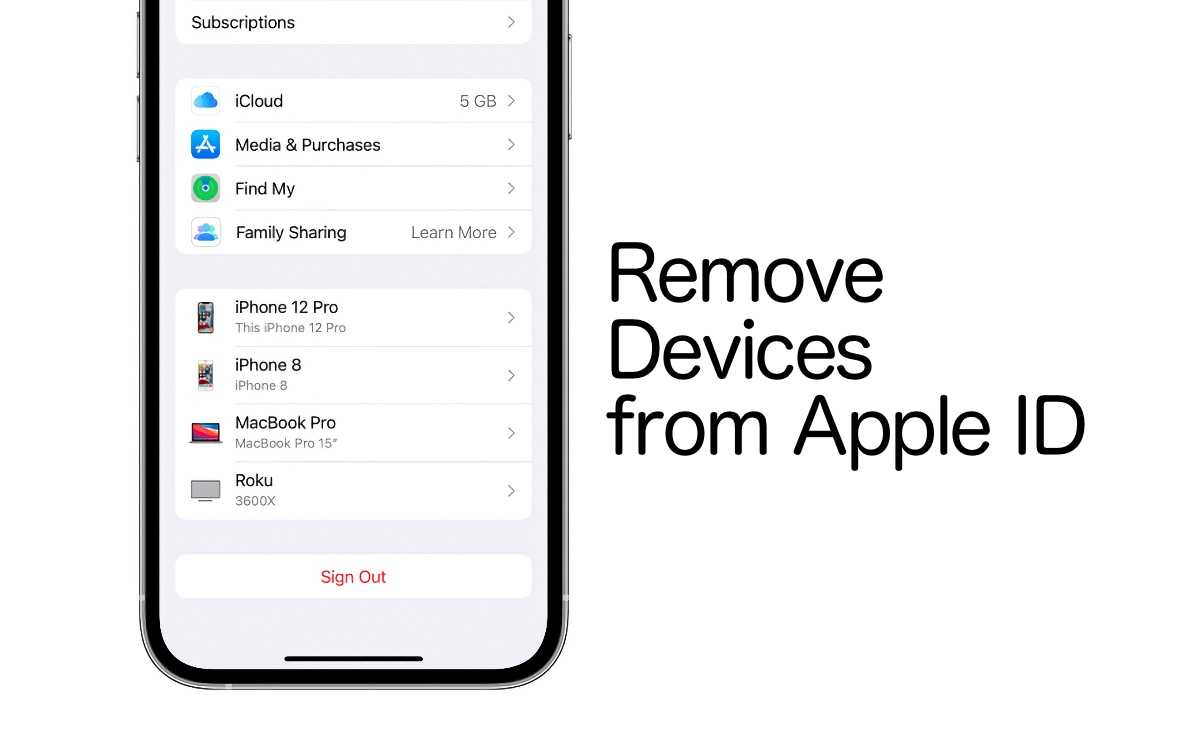
- Sign out of iCloud: The first step is to sign out of your iCloud account. Go to “Settings” on your iPhone, tap on your name at the top, scroll down, and click on “Sign Out”. You will be prompted to enter your Apple ID password and choose whether to keep a copy of your data on your iPhone or remove it.
- Remove Apple ID from App Store and iTunes: After signing out of iCloud, go back to “Settings” and scroll down to the “iTunes & App Store” section. Tap on your Apple ID, and a menu will appear. Click on “Sign Out” to remove your Apple ID from the App Store and iTunes.
- Disable Find My iPhone: To continue the process of removing your Apple ID, navigate to “Settings” once again and tap on your name. Scroll down and select “Find My” and then “Find My iPhone”. Toggle off the “Find My iPhone” switch by entering your Apple ID password when prompted. This step is essential as it deactivates the activation lock on your device, allowing it to be removed from your Apple ID.
- Erase all content and settings: The final step in removing your Apple ID from your iPhone is to erase all content and settings. This can be done by going to “Settings”, choosing “General”, and scrolling down to “Reset”. Tap on “Erase All Content and Settings” and confirm your decision by entering your iPhone passcode.
Once the process is complete, your iPhone will restart, and the Apple ID associated with it will be removed.
Troubleshooting common issues when removing Apple ID from iPhone
While removing your Apple ID from your iPhone is generally a straightforward process, there are some common issues that you may encounter along the way. Here are a few troubleshooting steps to help you overcome these obstacles:
- Unable to sign out of iCloud: If you are having trouble signing out of iCloud on your iPhone, make sure you have a stable internet connection. Additionally, check if any apps or services are accessing your iCloud account. You may need to disable them before signing out.
- App Store and iTunes still linked to your Apple ID: If you have signed out of your Apple ID in the settings but are still prompted to enter your password when accessing the App Store or iTunes, try signing out and back in again. If the issue persists, contact Apple Support for further assistance.
- Find My iPhone feature not turning off: If you are unable to disable the Find My iPhone feature, ensure that you have a stable internet connection and that your iPhone is connected to Wi-Fi or cellular data. In some cases, you may need to sign out of your iCloud account before you can turn off Find My iPhone.
- Issues with erasing all content and settings: If you encounter errors or your iPhone gets stuck during the process of erasing all content and settings, try restarting your device and attempting the erase again. If the problem persists, you may need to restore your iPhone using iTunes or contact Apple Support for assistance.
- Verification required when removing Apple ID: If your iPhone asks for verification when removing your Apple ID, ensure that you have entered the correct password and that you have access to the trusted phone number or email associated with your Apple ID. If you are still unable to verify your identity, contact Apple Support for further guidance.
- Unable to log in with a different Apple ID: If you want to sign in with a different Apple ID after removing the previous one, make sure that the new Apple ID is valid and does not have any restrictions. Additionally, ensure that your network connection is stable and try restarting your iPhone before attempting to sign in with the new Apple ID.
If you are facing any other issues or encountering specific error messages when removing your Apple ID from your iPhone, it is recommended to reach out to Apple Support for personalized assistance to resolve the problem.
### Introduction
Removing an Apple ID from an iPhone is a task that many users find necessary at some point. Whether you’re selling your device, giving it to a family member, or simply want to start fresh, it’s important to know the proper steps to remove your Apple ID. This article will guide you through the process, ensuring a smooth transition without any complications.
### Prerequisites for Removing Apple ID from iPhone
Prerequisites for removing Apple ID from iPhone
Before you begin the process of removing your Apple ID from your iPhone, there are a few important things to consider:
- Make sure you have the Apple ID and password associated with the account you want to remove. This is essential as it will be required for authentication during the process.
- Ensure that you have a stable internet connection. An internet connection is necessary to successfully sign out of iCloud and complete the removal process.
- Back up your iPhone data. Removing the Apple ID will result in the deletion of all data associated with that account from your device. To prevent any data loss, it’s recommended to create a backup of your iPhone using iCloud or iTunes.
Steps to Remove Apple ID from iPhone
Follow these step-by-step instructions to remove your Apple ID from your iPhone:
- Sign out of iCloud: Open the Settings app on your iPhone and tap on your name at the top of the screen. Then, scroll down and tap on “Sign Out”. Enter your Apple ID password when prompted and tap “Turn Off” to disable Find My iPhone. Finally, tap “Sign Out” to complete the process.
- Remove Apple ID from App Store and iTunes: In the Settings app, scroll down and tap “iTunes & App Store”. Tap on your Apple ID at the top of the screen, then tap “Sign Out”.
- Disable Find My iPhone: Go back to the main Settings screen and tap “Find My”. Then, tap “Find My iPhone” and toggle off the “Find My iPhone” option. Enter your Apple ID password when prompted.
- Erase all content and settings: In the Settings app, go to “General” and scroll down to the bottom. Tap “Reset” and then select “Erase All Content and Settings”. Confirm your choice and enter your device passcode if prompted. This will erase all data and settings on your iPhone, including the Apple ID information.
Troubleshooting Common Issues When Removing Apple ID from iPhone
While removing an Apple ID from an iPhone is a relatively straightforward process, there may be some common issues that you encounter. Here are a few troubleshooting tips:
- If you cannot sign out of iCloud or remove the Apple ID from the App Store and iTunes, ensure that you have entered the correct Apple ID and password. Double-check your login credentials and try again.
- If you are unable to disable Find My iPhone, make sure that you have a stable internet connection. Additionally, ensure that you are logged in with the correct Apple ID.
- If you encounter any error messages or difficulties during the erase process, try restarting your iPhone and attempting the reset again. Alternatively, you can connect your iPhone to a computer and use iTunes to perform the reset.
Conclusion
Removing an Apple ID from an iPhone is a crucial step when transitioning ownership or starting fresh with a new account. By following the steps outlined in this article, you can easily remove your Apple ID from your iPhone without any complications. Just remember to back up your data, ensure a stable internet connection, and double-check your login credentials. By doing so, you can confidently remove your Apple ID and proceed with your desired changes.
Conclusion
Removing an Apple ID from an iPhone is a straightforward process that can be done in a few simple steps. By following the instructions mentioned above, users can unlink their device from their Apple ID and regain control over their iPhone. It is essential to keep in mind that removing an Apple ID will also result in the loss of access to certain Apple services and iCloud data. Therefore, it is recommended to back up any important information before initiating the removal process.
Whether you are selling your iPhone, handing it down to a family member, or simply want to start fresh, removing an Apple ID is a necessary step to ensure your privacy and security. By taking the time to complete this process, you can rest assured that your personal information and digital identity are protected.
Now that you know how to remove an Apple ID from an iPhone, you can confidently manage the Apple ID settings on your device. Remember, if you encounter any difficulties or have further questions, it is always helpful to consult Apple’s official support documentation or reach out to their customer service for assistance.
FAQs
Q: Why would I want to remove my Apple ID from my iPhone?
A: There are several reasons why you might want to remove your Apple ID from your iPhone. Perhaps you have sold or given away your iPhone and want to ensure that your personal information is no longer accessible. Alternatively, you may want to switch to a different Apple ID or create a new one. Whatever the reason, removing your Apple ID from your iPhone can be necessary in certain situations.
Q: How do I remove my Apple ID from my iPhone?
A: To remove your Apple ID from your iPhone, follow these steps:
1. Open the Settings app on your iPhone.
2. Tap on your Apple ID profile at the top of the screen.
3. Scroll down and select “Sign Out” or “iTunes & App Store”.
4. Enter your Apple ID password when prompted.
5. Confirm by tapping “Turn Off” or “Sign Out”.
By following these steps, you will be able to remove your Apple ID from your iPhone successfully.
Q: Will removing my Apple ID from my iPhone delete all my data?
A: No, removing your Apple ID from your iPhone will not delete your data. Your personal data, apps, and other content will remain on your iPhone even after signing out of your Apple ID. However, any iCloud data that is not synced or backed up will not be accessible after removing your Apple ID.
Q: Can I use a different Apple ID after removing the current one?
A: Yes, after removing your current Apple ID from your iPhone, you can sign in with a different Apple ID. This allows you to switch to a new account or use an existing one on your device.
Q: What happens to my purchases and subscriptions if I remove my Apple ID?
A: If you remove your Apple ID from your iPhone, any purchases or subscriptions made using that Apple ID will no longer be accessible on your device. However, you can regain access to them by signing back in with your Apple ID.