
Setting up a printer on your iPhone can be a game-changer when it comes to convenience and productivity. Whether you need to print documents, tickets, or photos, having the ability to seamlessly connect your iPhone to a printer opens up a whole new world of possibilities.
In this article, we will guide you through the process of setting up a printer on your iPhone. We will provide step-by-step instructions to ensure a smooth setup experience. Whether you have a wireless printer or one that requires a direct connection, we have you covered.
By the end of this article, you will have the knowledge and confidence to effortlessly print from your iPhone to any compatible printer. Say goodbye to the hassle of transferring files to another device or dealing with clunky print settings. Let’s dive in and unlock the power of printing from your iPhone!
Inside This Article
- Section 1: Connecting your iPhone to the Printer
- Section 2: Setting up Printer on iPhone
- Section 3: Configuring Printer Settings on iPhone
- Section 4: Printing from iPhone
- Conclusion
- FAQs
Section 1: Connecting your iPhone to the Printer
To set up a printer on your iPhone, the first step is to ensure that you have a compatible printer. Check the printer’s documentation or visit the manufacturer’s website to see if it is compatible with your iPhone. Once you’ve confirmed compatibility, follow the steps below to connect your iPhone to the printer.
1. Enable Wi-Fi and Bluetooth:
Before connecting your iPhone to the printer, make sure Wi-Fi and Bluetooth are enabled on your iPhone. To do this, swipe down from the top-right corner of the screen (or swipe up from the bottom of the screen on iPhone models with a Home button) to access the Control Center. Tap on the Wi-Fi and Bluetooth icons to turn them on if they are not already enabled.
2. Ensure printer compatibility with iPhone:
Check that your printer supports wireless connections and has Wi-Fi or Bluetooth capabilities. Additionally, ensure that your printer model is compatible with AirPrint, which is Apple’s printing technology that enables printing from iOS devices like the iPhone. If your printer is AirPrint compatible, you can skip the next step and proceed to connecting your iPhone and printer.
3. Connect iPhone and printer using Wi-Fi or Bluetooth:
If your printer supports Wi-Fi connectivity, follow these steps:
- Access the Wi-Fi settings on your iPhone by going to “Settings” and tapping on “Wi-Fi”.
- Select your printer’s network from the list of available networks. It may have the name of the printer or the manufacturer’s name.
- Enter the password if prompted. This password is usually provided in the printer’s documentation or can be set up during the printer’s initial setup process.
- Once connected, your iPhone will display a checkmark next to the Wi-Fi network name, indicating that the connection is successful.
If your printer supports Bluetooth connectivity, follow these steps:
- Access the Bluetooth settings on your iPhone by going to “Settings” and tapping on “Bluetooth”.
- Make sure your printer is in pairing mode or discoverable mode. Consult the printer’s documentation or contact the manufacturer for instructions on how to enable Bluetooth pairing.
- In the Bluetooth settings on your iPhone, select your printer from the list of available devices.
- Once connected, your iPhone will display “Connected” next to the printer’s name, indicating a successful connection.
Now that your iPhone is connected to the printer, you’re ready to move on to the next section and set up the printer on your iPhone.
Section 2: Setting up Printer on iPhone
Setting up a printer on your iPhone is a simple process that allows you to conveniently print documents, photos, and more directly from your device. To get started, follow these steps:
1. Access the Settings app on your iPhone. This can usually be found on your home screen.
2. Once in the Settings app, scroll down and tap on “Printers & Scanners”. This option is usually located in the second or third section of the settings menu.
3. In the Printers & Scanners menu, you will see a list of already connected printers as well as the option to add a new one. Tap on “Add Printer or Scanner” to proceed.
4. At this point, your iPhone will search for available printers in your vicinity. If your printer is found, it will appear in the list. Simply tap on the name of your printer to select it.
5. In case your printer does not appear in the list, you have the option to manually enter its details. Tap on “Add Printer or Scanner” again, and then choose the “Printer not Found” option. Follow the prompts to enter the printer’s IP address or other required details.
Once you have selected or manually entered your printer, your iPhone will establish a connection with it. You can now proceed to configure the printer settings and begin printing documents directly from your iPhone.
Section 3: Configuring Printer Settings on iPhone
When setting up a printer on your iPhone, it’s essential to configure the printer settings to ensure optimal printing results. Here are the key printer settings you can adjust on your iPhone:
1. Adjusting Print Settings: One of the primary settings you can modify is the paper size and orientation. Whether you’re printing documents or photos, you can choose from a range of paper sizes, such as letter, A4, or legal, and set the orientation to portrait or landscape.
2. Enable or Disable Double-Sided Printing: To conserve paper and reduce printing costs, you have the option to enable double-sided printing. This setting allows you to print on both sides of the paper automatically, saving you time and resources.
3. Print Quality and Color Options: Depending on your printing preferences, you can adjust the print quality and color options on your iPhone. You can choose between draft, normal, or high-quality printing and select whether to print in color or black and white.
4. Setting Up Printer Preferences and Defaults: Customize your printer preferences and defaults on your iPhone to streamline the printing process. You can specify the default printer, choose the number of copies to print by default, and set other preferences like paper type and output quality.
By configuring these printer settings on your iPhone, you can ensure that your printed documents and photos meet your desired specifications, save resources, and optimize the printing experience.
Section 4: Printing from iPhone
Printing documents or photos from your iPhone is a simple and convenient process. Follow these steps:
-
Open the document or photo that you want to print on your iPhone. It could be a Word document, a PDF, an email, a web page, or an image file.
-
Tap on the share button or options menu. This button is typically represented by a box with an arrow pointing upwards and is located at the bottom of the screen.
-
In the options menu, you will see a variety of actions you can take with the document or photo. Scroll through the options until you find “Print” and then tap on it.
-
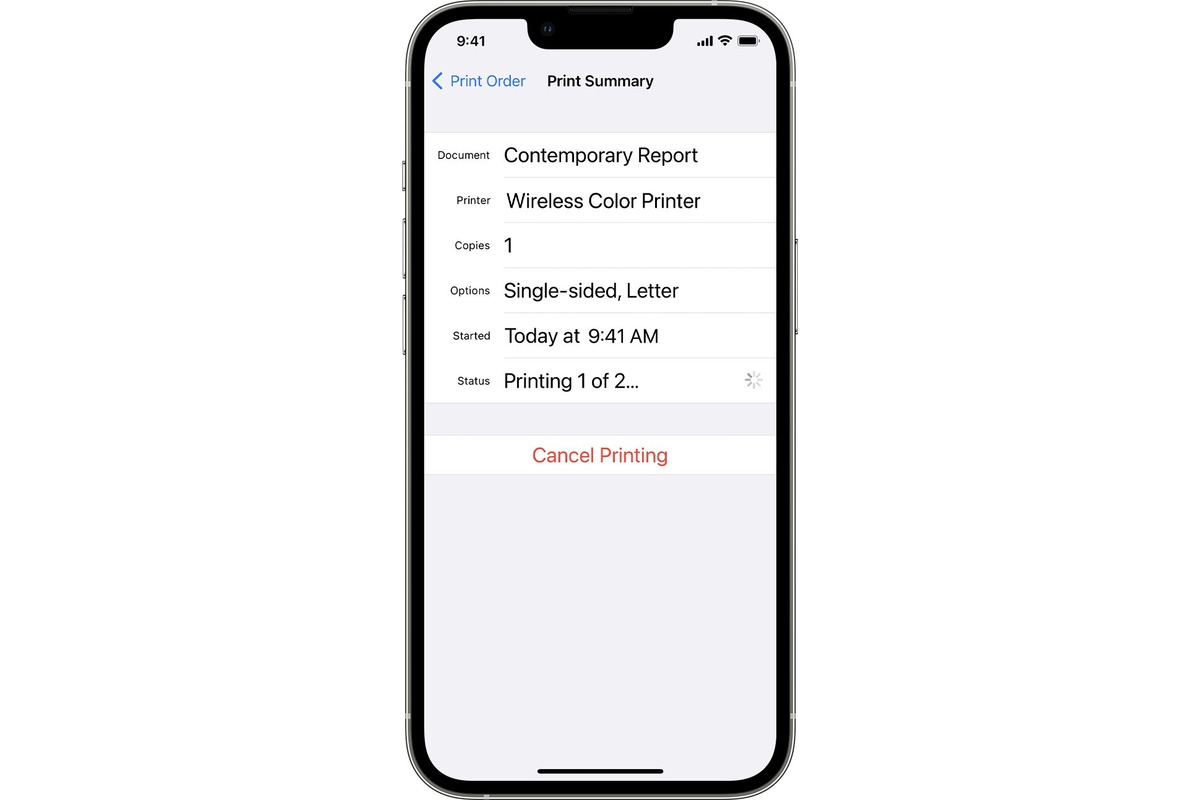
Once you select “Print,” you will be taken to the print settings page. Here, you can adjust various print settings, such as the number of copies, paper size, color or grayscale, and double-sided printing. Take the time to configure these settings according to your preferences or printing requirements.
-
After adjusting the print settings, tap the “Print” button located in the top-right corner of the screen. Your iPhone will send the print job to the connected printer, and the document or photo will start printing.
It’s important to note that the availability of the “Print” option may vary depending on the app you are using. Some apps may require you to swipe left or right in the options menu to find the “Print” button. Additionally, make sure that your iPhone is connected to a printer that supports AirPrint or has a compatible printing app installed.
By following these steps, you can easily print documents and photos from your iPhone without the need for a computer or additional software. Whether you need to print a presentation for a meeting or a memorable photo for your scrapbook, your iPhone can serve as a convenient printing tool.
Conclusion
Setting up a printer on your iPhone can greatly enhance your productivity and convenience. With the advancements in technology, it has become easier than ever to connect and use a printer directly from your iPhone. Whether you need to print documents, photos, or any other files, having the ability to print directly from your iPhone offers a seamless experience.
In this article, we have provided a comprehensive guide on how to set up a printer on your iPhone. From connecting to a Wi-Fi printer to using AirPrint, we have covered various methods to ensure that you can easily use your printer with your iPhone. By following the steps outlined in this article, you will be able to quickly and effortlessly print from your iPhone.
Remember to check the compatibility of your printer with the specific methods discussed in this article. Additionally, make sure to keep your printer drivers updated to ensure optimal performance.
Now that you have learned how to set up a printer on your iPhone, you can enjoy the convenience of printing directly from your device. Say goodbye to the hassle of transferring files to a computer or relying on other devices to print. With just a few simple steps, you can have your documents or photos printed at your fingertips.
FAQs
1. Can I print directly from my iPhone?
Yes, you can print directly from your iPhone. With the advancements in technology, iPhones now have built-in printing capabilities that allow you to wirelessly connect and print documents, photos, emails, and more.
2. What do I need to set up a printer on my iPhone?
You will need a printer that supports AirPrint, which is Apple’s wireless printing technology. Ensure that your printer is connected to the same Wi-Fi network as your iPhone. Additionally, make sure that your iPhone’s software is up to date.
3. How do I set up a printer on my iPhone?
To set up a printer on your iPhone, follow these steps:
- Make sure your printer is turned on and connected to the same Wi-Fi network as your iPhone.
- On your iPhone, open the app or document you want to print.
- Tap the share button, usually represented by a square with an arrow pointing upward.
- Scroll down and select “Print.”
- Your iPhone will search for available printers. Select your printer from the list.
- Choose the number of copies and any other print settings you desire.
- Tap “Print” to start printing.
4. What if my printer doesn’t support AirPrint?
If your printer does not support AirPrint, you can still print from your iPhone using a third-party printing app. These apps allow you to connect to your printer wirelessly and print documents from your iPhone. Simply search for a printing app in the App Store and follow the instructions for setting it up.
5. Can I print to any printer with my iPhone?
While most modern printers support wireless printing, not all printers are compatible with the AirPrint feature on iPhones. It is recommended to check if your printer is AirPrint-compatible before attempting to set it up with your iPhone. If your printer is not compatible, you can explore alternative printing options such as using a third-party printing app or connecting your iPhone to a computer that is connected to a printer.