
In the modern world, where cell phones have become an integral part of our lives, missing a phone call can be frustrating and even costly. One of the most common reasons for missed calls is forgetting to turn on the ringer on your Android phone. But fear not! In this article, we will guide you on how to easily turn on the ringer on an Android phone. Whether you’re new to Android or just need a refresher, our step-by-step instructions will help you ensure that you never miss an important call again. So, let’s dive in and discover the simple tricks to activate the ringer on your Android phone.
Inside This Article
- Method 1: Using the Volume Button
- Method 2: Changing the Sound Settings
- Method 3: Adjusting the Do Not Disturb Mode
- Conclusion
- FAQs
Method 1: Using the Volume Button
One of the easiest ways to turn on the ringer on an Android phone is by using the volume button. On most Android devices, the volume button is located on the side of the phone.
To turn on the ringer, simply press and hold the volume up button until you hear a sound or feel a vibration. This will increase the volume of the phone, including the ringer volume.
If the phone is already on silent or vibrate mode, you may need to press the volume up button a few times to reach the desired volume level. The phone should emit a sound or vibration for each press, indicating that the ringer is being turned on.
It’s important to note that the exact steps to turn on the ringer using the volume button may vary slightly depending on the Android device you are using. However, the general principle remains the same.
If you are unsure of the location of the volume button on your Android phone, consult the user manual or search online for the specific instructions for your device model.
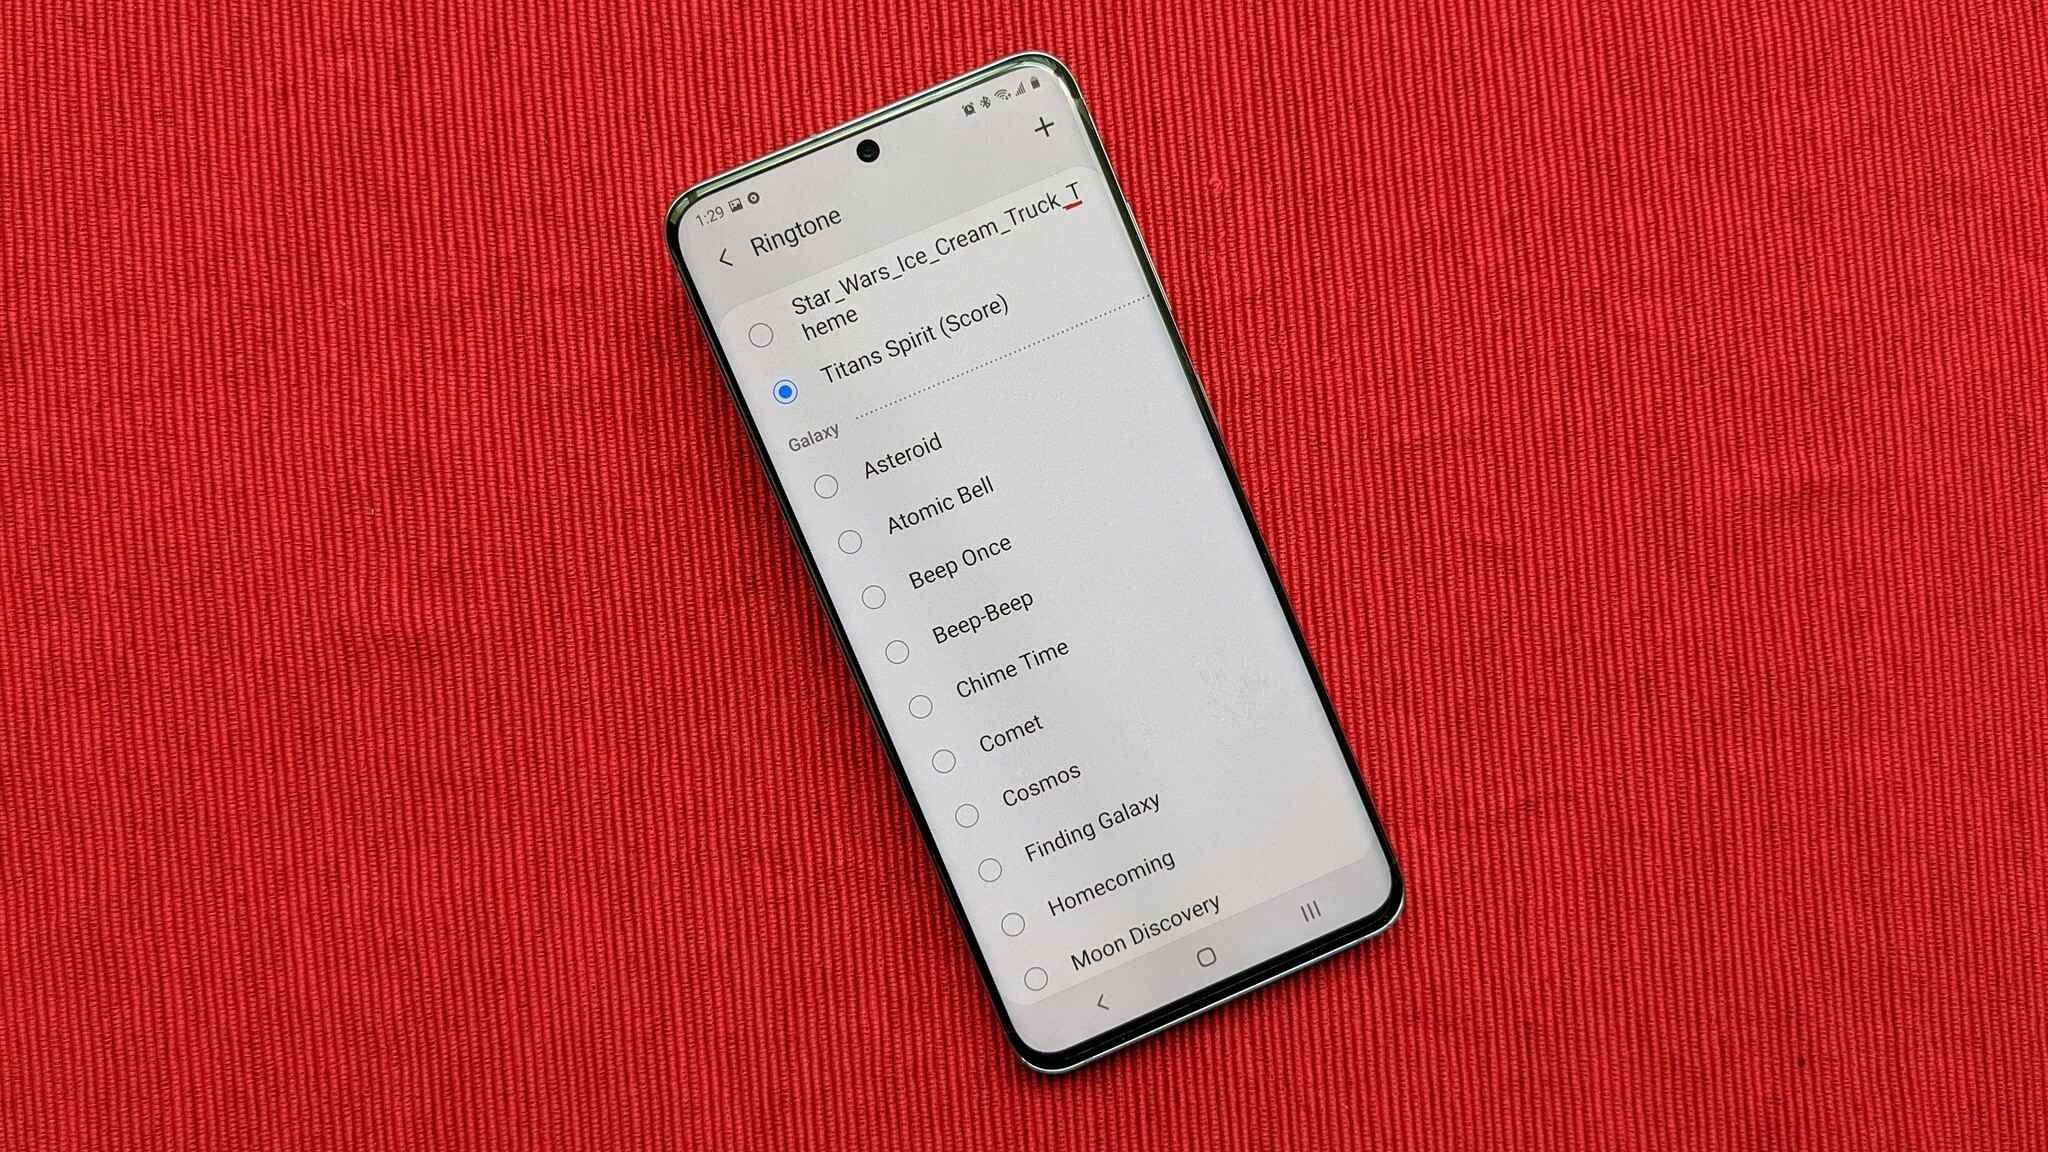
Method 2: Changing the Sound Settings
Another way to turn on the ringer on an Android phone is by changing the sound settings. This method allows you to customize the ringer volume, choose a specific ringer sound, and configure other audio settings.
To access the sound settings, follow these steps:
- Open the Settings app on your Android phone. You can usually find it in the app drawer or by swiping down from the top of the screen and tapping the gear icon.
- Scroll down and tap on “Sound & vibration” or a similar option. The exact name may vary depending on your Android version and phone model.
- Once you’re in the sound settings, you’ll see various options related to audio and vibrations.
- Find the “Ringer volume” or “Ringtone & notifications volume” option and adjust the slider to increase the ringer volume.
- If you want to change the ringer sound, look for the “Ringtone” or “Phone ringtone” option. Tap on it to select a new ringer sound from the available options or browse your device’s storage to choose a custom sound.
- Some Android phones may also have additional settings like “Vibrate” or “Vibration intensity” that control the vibration along with the ringer. You can enable or disable vibration according to your preference.
Once you have adjusted the sound settings to your liking, the ringer on your Android phone will be turned on. You should now be able to hear incoming calls and notifications.
Remember to test the ringer after making any changes to ensure that it’s working properly. You can ask a friend or use another device to call your phone and check if the ringer is audible.
If you’re still experiencing issues with the ringer not turning on, you may need to troubleshoot further or seek assistance from the manufacturer or a technical expert.
Method 3: Adjusting the Do Not Disturb Mode
If you need to temporarily mute all incoming calls and notifications on your Android phone, you can utilize the Do Not Disturb mode. This mode allows you to customize the settings according to your needs, ensuring that only essential calls or alerts can get through.
To activate the Do Not Disturb mode on your Android phone, follow these steps:
- Swipe down from the top of your screen to access the notification panel.
- Locate the Do Not Disturb icon, which looks like a bell with a diagonal line through it, and tap on it.
- You will be presented with different options for the Do Not Disturb mode. You can choose to enable it for a specific time period, such as “For 1 hour” or “Until you turn it off,” or customize the settings further.
- If you want to customize the settings, tap on “Sound & notification” or “Sound” depending on your Android version.
- Within the settings, you can choose to allow certain contacts to bypass the Do Not Disturb mode and enable important notifications to come through.
- You can also specify when the mode should automatically turn on, such as during specific times or when your phone is connected to a Bluetooth device.
Once you have adjusted the Do Not Disturb settings to your preference, you can easily toggle the mode on and off by swiping down from the top of the screen and tapping on the Do Not Disturb icon.
By utilizing the Do Not Disturb mode on your Android phone, you can have peace of mind knowing that you won’t be interrupted by unwanted calls and notifications during important moments or when you simply need some uninterrupted time.
Conclusion
In conclusion, being able to turn on the ringer on your Android phone is a basic yet essential function that can greatly enhance your user experience. By following the simple steps outlined in this article, you can ensure that you never miss an important call or notification again. Remember to check your volume settings, adjust your ringtone, and make sure your phone is not in silent or do not disturb mode. With just a few taps and clicks, you can have your ringer up and running, ready to alert you to any incoming calls or messages. So go ahead, try it out, and enjoy the convenience of always being connected on your Android phone!
FAQs
1. How do I turn on the ringer on my Android phone?
To turn on the ringer on your Android phone, follow these steps:
- Open the “Settings” app on your phone
- Select “Sounds & Vibration” or “Sound” (depending on your phone model)
- Look for the “Ringtone” or “Ring volume” option
- Adjust the slider to increase the volume or select a specific ringtone
- Once you’ve made your desired changes, exit the settings and your ringer will be turned on.
2. Why is my Android phone not ringing?
There could be several reasons why your Android phone is not ringing. Here are a few things to check:
- Ensure that the ringer is not set to silent or vibration mode. Double-check the volume settings and make sure the volume is turned up.
- Check if the ringtone you’ve selected is not set to a low volume or muted.
- Verify that the “Do Not Disturb” mode is turned off. This mode can silence incoming calls and notifications.
- Ensure that you haven’t accidentally blocked the contact or number you’re expecting a call from.
- If none of these solutions fix the problem, try restarting your phone or performing a factory reset if necessary.
3. Can I customize my ringtone on an Android phone?
Yes, you can customize your ringtone on an Android phone. Most Android devices allow you to choose from a variety of built-in ringtones or to use your own custom ringtone. Here’s how:
- Open the “Settings” app on your phone
- Select “Sounds & Vibration” or “Sound”
- Tap on “Ringtone” or “Phone ringtone”
- You will be presented with a list of pre-installed ringtones
- If you want to use a custom ringtone, select “Add ringtone” or “Choose a song”
- From there, you can select a ringtone from your phone’s storage or use a music app to choose a specific song as your ringtone.
4. How can I make my Android phone vibrate instead of ringing?
If you prefer your Android phone to vibrate instead of ringing, follow these steps:
- Go to the “Settings” app
- Select “Sounds & Vibration” or “Sound”
- Look for the “Vibration” or “Vibrate” option
- Toggle the switch to enable vibration
- You can further customize the vibration settings by selecting “Vibration pattern” or “Customize”
- Exit the settings, and your phone will now vibrate instead of ringing for incoming calls.
5. Is it possible to schedule the ringer on an Android phone?
Yes, it is possible to schedule the ringer on an Android phone using the “Do Not Disturb” feature. Follow these steps:
- Open the “Settings” app
- Select “Sounds & Vibration” or “Sound”
- Tap on “Do Not Disturb” or “Interruptions”
- Choose the scheduling option that best suits your needs, such as “Total silence,” “Alarms only,” or “Priority only”
- Set the start and end time for the scheduled ringer
- You can also customize additional settings like allowing calls from specific contacts or repeated calls
- Once the scheduling is set, the ringer on your Android phone will automatically adjust according to your preferences.