
If you've ever wanted to transfer your iPhone photos to your PC for safekeeping, sharing, or editing, you're in the right place. Viewing iPhone photos on a PC can be a seamless process, and in this article, we'll explore the various methods to achieve this. Whether you're using a Windows or Mac computer, we've got you covered. From using a USB cable to wireless solutions, you'll learn the most effective ways to access and manage your cherished memories captured on your iPhone. Let's dive in and uncover the best ways to view your iPhone photos on your PC. Whether you're a photography enthusiast or simply looking to free up space on your device, we'll guide you through the process with ease and efficiency.
Inside This Article
- Importing Photos from iPhone to PC
- Using Windows Photos App
- Using File Explorer
- Using iCloud for Windows
- Conclusion
- FAQs
Importing Photos from iPhone to PC
Transferring photos from your iPhone to your PC can be a straightforward process that allows you to store and organize your precious memories on your computer. Whether you want to free up space on your iPhone or simply have a backup of your photos on your PC, there are several methods to accomplish this task.
One of the most common ways to import photos from your iPhone to your PC is by using the Windows Photos app. This built-in application allows for seamless photo transfer and organization, making it convenient for users to manage their photo libraries.
Alternatively, you can utilize the File Explorer feature on your PC to import photos from your iPhone. By connecting your iPhone to your computer using a USB cable, you can access your device through File Explorer and easily copy and paste your photos into a designated folder on your PC.
If you prefer a cloud-based solution, you can make use of iCloud for Windows to sync your iPhone photos with your computer. This method allows for automatic photo syncing, ensuring that your PC stays up to date with the latest photos from your iPhone.
Each of these methods offers a convenient way to import photos from your iPhone to your PC, providing you with the flexibility to choose the approach that best suits your preferences and workflow.
Using Windows Photos App
Windows Photos app is a versatile tool for managing and viewing photos on your PC. It offers a seamless way to import and organize your iPhone photos. Here’s how to use the Windows Photos app to view your iPhone photos on your PC.
To get started, connect your iPhone to your PC using a USB cable. Once connected, unlock your iPhone and tap “Trust” on the prompt that appears on your iPhone screen to establish a connection between the two devices.
Next, open the Windows Photos app on your PC. The app will automatically detect your iPhone and prompt you to import photos and videos. Click on the “Import” button to start transferring your iPhone photos to your PC.
After the import process is complete, you can easily view and organize your iPhone photos within the Windows Photos app. You can create albums, edit photos, and share them with friends and family directly from the app.
The Windows Photos app also offers basic editing tools, allowing you to enhance your photos without the need for third-party software. You can adjust brightness, crop images, apply filters, and make other enhancements to your iPhone photos right within the app.
Additionally, the Windows Photos app seamlessly integrates with other Microsoft services, such as OneDrive, allowing you to sync your iPhone photos across your devices and access them from anywhere with an internet connection.
Using File Explorer
Another method to view iPhone photos on your PC is by using File Explorer. This method allows you to access your iPhone’s photos as if it were a regular digital camera or storage device.
To begin, connect your iPhone to your PC using a USB cable. Once connected, unlock your iPhone and tap “Trust” on the prompt that appears on your iPhone screen to establish a connection between the two devices.
Next, open File Explorer on your PC and locate your iPhone under “This PC” or “My Computer.” Click on your iPhone to access its internal storage.
Within your iPhone’s storage, navigate to the “DCIM” folder, which contains the photos and videos captured using your iPhone. You can then browse through the folders to view and copy the photos to your PC’s local storage.
Once you have located the desired photos, you can simply copy and paste them to a folder on your PC or directly view them from your iPhone’s storage within File Explorer.
Using File Explorer provides a straightforward way to access and view your iPhone photos on your PC without the need for additional software or applications.
**
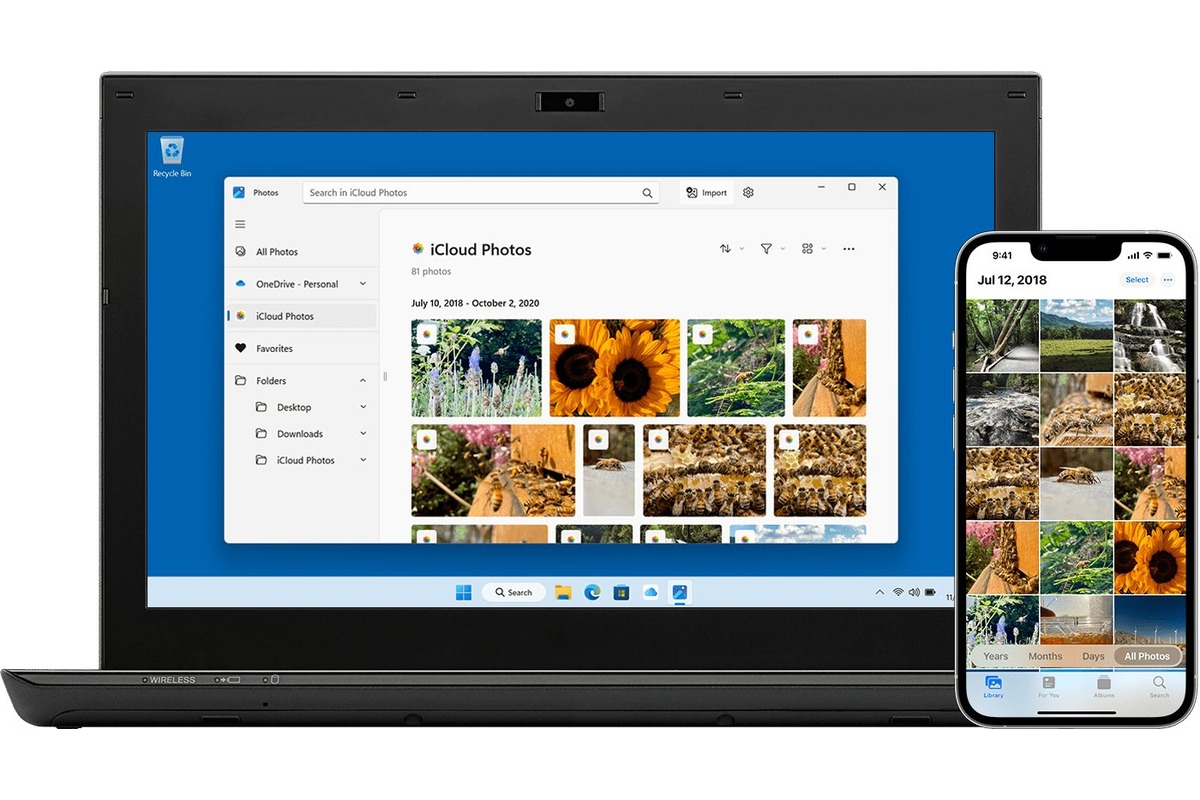
Using iCloud for Windows
**
Another way to view iPhone photos on your PC is by using iCloud for Windows. iCloud allows you to access your photos, videos, and other content across all your devices, including your PC. Here’s how to set it up:
First, download and install the iCloud for Windows app from the Microsoft Store. Once installed, open the app and sign in with your Apple ID. Ensure that the “Photos” option is selected to sync your iPhone photos to your PC.
After setting up iCloud for Windows, you can access your iPhone photos by opening the File Explorer and navigating to the iCloud Photos folder. Here, you’ll find all your synced photos and videos, organized by date and location.
Using iCloud for Windows provides a convenient way to access your iPhone photos on your PC without having to connect your device physically. It also ensures that your photos are automatically synced across all your devices, providing seamless access to your entire photo library.
Conclusion
Being able to view iPhone photos on a PC opens up a world of convenience and flexibility. Whether you prefer using a USB cable, iCloud, or third-party software, there are various methods to seamlessly transfer and access your cherished memories. By following the steps outlined in this guide, you can effortlessly view, manage, and share your iPhone photos on your PC. Remember to choose the method that best suits your needs and preferences, ensuring a smooth and efficient experience. Embracing these techniques empowers you to enjoy your photos across different devices, making it easier than ever to relive and showcase your special moments.
FAQs
**Q: Can I transfer photos from my iPhone to my PC without using iTunes?**
A: Yes, you can transfer photos from your iPhone to your PC without using iTunes. There are several methods to achieve this, including using iCloud, a USB cable, or third-party apps.
Q: Do I need to install additional software to view iPhone photos on my PC?
A: In most cases, you don't need to install additional software to view iPhone photos on your PC. The built-in Photos app on Windows and the Image Capture app on Mac allow you to access and view iPhone photos without the need for extra software.
Q: Can I transfer both photos and videos from my iPhone to my PC?
A: Yes, you can transfer both photos and videos from your iPhone to your PC. The methods for transferring videos are similar to those for transferring photos, and most of the built-in and third-party solutions support transferring both media types.
Q: Are there any wireless methods to transfer iPhone photos to a PC?
A: Yes, there are wireless methods to transfer iPhone photos to a PC. Using iCloud, AirDrop, or third-party wireless transfer apps, you can transfer photos from your iPhone to your PC without the need for a physical connection.
Q: What should I do if my iPhone photos don't appear on my PC after the transfer?
A: If your iPhone photos don't appear on your PC after the transfer, you can try restarting both your iPhone and your PC, ensuring that you've followed the transfer instructions correctly, and checking for any software updates that may be needed for compatibility.