
Are you tired of fumbling through your wallet or purse, searching for the right credit card or cash to make a payment? With the advent of mobile payment options like Apple Pay, those days may finally be behind us. Apple Pay is a digital wallet that allows users to make secure and convenient purchases using their iPhone, Apple Watch, or other Apple devices. In this article, we will explore how Apple Pay works and provide you with the necessary steps to start using it. Whether you’re a seasoned iPhone user or new to the world of mobile payments, this guide will help you understand the benefits of Apple Pay and how to get started with this innovative payment method.
Inside This Article
- How Apple Pay Works
- Setting Up Apple Pay on Your iPhone
- Adding Credit or Debit Cards to Apple Pay
- Making Payments with Apple Pay
- Conclusion
- FAQs
How Apple Pay Works
Apple Pay has revolutionized the way we make payments, transforming our iPhones into virtual wallets. But have you ever wondered how exactly Apple Pay works? Let’s dive into the fascinating world of this convenient and secure payment system.
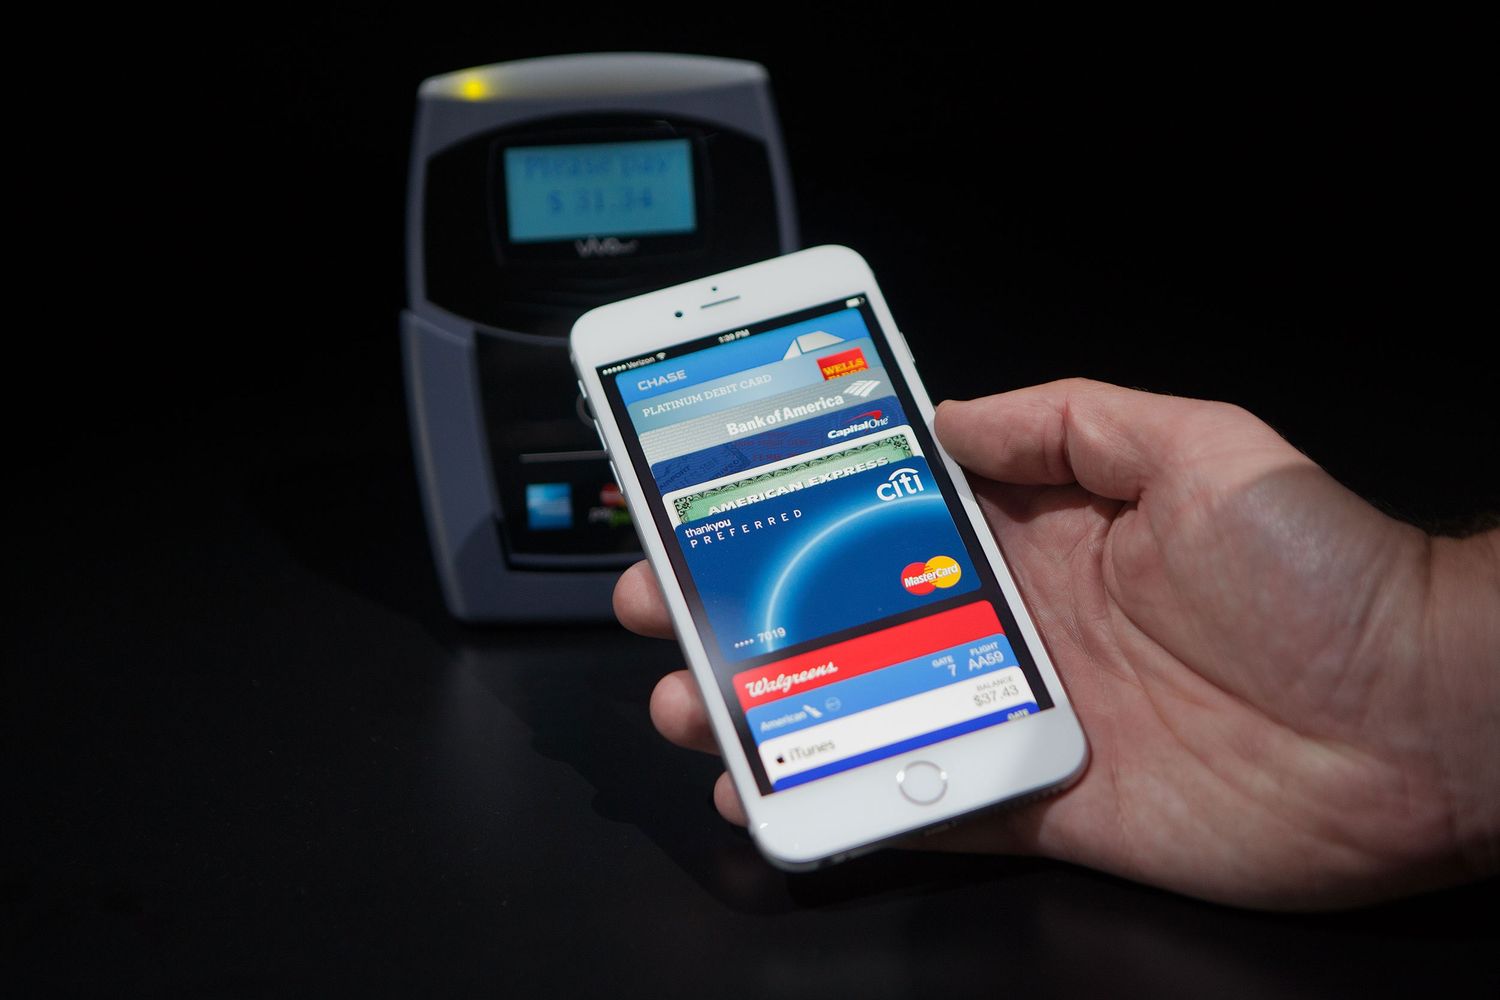
At its core, Apple Pay utilizes a technology called Near Field Communication (NFC). This technology allows your iPhone to communicate with contactless payment terminals, enabling seamless transactions without the need for physical credit cards.
When you’re ready to make a purchase, simply hold your iPhone near the payment terminal and authenticate using Touch ID or Face ID. The NFC chip in your device securely transmits the necessary payment information to the terminal, including your encrypted card details and a unique transaction identifier.
One of the key features of Apple Pay is its integration with the Wallet app. This app securely stores your credit and debit cards, as well as other payment methods like gift cards and loyalty cards. When you add a card to Apple Pay, it is encrypted and sent to the secure element on your iPhone, ensuring that your sensitive information is never stored or shared with merchants.
Another important aspect of Apple Pay is tokenization. This security measure replaces your actual card details with a unique token, making it virtually impossible for hackers to access your sensitive information. Additionally, each transaction is authenticated with a one-time dynamic security code, further enhancing the security of your payments.
Furthermore, Apple Pay supports a technology called “Device Account Number” or DAN. This feature assigns a unique number to each card you add to Apple Pay, so even if your device is compromised, your actual card details remain protected.
Apple Pay is not only convenient and secure but also incredibly versatile. It can be used to make payments not only at physical stores but also within apps and on websites that support Apple Pay. This ensures a seamless and consistent payment experience across various platforms.
Moreover, Apple Pay works with a wide range of credit and debit cards from major financial institutions. Simply add your card to the Wallet app, and you can start using Apple Pay wherever it is accepted.
Setting Up Apple Pay on Your iPhone
Apple Pay has revolutionized the way we make payments, offering convenient and secure transactions with just a tap of your iPhone. If you’re ready to set up Apple Pay on your iPhone, here’s how you can get started:
Step 1: Check Device Compatibility
Before diving into the setup process, ensure that your iPhone is compatible with Apple Pay. Apple Pay is available on iPhone SE, iPhone 6 or later models, and requires iOS 8.1 or later. If your device meets the requirements, you’re good to go!
Step 2: Enable Wallet & Apple Pay
Open the “Settings” app on your iPhone and scroll down until you find “Wallet & Apple Pay.” Tap on it to access the settings. Here, you’ll see options to set up your default card, add cards, and toggle features like Double-Click Side Button and Allow Access When Locked.
Step 3: Add Cards
To add a card, tap on the “Add Card” option. You can choose to either add your card manually by entering the card details or use the camera on your iPhone to capture the card information automatically. Follow the on-screen prompts to complete the card verification process.
Step 4: Set Up Default Card
If you have multiple cards added to your Apple Pay, you can set a default card for quick and easy payments. Simply select the card you want as your default and tap on “Set as Default Card.” This card will be automatically used when making payments unless you choose another card at the time of the transaction.
Step 5: Verify Cards
Depending on your bank or card issuer, additional verification steps may be required. This can include entering a one-time passcode, receiving a code via SMS, or contacting the bank directly to verify the card. Follow the instructions provided and complete the verification process.
Step 6: Enjoy the Convenience of Apple Pay
Once you have set up Apple Pay on your iPhone and added your cards, you’re ready to make payments with just a touch or a glance. Simply hold your iPhone near a contactless payment terminal, authenticate using Face ID, Touch ID, or your device passcode, and the payment will be processed swiftly and securely.
Now that you know how to set up Apple Pay on your iPhone, you can experience the convenience of making payments with just a tap, while ensuring the security of your personal and financial information.
Adding Credit or Debit Cards to Apple Pay
Apple Pay is a convenient and secure way to make payments using your iPhone. By adding your credit or debit cards to Apple Pay, you can easily make purchases in stores, online, or within apps. Here’s how you can add your cards to Apple Pay:
1. Open the Wallet app on your iPhone.
2. Tap the “+” (plus) sign to add a new card.
3. You’ll be presented with two options: “Credit or Debit Card” and “Apple Card.” Select “Credit or Debit Card.”
4. If you have a physical card, you can choose to use the camera to capture its details. Alternatively, you can enter the card information manually.
5. Follow the on-screen prompts to provide the necessary details, such as the card number, expiration date, and security code.
6. Once you’ve entered the information, your card issuer will verify it. This usually happens instantly, but in some cases, you may need to contact your bank for further verification.
7. After your card is verified, it will be added to Apple Pay. You can repeat this process for multiple cards.
8. If your card issuer supports it, you may be prompted to set up additional security features, such as Touch ID or Face ID authentication.
9. Finally, you’ll receive a notification confirming that your card is ready to use with Apple Pay.
With your credit or debit cards added to Apple Pay, you can now enjoy the convenience of making contactless payments using just your iPhone. Whether you’re shopping in-store or online, Apple Pay offers a seamless and secure payment experience.
Making Payments with Apple Pay
Once you have set up Apple Pay and added your credit or debit cards, making payments with Apple Pay becomes a breeze. Whether you’re shopping in-store, online, or within apps, Apple Pay offers a convenient and secure way to complete your transactions.
Here’s how you can use Apple Pay to make payments:
- In-Store: To make a payment at a physical store, simply look for the contactless payment symbol at the payment terminal. Hold your iPhone near the terminal and authenticate your payment using Face ID, Touch ID, or your device passcode. Once authenticated, the payment will be processed, and you’ll receive confirmation of your transaction.
- Online: When shopping online, select Apple Pay as your payment method during checkout. Ensure your iPhone or iPad is nearby, and follow the prompts to confirm the payment using Face ID, Touch ID, or your device passcode. Apple Pay securely stores your card details, so you won’t need to manually enter them for each transaction.
- Within apps: Many apps now offer the convenience of Apple Pay for in-app purchases. Look for the Apple Pay option during checkout, and follow the same authentication steps as mentioned above to complete your payment swiftly and securely.
Apple Pay simplifies the payment process by eliminating the need for physical cards or entering sensitive card details repeatedly. Additionally, it adds an extra layer of security by using tokenization, which replaces your actual card number with a unique identifier. This ensures that your card information remains secure and is not shared with merchants.
Furthermore, Apple Pay also works seamlessly with Apple Wallet, allowing you to keep track of your transactions and view your payment history all in one place.
Remember, Apple Pay is compatible with a wide range of establishments, including restaurants, supermarkets, retail stores, and more. Look out for the Apple Pay logo and start embracing the convenience and security it offers for your everyday purchases.
Overall, Apple Pay has revolutionized the way we make payments using our cell phones. With its seamless integration and advanced security features, it offers a convenient and secure way to make transactions. Whether you’re shopping in stores, online, or in apps, Apple Pay provides a quick and hassle-free payment experience.
By using Near Field Communication technology and tokenization, Apple Pay ensures that your financial information remains encrypted and protected. With the added layer of biometric authentication, such as Touch ID or Face ID, it offers an extra level of security that traditional payment methods may lack.
Furthermore, Apple Pay has gained widespread acceptance globally, making it widely available across various merchants and service providers. As more businesses embrace this technology, it is expected to become even more prevalent and convenient for users worldwide.
So, if you’re ready to simplify your payment experience and enjoy the benefits of enhanced security, consider setting up Apple Pay on your iPhone or Apple device. With just a few simple steps, you can start tapping and paying with ease!
FAQs
1. What is Apple Pay?
Answer: Apple Pay is a mobile payment and digital wallet service developed by Apple. It allows users to make payments for goods and services using their Apple devices, such as iPhone, iPad, Apple Watch, or Mac.
2. How does Apple Pay work?
Answer: Apple Pay uses Near Field Communication (NFC) technology to enable contactless payments. When a user wants to make a payment, they simply hold their device near a compatible payment terminal and authenticate the transaction with Touch ID, Face ID, or a passcode. Apple Pay also securely stores the user’s credit or debit card information, which is tokenized for added security.
3. Can I use Apple Pay with any merchant?
Answer: Apple Pay is widely accepted by a growing number of merchants, both online and in-store. It can be used at any NFC-enabled payment terminal or with participating apps and websites. However, it’s always good to check with the merchant beforehand to ensure they accept Apple Pay.
4. Can I add multiple cards to Apple Pay?
Answer: Yes, you can add multiple credit or debit cards to Apple Pay. The Wallet app on your Apple device allows you to add and manage various payment cards. You can then choose a default card and easily switch between cards when making a payment.
5. Is Apple Pay secure?
Answer: Yes, Apple Pay is considered to be highly secure. It incorporates several layers of security, including tokenization, encryption, and device authentication. When making a payment, your actual card details are never shared with the merchant, reducing the risk of fraud. Additionally, biometric authentication methods, such as Touch ID or Face ID, add an extra layer of protection to your transactions.