
Are you eager to make your iPhone 14 experience even more seamless and convenient? Look no further than Apple Pay! This innovative payment solution allows you to make secure transactions right from your iPhone 14. With Apple Pay, you can say goodbye to fumbling with your wallet or digging for loose change. Whether you’re buying groceries, grabbing a cup of coffee, or treating yourself to a new pair of shoes, Apple Pay simplifies the payment process with just a tap of your device. In this article, we will guide you through the steps of setting up and using Apple Pay on your iPhone 14, ensuring that you can seamlessly make purchases with ease and confidence. So, let’s dive in and explore the world of Apple Pay on your new iPhone 14!
Inside This Article
- Setting up Apple Pay on iPhone 14
- Adding and managing payment methods
- Making payments with Apple Pay
- Using Apple Pay securely in iPhone 14
- Conclusion
- FAQs
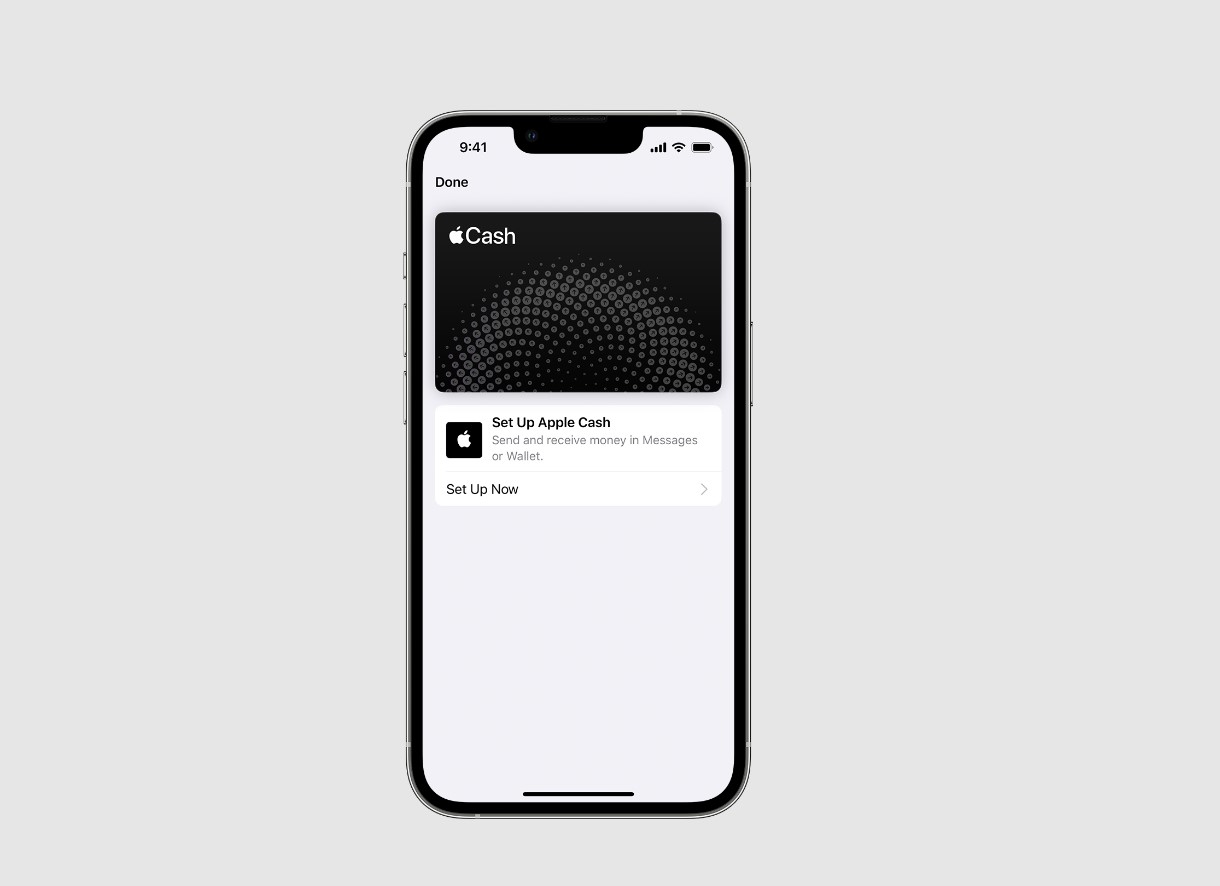
Setting up Apple Pay on iPhone 14
Apple Pay is a convenient and secure way to make payments using your iPhone 14. Setting up Apple Pay on your device is quick and easy. Follow these simple steps to get started:
1. Open the Wallet app on your iPhone 14. It’s a pre-installed app that comes with your device. If you can’t find it, simply swipe right from your home screen and type “Wallet” in the search bar.
2. Tap on the “+” icon in the top-right corner of the screen to add a new card. You’ll be presented with various options, including credit or debit cards from participating banks, rewards cards, and even transit cards in some regions.
3. Select the type of card you want to add. If you’re adding a credit or debit card, you can choose to input the card details manually or use your iPhone’s camera to scan the card information. Ensure that the card belongs to you and is supported by Apple Pay.
4. Follow the on-screen prompts to verify your card. This may involve entering security codes, receiving verification codes via text message or email, or contacting your bank for authentication. Apple Pay ensures that your information is encrypted and kept secure throughout this process.
5. Once your card is verified, you can start using Apple Pay. It will be added to your Wallet app, and you can access it by double-clicking the side button on your iPhone 14 or by double-clicking the home button for older models.
6. To complete the setup process, you may need to enable Face ID or Touch ID, depending on the model of your iPhone 14. This adds an extra layer of security, ensuring that only you can authorize payments.
That’s it! You’ve successfully set up Apple Pay on your iPhone 14. You can now use your device to make secure and convenient payments with just a tap of your finger or a glance of your face.
Adding and managing payment methods
One of the key benefits of using Apple Pay on your iPhone 14 is the convenience of adding and managing your payment methods. Here’s how you can easily set it up:
1. Open the Wallet app on your iPhone 14.
2. If you already have a card associated with your Apple ID, it will be listed under “Payment Cards.” You can tap on it to continue using it for Apple Pay.
3. To add a new card, tap on the “+” symbol in the top right corner of the screen.
4. You have the option to either add a card manually or scan it using the iPhone camera. If you choose to add it manually, enter the card details, including the card number, expiration date, and security code.
5. Follow the prompts to verify the card. This may involve receiving a verification code via text message or email, depending on your bank’s verification process.
6. Once the card is verified, it will be added to your Wallet app and can be used for Apple Pay transactions.
Managing your payment methods in Apple Pay is also straightforward:
1. Open the Wallet app on your iPhone 14.
2. Tap on the card you want to manage.
3. Here, you can edit the card’s details, such as the billing address, contact information, or remove the card altogether.
4. If you have multiple cards added, you can choose your default card, which will be used by default for Apple Pay transactions unless you specify otherwise during the payment process.
5. You can also re-order the cards by tapping and dragging them in the desired order.
6. Additionally, you can enable or disable the card’s ability to make payments. This can be useful if you want to temporarily disable a card without removing it from your Wallet.
By following these simple steps, you can easily add, edit, and manage your payment methods for Apple Pay on your iPhone 14. This ensures a seamless and convenient payment experience whenever you use your device.
Making payments with Apple Pay
Apple Pay provides a convenient and secure way to make payments using your iPhone 14. Here’s how you can use Apple Pay to make seamless transactions:
1. Find a participating store: Look for the Apple Pay symbol or contactless payment signs at the store where you want to make a purchase. Many retailers, restaurants, and apps accept Apple Pay.
2. Authenticate: To pay with Apple Pay, simply double-click the side button of your iPhone 14 when your device is locked, or double-click the side button and use Face ID or enter your passcode when your device is unlocked.
3. Place your iPhone near the payment terminal: Hold your iPhone close to the contactless reader or payment terminal and wait for the transaction to process. You may also need to authenticate again using Face ID or Touch ID, depending on the store’s requirements.
4. Complete the transaction: Once your payment is approved, you’ll receive a subtle vibration or a sound notification from your iPhone. You can also see the transaction details on your device’s screen.
5. Keep your device secure: After making a payment, make sure to lock your device and keep it in a safe place. Apple Pay uses tokenization to secure your payment information and doesn’t transmit your actual card details.
6. Enjoy the convenience: With Apple Pay, you can easily make payments without needing to carry physical cards or cash. Your iPhone 14 acts as a digital wallet, allowing you to make purchases swiftly and securely.
It’s important to note that Apple Pay works not only in physical stores but also within apps and on websites that support Apple Pay. This means you can make purchases in a variety of contexts, whether you’re ordering food delivery, shopping online, or paying for a ride-share.
Pro tip: To maximize the benefits of Apple Pay, consider adding multiple payment cards to your Wallet app. This way, you can choose the card you want to use for different transactions, earning rewards or taking advantage of promotional offers available on specific cards.
As Apple Pay continues to grow in popularity, more merchants are adding support for this convenient payment method. So, next time you’re ready to make a purchase, look for the Apple Pay logo and enjoy a seamless transaction experience with your iPhone 14!
Using Apple Pay securely in iPhone 14
Apple Pay revolutionized the way we make payments, providing a convenient and secure method to complete transactions with just a tap of your iPhone 14. To ensure your financial transactions remain protected, here are some essential tips for using Apple Pay securely:
1. Protect your iPhone with a passcode or Face ID: Set up a strong passcode or enable Face ID on your iPhone 14. This extra layer of security prevents unauthorized access to your device and keeps your Apple Pay transactions secure.
2. Use two-factor authentication: Enable two-factor authentication for your Apple ID associated with Apple Pay. This adds an additional verification step when accessing your account, adding an extra level of security to your transactions.
3. Never share your passcode: Avoid sharing your iPhone passcode with anyone. This code is your primary defense against unauthorized access to your device and Apple Pay information.
4. Set up Apple Pay notifications: Stay informed about your transactions by enabling notifications for Apple Pay. You will receive instant alerts whenever a payment is made using Apple Pay on your iPhone 14, allowing you to keep track of your purchases and quickly spot any suspicious activity.
5. Regularly monitor your transaction history: Take the time to review your transaction history in the Wallet app. By doing so, you can quickly identify any unauthorized payments and report them to your financial institution.
6. Be cautious when sharing information: When making a purchase, be mindful of the information you may be sharing with the merchant. Only provide necessary details and avoid sharing additional personal information that could potentially compromise your security.
7. Use Apple Pay in trusted environments: Whenever possible, use Apple Pay in reputable and certified establishments. Avoid using Apple Pay on unfamiliar or suspicious websites and apps to minimize the risk of fraud.
8. Keep your iPhone up to date: Regularly update your iPhone 14’s operating system and the Wallet app to ensure you have the latest security patches and features that enhance the overall security of Apple Pay.
9. Activate Lost Mode for your iPhone: If your iPhone 14 is lost or stolen, immediately activate Lost Mode through the Find My app or the iCloud website. This feature disables Apple Pay on the device, preventing unauthorized transactions.
10. Enable Apple Pay’s optional security features: Apple Pay offers additional security features like Express Transit mode, which allows for contactless payments without the need to unlock your iPhone. Review these optional features and enable them according to your preferences and security needs.
By following these security practices, you can confidently use Apple Pay on your iPhone 14, knowing that your financial transactions are protected. Embrace the convenience and security of Apple Pay to streamline your payment experiences while keeping your sensitive information secure.
Conclusion
Apple Pay is a convenient and secure way to make payments on your iPhone 14. With its easy setup process and widespread acceptance, it offers a seamless payment experience for users. By simply adding your credit or debit cards to the Wallet app, you can use Apple Pay to make purchases both in-store and online.
Not only does Apple Pay keep your financial information safe, but it also eliminates the need to carry physical cards or cash. The integration of Touch ID or Face ID adds an extra layer of security, ensuring that only you can authorize transactions.
With its growing popularity and continuous expansion to more countries and retailers, Apple Pay is becoming the go-to payment method for iPhone 14 users worldwide. So, take advantage of this convenient and secure feature and start making your everyday transactions simpler and more streamlined with Apple Pay.
FAQs
1. What is Apple Pay and how does it work on iPhone 14?
Apple Pay is a digital payment service offered by Apple that allows users to make secure and convenient payments directly from their iPhone. It utilizes Near Field Communication (NFC) technology, which enables iPhones to establish a wireless connection with compatible payment terminals. Users can add their credit or debit cards to the Apple Wallet app and simply tap their iPhone 14 on the payment terminal to complete a transaction.
2. Is Apple Pay safe to use on iPhone 14?
Yes, Apple Pay is incredibly secure. When you add your cards to Apple Wallet, the actual card numbers are not stored on your device or Apple’s servers. Instead, a unique Device Account Number is assigned and encrypted on a secure chip within your iPhone called the Secure Element. When you make a payment, your Device Account Number and a dynamic security code are sent to the payment terminal, ensuring your actual card details remain private.
3. Can I use Apple Pay for online purchases with iPhone 14?
Absolutely! Apple Pay can be used for online purchases within apps and on websites that support this payment method. When making an online purchase, simply select Apple Pay as your payment option and authorize the transaction using Face ID, Touch ID, or your device passcode. This adds an extra layer of security, as your biometric data or passcode is required to complete the transaction.
4. Are there any transaction limits for using Apple Pay on iPhone 14?
Transaction limits may vary depending on the country, payment network, and the merchant you’re making a purchase from. In most cases, there are no specific transaction limits set by Apple for Apple Pay. However, individual banks or card issuers may impose their own limits for security reasons. It’s best to check with your bank or the specific merchant to determine the transaction limits for Apple Pay.
5. Can I add multiple cards to Apple Pay on iPhone 14?
Yes, iPhone 14 allows you to easily add and manage multiple credit and debit cards in the Apple Wallet app. This way, you can choose the appropriate card for each purchase without needing to carry all your physical cards with you. Additionally, you can set a default card for quick access and easily swap between cards during the payment process.