
Are you tired of the default text font on your Android device? Do you want to add a personal touch to your texts? Well, look no further! In this article, we’ll explore the exciting world of changing text fonts on Android. Whether you’re looking for a sleek and professional font or a fun and quirky one, we’ll show you how to give your device a fresh new look. From system settings to third-party apps, we’ll guide you through the various methods available to change the text font on your Android device. So, get ready to say goodbye to boring texts and hello to an exciting, customized font experience on your Android phone or tablet!
Inside This Article
- Changing the System Font on Android
- Modifying the Font in Specific Apps
- Using Third-Party Apps to Change the Font
- Applying Custom Fonts on a Rooted Android Device
- Conclusion
- FAQs
Changing the System Font on Android
Android devices are known for their customizability, and one aspect that can be easily personalized is the system font. By changing the default font on your Android device, you can give it a fresh new look and add a touch of personal style to your smartphone or tablet.
Here’s a step-by-step guide on how to change the system font on Android:
- Go to the “Settings” menu on your Android device. It is usually represented by a gear icon.
- Scroll down and find the “Display” or “Display & Brightness” option. Tap on it.
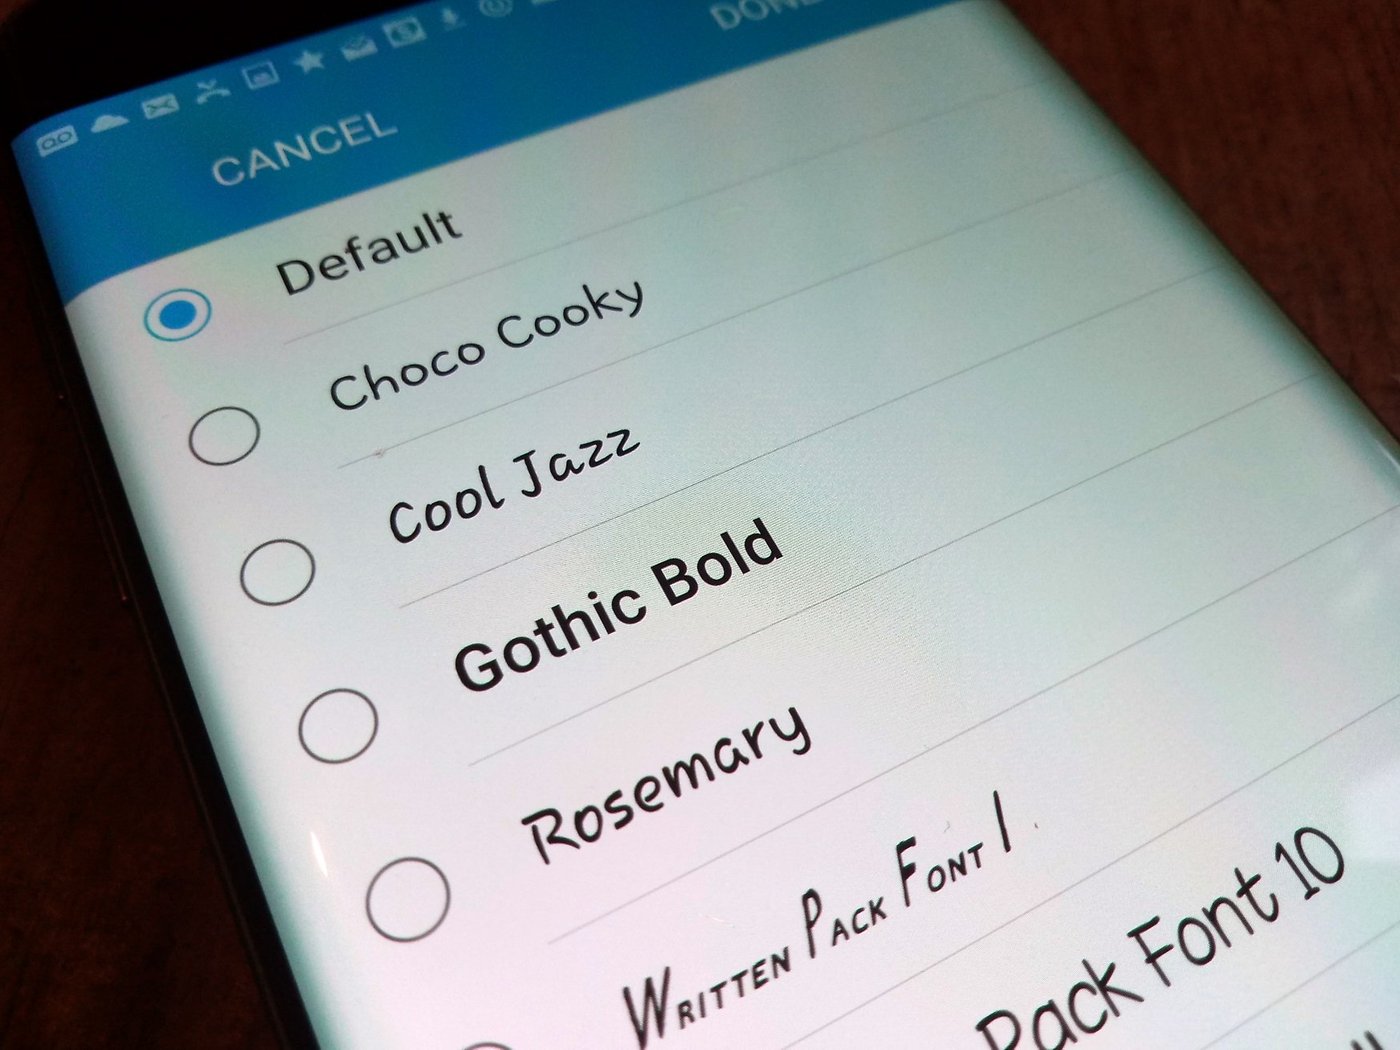
- Look for the “Font” or “Font Style” option. The exact name may vary depending on the Android version and manufacturer.
- Tap on “Font” or “Font Style” to explore the available font options.
- Select the font that you prefer from the list. Android provides a number of built-in font options.
- Once you have selected the desired font, it will be applied to your device immediately.
- To preview the changes, you can go back to the home screen or launch any app that uses text.
It’s important to note that not all Android devices offer the ability to change the system font natively. In such cases, you might need to install a third-party launcher or use rooting methods to gain access to this customization feature.
Changing the system font on your Android device is a simple yet effective way to personalize its appearance. Whether you prefer a minimalist style or a more playful look, experimenting with different fonts can completely transform the visual experience of using your Android device.
Modifying the Font in Specific Apps
If you’re not looking to change the system font on your Android device, but rather modify the font in specific apps, you’re in luck! Many apps offer customization options that allow you to change the font style within their interface. This can be a great way to personalize your experience and make certain apps more visually appealing.
To modify the font in specific apps, follow these steps:
- Open the app in which you want to change the font.
- Access the app’s Settings or Options menu.
- Look for a Font or Appearance option. The exact location of this option may vary depending on the app.
- If you find the Font or Appearance option, tap on it.
- From the list of available fonts, choose the one you prefer.
- Save your changes and exit the settings menu.
It’s important to note that not all apps have built-in font customization options. In such cases, you may need to explore third-party apps or alternative methods to achieve the desired font modifications.
Modifying the font in specific apps is a fantastic way to personalize your Android device and enhance your overall experience. Whether you want to change the font in your messaging app or give your favorite social media app a fresh new look, exploring these customization options can bring a whole new level of creativity to your device.
Using Third-Party Apps to Change the Font
If you’re not satisfied with the default font options available on your Android device, you can explore the wide variety of third-party apps that allow you to change the font system-wide or even within specific apps. These apps offer a vast collection of fonts to choose from, giving you the freedom to customize your device’s look and feel to match your personal style.
One popular app for changing fonts on Android is “GO Launcher EX.” This app not only offers an extensive collection of fonts but also provides a user-friendly interface for easy customization. Once you’ve installed the app, navigate to its font settings and select your preferred font from the available options. After making the selection, your entire device’s system font will be changed to the font you chose.
Another top-rated app for font customization is “iFont.” With this app, you can choose from a vast library of fonts and apply them to your Android device. iFont also allows you to preview the font before applying it, ensuring that you find the perfect fit for your device.
Font Changer is another popular option, offering a wide range of fonts and the ability to change the font not just system-wide, but also for individual apps. This allows you to have a unique font for specific applications, adding a personalized touch to your Android experience.
Once you’ve selected a third-party app to change your font, simply follow the app’s instructions to install and apply the new font. Remember, these apps require certain permissions to modify system settings, so make sure to review the permissions and trust only reputable apps from the Google Play Store.
Another point to keep in mind when using third-party font apps is the compatibility with your device and Android version. Some fonts may not be compatible with specific devices or versions, which could result in unpredictable results or the font not displaying correctly. It’s always a good idea to check user reviews and consult the app developer’s documentation to ensure compatibility.
Applying Custom Fonts on a Rooted Android Device
If you have a rooted Android device, you have even more flexibility when it comes to changing the font. Rooting your device allows you to have administrator access, which means you can make deeper system modifications, such as applying custom fonts.
Here is a step-by-step guide on how to apply custom fonts on a rooted Android device:
- Backup your device: Before proceeding with any modifications, it is essential to back up your device’s data to prevent any potential loss or damage.
- Download a custom font: Find a custom font pack that suits your preferences. Many websites offer a variety of font options to choose from. Download the font file to your device.
- Install a font manager: To apply custom fonts, you’ll need a font manager app. There are several font manager apps available on the Google Play Store, such as “iFont” or “FontFix.” Install one of these apps on your rooted Android device.
- Grant root access: Open the font manager app and grant it root access. Since you have rooted your device, you have the necessary privileges to modify the system files.
- Select and apply the font: In the font manager app, browse through the downloaded font files and select the one you want to apply. Follow the on-screen instructions to apply the font to your Android device.
- Reboot your device: Once the font is applied, it is recommended to reboot your device to ensure the changes take effect.
It’s important to note that rooting your Android device has its risks and can void your warranty. Make sure you understand the implications and consequences before proceeding with any root-related modifications.
Applying custom fonts on a rooted Android device allows you to personalize your device even further. Whether you want a stylish and unique font for your device’s interface or for specific apps, custom fonts can enhance the overall aesthetic appeal of your Android experience.
Remember to explore different options and experiment with various fonts to find the perfect fit for your device. Have fun customizing your rooted Android device with the limitless possibilities of custom fonts!
Conclusion
In conclusion, changing the text font on your Android device can be a fun and creative way to personalize your smartphone or tablet. Whether you prefer a bold and eye-catching font or a more elegant and minimalist style, Android offers various options to suit your preferences. By following the steps outlined in this article, you can easily change the text font on your Android device and give it a fresh new look.
Remember to choose fonts that are easy to read and maintain good legibility, especially for longer periods of use. Experiment with different fonts and find the one that not only looks visually appealing but also enhances your overall mobile experience. Keep in mind that some fonts may require additional installation or may not be compatible with all apps or systems.
So go ahead, explore the vast world of fonts, and make your Android device truly reflect your personal style!
FAQs
1. Can I change the text font on my Android device?
Absolutely! Android devices offer built-in options to change the text font, allowing you to personalize the look and feel of your device.
2. How do I change the text font on my Android device?
To change the text font on your Android device, go to the “Settings” menu and look for the “Display” or “Accessibility” section. Within these settings, you will find an option to adjust the font style. Tap on it, and you will be presented with a list of available fonts to choose from.
3. Are there additional font options available for Android?
Yes, in addition to the default fonts provided by your Android device, you can also download and install custom fonts from various sources, such as the Google Play Store or third-party font websites. These custom fonts can offer a wide range of unique styles to choose from.
4. Will changing the text font affect the performance of my Android device?
Changing the text font on your Android device should not have any significant impact on its performance. However, keep in mind that using custom fonts or certain font styles that are larger or more complex may slightly increase the device’s load time for displaying text.
5. Can I revert back to the default font if I don’t like the one I’ve chosen?
Yes, you can easily revert back to the default font on your Android device. Simply go back to the font settings in the “Display” or “Accessibility” section of your device’s settings and select the default font option. Once selected, the text font will be reverted back to the original one.