
In today’s fast-paced digital world, social media has become a staple in our daily lives, connecting us with friends and family, sharing memorable moments, and keeping us up to date with the latest news and trends. One of the most popular social media platforms, Facebook, has millions of active users worldwide. While Facebook can be a great way to stay connected, there may come a time when you decide to delete your Facebook account on your Android device.
Deleting your Facebook account on Android may seem like a daunting task, but fear not! In this comprehensive guide, we’ll walk you through the step-by-step process of deleting your Facebook account on your Android device. Whether you want to take a break from social media or simply remove your presence from Facebook entirely, we’ve got you covered. So, let’s dive in and learn how to delete Facebook on Android!
Inside This Article
- Point 1: Deactivating Your Facebook Account
- Point 2: Deleting Your Facebook Account Permanently
- Point 3: Removing the Facebook App from Your Android Device
- Point 4: Clearing Your Facebook Data from Your Android Device
- Conclusion
- FAQs
Point 1: Deactivating Your Facebook Account
Deactivating your Facebook account is a temporary measure that allows you to take a break from the social media platform without permanently deleting your account. This can be a useful option if you want to step away from Facebook for a while but still retain the option to reactivate your account later.
To deactivate your Facebook account on your Android device, follow these steps:
- Open the Facebook app on your Android device.
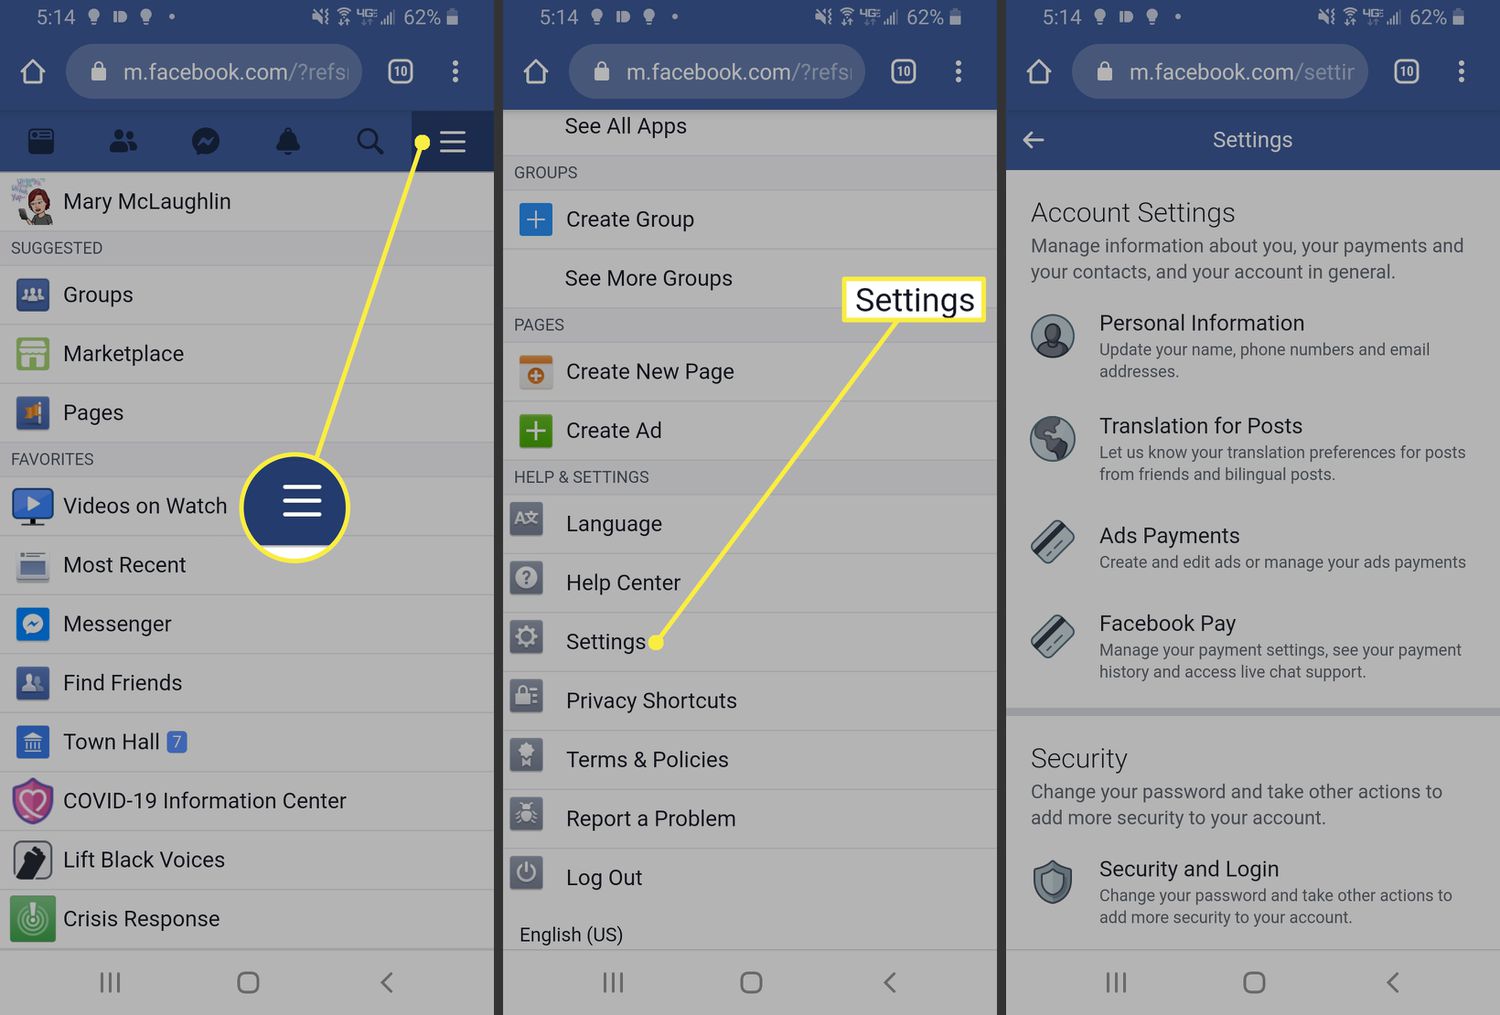
- Tap the menu icon (three horizontal lines) in the top-right corner of the screen.
- Scroll down and tap “Settings & Privacy.”
- Tap “Settings.”
- Scroll down and tap “Account Ownership and Control.”
- Tap “Deactivation and Deletion.”
- Select “Deactivate Account” and follow the prompts to confirm your decision.
Once your account is deactivated, your profile will no longer be visible to other users, and your name will be removed from most of the content you have shared. However, some information may still be visible to others, such as messages you have sent, group posts you have created, and comments you have made.
Keep in mind that deactivating your account does not completely remove it from the Facebook servers. Therefore, if you decide to reactivate your account, your profile and all your previous data will be restored as it was before deactivating.
If you don’t remember your login details and can’t access your account, you can try recovering it by following Facebook’s account recovery process.
Now that you know how to deactivate your Facebook account on Android, let’s move on to the next point: deleting your Facebook account permanently.
Point 2: Deleting Your Facebook Account Permanently
If you have decided to completely remove your Facebook account from your Android device, follow these steps:
1. Open the Facebook app on your Android device. Tap on the three horizontal lines in the top-right corner of the screen to open the menu.
2. Scroll down the menu and tap on “Settings & Privacy.”
3. In the Settings & Privacy menu, tap on “Settings.”
4. In the Settings menu, scroll down and tap on “Your Facebook Information.”
5. In the Your Facebook Information menu, tap on “Account Ownership and Control.”
6. In the Account Ownership and Control menu, tap on “Deactivation and Deletion.”
7. Under the “Delete Your Account” section, tap on “Deactivate and Delete.”
8. You will be presented with two options: “Deactivate Account” and “Delete Account.” Since we want to permanently delete the account, tap on “Delete Account.”
9. A confirmation message will appear, informing you that your account will be permanently deleted within 30 days. If you change your mind during this period, you will have the option to cancel the deletion process. Tap on “Continue to Account Deletion.”
10. You will be prompted to enter your Facebook password for security purposes. Enter your password and tap on “Continue.”
11. Finally, a message will appear, confirming that your account deletion request has been submitted. Your account will be deactivated immediately, and it will be permanently deleted after the 30-day grace period.
Keep in mind that once your Facebook account is deleted, you will no longer have access to your profile, photos, videos, messages, or any other content associated with your account. This action cannot be undone, so be sure to download any important data before proceeding with the deletion process.
Point 3: Removing the Facebook App from Your Android Device
Facebook’s mobile app has become a staple on most Android devices, but there may come a time when you want to remove it. Whether you’re looking to free up storage space, reduce distractions, or simply take a break from social media, uninstalling the Facebook app from your Android device is a straightforward process. Follow these simple steps to remove the Facebook app from your Android device:
Step 1: Locate the Facebook App
Start by locating the Facebook app on your Android device. It is usually represented by the iconic blue and white “f” logo. You can find it on your home screen, in the app drawer, or in your list of installed apps. Once you’ve found it, proceed to the next step.
Step 2: Long-Press and Drag
Long-press the Facebook app icon until a menu appears. This menu typically includes options like “Uninstall,” “App Info,” or “Remove.” Drag the Facebook app icon to the “Uninstall” or “Remove” option. This action will vary slightly depending on your Android device and the version of Android you are using.
Step 3: Confirm the Uninstallation
After dragging the Facebook app icon to the “Uninstall” or “Remove” option, a confirmation message will appear on your screen. This message will ask you to confirm your decision to uninstall the app. Tap “OK” or “Confirm” to finalize the uninstallation process.
Step 4: Clear App Data (Optional)
If you want to ensure that all your data associated with the Facebook app is removed from your device, you can also clear the app data. To do this, go to your device settings, find the “Apps” or “App Manager” section, locate the Facebook app, and tap on it. From there, you should see an option to “Clear Data” or “Storage.” Tap on it and confirm your action when prompted.
Step 5: Enjoy a Facebook-Free Device
Once you have completed these steps, the Facebook app will be successfully removed from your Android device. You can now enjoy a device that is free from the distractions and data usage associated with Facebook.
Remember, removing the Facebook app from your Android device does not delete your Facebook account. It simply removes the app from your device, and you can still access Facebook through a web browser if needed.
Now that you know how to remove the Facebook app from your Android device, you have the freedom to decide when and where to engage with the social media platform. Whether you’re taking a break, decluttering your device, or simply trying to minimize distractions, removing the Facebook app is a simple and effective solution.
Point 4: Clearing Your Facebook Data from Your Android Device
If you’ve decided to delete your Facebook account or simply want to clear your Facebook data from your Android device, it’s important to take the necessary steps to ensure that your personal information is completely removed. Here are some easy-to-follow steps to help you clear your Facebook data from your Android device:
1. Open the Settings app on your Android device. This can usually be found by swiping down from the top of your screen and tapping the gear icon or by accessing your App Drawer and locating the Settings app.
2. Scroll down and tap on “Apps” or “Applications”, depending on your device. This will take you to a list of all the apps installed on your phone or tablet.
3. Find and tap on the Facebook app in the list. It may be listed under the letter “F” or you can use the search bar at the top to quickly find it.
4. Once you’re on the Facebook app info page, tap on “Storage” or “Storage & cache” depending on your device. This will take you to a screen that shows how much storage space the app is using.
5. On the storage screen, you’ll see two options: “Clear data” and “Clear cache”. To completely remove your Facebook data, tap on “Clear data”. This will delete all the data associated with the Facebook app, including your login information, app settings, and any cached data.
6. After confirming the action, your Facebook data will be cleared from your Android device. You can now rest assured that your personal information is no longer stored on your device.
7. If you’re still seeing the Facebook app icon on your home screen or in your App Drawer, you can long-press on it and select “Uninstall” to remove the app completely from your device. This step is optional but recommended if you no longer plan on using Facebook.
By following these steps, you can effectively clear your Facebook data from your Android device and ensure that your personal information remains secure. Remember, it’s always important to take precautions when handling your personal data, especially when deleting or removing apps that may have access to sensitive information.
Conclusion
In conclusion, deleting Facebook on Android can be a straightforward process when using the official app. By following the steps outlined above, you can successfully remove Facebook from your Android device and regain your privacy or free up some storage space. Remember to consider the implications of deleting your Facebook account, as it will also remove access to Messenger and other integrated services. Additionally, keep in mind that deleting the app does not delete your Facebook account entirely. To permanently delete your account, you would need to go through a separate process on the Facebook website. Ultimately, the decision to delete Facebook or any other app on Android is a personal choice, but now you have the knowledge to take action if you wish.
FAQs
Q: Can I delete the Facebook app from my Android device?
A: Absolutely! You can easily delete the Facebook app from your Android device if you no longer wish to use it. Just follow the steps mentioned earlier in this article to uninstall the app.
Q: Will deleting the Facebook app delete my Facebook account?
A: No, deleting the Facebook app from your Android device will not delete your Facebook account. Your account will still be active and accessible through other means, such as the Facebook website or other devices where you’ve logged in.
Q: What happens to my data when I delete the Facebook app?
A: When you delete the Facebook app, it does not delete your account or your data from Facebook’s servers. Your account information, posts, photos, and other data will still remain on Facebook’s servers unless you specifically delete them or deactivate your account.
Q: Can I reinstall the Facebook app after I delete it?
A: Yes, you can reinstall the Facebook app on your Android device at any time if you change your mind. Simply go to the Google Play Store, search for the Facebook app, and reinstall it.
Q: Are there any alternative apps to Facebook for Android?
A: Yes, there are several alternative apps available for Android that allow you to connect with friends and share content. Some popular alternatives to Facebook include Instagram, Twitter, Snapchat, and LinkedIn.