
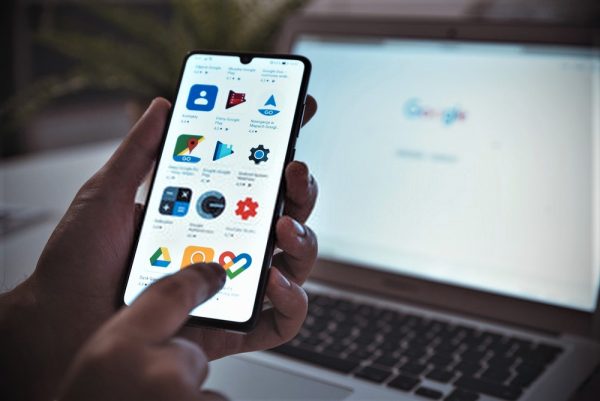
Own an Android phone? Then you’d no doubt be familiar with how frustrating it can be to move your photos and music to and from your phone and computer. Some Android phones even lack a proper file organizer, making it even harder to sort your files and keep them in order.
Luckily for you, we’ve found a number of methods you can use to perform Android file transfers. Check out what we’ve uncovered below:
Inside This Article
How to Transfer Android Files Using Google
Google is the one-stop hub for just about everything you do on your Android phone, and it’s also capable of facilitating file transfers. Its built-in cloud service (aka Google Drive) is, by far, the most convenient option you have at your fingertips.
We’ll start by first showing you how to use Google Drive to transfer basic files like music and documents, followed by Google Photos to synchronize images.
Transfer Files Using Google Drive
When you sign up for an account with Google, you’re automatically awarded 15 GB of free storage space on its cloud Drive—more than enough for basic file transfers. The Google Drive app also comes pre-installed on your phone, granting you quick and easy access from the get-go.
To get started, simply launch the Google Drive app and follow the steps below:
- Tap the add (+) button.
- Select Upload.
- Look for the files you want to transfer and tap on them.
- Wait for the files to be uploaded and you’re done.
Do note that Google Drive saves your files in the “My Drive” folder by default. You can then transfer the files to other folders within the app itself.
Transfer Photos Using Google Photos
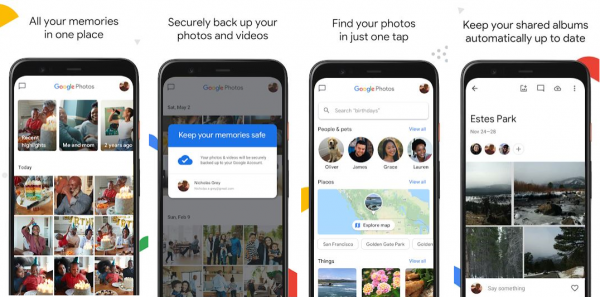
If you’re just transferring photos and videos to and from your Android phone, then Google Photos is the better option for you. Part of the official Google suite of work apps, Google Photos doubles as a gallery and a tool for syncing your images with your desktop.
You can even set the app to automatically back up and sync your images. Here’s how:
- Launch the Google Photos app.
- Sign in to your Google account.
- Tap your account profile icon on the top-right.
- Navigate to Photos settings and select Backup & sync.
- Toggle the Backup & sync option to turn on.
With this, your Android phone will back up your images to Google Photos. To perform the same setup on your computer, follow the steps below:
- Download the Backup and Sync app on your computer.
- Sign in to the same Google account you used before.
- Choose whether to backup all files, or only photos and videos.
- Select the folders you want to be backed up.
- Choose the upload size you want for media files under “Photo & video upload size.”
- Click Start.
Afterward, you can successfully back up and synchronize your photos and videos across your devices.
Also read: Little-Known Ways You Can Recover Deleted Photos on Android
How to Transfer Android Files to PC
Google isn’t a foolproof solution for file transfers—it’s possible for you to max out your storage limit on Google Drive and/or Google Photos. As an alternative, we’ll show you how to manually transfer your files from Android to your PC with a good old-fashioned USB cable.
Here’s how to do it:
- Pull out your Android phone and make sure it’s unlocked.
- Use a compatible USB cable to connect your phone to your PC.
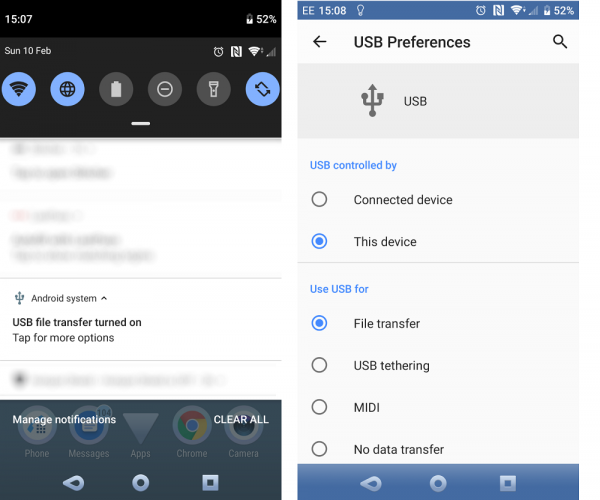
- You should receive a notification that says “Charging this device via USB.” Tap on it.
- Select File Transfer under the “Use USB for” section.
- Your Windows PC will automatically open an Android file transfer window. You can use this to drag files and transfer them between the devices.
- Afterward, make sure to eject your phone from your PC. You can do this in the lower-right corner of the taskbar. Look for an icon that resembles a USB. Right-click on it, then hit eject.
- Unplug the USB cable.
Troubleshooting PC Android File Transfer
Conducting an Android file transfer between an Android phone and a PC is pretty straightforward. However, problems may arise during the process. If this happens, you might need to do a little troubleshooting to resolve the issues. Troubleshooting isn’t as difficult as you might think, as we’ll show you below:
Check Your Computer
Check if there’s a problem with your computer. Sometimes, Windows PCs don’t automatically detect new hardware that’s plugged in. Check your settings in the Windows Settings app to make sure this isn’t the case. If it is, then adjust your settings to detect new hardware immediately.
However, if this isn’t the problem, then try restarting your computer. Afterward, try to repeat the Android file transfer process and see if it works.
Check Your Phone
If your PC isn’t the problem, then it’s time to check your phone. To troubleshoot your phone, you need to first check your Android version.
This is because sometimes there are incompatibility issues when your software isn’t updated. If it isn’t, then update your Android OS through the settings. Otherwise, try restarting your phone and repeating the Android file transfer process.
Check Your Cable
If neither your PC nor your phone is the problem, then it might be the cable you’re using. Not all USB cables have a file transfer capability, so this might be the issue.
Try using a different USB cable and see if it works for the Android file transfer. If this doesn’t work, then try using your USB to connect to a different computer, as it could be the computer port that’s the issue. You should also try connecting your computer to a different phone to see if your phone’s port is the culprit.
How to Transfer Android Files to Mac
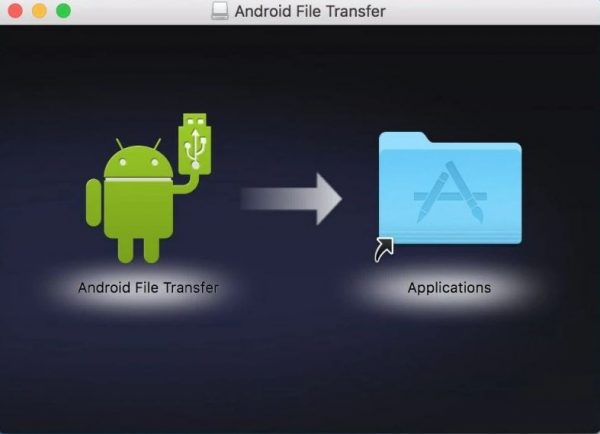
While Apple has iCloud to facilitate file transfers across all its devices, compatibility is not extended to Android. However, this doesn’t mean that you can’t transfer files from your Android phone to your Mac. There are a few workarounds you can try, but first, you’ll need four things: your Mac, your Android phone, a USB cable, and the Android File Transfer app. Here’s how to use Android File Transfer and set things up:
1. Download the Android File Transfer app on your Mac.
You have to use macOS X 10.5 or later for this to work.
2. Launch the Android File Transfer app.
After your first transfer, this app will open automatically once your phone connects.
3. Unlock your Android device. Then, connect it to the Mac using a compatible USB cable.
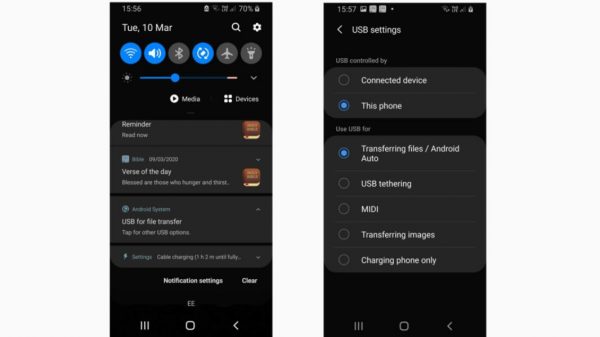
4. Your phone should get a new notification saying “Charging this device via USB”. Tap on it.
5. Afterward, select File Transfer under the “Use USB for” section.
6. Android File Transfer should open once you do this. Using the open window, drag and drop the files you want from your Android device.
7. After you’re finished, you can now unplug the USB cable.
Troubleshooting Mac Android File Transfer
Apart from needing to download a separate Android File Transfer app, the process with a Mac is fairly simple. However, there are times when problems may crop up. When this happens, it’s time to check all the possible problems and troubleshoot the issues. Here’s what you need to check:
Check Your Mac
Firstly, check your Mac and ensure you’re running macOS X 10.5 or later. Otherwise, the Android File Transfer app will not be able to run.
If you’re using an older OS, update your Mac to get it to work. If the OS isn’t the problem, make sure the Android File Transfer app is working. Check to see if it’s properly installed and is open on your Mac. Otherwise, try to restart your device and see if it helps.
Check Your Phone
Your phone could very well be the problem. Make sure you’re running the most updated version of Android so you won’t have problems. If you’re not updated, go to the Settings app and update your OS. Afterward, try the Android file transfer process again. If it doesn’t work, try restarting your Android device.
Check Your Cable
If none of the previous methods worked, check your USB cable as it might be unable to transfer files. If it’s the right kind of cable, try testing its connections.
Plug the Android device into a different computer and see if it works. If it does, try plugging the computer into a different device to check its ports. It could be a simple port problem on either device, so check it to make sure.
How to Transfer Android Files to Chromebook
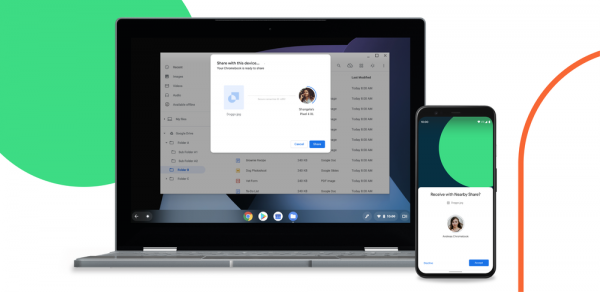
This section is for you if you’re a Chromebook user. To perform Android file transfers with your Chromebook, follow the steps below:
- Open your Android device and make sure it’s unlocked.
- Use the USB cable to connect your Chromebook to your Android device.
- Your phone should receive a new notification saying “Charging this device via USB.” Tap on it.
- Select File Transfer under the “Use USB for” section.
- Your Chromebook should detect this and open the Files app. Use the app to drag files between the Chromebook and the Android device.
- Unplug the USB cable when you’re finished.
Android File Transfers Made Easy
Transferring files between your Android device and your computer shouldn’t be difficult, and as the steps we’ve outlined above show, the process is pretty easy no matter what OS you’re running.