
The Notes app on iPhone is a powerful tool for staying organized and keeping track of tasks, ideas, and important information. One helpful feature of the Notes app is the ability to create checklists, allowing you to mark off items as they are completed. However, as your checklist grows, it can become tedious to manually sort and organize the completed items. Luckily, there is a way to automate this process and save yourself time and effort.
In this article, we will guide you through the steps to auto-sort completed checklist items in the Notes app on your iPhone. By enabling this feature, you can ensure that your completed tasks are always neatly organized, making it easier to review your progress and stay on top of your to-do list. So, let’s dive right in and discover how to streamline your note-taking experience on the iPhone.
Inside This Article
- Overview
- Method 1: Using Drag and Drop
- Method 2: Using the Share Sheet
- Method 3: Using the Markup Tool
- Method 4: Using an Automation Shortcut
- Conclusion
- FAQs
Overview
The Notes app on your iPhone is a handy tool for keeping track of your ideas, to-do lists, and other important information. One useful feature of the app is the ability to create checklists within your notes. This allows you to organize your tasks and mark them as completed as you go.
However, the default behavior of the Notes app is to keep completed checklist items at their original position within the list. This can make it difficult to quickly see which tasks are still pending. Thankfully, there are several methods you can use to automatically sort completed checklist items in the Notes app on your iPhone, making it easier to stay organized.
In this article, we will explore four different methods that allow you to automatically sort completed checklist items in the Notes app on your iPhone. These methods include using drag and drop, the share sheet, the markup tool, and an automation shortcut. Let’s dive in and discover how to streamline your note-taking experience.
Method 1: Using Drag and Drop
One of the easiest ways to auto-sort completed checklist items in the Notes app on your iPhone is by using the drag and drop gesture. This method allows you to rearrange and organize your checklist items effortlessly.
Here’s how you can use drag and drop:
- Open the Notes app on your iPhone.
- Navigate to the specific note with the checklist you want to sort.
- Scroll down to the completed checklist items section.
- Tap and hold the item you want to move.
- Drag the item to the desired position in the checklist.
- Release your finger to drop the item into its new position.
By following these steps, you can easily rearrange the completed checklist items within the Notes app to your preferred order. This feature comes in handy, especially when you want to prioritize certain tasks or group similar items together.
Please note that this method allows you to manually sort the completed checklist items. If you’re looking for an automated way to sort them, you can explore other methods discussed below.
Method 2: Using the Share Sheet
If you want to auto-sort completed checklist items in the Notes app on your iPhone, you can take advantage of the Share Sheet feature. The Share Sheet allows you to quickly share and perform actions on various items within apps.
Follow these steps to auto-sort completed checklist items using the Share Sheet:
- Open the Notes app on your iPhone.
- Locate the note containing the checklist items you want to sort.
- Tap on the note to open it.
- Scroll through the note and find the checklist items that you have marked as completed.
- Select the completed checklist items by tapping and holding on one of them. A menu will appear.
- In the menu that appears, tap on the Share button. The Share Sheet will open.
- Swipe left on the Share Sheet to reveal more options. Locate and tap on the “Sort” option. If you don’t see the “Sort” option, tap on the “More” button and enable it from the list.
- Choose the desired sorting option from the available options. You can sort by Date, Title, or manually drag and rearrange the items.
- The completed checklist items will now be automatically sorted according to your chosen criteria.
Using the Share Sheet method is a convenient way to quickly sort completed checklist items in the Notes app on your iPhone. It saves you time and ensures that your notes are well-organized and easy to navigate.
Pro tip: You can also access the Share Sheet by tapping on the ellipsis (…) button while viewing a note and selecting “Share” from the menu.
Method 3: Using the Markup Tool
If you’re looking for a convenient way to auto-sort completed checklist items in the Notes app on your iPhone, the Markup tool can come in handy. Follow the steps below to get started:
1. Open the Notes app on your iPhone and access the checklist with the completed items that you want to sort.
2. Tap on the specific checklist item that you want to mark as complete. This will open up a menu at the bottom of the screen.
3. In the menu, you will see an option called “Markup”. Tap on it to launch the Markup editor.
4. Once in the Markup editor, you can use various tools and options to annotate and edit the checklist item. We will focus on the sorting feature in this method.
5. Look for the three-dot icon (ellipsis) in the Markup editor toolbar and tap on it. This will reveal a hidden menu with additional options.
6. Among the options, you will find “Arrange”. Tap on it to access the sorting options.
7. In the “Arrange” menu, you will see three options: “Bring to Front”, “Send Backward”, and “Automatically Rearrange”. Tap on “Automatically Rearrange”.
8. After selecting “Automatically Rearrange”, the completed checklist item will be moved to the end of the list, effectively auto-sorting it with other completed items.
9. You can repeat the same process for other completed checklist items in the list to auto-sort them as well.
10. Once you’re done with sorting, tap “Done” in the top-right corner of the Markup editor to save your changes and exit.
By utilizing the Markup tool in the Notes app, you can quickly and easily auto-sort completed checklist items on your iPhone. This feature can be particularly useful if you have a long list of items and want to keep track of completed tasks. Give it a try and enjoy the convenience of automated sorting in the Notes app!
Method 4: Using an Automation Shortcut
If you want a quick and efficient way to automatically sort completed checklist items in the Notes app on your iPhone, you can take advantage of automation shortcuts. Automation shortcuts allow you to create custom workflows that can be triggered with a single tap or based on specific criteria.
To create an automation shortcut for sorting completed checklist items, follow these steps:
- Open the Shortcuts app on your iPhone. If you don’t have it installed, you can download it for free from the App Store.
- Tap on the “Automation” tab at the bottom of the screen.
- Tap on the “+” button in the top-right corner to create a new automation.
- Choose the “Create Personal Automation” option.
- Scroll down and select “App” under the “Apps” section.
- Tap on “Notes” to select it as the app for the automation.
- Under “Triggers”, choose “Is Completed” to specify the trigger for the automation.
- Tap on “Next” to move on to the next step.
- Tap on the “+” button to add an action.
- Search for “Sort List” and select the “Sort List” action from the results.
- Choose the appropriate sorting option for your checklist items.
- Tap on “Next” to continue.
- Toggle off the “Ask Before Running” option if you want the automation to run without any prompts.
- Tap on “Done” to save the automation.
Once you have created the automation shortcut, whenever you mark a checklist item as completed in the Notes app, the shortcut will automatically sort the completed items based on the chosen sorting option.
This automation shortcut can save you time and effort, especially if you frequently use the Notes app to keep track of tasks or create to-do lists. Instead of manually sorting the completed items, the shortcut takes care of it for you, ensuring that your lists remain organized and easy to navigate.
Remember, automation shortcuts can be customized and modified based on your preferences. You can explore other actions and conditions to create more advanced and personalized shortcuts that fit your specific needs.
Conclusion
In conclusion, the ability to auto-sort completed checklist items in the Notes app on your iPhone is a handy feature that can help you stay organized and easily track your progress. By using the simple steps outlined in this article, you can ensure that your completed tasks are automatically moved to the bottom of the checklist, keeping your active tasks at the top for easy access.
This feature is especially useful for individuals who rely on the Notes app for managing their daily tasks, to-do lists, and other important information. By taking advantage of the auto-sort functionality, you can streamline your workflow, save time, and maintain a clutter-free checklist.
So go ahead and make the most of this convenient feature on your iPhone. Stay organized, stay productive, and let the auto-sort feature in the Notes app do the work for you!
FAQs
1. Can I auto-sort completed checklist items in the Notes app on my iPhone?
Yes, you can! The Notes app on your iPhone has a feature that allows you to automatically sort completed checklist items. This can be helpful in organizing your notes and keeping them tidy.
2. How do I enable auto-sort for completed checklist items in the Notes app?
To enable auto-sort for completed checklist items in the Notes app, follow these steps:
- Open the Notes app on your iPhone.
- Tap on the specific note which contains the checklist.
- Tap on the three-dot menu icon in the upper-right corner of the screen.
- From the dropdown menu, select “Sort Checked Items”.
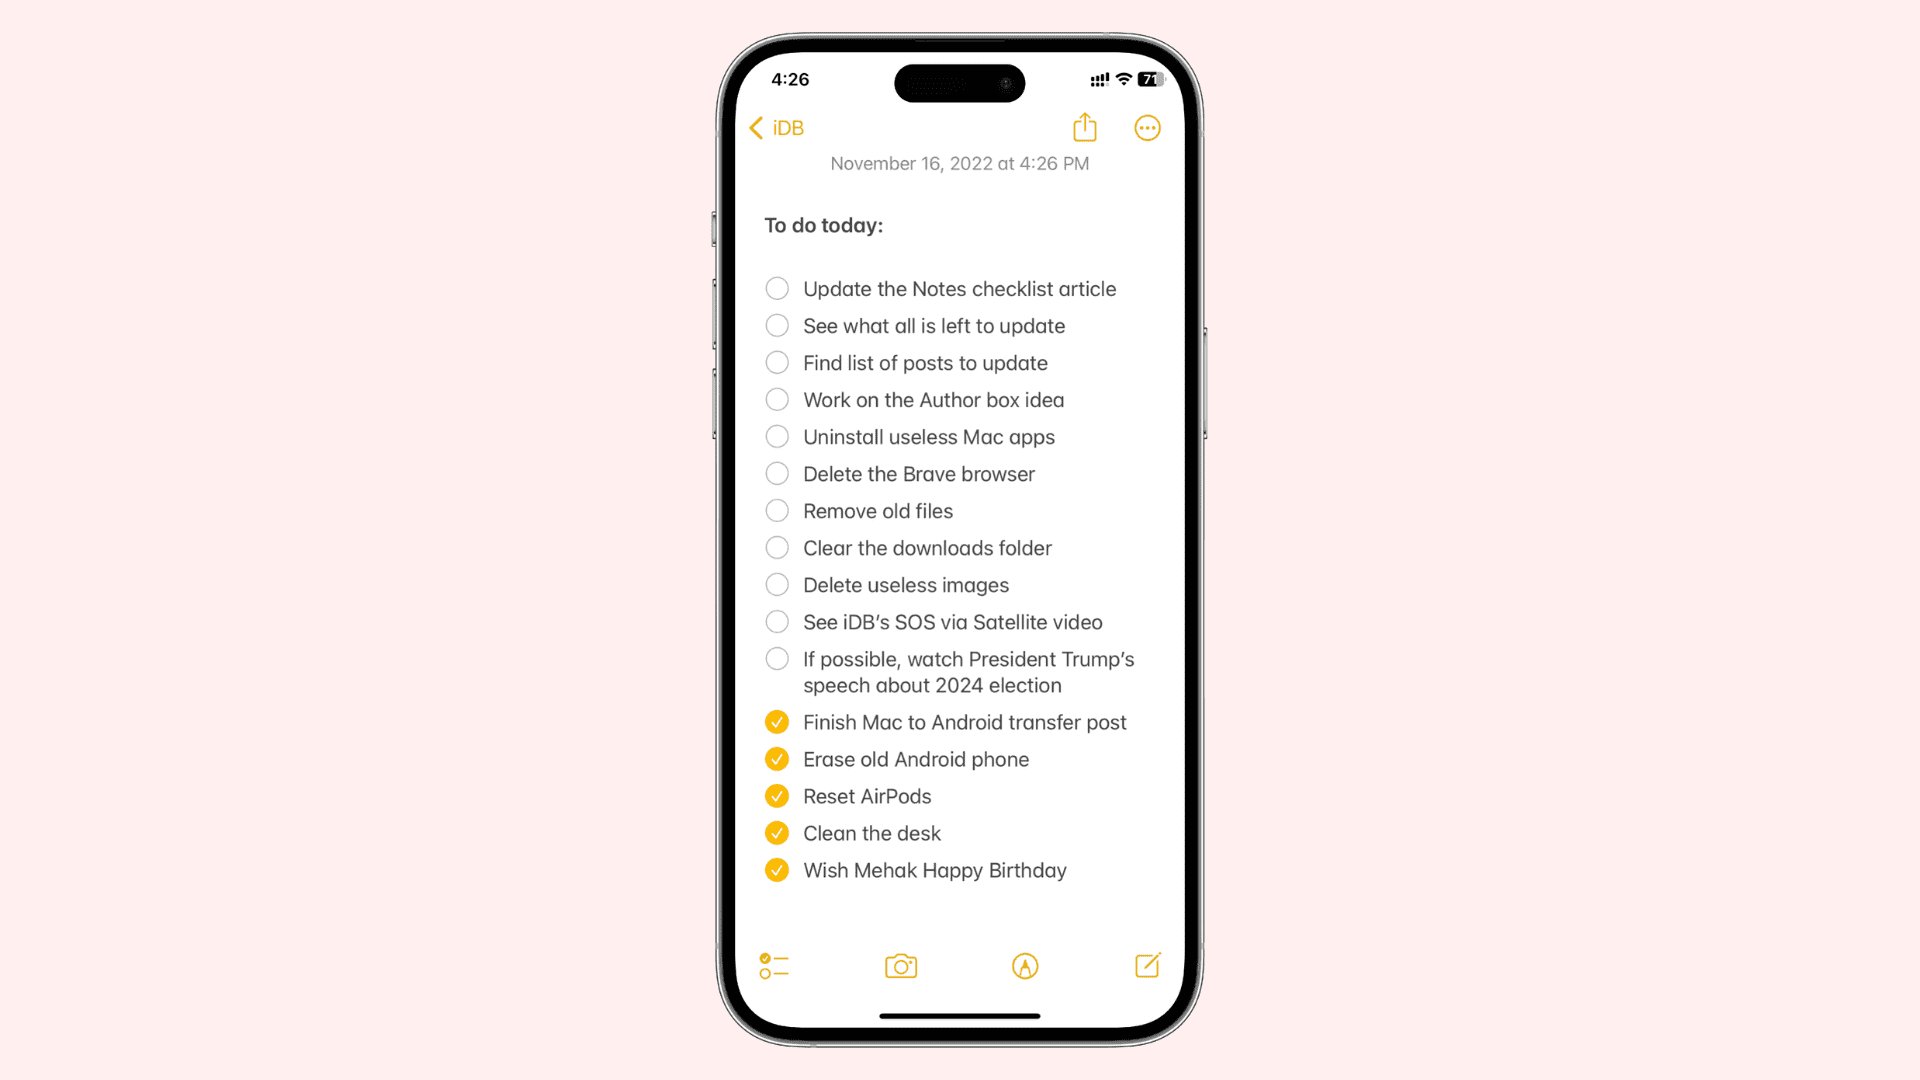
- The checklist items will now be automatically sorted, with completed items moved to the bottom of the list.
3. Can I customize the sorting order for completed checklist items?
Unfortunately, the Notes app on iPhone does not currently offer customization options for the sorting order of completed checklist items. The app automatically moves completed items to the bottom of the list, ensuring an organized and logical flow within the checklist.
4. Will enabling auto-sort affect the order of unchecked items in the checklist?
No, enabling auto-sort for completed checklist items will not affect the order of unchecked items in the checklist. The Notes app will only rearrange the completed items, placing them at the bottom of the list, while leaving the unchecked items in their original order.
5. Can I undo the auto-sorting of completed checklist items?
Unfortunately, there is no direct way to undo the auto-sorting of completed checklist items in the Notes app. However, if you manually uncheck a completed item, it will revert to its original position in the list of unchecked items.