
In today’s digital world, having a dedicated email account on your iPhone is essential for staying connected and organized. Whether you are setting up a new iPhone or simply want to create a new email account, this article will guide you through the process. With just a few simple steps, you’ll be able to set up a new email on your iPhone and start enjoying the benefits of having a dedicated email account at your fingertips. Whether it’s for personal use, work, or to keep your various email accounts separate, creating a new email on your iPhone is quick and easy. Let’s dive into the step-by-step process and get you set up with a new email account on your iPhone!
Inside This Article
- How to Access Email Settings on iPhone
- Creating a New Email Account on iPhone
- Adding Email Details and Credentials
- Configuring Email Settings and Preferences
- Conclusion
- FAQs
How to Access Email Settings on iPhone
Accessing email settings on your iPhone is a straightforward process that allows you to customize and manage your email accounts. Whether you want to add a new email account, change server settings, or simply explore the various options available, accessing email settings is an essential task. In this guide, we will walk you through the steps on how to access email settings on your iPhone.
To begin, open the Settings app on your iPhone. It can be easily located on your home screen, represented by the gear icon. Tap on the Settings app to launch it.
Once you have opened the Settings app, scroll down and look for the “Mail” option. It is typically located in the fifth section, following “Safari” and “News.” Tap on the “Mail” option to proceed.
In the Mail settings, you will find a list of all the email accounts that are currently configured on your iPhone. Each account will be listed under the “Accounts” section. Tap on the specific email account you want to access the settings for.
After selecting the email account, you will be presented with a screen that displays the general settings and preferences for that account. Here, you can modify various aspects such as the account name, email address, password, and description.
If you want to make changes to the server settings, such as incoming and outgoing mail server information, tap on the “Account” option at the top of the screen. This will take you to a new screen where you can configure advanced settings, including server details, SSL settings, and port numbers.
Additionally, the Mail settings also provide options to manage notifications, customize email signature, adjust mailbox behavior, and enable or disable certain features like VIP and threaded conversations. Simply navigate through the different sections and toggle the switches to suit your preferences.
Once you have made the desired changes, you can simply exit the settings and your new email settings will be saved. You can now enjoy an enhanced email experience with customized settings on your iPhone.
Accessing email settings on your iPhone is a straightforward process that allows you to modify and personalize your accounts according to your needs. Whether you need to add a new email account, configure server settings, or customize your mailbox behavior, understanding how to access these settings is essential for optimizing your email experience on your iPhone.
Creating a New Email Account on iPhone
Setting up a new email account on your iPhone allows you to stay connected and organized while on the go. Whether you want to set up a personal or work email account, the process is simple and can be done in just a few steps. Follow the instructions below to create a new email account on your iPhone.
1. Launch the Settings app on your iPhone and scroll down until you find the option for “Mail.”
2. Tap on “Mail” and then select “Accounts.” This will bring up a list of all the email accounts that are currently set up on your iPhone.
3. At the bottom of the screen, tap on “Add Account.” This will display a list of popular email providers such as Google, iCloud, and Yahoo, or you can choose “Other” for custom email accounts.
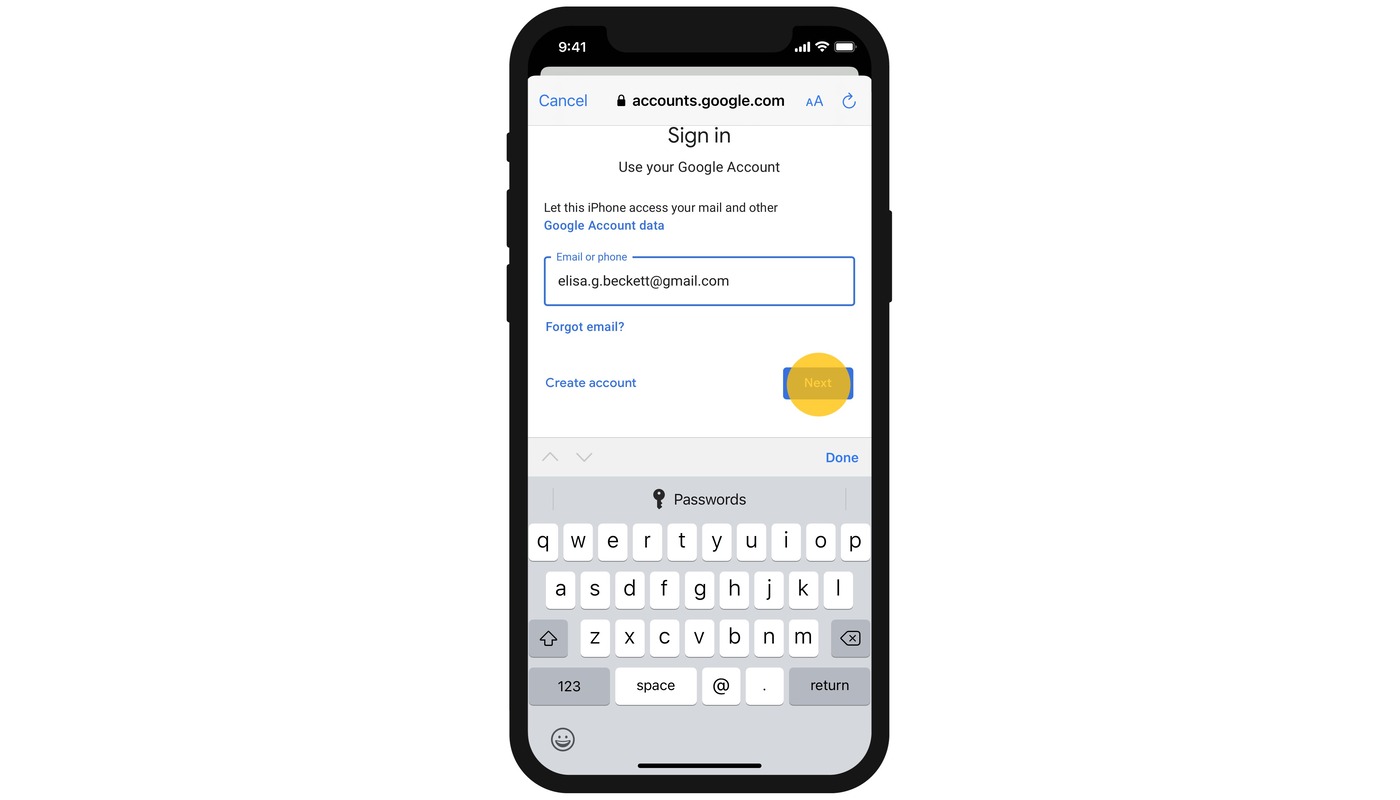
4. Select the email provider or “Other” if your provider is not listed. If you choose a popular provider, such as Google or iCloud, you will be prompted to sign in with your existing account credentials.
5. If you choose “Other,” you will need to enter your name, email address, password, and a description for the email account. Tap “Next” to proceed.
6. The iPhone will attempt to automatically configure your email settings based on the information you provided. If successful, you will see a checkmark next to each item, indicating that the setup was completed successfully. If any issues arise, you may need to manually enter your email server settings.
7. After the setup is complete, you will be asked to select the apps or features you want to associate with the new email account. You can choose to sync your mail, contacts, calendars, and notes. Toggle the switches on or off based on your preferences.
8. Tap “Save” to finalize the setup process. Your new email account will now appear in the list of accounts under the “Mail” section of the Settings app.
By following these steps, you can easily create a new email account on your iPhone and start managing your emails right from your device. Whether it’s for personal, work, or school use, having all your emails in one place can greatly improve your productivity and efficiency.
Adding Email Details and Credentials
Once you have accessed the email settings on your iPhone, it’s time to add the necessary details and credentials for your new email account. Follow the step-by-step instructions below to complete this process:
- Select the option to add a new email account: Look for the “Add Account” or “Add Email Account” button. It may be located at the top of the email settings page or in a separate “Accounts” section.
- Choose your email provider: On the next screen, you will be presented with a list of popular email providers such as Google, Outlook, Yahoo, etc. Select your provider from the list. If your provider isn’t listed, choose the “Other” option.
- Enter your email address: Type in your full email address in the designated field. Make sure to double-check for any spelling errors or typos.
- Provide your password: Input the password associated with your email account. If you don’t remember your password, you may need to reset it using the “Forgot Password” option provided by your email provider.
- Configure additional settings: Depending on your email provider, you may need to configure additional settings such as incoming and outgoing server information, port numbers, SSL settings, etc. Consult your email provider’s support documentation or contact their customer service for specific instructions.
- Enable sync options: Choose whether you want to sync your email, contacts, calendars, and other data between your iPhone and email account. This allows you to access your emails and other information across multiple devices seamlessly.
- Save your changes: Once you have entered all the required details and configured the necessary settings, tap on the “Save,” “Next,” or “Done” button to save your changes and complete the setup process.
By following these steps, you can easily add the necessary email details and credentials to set up your new email account on your iPhone. Make sure to double-check all the information you enter to ensure a smooth and error-free setup.
Configuring Email Settings and Preferences
Once you have created a new email account on your iPhone, it’s time to configure the email settings and preferences to tailor your email experience to your liking. Here are some important settings and preferences you can adjust:
1. Push or Fetch Email: You can choose whether you want your iPhone to receive new email notifications instantly (push) or at regular intervals (fetch). To access this setting, go to “Settings” > “Mail” > “Accounts” > “Fetch New Data”. Choose either “Push” to receive emails right away or select “Fetch” and set the preferred fetch interval.
2. Signature: Personalize your email messages by adding a custom signature. This can include your name, contact information, or a witty quote. To set up your signature, go to “Settings” > “Mail” > “Signature” and enter your desired text.
3. Default Mail App: If you have multiple email accounts set up on your iPhone, you can choose which email account is used as the default when composing new messages. To change the default mail app, go to “Settings” > “Mail” > “Default Account” and select the desired account.
4. Auto-reply: If you’re away or on vacation, you can set up an automatic reply to let people know that you’re not available. This feature is particularly useful for work-related emails. To enable auto-reply, go to “Settings” > “Mail” > “Auto-Reply” and customize the message and duration of the auto-reply.
5. Notification Settings: Customize the notifications you receive for new emails. You can choose to enable or disable banner notifications, lock screen notifications, and sound alerts. Go to “Settings” > “Notifications” > “Mail” and adjust the settings according to your preferences.
6. Threaded Conversations: If you prefer organizing your emails in threaded conversations, you can enable this feature. With threaded conversations, all related emails are grouped together, making it easier to follow the conversation flow. To enable threaded conversations, go to “Settings” > “Mail” > “Threading” and toggle the switch to the on position.
7. Filtering and Sorting: Customize how your emails are filtered and sorted in the email app. You can set up rules to automatically move certain emails to specific folders or mark them as important. To create filters and sorting rules, go to “Settings” > “Mail” > “Rules” and add the desired filters and actions.
8. Syncing and Storage: You can manage your email storage and syncing preferences to optimize the performance of your iPhone. This includes choosing the time period to sync emails, limiting the number of emails stored on your device, and selecting whether to sync only unread emails. To manage email storage and syncing, go to “Settings” > “Mail” > “Accounts” > “Choose an account” > “Mail days to sync” and adjust the settings accordingly.
By configuring these email settings and preferences on your iPhone, you can customize your email experience and make it more efficient and personalized. Take some time to explore these settings and adjust them according to your preferences and needs.
Conclusion
Creating a new email account on your iPhone is a simple and straightforward process. Whether you prefer using the built-in Mail app or a third-party email client, you can easily set up a new email on your device by following a few steps. Simply go to the Settings app, navigate to the Mail section, and select “Add Account” to begin the process. From there, you can choose your email provider and enter your account credentials to set up your new email. Once configured, you can start sending and receiving emails right from your iPhone.
Having a dedicated email account on your iPhone allows you to stay connected and organized on the go. You can access your emails, reply to messages, and manage your inbox from anywhere, anytime. Whether you use your email for personal, professional, or both purposes, the convenience of having it readily available on your iPhone is a valuable asset.
So, go ahead and create a new email account on your iPhone today. Stay connected, communicate effectively, and make the most out of your mobile phone’s capabilities.
FAQs
1. How do I create a new email account on my iPhone?
2. Can I have multiple email accounts on my iPhone?
3. Is it possible to customize my email signature on the iPhone?
4. What are the benefits of using the Mail app on iPhone instead of third-party apps?
5. How do I add attachments to my emails on the iPhone?