
In today’s digital age, capturing and sharing moments through photos has become an integral part of our lives. Whether it’s a stunning landscape, a delicious meal, or a heartfelt selfie, most of us rely on our smartphones to capture these special moments. If you own an iPhone, you’ll be happy to know that it’s incredibly easy to put two photos side by side, creating a visually appealing collage or comparison image. Whether you want to showcase before and after shots, create a “then and now” memory, or simply want to showcase two images together, this guide will walk you through the step-by-step process of putting two photos side by side on your iPhone. Let’s dive in and discover how to unleash your creative side using your iPhone’s powerful photo editing capabilities.
Inside This Article
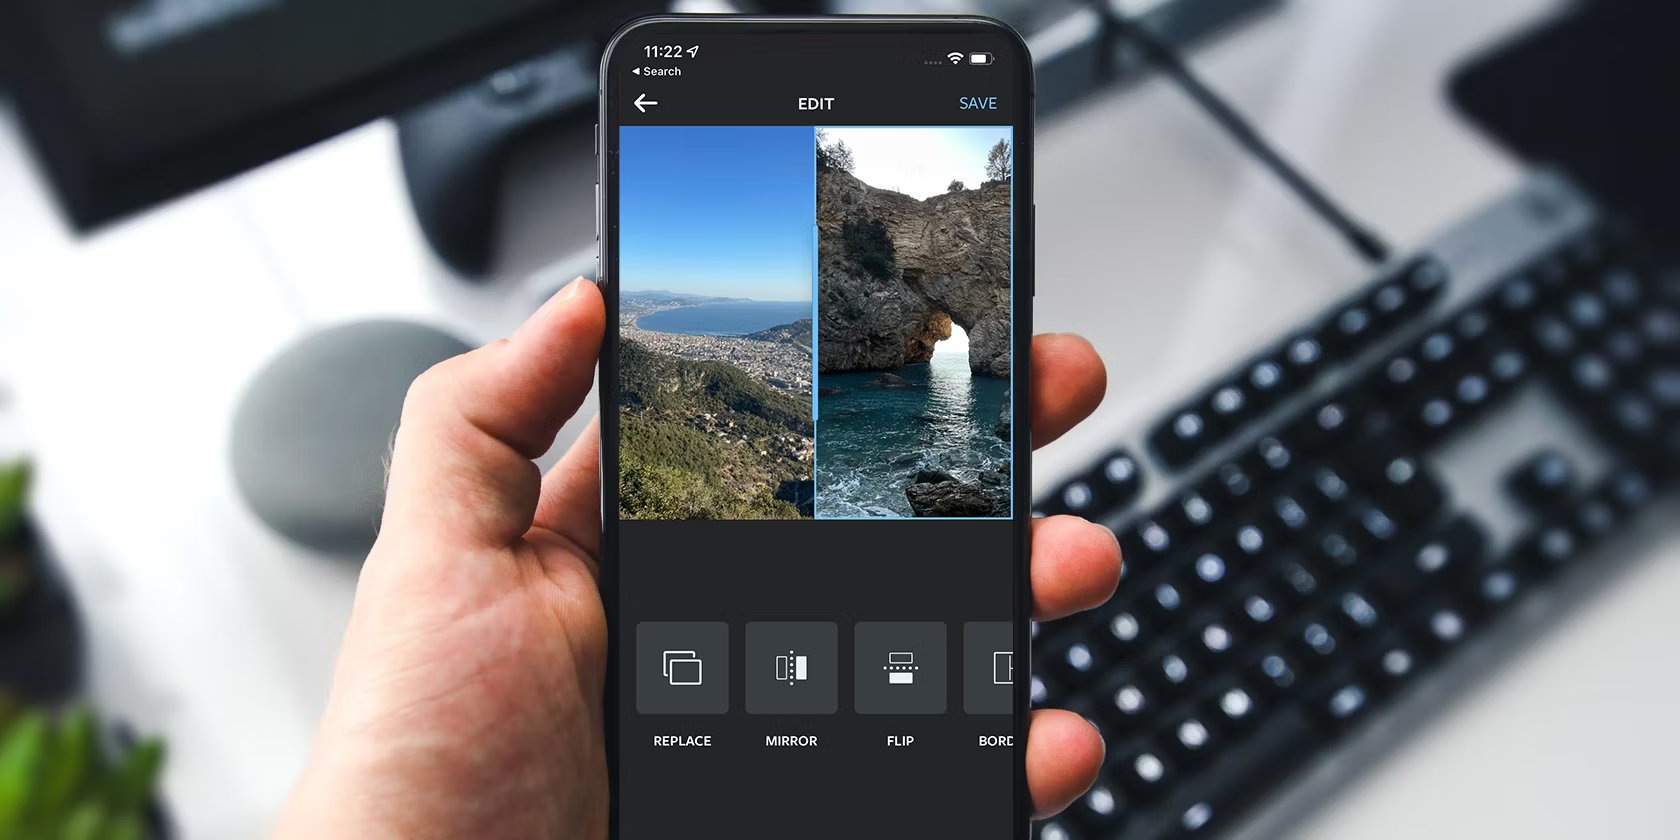
- How to Put Two Photos Side By Side on iPhone
- Using the Photos App
- – Open the Photos app on your iPhone.
- – Tap on “Albums” at the bottom of the screen.
- – Select the album containing the photos you want to put side by side.
- – Tap on the first photo to open it.
- – Tap on the “Edit” option at the top right corner of the screen.
- – Tap on the three dots (…) to access additional options.
- – Select “Markup” from the list of options.
- – Tap on the “+” icon at the bottom right corner and choose “Text” from the pop-up menu.
- – Tap and hold the text box to resize and reposition it.
- – Tap the text box to bring up the magnifying glass and select “Cut.”
- – Tap on the second photo to open it.
- – Repeat the above steps to add a text box to the second photo.
- – Position the text boxes side by side to create the desired effect.
- – Tap “Done” to save the changes.
- Using a Collage App
- – Install a collage app from the App Store (such as “Layout” by Instagram)
- – Open the collage app and select the photos you want to include in the collage
- – Choose the layout option that allows you to put two photos side by side
- – Adjust the size and position of each photo within the collage
- – Add any additional effects or stickers as desired
- – Save the collage to your iPhone’s camera roll or share it directly from the app
- Using Third-Party Photo Editing Apps
- Install a photo editing app with advanced features
- Open the app and import the two photos
- Use the app’s editing tools to resize and position the photos
- Apply any additional effects or adjustments as desired
- Save the edited photo to your iPhone’s camera roll
- Using the Markup Feature in the Files App
- – Find and open the Files app on your iPhone.
- – Navigate to the location where the two photos are saved.
- – Select one photo and tap on the “Share” icon.
- – Choose the “Markup” option from the list of available actions.
- – Tap on the “+” icon in the top right corner and select “Text.”
- – Resize and reposition the text box to create space for the second photo.
- – Tap “Done” when you are satisfied with the layout.
- – Select the second photo and repeat the above steps.
- – Save the final image to your iPhone’s camera roll.
- Conclusion
- FAQs
How to Put Two Photos Side By Side on iPhone
Do you want to create a stunning visual composition by placing two photos side by side on your iPhone? Whether you want to create a photo collage or simply compare two images, it can be easily done with just a few taps on your iPhone. In this article, we will explore different methods to put two photos side by side on your iPhone, ranging from using a photo collage app to utilizing built-in editing tools.
Using a Photo Collage App
If you prefer a straightforward and hassle-free way to put two photos side by side on your iPhone, using a photo collage app is the way to go. There are various photo collage apps available on the App Store, such as Canva, PicsArt, and Adobe Spark Post. Follow these simple steps to get started:
- Download and install a suitable photo collage app from the App Store.
- Select the photos you want to include in the collage from your Camera Roll.
- Add the selected photos to the collage within the app.
- Arrange and align the photos side by side as desired using the editing tools provided.
- Save the final composition to your Camera Roll or share it directly on social media.
Using a Third-Party Editing App
If you are looking for more advanced editing features and creative control, using a third-party editing app is a great option. Apps like Snapseed, VSCO, and Adobe Lightroom offer a wide range of editing tools for your photos. Here’s how to put two photos side by side using a third-party editing app:
- Search and download a suitable third-party editing app from the App Store.
- Import the two photos you want to place side by side into the editing app.
- Use the editing tools provided by the app to resize and align the photos side by side.
- Apply any desired filters or adjustments to enhance the visual appeal of the composition.
- Save or export the edited image with the two photos side by side.
Using Built-in Editing Tools
If you prefer to keep things simple and use the native options on your iPhone, you can utilize the built-in editing tools within the Photos app. Here’s how:
- Open the Photos app on your iPhone and select the two photos you want to place side by side.
- Tap on the “Edit” button and choose one of the selected photos to start editing.
- Swipe up on the editing screen to reveal additional editing options.
- Select the “Duplicate” option to create a copy of the photo.
- Exit the editing mode and go back to the main editing screen.
- Tap on the second photo and select the “Duplicate” option once again.
- Now, you have two duplicated photos of the original images.
- Select the first photo and tap on the “Crop” tool.
- Drag the corners of the crop frame to adjust the size and position of the photo.
- Repeat the same steps for the second duplicated photo to crop it accordingly.
- Exit the crop tool and you will have the two photos side by side.
Using One of Apple’s Photo Apps
Apple provides a range of powerful photo apps, such as Pages or Keynote, that can be used to create stunning compositions with multiple images. Follow these steps to put two photos side by side using one of Apple’s photo apps:
- Open the Apple photo app of your choice, such as Pages or Keynote.
- Create a new document or presentation within the app.
- Import the two photos you want to place side by side.
- Drag and drop the photos onto the canvas or slide.
- Resize and position the photos side by side using the app’s editing features.
- Customize the composition by adding text, shapes, or other elements if desired.
- Save the final composition within the app or export it as an image to your Camera Roll.
With these different methods at your disposal, you can easily put two photos side by side on your iPhone. Whether you choose a photo collage app, a third-party editing app, the built-in editing tools, or one of Apple’s photo apps, you can create visually appealing compositions that showcase your favorite moments and memories.
Using the Photos App
One of the simplest ways to put two photos side by side on your iPhone is by using the built-in Photos app. This app offers basic editing and arranging features that allow you to create a simple collage of your photos. Here’s how you can do it:
- Open the Photos app on your iPhone.
- Navigate to the albums or folder where the photos you want to use are located.
- Select the first photo you want to include in the collage by tapping on it.
- Tap the Select button on the top-right corner of the screen.
- Scroll through your photos and tap on the additional photos you want to add to the collage. Each selected photo will be marked with a blue checkmark.
- Tap the Share button at the bottom-left corner of the screen.
- In the share sheet that appears, swipe left on the bottom row of options and tap on the More button.
- In the activity view that opens, make sure the Photos option is enabled. You can customize the order of the options by tapping and dragging the handles on the right side.
- Tap the Done button at the top-right corner of the screen.
- In the share sheet, tap on the Photos option.
- The Photos app will open with the selected photos in a grid. Tap on the Collage option.
- The Photos app will generate a simple collage with the selected photos arranged side by side.
- You can tap on the Adjust button to make minor adjustments to the collage, such as zooming or rotating the photos.
- Tap on the Done button when you’re satisfied with the arrangement.
- Finally, tap on the Save button to save the collage to your Photos library.
Using the Photos app is a quick and easy way to put two photos side by side on your iPhone. However, keep in mind that the options for customization and editing are limited compared to dedicated photo collage or editing apps.
– Open the Photos app on your iPhone.
One of the easiest ways to put two photos side by side on your iPhone is by using the built-in Photos app. Start by opening the Photos app on your device.
– Tap on “Albums” at the bottom of the screen.
Once you have the Photos app open, navigate to the bottom of the screen and tap on the “Albums” tab. This will display all your photo albums.
– Select the album containing the photos you want to put side by side.
Scroll through the list of albums and select the album that contains the two photos you want to place side by side. Tap on the album to open it.
– Tap on the first photo to open it.
In the selected album, locate the first photo and tap on it to open it in full screen mode. This will allow you to view and edit the photo.
– Tap on the “Edit” option at the top right corner of the screen.
In the top right corner of the screen, you’ll see an “Edit” button. Tap on it to access the editing options for the photo.
– Tap on the three dots (…) to access additional options.
Within the editing options, you will find three dots (…) symbol. Tap on it to access additional editing features.
– Select “Markup” from the list of options.
From the list of additional editing options, choose “Markup.” This will open up the Markup editor, allowing you to make various changes to the photo, including placing two photos side by side.
– Tap on the “+” icon at the bottom right corner and choose “Text” from the pop-up menu.
Once you’re in the Markup editor, you’ll see a “+” icon at the bottom right corner of the screen. Tap on it to bring up a pop-up menu with various annotation options. Select “Text” from the menu.
– Tap and hold the text box to resize and reposition it.
After selecting “Text,” a text box will appear on your photo. Tap on the text box and hold it to resize and reposition it wherever you want it to be on the photo.
– Tap the text box to bring up the magnifying glass and select “Cut.”
Once the text box is in position, tap on it to bring up the magnifying glass. Use the magnifying glass to precisely select the “Cut” option, which will remove the default text in the box.
– Tap on the second photo to open it.
Exit the Markup editor by tapping the “Done” button at the top right corner. Go back to your album and tap on the second photo that you want to place side by side with the first photo.
– Repeat the above steps to add a text box to the second photo.
Following the previous steps, open the Markup editor for the second photo and add another text box to it. Resize and reposition the box to your desired location.
– Position the text boxes side by side to create the desired effect.
Now, position the two text boxes side by side on each photo, aligning them exactly as you want them to appear in the final image. Take your time to adjust the positioning until you’re satisfied with the result.
– Tap “Done” to save the changes.
Once you have positioned the text boxes to your liking, tap the “Done” button at the top right corner of the screen to save the changes. Your iPhone will save the edited photos with the text boxes placed side by side.
Using a Collage App
If you want a quick and easy way to put two photos side by side on your iPhone, using a photo collage app is a great option. These apps are specifically designed to help you arrange and combine multiple photos into a single layout. Follow the step-by-step instructions below to get started:
1. Download and Install a Suitable Collage App: Begin by browsing the App Store for a collage app that suits your needs. Some popular options include Pic Collage, Canva, and Adobe Spark Post. Once you find an app you like, download and install it on your iPhone.
2. Select and Add Photos: Open the collage app and start a new project. From there, you’ll be prompted to add photos to your collage. Select the photos you want to place side by side from your iPhone’s camera roll or photo library.
3. Arrange and Align: Once your photos are added, you can start arranging and aligning them side by side. Most collage apps provide a variety of layout options, allowing you to customize the positioning of your photos. Some even offer gridlines or snap-to-grid features to help you align the photos perfectly.
4. Adjust and Customize: After placing the photos side by side, you can further customize your collage by adjusting the size, rotation, and border options. Some apps also offer additional editing tools like filters, stickers, and text overlays. Explore these options to enhance your photo arrangement.
5. Save and Share: Once you’re satisfied with your collage, save it to your iPhone’s camera roll or share it directly to social media platforms, messaging apps, or email. Most collage apps provide easy sharing options, allowing you to effortlessly showcase your side-by-side photo creation to others.
Using a collage app eliminates the need for complex editing tools or specialized knowledge. It’s a straightforward and efficient way to put two photos side by side on your iPhone, making it an excellent choice for casual users or those who prefer simplicity. Try out different collage apps to find the one that suits your style and produces the desired results.
– Install a collage app from the App Store (such as “Layout” by Instagram)
To put two photos side by side on your iPhone, the first step is to install a suitable collage app from the App Store. One popular option is “Layout” by Instagram, which allows you to create beautiful photo collages with ease.
– Open the collage app and select the photos you want to include in the collage
After installing the collage app, open it on your iPhone. Then, choose the photos you want to include in your collage. You can select multiple photos from your camera roll or any other album on your device.
– Choose the layout option that allows you to put two photos side by side
Once you have selected your photos, it’s time to choose a layout that allows you to put two photos side by side. Many collage apps offer a variety of layout options, including ones specifically designed for placing photos side by side.
– Adjust the size and position of each photo within the collage
After selecting the desired layout, you can adjust the size and position of each photo within the collage. Simply use your fingers to resize and reposition the photos until they are arranged side by side to your liking.
– Add any additional effects or stickers as desired
If you want to add some creative flair to your collage, most collage apps offer additional effects and stickers. Feel free to experiment and enhance your photo arrangement with filters, overlays, text, or fun stickers.
– Save the collage to your iPhone’s camera roll or share it directly from the app
Once you are satisfied with your photo arrangement, you can save the collage to your iPhone’s camera roll. This way, you can access and share it with others easily. Alternatively, many collage apps also provide direct sharing options to social media platforms or messaging apps.
By following these simple steps and utilizing a collage app like “Layout” by Instagram, you can easily put two photos side by side on your iPhone and create visually appealing collages to share with your friends and family.
Using Third-Party Photo Editing Apps
When it comes to putting two photos side by side on your iPhone, using a third-party photo editing app can give you more control and options. These apps are specifically designed to provide advanced editing tools and features that can help you create stunning visual compositions. Here, we will walk you through the process of using a third-party photo editing app to accomplish this task.
The first step is to select and download a suitable third-party photo editing app from the App Store. There are numerous options available, ranging from free apps to paid ones with additional features. Choose an app that suits your needs and preferences, and follow the prompts to install it on your iPhone.
Once the app is installed, open it and import the photos you want to put side by side. Most apps have a simple and intuitive interface that allows you to easily import photos from your iPhone’s camera roll or gallery. Select the photos you wish to use and import them into the editing app.
After the photos are imported, you can start arranging them side by side. The app will typically provide you with tools and options to adjust the size, position, and orientation of the photos. You can use your fingers to drag and resize the photos on the screen, or use the app’s specific editing features for more precise control.
Some photo editing apps may also offer additional features like filters, effects, and text overlays. You can explore these options to further enhance the appearance of your photos and create a unique composition. Experiment with different editing tools until you achieve the desired result.
Once you are satisfied with the placement and editing of the photos, save the final composition to your iPhone’s camera roll or share it directly on social media. The app will typically provide options to save or export the image in various formats, ensuring compatibility with different platforms and devices.
Using a third-party photo editing app gives you the flexibility and control to create visually stunning compositions with two photos side by side on your iPhone. Explore different apps and their features to find the one that best suits your editing needs and unleash your creativity.
Install a photo editing app with advanced features
If you want to put two photos side by side on your iPhone, you’ll need a photo editing app with advanced features. Apps like “Snapseed” or “Adobe Photoshop Express” offer a wide range of editing tools that allow you to resize, position, and add effects to your photos.
Open the app and import the two photos
Once you’ve installed the photo editing app, open it on your iPhone. Then, import the two photos that you want to put side by side. Most editing apps allow you to import photos directly from your camera roll, so you can easily select the desired images.
Use the app’s editing tools to resize and position the photos
After importing the photos, use the editing tools provided by the app to resize and position them next to each other. You can usually find options like cropping, resizing, and rotating, allowing you to adjust the size and orientation of the photos to fit your desired layout.
Apply any additional effects or adjustments as desired
If you want to enhance your photos further, you can apply additional effects or adjustments using the app’s features. This could include adjusting the brightness, contrast, saturation, or applying filters and other creative effects to give your images a unique look.
Save the edited photo to your iPhone’s camera roll
Once you’re satisfied with the arrangement and adjustments, save the edited photo to your iPhone’s camera roll. This will allow you to access and share the side-by-side photo with others on your favorite social media platforms or messaging apps.
By following these steps and using a photo editing app with advanced features, you can easily put two photos side by side on your iPhone. It opens up a whole new world of creativity and allows you to showcase your favorite moments in an engaging and visually appealing way.
Using the Markup Feature in the Files App
The Markup feature in the Files app is a handy tool that allows you to annotate and customize your photos. It offers a simple and intuitive way to add text, shapes, drawings, and even your signature to your photos.
To use the Markup feature:
- Open the Files app on your iPhone.
- Navigate to the location where your photos are saved.
- Select the photo you want to edit.
- Tap the Share button.
- Scroll down and tap Markup.
- The Markup interface will appear, displaying a wide range of editing options at the bottom of the screen.
- Tap the (+) button to access additional tools, such as text, shapes, and drawings.
- To add text, tap the Text tool and type in your desired text. You can adjust the font, color, size, and placement of the text.
- If you want to add shapes, tap the Shapes tool and choose from a variety of shapes such as rectangles, circles, arrows, and more. You can resize, rotate, and customize the shapes to fit your photo.
- To draw on your photo, tap the Drawing tool. You can use different brush sizes and colors to create freehand drawings or annotations.
- If you want to sign your photo, tap the Signature tool. You have the option to sign using your finger or Apple Pencil if you have one.
- Once you are satisfied with your edits, tap Done.
- You can then choose to save the edited photo or share it with others via various platforms.
The Markup feature in the Files app is a versatile tool that allows you to personalize your photos and add a creative touch. It is especially useful if you need to quickly make annotations, add captions, or highlight specific details in your images.
– Find and open the Files app on your iPhone.
The first step to putting two photos side by side on your iPhone is to find and open the Files app. This app allows you to access and manage your files, including photos. You can usually find the Files app on your iPhone’s home screen or in the “Extras” folder. Simply tap on the app’s icon to open it.
– Navigate to the location where the two photos are saved.
Once you have opened the Files app, navigate to the location where the two photos you want to put side by side are saved. This could be in the Photos app folder, in a cloud storage service like iCloud Drive or Dropbox, or in any other folder on your iPhone. Use the app’s interface to browse through the different folders and find the location where your photos are stored.
– Select one photo and tap on the “Share” icon.
After locating the folder containing your photos, select one of the photos that you want to put side by side. To do this, tap on the photo to open it in a full-screen view. Once the photo is open, look for the “Share” icon, which is typically represented by a box with an arrow pointing upward.
– Choose the “Markup” option from the list of available actions.
When you tap on the “Share” icon, a list of available actions will appear. Scroll through the list and look for the “Markup” option. This option allows you to edit and annotate the photo, including adding text or drawings. Tap on the “Markup” option to proceed.
– Tap on the “+” icon in the top right corner and select “Text.”
Once you have entered the Markup editor, look for the “+” icon in the top right corner of the screen. Tap on this icon to open the available annotation options. From the list of options, select “Text.” This will allow you to add a text box to the photo.
– Resize and reposition the text box to create space for the second photo.
After adding the text box, you can resize and reposition it to create space for the second photo. Use your fingers to adjust the size of the text box by dragging its corners. You can also move the text box around the screen by tapping and dragging it to a different location. Make sure to create enough space for the second photo to fit alongside the first one.
– Tap “Done” when you are satisfied with the layout.
Once you have resized and repositioned the text box to your liking, tap on the “Done” button. This will save your changes and exit the Markup editor. You will now see the text box overlaid on top of the first photo, creating space for the second photo.
– Select the second photo and repeat the above steps.
Now that you have created space for the second photo, go back to the folder containing your photos and select the second photo you want to put side by side. Repeat the steps outlined above, starting from tapping on the “Share” icon, choosing the “Markup” option, and adding a text box. Resize and reposition the text box as necessary to fit the second photo beside the first one.
– Save the final image to your iPhone’s camera roll.
Once you have placed the two photos side by side and are satisfied with the layout, it’s time to save the final image. Tap on the “Done” button in the Markup editor to exit the annotation mode. You will now see the composite image with the two photos side by side. Tap on the “Share” icon again, but this time select the option to save the image to your iPhone’s camera roll.
Remember to experiment with different methods to find the one that suits your preferences and skills best. There are also other apps available on the App Store that specialize in creating collages or combining multiple photos side by side. Don’t be afraid to explore different options and get creative with your photo editing on your iPhone!
Conclusion
Putting two photos side by side on your iPhone can be a great way to create collages, compare images, or tell a visual story. With the help of photo editing apps, you have a variety of options available to accomplish this task easily and effectively.
Whether you choose to use built-in iOS features like the Photos app, or third-party applications like PicsArt or Canva, you’ll find that the process is simple and user-friendly. By following the steps mentioned in this article, you can achieve stunning results and impress your friends and followers with your creativity.
So, don’t wait any longer. Give it a try and unleash your artistic side by putting two photos side by side on your iPhone!
FAQs
Q: Can I put two photos side by side on my iPhone?
Yes, you can! The iPhone offers various methods to put two photos side by side, allowing you to create collages, compare images, or simply create a visually appealing display of your favorite pictures.
Q: How do I put two photos side by side on my iPhone?
There are several ways to put two photos side by side on your iPhone. One way is to use a photo editing app from the App Store, such as Adobe Photoshop Express or PicsArt, which have features specifically designed for creating collages or combining multiple photos into one image. Additionally, you can use the built-in Markup tool in the Photos app to place two photos side by side.
Q: Can I adjust the size and position of the photos when placing them side by side?
Yes, when using a dedicated photo editing app, you have the ability to adjust the size and position of the photos. These apps typically provide options to resize, rotate, and move the photos to create the desired arrangement. If you choose to use the Markup tool in the Photos app, you can also adjust the size and position by dragging and resizing the photos with your fingers.
Q: Are there any apps specifically designed for creating side-by-side photos on an iPhone?
Yes, there are several apps available that specialize in creating side-by-side photos on an iPhone. Some popular options include Side by Side Photo Editor, Split Pic Collage Maker, and Pic Collage. These apps offer a range of features, including templates, filters, and editing tools, to help you create professional-looking side-by-side photos.
Q: Can I add captions or text to the photos when putting them side by side?
Absolutely! Most photo editing apps, including the ones mentioned earlier, allow you to add captions, text, or even stickers to your photos. This gives you the freedom to personalize your side-by-side photos and add context or descriptions to each image. The built-in Markup tool in the Photos app also allows for adding text, highlighting, and drawing on photos.