
Have you ever found yourself needing to send an email while on the go? With the increased functionality of smartphones, it is now easier than ever to send emails directly from your mobile device. Whether you’re traveling, in a meeting, or simply away from your computer, sending an email from your phone allows you to stay connected and productive. In this article, we will guide you through the step-by-step process of sending an email from your phone. We’ll cover different email apps, how to set up and sync your email account, composing and sending emails, and even some useful tips and tricks. So, if you’re ready to take your email game to the next level while on the move, let’s get started!
Inside This Article
- Setting up Email on Your Phone
- Composing a New Email
- Attaching Files to an Email
- Sending and Managing Emails on Your Phone
- Conclusion
- FAQs
Setting up Email on Your Phone
Setting up email on your phone allows you to conveniently access and manage your emails from anywhere. Whether you use an iPhone or an Android device, the process is relatively straightforward. Here’s a step-by-step guide to help you set up email on your phone:
1. Open the email app on your phone. Most phones come with a pre-installed email app, such as Apple Mail or Gmail, which you can find on your home screen or in the app drawer.
2. Tap on the app to open it and go to the settings menu. Look for the gear icon or three vertical dots, usually located in the top-right corner of the screen.
3. In the settings menu, locate the option to add an email account. The wording may vary depending on the email app you’re using, but it’s usually labeled “Add Account,” “Add Email Account,” or something similar.
4. Select the type of email account you want to add. Popular options include Gmail, Yahoo, Outlook, and iCloud. If your email provider is not listed, choose the “Other” option.
5. Enter your email address and password. Make sure to double-check your credentials to avoid any errors. Some email apps may also ask for additional information like your name or server settings. Follow the on-screen instructions to complete the setup process.
6. Once you’ve entered your account details, the app will attempt to verify the information and connect to the email server. This may take a few moments. If everything is correct, you should see a success message or a notification that your email account has been added successfully.
7. Tap on the app’s home or inbox icon to start accessing your emails. Depending on the app, you may need to sync your emails manually or set up automatic syncing to receive new messages in real-time.
That’s it! You’ve successfully set up your email on your phone. Now you can check your inbox, compose new emails, and manage your email settings straight from your device.
Note that the exact steps may vary slightly depending on the make and model of your phone and the email app you use. If you encounter any difficulties during the setup process, consult the app’s official documentation or reach out to your email provider’s support team for assistance.
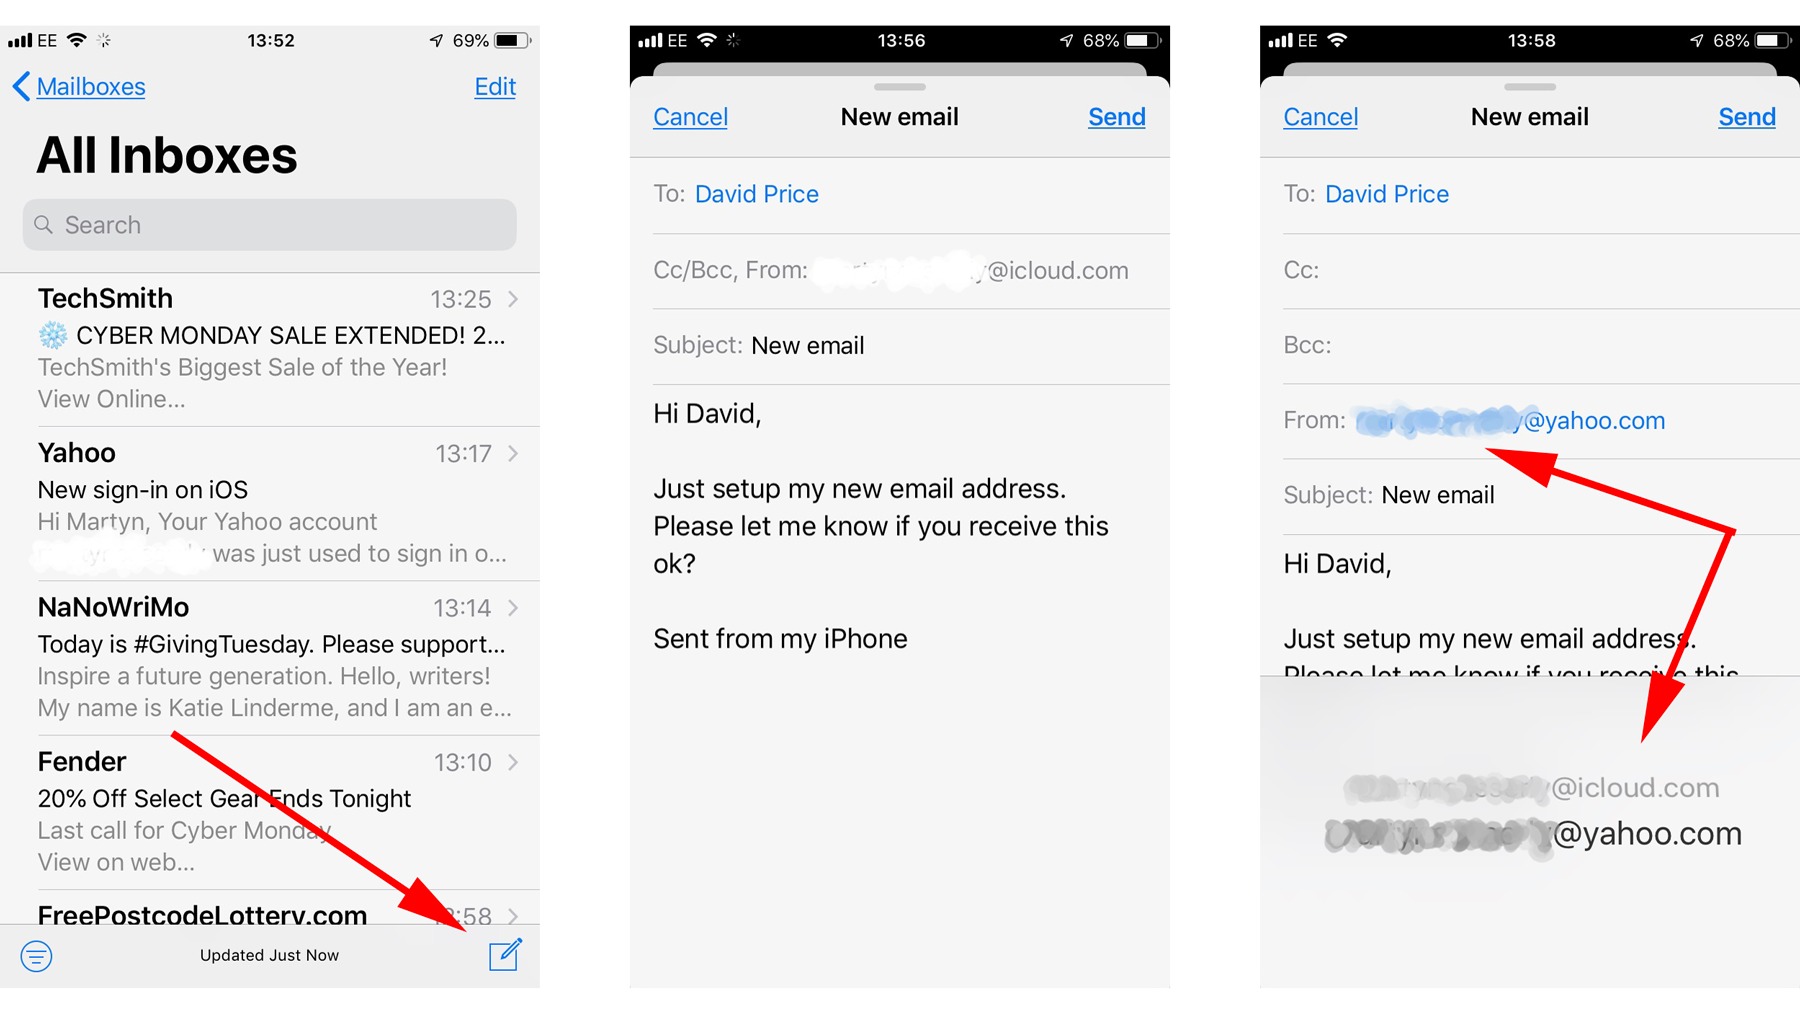
Composing a New Email
Composing a new email on your phone is a straightforward process that allows you to stay connected and communicate with others while on-the-go. Whether you’re using an iPhone, Android device, or any other type of mobile phone, the steps are generally the same. Let’s walk through the process:
1. Open your email application: Locate the email app on your phone’s home screen or app drawer and tap to open it. The app icon typically resembles an envelope or has the name of your email provider.
2. Tap on the “Compose” or “New Email” button: Look for a button labeled “Compose” or “New Email” within the email app, usually found in the top-right corner of the screen. Tap on it to start a new email.
3. Enter the recipient’s email address: In the “To” or “Recipient” field, enter the email address of the person you want to send the email to. You can type it manually, or if the person is in your contacts, start typing their name or email address, and your phone will suggest matching options.
4. Add a subject: Next, tap on the “Subject” field and enter a brief summary of the email’s content. This helps the recipient understand the purpose of the email at a glance.
5. Compose your message: In the body section of the email, tap on the text area and start typing your message. You can format the text, add bulleted/numbered lists, and include links as needed. Most email apps provide options for formatting the text, such as bold, italics, and underline. Take advantage of these features to enhance the readability of your message.
6. Attach files if necessary: If you want to attach any files, such as documents, photos, or videos, look for the attachment icon (usually a paperclip) and tap on it. You can then browse your phone’s storage or use cloud storage services to select the files you want to attach. Keep in mind that some email providers may have file size limitations for attachments.
7. Review and send: Before sending the email, take a moment to review the content to ensure it conveys the intended message accurately. Double-check the recipient’s email address and subject line for accuracy. If everything looks good, tap on the send button, often represented by an arrow or paper plane icon.
That’s it! Your email is now composed and ready to be sent from your phone. Remember to keep your emails concise, clear, and professional, while still maintaining a friendly and personable tone.
Attaching Files to an Email
One of the most important features of email is the ability to send and receive attachments. Whether you want to share a document, a photo, or any other type of file, attaching it to an email allows you to easily send it to someone else. Here are some steps to attach files to your email on your phone:
Step 1: Open your email application: Start by opening the email application on your phone. This can be the default email app that came with your phone or a third-party app such as Gmail or Outlook.
Step 2: Create a new email: Tap on the compose button to create a new email. This will open a blank email template where you can enter the recipient’s email address, subject, and message.
Step 3: Find the attachment button: Look for the attachment button in the email composition screen. It is usually represented by a paperclip icon or a “+” symbol. Tap on it to proceed.
Step 4: Select the file you want to attach: A file explorer window will appear, allowing you to browse through your phone’s storage and select the file you want to attach. You can choose files from your gallery, documents folder, or any other location where the file is saved.
Step 5: Confirm the attachment: After selecting the file, you will see its name or icon displayed in the email composition screen, indicating that it has been attached successfully. Take a moment to review the attachment before proceeding.
Step 6: Add any additional attachments: If you want to attach more files, repeat steps 3 to 5 for each additional file you want to include in the email.
Step 7: Finish composing your email: Once you have attached all the necessary files, you can proceed to finish composing your email. Add the recipient’s email address, subject, and message as needed.
Step 8: Send your email: Finally, when you are ready to send the email, tap on the send button. Your email, along with the attached files, will be sent to the recipient’s email address.
With these simple steps, you can easily attach files to an email using your phone. It’s a convenient way to share important documents, memorable photos, or any other files with friends, colleagues, or family members directly from your mobile device.
Sending and Managing Emails on Your Phone
Sending and managing emails on your phone has become a necessity in today’s fast-paced world. With the ever-increasing reliance on mobile devices, it’s essential to have the ability to send and receive emails conveniently from anywhere. Whether you need to respond to an important business email or simply stay connected with friends and family, knowing how to navigate your phone’s email function is crucial. In this article, we will guide you through the process of sending and managing emails on your phone, making it easier for you to stay connected and organized on the go.
1. Setting Up Your Email Account:
The first step in sending and managing emails on your phone is to set up your email account. Most smartphones come with a pre-installed email app or support for popular email clients like Gmail or Outlook. Start by launching the email app on your phone and selecting the option to add a new account. Enter your email address and password, and the app will automatically configure the necessary settings for your email provider.
2. Composing a New Email:
Once you have set up your email account, you can start composing new emails directly from your phone. Open the email app, and look for the option to create a new email or compose a message. Tap on it, and you will be presented with a blank email template. Enter the recipient’s email address in the “To” field, add a subject line, and then proceed to type your message. To enhance your email, you can use formatting options like bold, italicize, or underline the text. Once you are satisfied with your email, tap the send button to dispatch it.
3. Attaching Files to an Email:
Attachments are a common requirement when sending emails. Luckily, most email apps on smartphones allow you to attach files seamlessly. While composing a new email, look for the attachment icon, typically represented by a paperclip. Tap on it, and a file explorer will open, allowing you to browse and select the files you want to attach. Depending on the email app and the file type, you can attach documents, photos, videos, or any other compatible file. Once the files are attached, you can proceed to send the email as usual.
4. Sending and Managing Emails:
After sending an email, you can keep track of your sent messages and manage your inbox using the email app on your phone. Most email apps provide options to organize your emails into folders, mark messages as unread or flagged, and search for specific emails. You can also set up notifications to receive alerts whenever you receive a new email. To stay organized, it’s important to regularly clean up your inbox by deleting unnecessary emails and organizing important ones into folders.
With these simple steps, you can easily send and manage emails on your phone, ensuring that you never miss an important message while on the move. Email functionality on smartphones has made staying connected and organized easier than ever, so make the most of it and stay on top of your email communication.
Frequently Asked Questions:
Q: Can I send attachments from my phone’s storage?
A: Yes, most email apps allow you to attach files stored on your phone. Simply tap on the attachment icon while composing an email, and select the desired file from your phone’s storage.
Q: Can I access my sent emails on my phone?
A: Yes, the email app on your phone typically keeps a copy of your sent emails in the “Sent” folder. You can navigate to this folder to review or resend any previously sent email.
Q: How can I manage multiple email accounts on my phone?
A: Many email apps support the addition of multiple email accounts. Simply follow the same steps mentioned earlier for setting up a new account, and you can switch between different accounts within the email app.
Q: Is it possible to schedule emails on my phone?
A: Some email apps offer the feature to schedule emails to be sent at a later time. Check the settings of your email app or explore third-party email apps that offer this functionality.
By following these steps, you can confidently send and manage emails on your phone. Stay connected and organized, no matter where you are.
Conclusion
In conclusion, sending an email from your phone has become a seamless and convenient process with the advancements in mobile technology. Whether you have an Android or iOS device, there are several options available to you. You can use the built-in email apps provided by your phone’s manufacturer or opt for popular email client apps from third-party developers.
By following the simple steps outlined in this article, you can easily set up and send emails directly from your phone. Remember to ensure that you have a stable internet connection and double-check the recipient’s email address to avoid any errors.
Having the ability to send emails on the go is a game-changer in today’s fast-paced digital world. Whether you’re a business professional or simply want to stay connected, being able to access and send emails from your phone provides convenience and flexibility.
So, next time you need to send an important message, don’t fret! Just grab your phone, follow the steps outlined in this article, and hit send. It’s as simple as that!
FAQs
1. How do I send an email from my phone?
Sending an email from your phone is a simple process. Here’s a step-by-step guide to help you send an email from your phone:
- Open the email application on your phone. This app may be pre-installed or can be downloaded from your device’s app store.
- Once the app is open, tap on the compose button, usually represented by a pencil or a plus sign.
- Enter the recipient’s email address in the “To” field.
- Compose your message in the body of the email. You can type the text, add attachments, and format your email as needed.
- Review your email to ensure all the details are correct and then tap the send button, typically represented by an arrow or a paper plane icon.
2. Can I send attachments with email from my phone?
Yes, you can send attachments with emails from your phone. Most email applications on smartphones allow you to attach various types of files, such as photos, documents, and videos. To send an attachment, follow these steps:
- While composing an email, look for an icon or an option that says “Attach” or “Attach File”. It is usually represented by a paperclip.
- Tap on the attach icon and browse through your phone’s storage to select the file you want to attach.
- Once you’ve selected the file, it will be attached to your email, and you can proceed to send it as usual.
3. Why is my email not sending from my phone?
There could be several reasons why your email is not sending from your phone. Here are a few possible solutions:
- Check your internet connection – Ensure that your phone is connected to a stable internet connection.
- Review email settings – Double-check your email app settings to make sure you’ve entered the correct outgoing server settings, such as the SMTP server and port number.
- Clear app cache – If the app you’re using to send emails has a cache, try clearing it to resolve any potential issues.
- Restart your phone – Sometimes a simple restart can help resolve minor glitches that might be preventing your email from sending.
- Contact your email service provider – If none of the above solutions work, consider reaching out to your email service provider for further assistance.
4. Can I send an email with voice dictation on my phone?
Yes, many smartphones offer the option to send emails using voice dictation. This feature allows you to speak your message, which is then converted into text and sent as an email. To use voice dictation for sending emails, follow these steps:
- Open the email app on your phone and tap on the compose button.
- In the email body, look for a voice dictation icon, which is usually a microphone.
- Tap on the microphone icon and start speaking your message. The voice-to-text feature will convert your speech into text in real-time.
- Review the converted text and make any necessary corrections before sending the email.
- Tap on the send button to send the email.
5. Can I schedule emails to be sent later from my phone?
Yes, many email applications on smartphones provide the option to schedule emails for sending at a later time. This feature is useful when you want to compose an email but send it at a specific date or time in the future. To schedule an email on your phone, follow these steps:
- Open the email app on your phone and start composing a new email.
- Instead of tapping the send button, look for an option or icon that allows you to schedule the email.
- Select the desired date and time for sending the email.
- Finish composing your email and then tap on the schedule or save button to set the scheduled send time.