
Sending emails from your iPhone 13 is a breeze, allowing you to stay connected and productive on the go. Whether you're using your iPhone for personal or professional communication, knowing how to send emails efficiently can streamline your daily tasks. In this comprehensive guide, we'll explore the steps to send an email from your iPhone 13, along with valuable tips to enhance your email experience. Whether you're a seasoned iPhone user or new to the iOS ecosystem, this article will equip you with the knowledge and confidence to compose and send emails effortlessly from your iPhone 13. So, let's dive in and harness the full potential of your iPhone for seamless email communication.
Inside This Article
- Setting up Email Accounts on iPhone 13
- Composing and Sending Email
- Managing Email Settings
- Conclusion
- FAQs
Setting up Email Accounts on iPhone 13
Setting up email accounts on your iPhone 13 is a straightforward process that allows you to access your emails on the go. Whether you use Gmail, Yahoo, Outlook, or any other email service, the iPhone 13 makes it easy to set up and manage your email accounts directly from the device.
To begin, open the “Settings” app on your iPhone 13 and scroll down to find the “Mail” option. Tap on “Mail,” and then select “Accounts.” Next, tap on “Add Account” to initiate the setup process for your email account.
From there, you will be presented with a list of popular email providers. If your email service is listed, simply select it and enter your login credentials, including your email address and password. The iPhone 13 will then automatically configure the settings for your account, allowing you to start using your email right away.
If your email provider is not listed, you can choose the “Other” option and manually enter the details of your email account, including the incoming and outgoing mail server information. Once you have entered all the necessary details, the iPhone 13 will verify the settings and complete the setup process.
After setting up your email account, you can choose to sync your email, contacts, and calendar with your iPhone 13, allowing you to access all your important information in one place. Additionally, the iPhone 13’s Mail app offers various customization options, such as notification settings and email organization, to ensure that you can manage your emails efficiently.
Composing and Sending Email
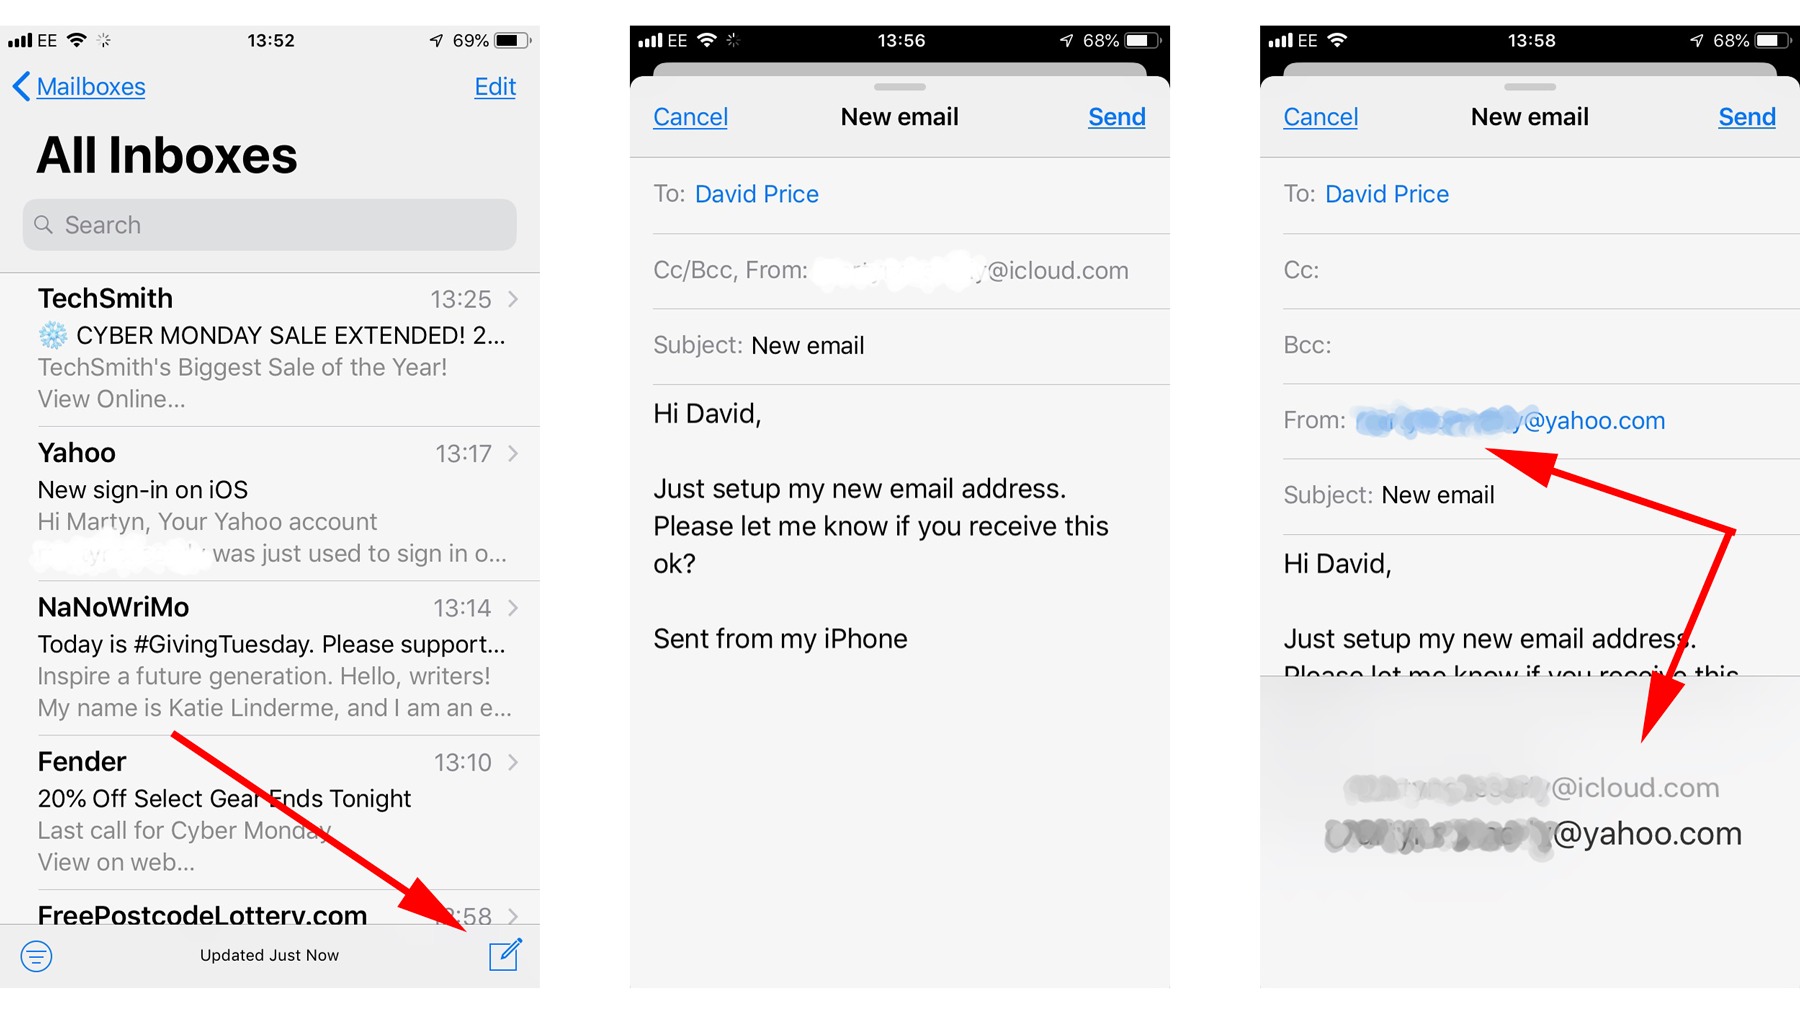
Once you’ve set up your email accounts on your iPhone 13, composing and sending emails is a breeze. To start, open the Mail app and tap on the “Compose” button, usually represented by a pencil icon. This will open a new email draft where you can begin crafting your message.
When composing your email, you can easily add recipients by typing their email addresses in the “To” field. If you want to carbon copy (CC) or blind carbon copy (BCC) someone, simply tap the respective fields and add the additional recipients. This allows you to easily include multiple recipients in your email.
After adding the recipients, you can proceed to the subject line, where you should succinctly summarize the purpose of your email. A clear and concise subject line can significantly improve the chances of your email being read and understood by the recipient.
Once the recipients and subject line are in place, you can start composing the body of your email. The iPhone 13’s keyboard makes it easy to type and edit your message. You can also format the text, add attachments, and insert images directly from the email composer, giving you the flexibility to craft a professional and visually appealing email.
When your email is ready to go, simply tap the “Send” button, typically represented by a paper airplane icon. Your email will then be sent to the recipients, and you’ll be able to find it in the “Sent” folder of your email account, allowing you to keep track of your outgoing messages.
**
Managing Email Settings
**
Once you’ve set up your email accounts and started sending emails from your iPhone 13, it’s essential to manage your email settings to ensure a smooth and efficient experience. The iPhone 13 offers a range of customizable options to tailor your email usage to your preferences and needs.
One of the key settings to consider is notification preferences. You can choose how and when you receive notifications for new emails. Whether you prefer to be alerted with a sound, vibration, or simply a visual notification on your screen, the iPhone 13 allows you to customize these settings for each of your email accounts.
Another important aspect of managing email settings on your iPhone 13 is organizing your inbox. With the ability to create folders and apply filters, you can keep your emails neatly categorized and easily accessible. This feature is particularly useful for individuals who receive a high volume of emails and need to stay organized.
Furthermore, the iPhone 13 enables users to set up automatic email replies, also known as “out-of-office” messages. This is a valuable tool for informing contacts that you are unavailable and may not be able to respond to emails immediately. It helps manage expectations and ensures that important contacts are aware of your availability.
Additionally, the iPhone 13 allows for the customization of signature settings. You can create personalized email signatures for each of your accounts, adding a professional touch to your outgoing emails. This feature is ideal for individuals who use their iPhone 13 for both personal and professional communication.
Lastly, it’s essential to stay up to date with software updates for your iPhone 13, as these updates often include enhancements and security patches for email functionality. Regularly checking for and installing updates will ensure that your email settings remain optimized and secure.
Conclusion
Being able to send emails from your iPhone 13 is an essential feature that enhances your productivity and communication on the go. With the user-friendly interface and seamless integration with various email providers, the iPhone 13 makes it convenient to manage your emails anytime, anywhere. Whether you’re sending a quick response or composing a detailed message, the intuitive email functionality of the iPhone 13 ensures a smooth and efficient experience. By following the simple steps outlined in this guide, you can harness the full potential of your iPhone 13 to stay connected and organized through email communication.
FAQs
**Q: Can I send emails from my iPhone 13?**
Yes, you can easily send emails from your iPhone 13 using the built-in Mail app or any other email app available on the App Store.
Q: Can I attach files to my emails on iPhone 13?
Absolutely! You can attach photos, videos, documents, and other files to your emails directly from your iPhone 13.
Q: How do I set up my email account on iPhone 13?
Setting up an email account on your iPhone 13 is a breeze. Simply go to Settings, select Mail, tap on Accounts, and then choose Add Account. From there, follow the prompts to add your email account.
Q: Can I use Siri to send emails on my iPhone 13?
Yes, Siri can help you compose and send emails on your iPhone 13 using voice commands. Just activate Siri and say, "Send an email to [recipient's name]".
Q: Is it possible to schedule emails on iPhone 13?
While the default Mail app on iPhone 13 doesn't have a built-in email scheduling feature, there are third-party email apps available on the App Store that allow you to schedule emails for later delivery.