
Procreate is a powerful digital art application that provides artists with a wide range of tools and features to create stunning artwork on their iPad or iPhone. One of the key aspects of Procreate is the ability to render artwork effectively, bringing it to life with depth, texture, and realism. Whether you’re a beginner or an experienced artist, understanding how to render on Procreate is essential for creating visually captivating artwork. In this article, we will explore various techniques and tips to help you master the art of rendering on Procreate. From understanding lighting and shadows to utilizing brushes and layering techniques, we will cover everything you need to know to take your digital art to the next level. So, let’s dive in and discover how to render on Procreate like a pro!
Inside This Article
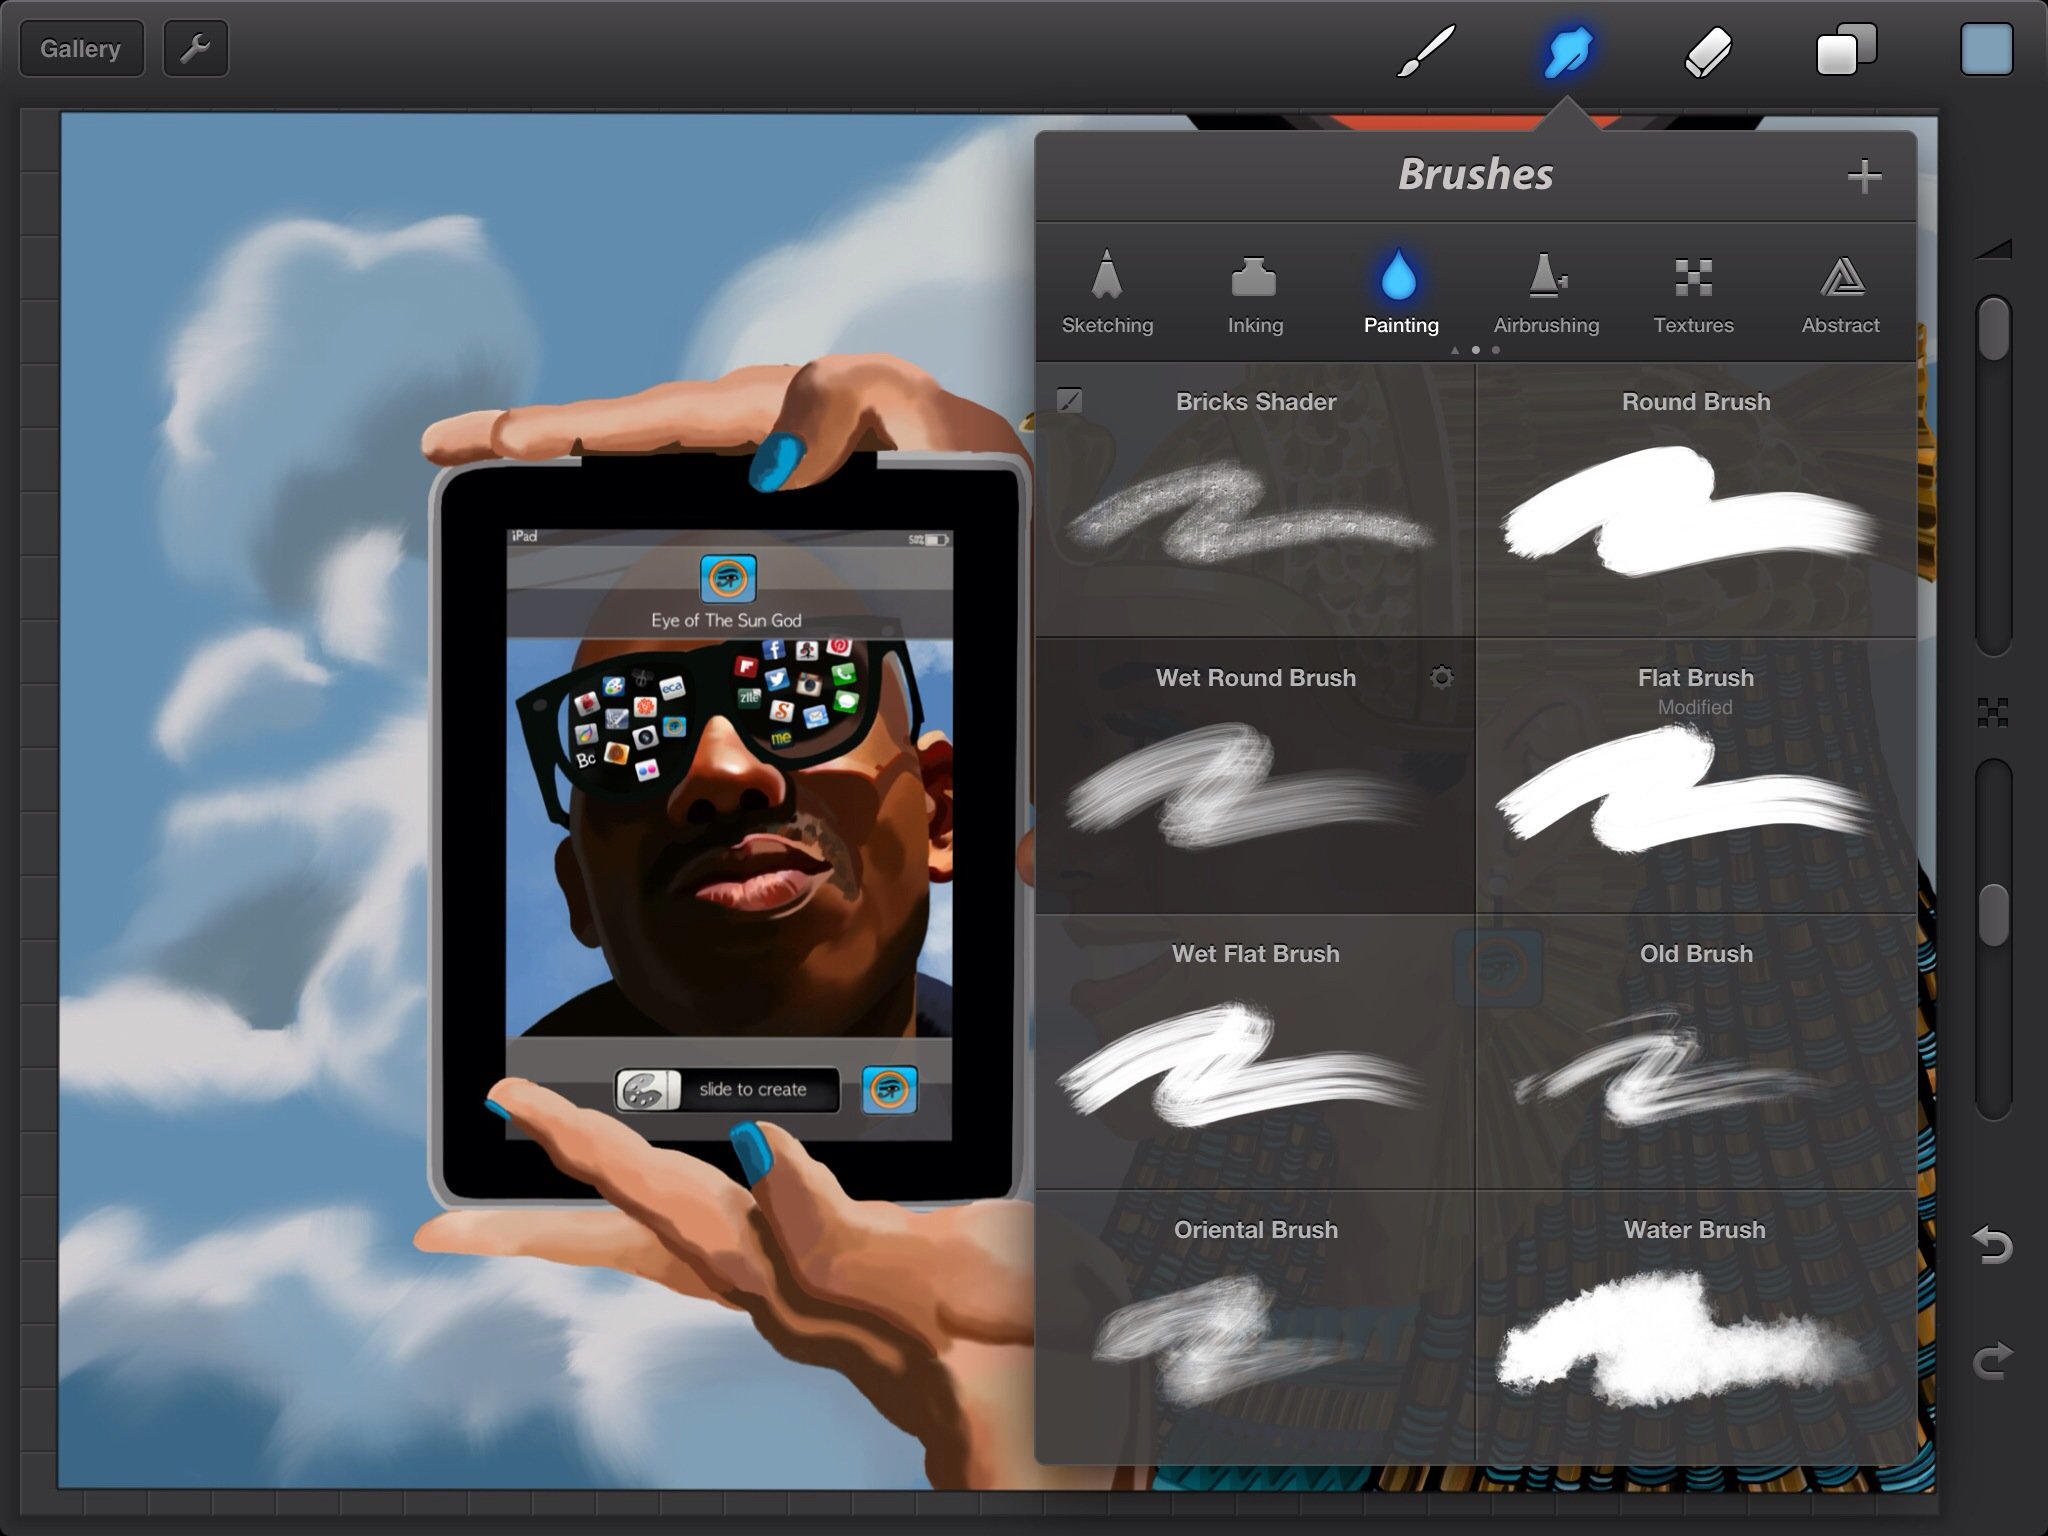
- Choosing the Right Brush
- Understanding Layers and Opacity
- Exploring Blending Modes
- Utilizing Different Brush Techniques
- Conclusion
- FAQs
Choosing the Right Brush
When it comes to creating stunning digital art on Procreate, one of the most crucial aspects is choosing the right brush. With a wide range of brush options available, it can be overwhelming to know which one to select for your specific artistic needs. However, by understanding the different brush types and their characteristics, you can easily find the perfect brush to bring your creative vision to life.
First and foremost, consider the type of effect or texture you want to achieve in your artwork. Procreate offers brushes that simulate various mediums, such as pencil, ink, watercolor, and oil paint. Each brush type has unique settings and textures that can enhance the realism and aesthetics of your artwork.
Next, take into account the size and shape of the brush. You’ll find brushes ranging from fine-pointed pencils to broad, textured brushes. The size and shape of the brush will greatly influence the level of detail and precision you can achieve in your artwork. Experiment with different brush sizes to determine which one best suits your style and desired outcome.
Opacity is another important factor to consider when choosing a brush. Opacity refers to the transparency or solidity of the brushstroke. Some brushes have a high opacity, resulting in solid, vibrant colors, while others have a lower opacity, allowing for more transparent and layered effects. Understanding the opacity settings of a brush will give you greater control over the overall look and feel of your artwork.
Lastly, explore the various properties and adjustments available for each brush. Procreate allows you to customize and modify brushes extensively, including adjusting the pressure sensitivity, spacing, and shape dynamics. These fine-tuning options enable you to personalize the brush to suit your unique style and preferences.
Remember, choosing the right brush is essential for creating captivating and expressive digital art. Take the time to experiment and familiarize yourself with the different brush options in Procreate. By discovering the perfect brush for your needs, you’ll be able to unlock your full creative potential in bringing your imaginative ideas to life.
Understanding Layers and Opacity
When working with Procreate, one of the essential concepts to grasp is the concept of layers and opacity. Layers allow you to separate different elements of your artwork, making it easier to edit and manipulate each component individually.
Each layer in Procreate acts as a transparent sheet that can be stacked on top of one another. Think of it as a stack of transparent papers where you can draw or paint on each sheet. By organizing your elements into separate layers, you have more control over the composition and can make adjustments without affecting the rest of your artwork.
Opacity, on the other hand, refers to the transparency or level of visibility of a layer. By adjusting the opacity of a layer, you can control how much it shows through to the layers underneath. This allows you to create interesting effects, such as overlaying textures or adding subtle shading to your artwork.
Understanding how to utilize layers and opacity effectively is crucial for creating complex and detailed artwork in Procreate. By judiciously stacking and adjusting the opacity of your layers, you can add depth and dimension to your artwork, creating stunning visual effects.
In addition, layers and opacity are not only limited to static elements in your artwork. They can also be used to create dynamic effects in animations. By manipulating the visibility and opacity of different layers over time, you can bring your artwork to life.
Mastering the concept of layers and opacity may take some practice, but it opens up a world of possibilities when it comes to creating art in Procreate. Whether you’re a beginner or an experienced artist, understanding how to effectively use layers and opacity will elevate your artwork and allow you to unleash your creativity.
Exploring Blending Modes
Blending modes in Procreate can help you achieve stunning effects and enhance your artwork. Understanding and utilizing blending modes effectively can take your digital art to the next level. Blending modes allow you to combine multiple layers in different ways, producing various visual results. Let’s dive into some popular blending modes and how they can be used.
One common blending mode is “Multiply,” which darkens the colors of the layer below. This mode is great for shading and adding depth to your artwork. By using the Brush tool with a dark color on a Multiply layer, you can create realistic shadows and give your artwork a sense of dimension.
Another frequently used blending mode is “Screen.” This mode lightens the colors of the layer below, making it useful for creating highlights and adding brightness. With the Brush tool and a light color on a Screen layer, you can simulate the effect of light hitting an object, giving it a vibrant and illuminated appearance.
“Overlay” is another versatile blending mode. It combines the effects of both Multiply and Screen, resulting in increased contrast and saturation. This mode is great for adding texture and enhancing colors in your artwork. You can experiment with different brush strokes and opacities to achieve unique and visually appealing results.
If you’re looking for a dreamy and ethereal effect, the “Soft Light” blending mode can do wonders. It adds a soft glow to your artwork and works well for creating a romantic or whimsical atmosphere. By using a soft brush with gentle strokes on a Soft Light layer, you can create a subtle and enchanting ambiance in your artwork.
Procreate also offers blending modes like “Color Dodge,” “Color Burn,” “Difference,” and many more. Each blending mode has its own unique effect, allowing you to experiment and create different moods and styles in your artwork. Don’t be afraid to try out different combinations and discover the blending modes that work best for your artistic vision.
Remember, blending modes can be applied to individual layers or to groups of layers. This flexibility gives you even more control over the overall look and feel of your artwork. Take the time to explore and experiment with blending modes in Procreate, and you’ll be amazed at the creative possibilities they open up.
Utilizing Different Brush Techniques
When it comes to creating stunning artwork on Procreate, mastering various brush techniques is essential. The right brush technique can bring your digital art to life, adding depth, texture, and dimension to your work. In this section, we will explore some of the most effective brush techniques that you can utilize to level up your Procreate skills.
1. Brush Opacity: Adjusting the opacity of your brushes can have a significant impact on the final result. By reducing the opacity, you can create subtle, translucent effects, perfect for delicate details or soft shading. On the other hand, increasing the opacity will give your artwork a bold and vibrant appearance, making it stand out.
2. Brush Size: Varying the brush size allows you to achieve different effects and control the level of detail in your artwork. A larger brush size is ideal for covering larger areas quickly, while a smaller brush size is perfect for those intricate details.
3. Layering Brushes: One of the powerful features of Procreate is the ability to work with multiple layers. By utilizing different brush techniques on separate layers, you can easily create complex and dynamic effects. For example, you can use a textured brush on one layer to create a background, and then use a fine detail brush on another layer to add intricate elements to the foreground.
4. Brush Pressure: Procreate is designed to work seamlessly with pressure-sensitive styluses. By utilizing brush pressure, you can create varying line weights and achieve a more organic feel in your artwork. The harder you press, the thicker the line, and the lighter you press, the thinner the line. This variability adds depth and dimension to your strokes.
5. Brush Textures: Procreate offers a wide selection of brush textures that can be applied to your artwork. Experimenting with different textures can result in unique and captivating effects. Whether you want to create the look of glossy paint, rough pencil strokes, or anything in between, there is a brush texture available to suit your artistic vision.
6. Brush Opacity Dynamics: Opacity dynamics allow you to create brush strokes that transition from opaque to transparent, giving your artwork a sense of depth and movement. By adjusting the opacity dynamics settings, you can control how the brush responds to the pressure or speed of your strokes.
7. Brush Blend Modes: In addition to the default blending mode, Procreate offers a range of blend modes that can dramatically alter the appearance of your brush strokes. Experimenting with blend modes can result in interesting and unexpected combinations, adding a unique touch to your artwork.
By utilizing these different brush techniques, you can take your Procreate artwork to the next level. Don’t be afraid to experiment and try out different combinations to discover your own unique style. With a bit of practice and exploration, you’ll be amazed at the incredible results you can achieve.
Conclusion
In conclusion, learning how to render on Procreate can greatly enhance your digital art skills. With its powerful tools and intuitive interface, Procreate provides a seamless and enjoyable drawing experience. By mastering rendering techniques, such as shading, highlighting, and texture creation, you can bring your artwork to life with depth and realism. Remember to experiment with different brushes, layer settings, and blending modes to achieve the desired effects. Additionally, don’t be afraid to push your boundaries and explore new styles and techniques. With practice and dedication, you’ll be able to create stunning digital artworks that showcase your unique creativity. So, grab your stylus, open Procreate, and let your imagination run wild!
FAQs
1. Can Procreate be used on Android devices?
No, Procreate is currently only available for iOS devices such as iPads and iPhones. There is no official version of Procreate for Android.
2. Is Procreate free to download and use?
No, Procreate is not a free app. It is a paid app available on the App Store and requires a one-time purchase. However, considering its feature-rich capabilities and powerful tools, the price of Procreate is well worth the investment for artists and illustrators.
3. What are the system requirements for running Procreate?
To run Procreate efficiently, you will need an iPad running on iOS 13 or later. The specific models supported include iPad Pro, iPad Air (3rd generation), and iPad (6th generation) or newer.
4. Can I import my own brushes in Procreate?
Yes, Procreate allows you to import custom brushes and create your own unique brush library. You can import brushes in various formats such as .brush, .brushset, .procreate, and .brusharchive, expanding your creative possibilities.
5. Can I export my Procreate artwork to other file formats?
Absolutely! Procreate offers a range of export options to cater to your needs. You can export your artwork as a PNG, JPEG, or TIFF file. Additionally, Procreate also supports PSD (Adobe Photoshop) export, allowing for seamless collaboration with other digital art tools or software.