
When it comes to digital art, selecting the perfect color can make a world of difference. If you’re a fan of creating digital art using Procreate, you already know the possibilities are endless when it comes to color selection. But with so many options at your fingertips, it’s easy to feel overwhelmed.
In this article, we’ll explore the tips and techniques for selecting the right colors in Procreate to make your artwork truly stand out. From understanding color theory to utilizing the color palette and brush settings available in Procreate, we’ll cover all the essential aspects to help you create eye-catching and harmonious color schemes.
Join us as we dive into the world of color selection on Procreate and uncover the secrets to elevating your digital art to the next level.
Inside This Article
- Understanding the Color Picker Tool
- Exploring the Color Library
- Utilizing the Color Wheel
- Customizing the Color Palettes
- Conclusion
- FAQs
Understanding the Color Picker Tool
The Color Picker tool is an essential feature in Procreate that allows you to select and utilize colors in your digital artwork. By understanding how this tool works, you can unlock a world of creative possibilities and make your illustrations truly come to life.
When you open the Color Picker tool in Procreate, you are presented with a spectrum of colors. This spectrum is divided into a gradient, ranging from warm colors like red and orange to cool colors like blue and green. By dragging your finger or stylus along this spectrum, you can easily choose a desired hue.
Once you have selected a hue, you can then adjust the saturation and brightness of the color using the circular sliders at the bottom of the Color Picker tool. The saturation slider controls how vivid or muted the color appears, while the brightness slider determines how light or dark the color is.
In addition to the spectrum and sliders, the Color Picker tool also provides you with options to input specific color values. This can be useful when you want to match a particular color code or replicate a color that you have used before. By tapping the hexadecimal code or the RGB values, you can enter precise color information.
Furthermore, the Color Picker tool allows you to create and save custom color swatches. Once you have customized a color to your liking, simply tap and hold on the color circle at the top of the tool. This will bring up a menu that allows you to save the color to your swatches for easy access in future projects.
By familiarizing yourself with the Color Picker tool in Procreate, you gain control over the colors in your artwork. Whether you are a digital artist, graphic designer, or illustrator, understanding how to leverage this tool effectively can help you bring your creative visions to fruition.
Exploring the Color Library
One of the key features of Procreate is its extensive Color Library, which offers users a wide range of pre-selected colors to choose from. This vast collection makes it easy to find the perfect color for your artistic creations.
When you open the Color Library in Procreate, you’ll find a variety of color palettes grouped into different categories. These palettes are curated by Procreate and provide a great starting point for your artwork.
Each color palette in the library contains a selection of complementary colors that work well together. This allows you to create visually appealing compositions and maintain color harmony in your artwork.
Browsing through the Color Library is a breeze. Simply swipe left or right to navigate between palettes, and tap on a color to select it. If you find a color that you love, you can easily save it to your Favorites for quick access in the future.
For those who prefer more control over their color choices, Procreate allows you to create custom color palettes. You can add and arrange colors to build your own unique palette that suits your artistic style and preferences.
With the Color Library in Procreate, you’ll never be short of color options. Whether you’re a beginner or an experienced artist, exploring the vast collection of colors will inspire and enhance your artwork.
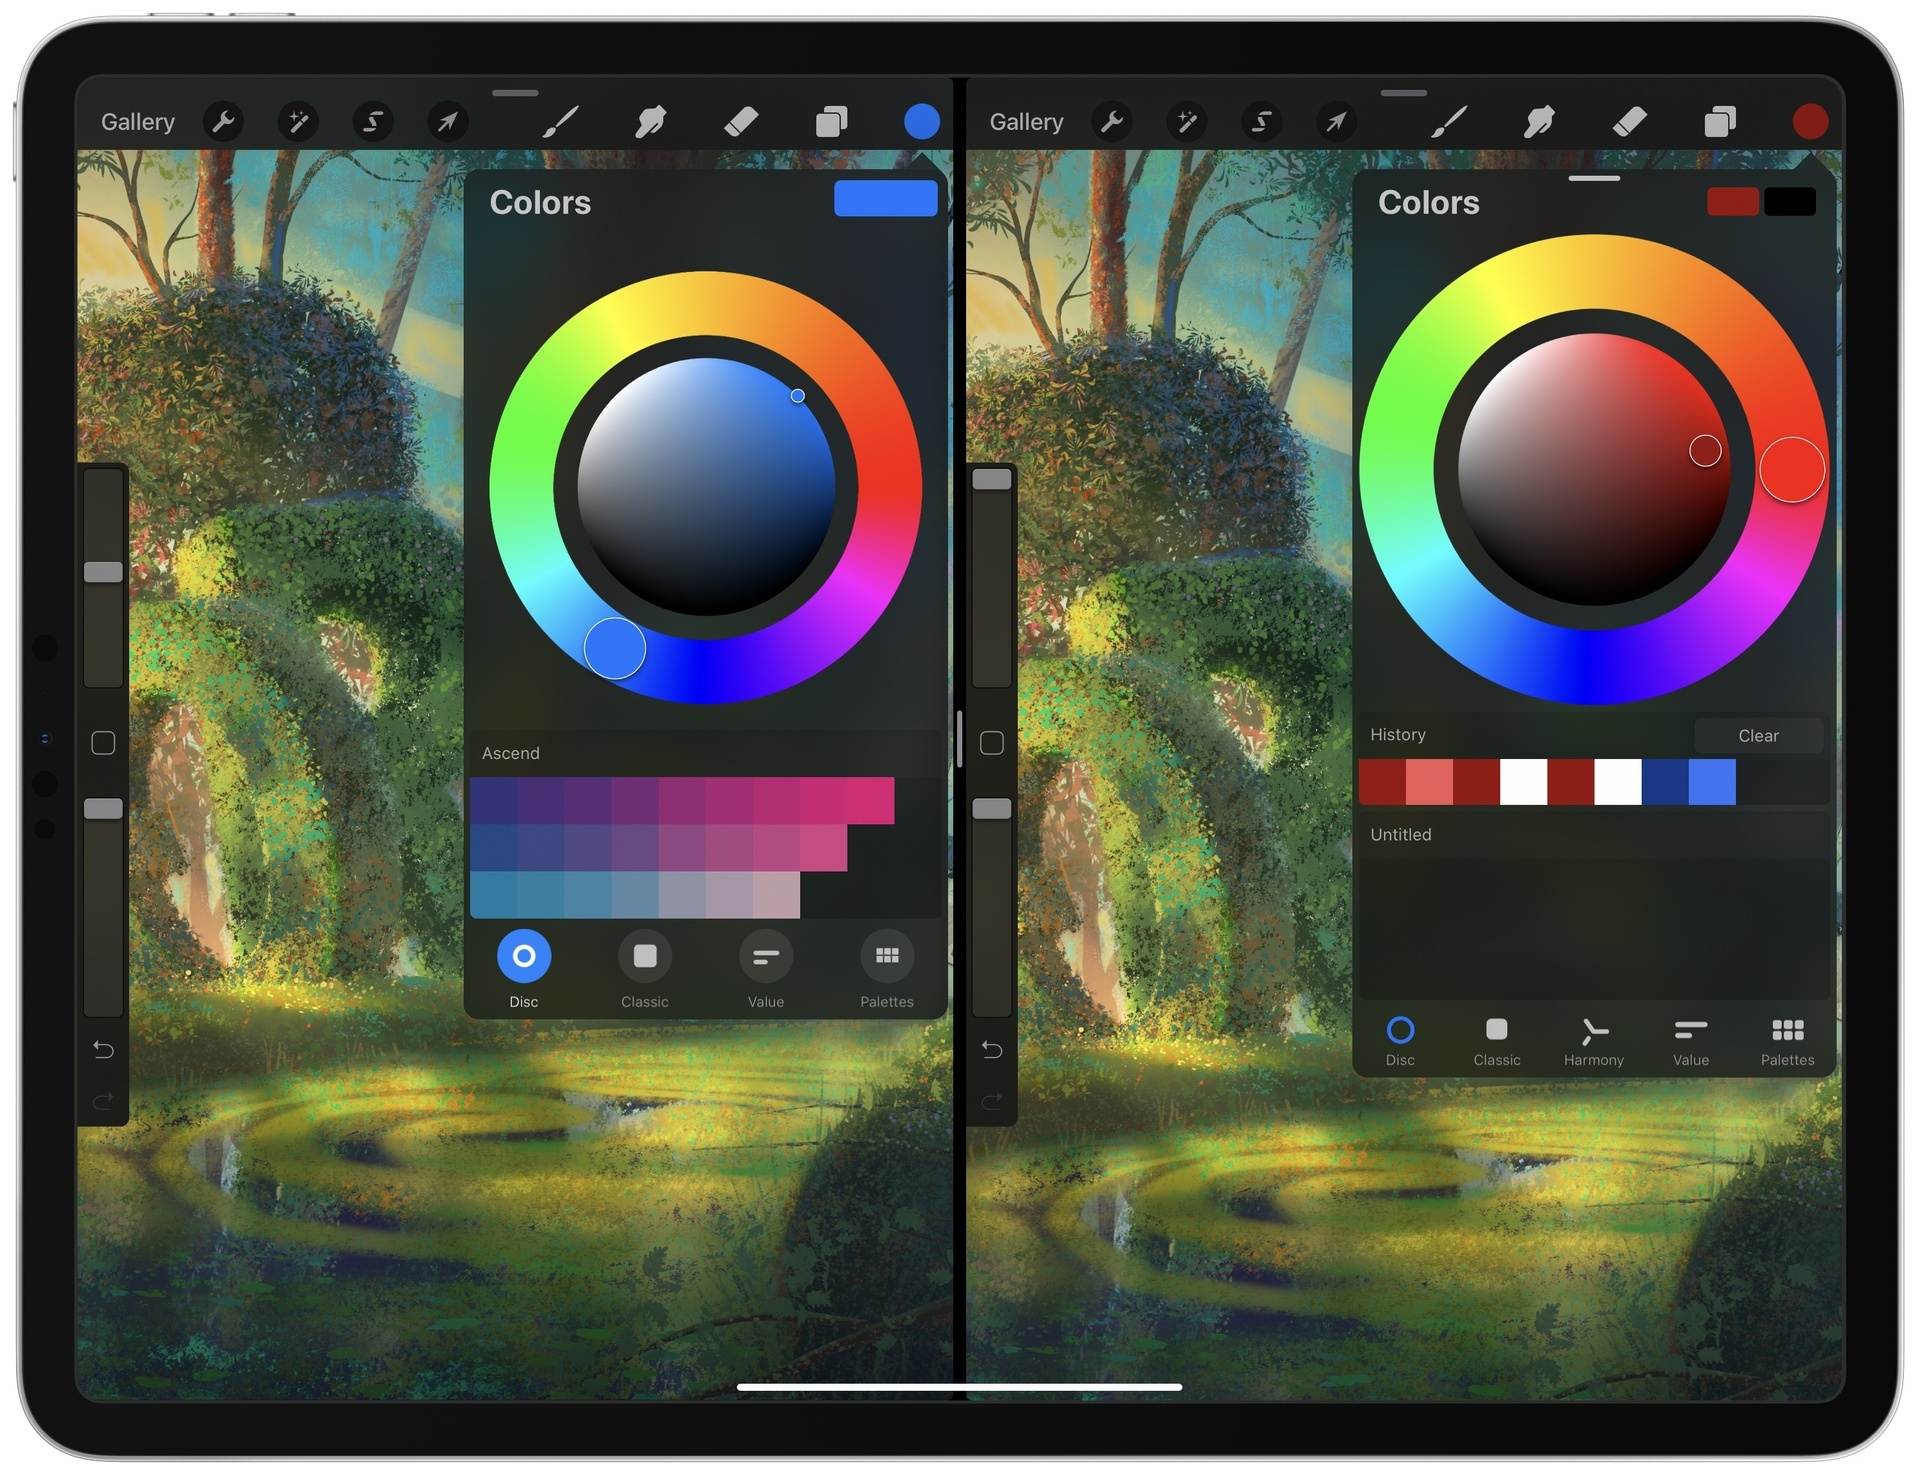
Utilizing the Color Wheel
When it comes to selecting colors for your Procreate artwork, one of the most powerful tools at your disposal is the Color Wheel. The Color Wheel is an essential feature that allows you to easily choose and combine colors that harmonize well together.
Understanding the Color Wheel can greatly enhance your ability to create visually stunning and cohesive artwork. The Color Wheel consists of a circular diagram that displays the relationships between primary, secondary, and tertiary colors. It is divided into different sections that represent the various color schemes and harmonies.
One of the key benefits of using the Color Wheel is its ability to help you select complementary colors. Complementary colors are pairs of colors that are opposite each other on the Color Wheel. These pairs create a vibrant and eye-catching contrast when used together in your artwork.
Another useful feature of the Color Wheel is the ability to create analogous color schemes. Analogous colors are groups of colors that are adjacent to each other on the Color Wheel. These color schemes create a harmonious and unified look in your artwork.
Additionally, you can use the Color Wheel to explore split complementary colors. Split complementary colors are a variation of complementary colors where you choose a main color and then select the two colors that are on either side of its complementary color. This creates a balanced and visually interesting color palette.
Furthermore, the Color Wheel allows you to experiment with triadic color schemes. Triadic colors are three colors that are evenly spaced around the Color Wheel, creating a balanced and dynamic palette. This can add depth and interest to your artwork.
Customizing the Color Palettes
Procreate offers a wide range of pre-made color palettes to choose from, but sometimes you may want to create your own custom palettes to suit your specific needs. With Procreate’s powerful customization options, you can easily create personalized color schemes to enhance your artwork. Here’s how you can customize the color palettes in Procreate:
1. Accessing the Color Palettes: To customize the color palettes in Procreate, first, open the Color Panel by tapping on the color icon in the top right corner of the screen. Then, tap on the Palettes tab at the top of the panel to view the available color palettes.
2. Creating a New Palette: To create a new custom palette, tap on the plus icon at the top right corner of the Palette tab. This will open the New Palette window where you can name your palette and choose a color harmony option.
3. Adding Colors to the Palette: After creating a new palette, you can start adding colors to it. To add a color, tap on the empty color swatch in the palette, and a color picker will appear. You can choose a color by selecting it from the color wheel or by manually entering the color values.
4. Organizing the Colors: Procreate allows you to rearrange the colors in your custom palette to suit your preferences. Simply tap and hold on a color swatch, then drag it to the desired position in the palette. This way, you can easily organize your colors for quick access during your drawing process.
5. Editing Colors in the Palette: If you want to make adjustments to a color in your custom palette, simply tap on the color swatch to open the color picker. From there, you can modify the hue, saturation, brightness, and opacity of the selected color to achieve the desired effect.
6. Importing and Exporting Palettes: Procreate also allows you to import and export custom color palettes. This is useful if you want to share your palette with other artists or if you want to use a palette created by someone else. You can import a palette by tapping on the Actions button in the Palettes tab and selecting the Import option. Similarly, you can export a palette by selecting the Export option and saving the palette file.
7. Deleting a Palette: If you no longer need a custom palette, you can easily delete it. Simply swipe left on the palette name in the Palettes tab, and a delete button will appear. Tap on the delete button to remove the palette from your color library.
By customizing the color palettes in Procreate, you can unleash your creativity and create stunning artworks that reflect your unique style. Experiment with different color combinations, explore new harmonies, and express yourself through vibrant and captivating colors. Procreate provides you with the tools you need to take your digital art to the next level.
Choosing the right colors is crucial when using Procreate to create stunning artworks. By understanding color theory and utilizing Procreate’s powerful tools, artists can bring their visions to life with precision and creativity. The color selection process starts with considering the mood and theme of the artwork, followed by experimenting with different color combinations to find the perfect harmony. Procreate’s color wheel, palettes, and hue, saturation, and brightness sliders provide numerous options for customization and fine-tuning. Whether you’re a beginner or an experienced artist, taking the time to explore and experiment with colors in Procreate will undoubtedly elevate your creations to new heights. So, embrace the world of colors in Procreate and let your imagination soar!
FAQs
1. How do I select a color on Procreate?
Selecting a color on Procreate is quite simple. To do so, follow these steps:
- Open the Procreate app on your device.
- Tap on the color palette icon, usually located in the top toolbar.
- You will see a spectrum of colors displayed. Swipe your finger to scroll through the available colors.
- If you have a specific color in mind, you can use the color picker tool. Tap and hold your finger on the canvas, and a magnifying glass will appear. Drag your finger to the desired color and release to select it.
- Alternatively, you can create custom colors by tapping on the color wheel icon. This will open a color wheel where you can adjust the hue, saturation, and brightness to create your desired color.
2. Can I import my own color palettes in Procreate?
Yes, you can import your own color palettes in Procreate. To do this, follow these steps:
- Ensure that the color palette you wish to import is saved as an image file on your device.
- In Procreate, go to the color palette menu by tapping on the color palette icon in the top toolbar.
- Tap on the “+” button to create a new color palette.
- In the color palette settings, tap on the “Import” button.
- Navigate to the location where your color palette image is saved and select it.
- Your custom color palette will now be imported into Procreate, and you can start using it in your artwork.
3. Can I save colors for quick access in Procreate?
Absolutely! Procreate allows you to save colors for quick access. To save a color, follow these steps:
- Open the Procreate app on your device.
- Tap on the color palette icon in the top toolbar to access the color menu.
- Select the color you want to save.
- Tap and hold the color. A pop-up menu will appear.
- Select the “Save Color” option.
- Choose the desired color palette to save the color in.
- The color will now be saved in the selected color palette and can be easily accessed in the future.
4. Is it possible to adjust the opacity of colors in Procreate?
Yes, Procreate allows you to adjust the opacity of colors. Here’s how you can do it:
- Open the Procreate app on your device.
- Select the color you want to adjust.
- In the color menu, locate the opacity slider.
- Slide the opacity slider left or right to decrease or increase the opacity, respectively.
- The color’s opacity will adjust accordingly, allowing you to achieve the desired transparency effect.
5. Can I create gradients with colors in Procreate?
Absolutely! Procreate makes it easy to create gradients with colors. Follow these steps to create a gradient:
- Open the Procreate app on your device.
- Select the drawing tool you want to use.
- Tap on the color menu to access the color picker.
- Select the first color you want to use in the gradient.
- Tap and hold the second color slot in the color menu.
- A pop-up menu will appear with various options. Select the “Gradient” option.
- A gradient editor will appear. Adjust the gradient sliders to create the desired gradient effect, selecting colors and adjusting opacity along the way.
- Once you’re happy with the gradient, simply start drawing with your selected drawing tool, and the gradient will be applied.