
Are you a digital artist or designer looking to learn how to crop an image on Procreate? Look no further, as this comprehensive guide will walk you through the step-by-step process of cropping images on Procreate. Procreate is one of the most popular digital art apps available, known for its powerful and versatile features. Cropping an image can be a crucial skill to master, whether you’re trying to remove unwanted elements, resize the composition, or create a custom aspect ratio for your artwork. With Procreate’s intuitive interface and robust editing tools, cropping an image has never been easier. So, let’s dive into this tutorial and unlock the potential of cropping images on Procreate.
Inside This Article
- Cropping Basics
- Step-by-Step Guide to Cropping in Procreate
- Advanced Cropping Techniques in Procreate
- Tips and Tricks for Cropping Images in Procreate
- Conclusion
- FAQs
Cropping Basics
Cropping an image is a fundamental editing technique that allows you to trim away unwanted parts of a photo and focus on the subject. Whether you want to remove distractions, create a tighter composition, or emphasize a specific area, understanding the basics of cropping is essential. In this article, we will guide you through the process of cropping an image on Procreate, a powerful software that brings creativity to your fingertips.
Procreate offers a intuitive and user-friendly interface, making it easy to crop images. The crop tool allows you to select a specific region and adjust the boundaries to achieve the desired composition. Let’s explore the cropping basics in Procreate.
1. Understanding the Crop Tool
The Crop tool in Procreate is located in the Transform Studio, represented by an icon that looks like a square overlapping a diagonal line. Once you select the Crop tool, the canvas will be overlayed with a bounding box, indicating the selected area for cropping.
2. Selecting the Crop Area
To select the area you want to crop, simply drag the corners or edges of the bounding box. Procreate provides handles that you can use to adjust the dimensions of the crop area. You can also rotate the bounding box by using two fingers and twisting on the screen.
3. Adjusting the Crop Boundaries
Once you have selected the crop area, you can fine-tune the boundaries to enhance the composition. Procreate offers various options to adjust the crop boundaries, such as flipping the image horizontally or vertically, scaling the crop area, or even changing the aspect ratio. These options give you flexibility in creating the perfect crop for your image.
4. Finalizing and Saving the Crop
After adjusting the crop boundaries, take a moment to review the composition and ensure that it meets your expectations. Once you are satisfied, tap the Crop button located at the top of the screen to finalize the crop. Procreate will then update the canvas with the cropped version of the image.
Remember to save your cropped image by exporting it to your desired format or saving it directly to your Procreate gallery. This way, you can easily access and share your beautifully cropped images.
Step-by-Step Guide to Cropping in Procreate
Procreate is a powerful digital art app that allows artists and designers to unleash their creativity. One of the essential features of Procreate is the ability to crop an image. Cropping an image is an important tool to focus on a specific area, remove unwanted parts, or change the composition of your artwork. In this article, we will provide you with a step-by-step guide on how to crop an image in Procreate.
Step 1: Launch Procreate and open the image you want to crop. You can either import an image from your device’s photo library or create a new canvas and draw something before cropping it.
Step 2: Tap on the “Actions” button, which is located in the top-right corner of the screen. It looks like a wrench icon.
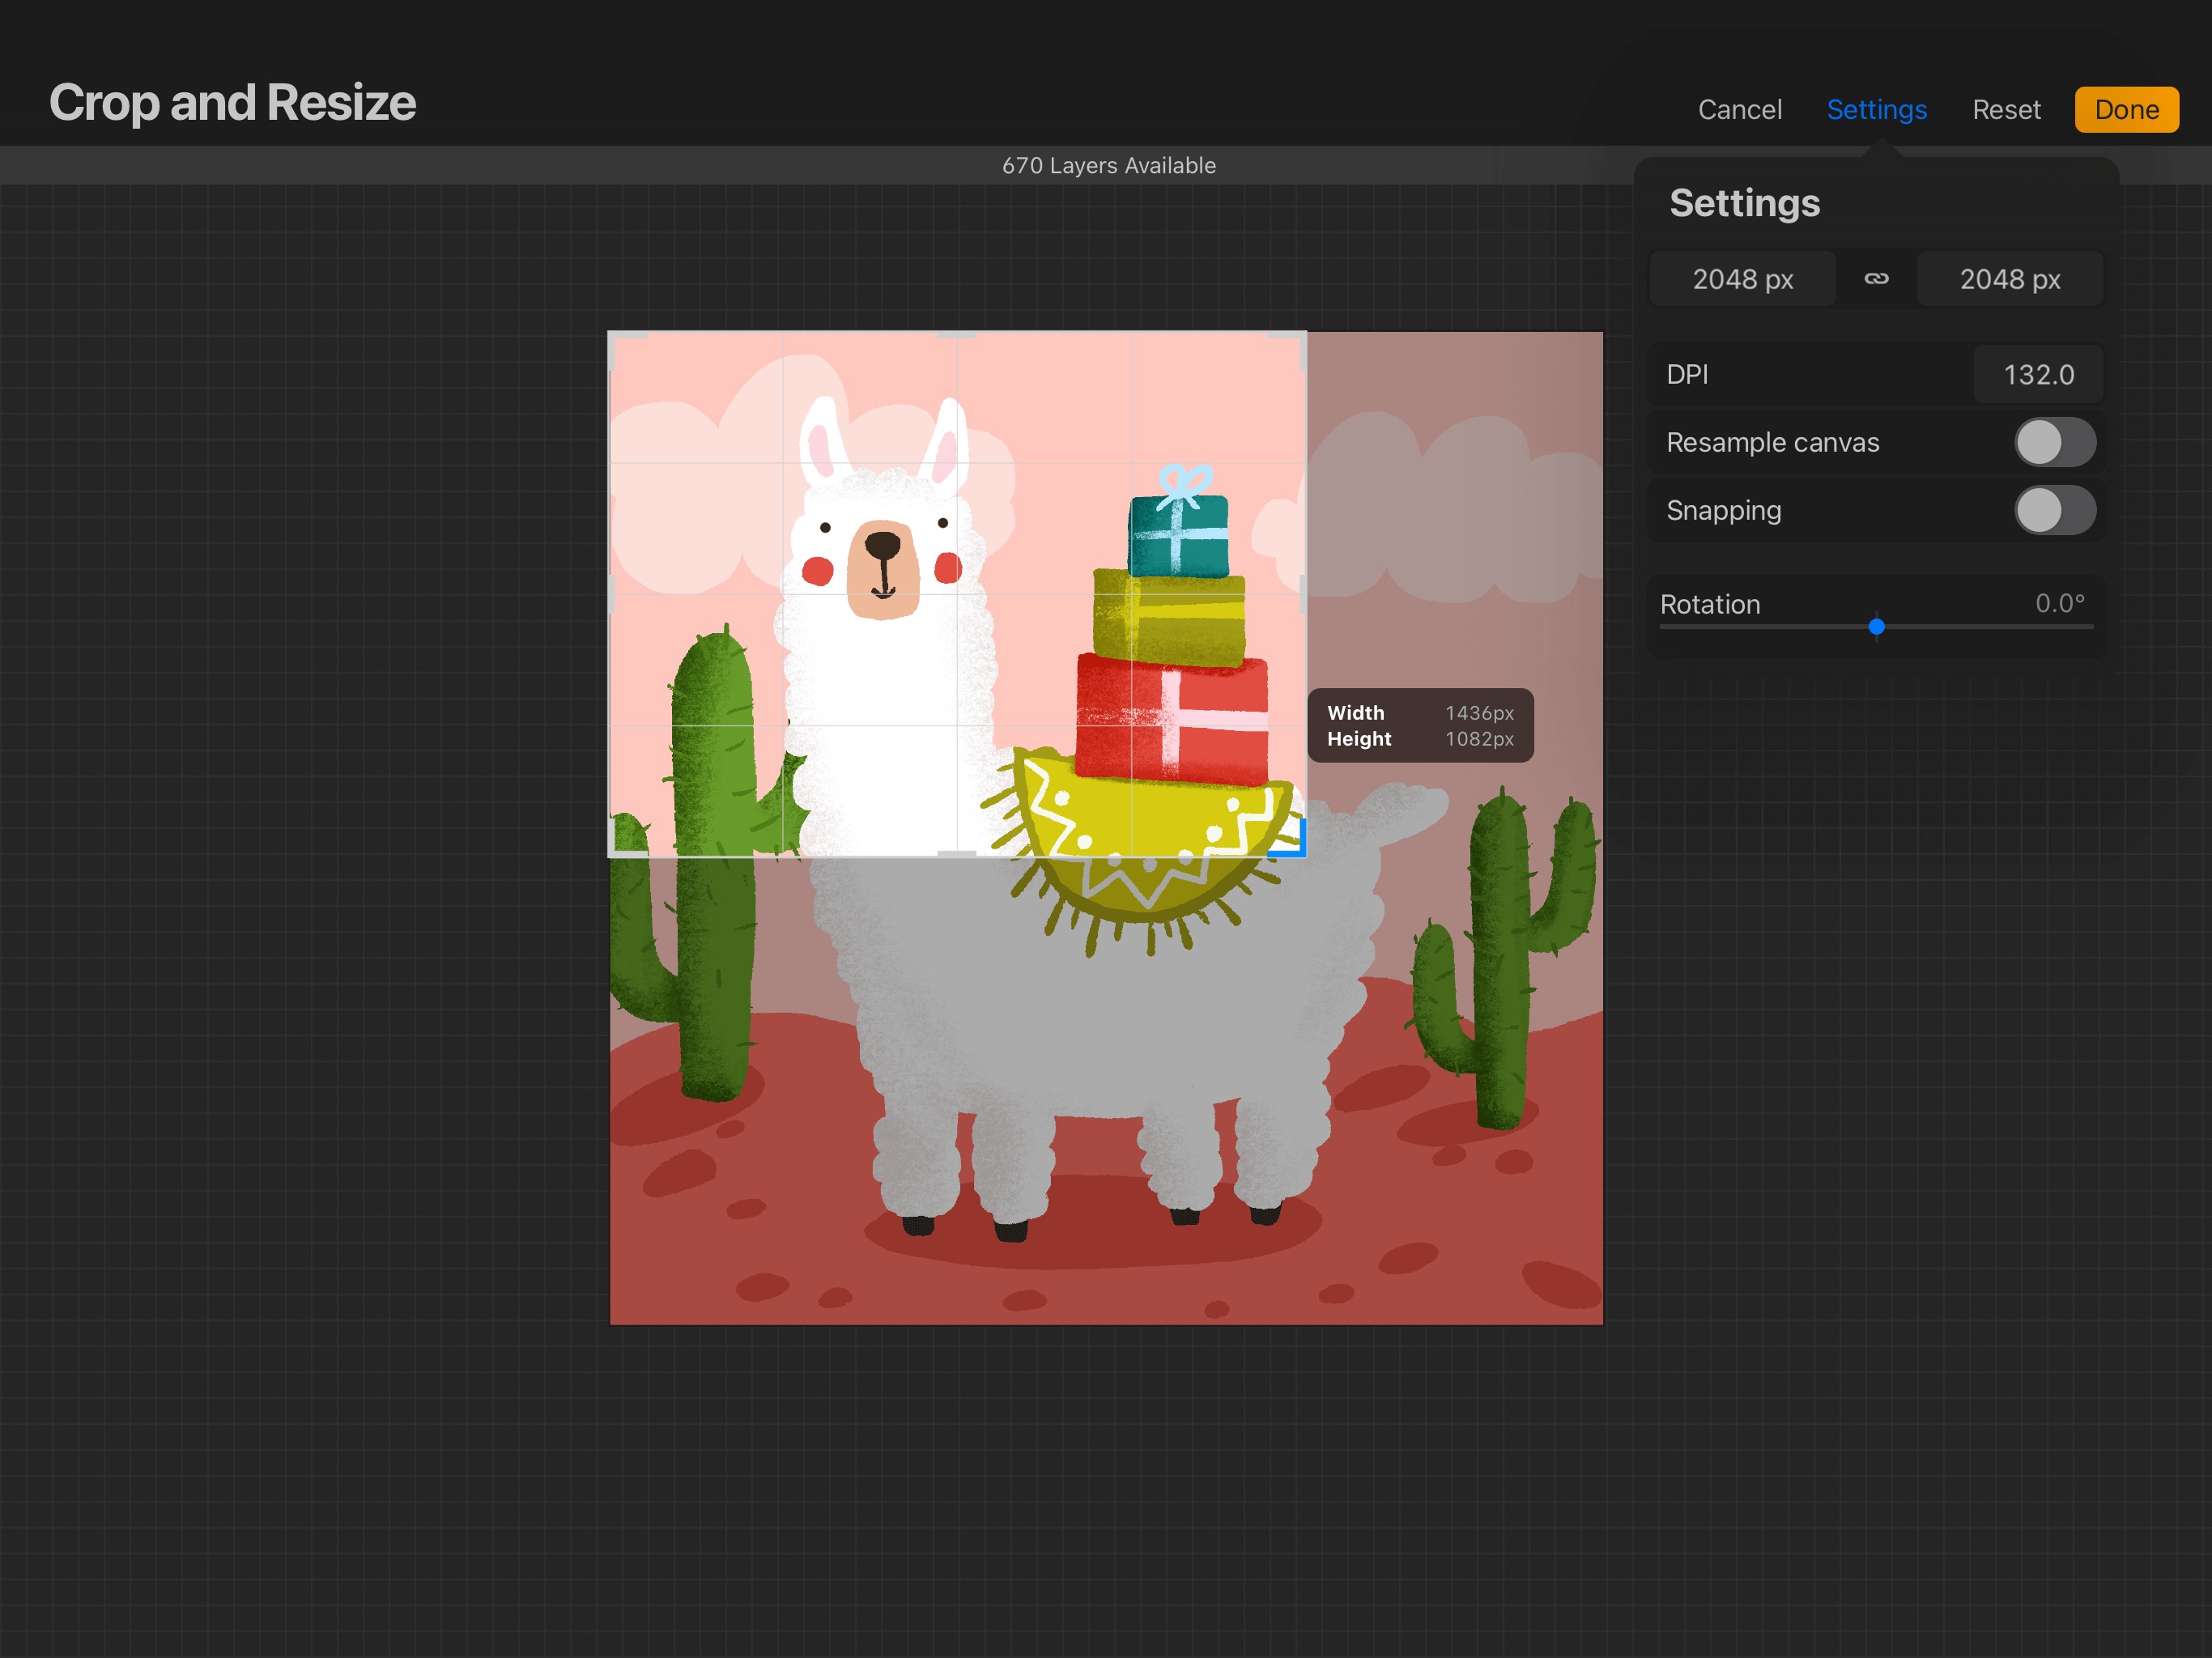
Step 3: In the Actions menu, tap on “Crop and Resize.” This will bring up the cropping options.
Step 4: You will see a bounding box on your image. You can adjust the size and position of the box by dragging the handles or tapping and dragging the box itself.
Step 5: To maintain the original aspect ratio of the image, make sure the “Constrain Proportions” button is toggled on. This will prevent your image from becoming distorted during the cropping process.
Step 6: Once you have adjusted the crop area to your liking, tap on the “Apply” button to confirm the crop. If you change your mind and want to start over, you can tap on the “Reset” button to revert to the original image.
Step 7: After applying the crop, you can make further adjustments to the cropped image using Procreate’s wide array of editing tools. This includes adjusting brightness, contrast, saturation, or adding filters and effects.
Step 8: When you’re satisfied with the final result, tap on the “Done” button located in the top-right corner to save your cropped image. You can choose to save it as a new file or overwrite the existing image.
Cropping an image in Procreate is a simple and straightforward process that allows you to have full control over the composition of your artwork. Whether you’re a professional artist, a hobbyist, or just someone who wants to edit their photos, Procreate provides all the necessary tools to accomplish your vision. So go ahead, get creative, and start cropping those images in Procreate!
Advanced Cropping Techniques in Procreate
If you’re a digital artist or designer using Procreate, you may already be familiar with its basic cropping functionality. But did you know that Procreate offers advanced cropping techniques that can take your artwork to the next level? In this article, we’ll explore some of the lesser-known cropping features in Procreate that can help you create stunning compositions and improve your overall workflow.
One of the advanced cropping techniques in Procreate is the ability to apply non-destructive cropping. This means that you can crop an image without permanently cutting off any part of it. Instead, Procreate creates a separate layer for the cropped area, allowing you to make adjustments or revert to the original image at any time. To use non-destructive cropping, simply select the Crop tool and adjust the boundaries as desired. Once you’re satisfied with the crop, Procreate will automatically create a new layer for the cropped area.
Another powerful cropping feature in Procreate is the ability to crop to a specific aspect ratio. This is especially useful when you’re working on projects that require images to adhere to certain dimensions. To crop to a specific aspect ratio, select the Crop tool and choose the desired ratio from the Aspect Ratio menu. Procreate offers a wide range of preset ratios, such as 16:9 for widescreen compositions or 1:1 for square images. If you don’t find the ratio you need, you can also manually enter custom dimensions.
Procreate also offers advanced options for refining your crop. For example, you can use the Perspective Distort tool to adjust the perspective of your crop, making it appear as if the image is viewed from a different angle. This can be especially useful when working on illustrations with complex backgrounds or when creating realistic compositions. Additionally, you can use the Transform tool to further resize, rotate, or flip the cropped image, allowing for even more precise adjustments.
Once you’ve perfected your crop, it’s time to save your artwork. Procreate gives you the choice to save the cropped image as a separate file or overwrite the original image. To save as a separate file, simply tap on the wrench icon to access the Actions menu and select “Crop & Share.” This will create a new file with the cropped image, leaving the original image intact. If you prefer to overwrite the original image, select “Crop & Edit” instead. Procreate will automatically replace the original image with the cropped version, giving you a streamlined editing process.
Tips and Tricks for Cropping Images in Procreate
Procreate is a powerful digital art and design app that offers a wide range of features for artists and designers. One of its useful tools is the Crop tool, which allows you to easily trim and adjust the composition of your images. Whether you want to remove unwanted parts of an image or create a specific focal point, understanding how to crop an image in Procreate can greatly enhance your artwork. Here are some tips and tricks to help you get the most out of the Crop tool.
1. Use the Crop tool to improve composition: The Crop tool in Procreate allows you to experiment with different compositions and ratios. By adjusting the crop boundaries, you can create a more balanced and visually appealing image. Take advantage of the Rule of Thirds or Golden Ratio to create a sense of harmony and balance within your artwork.
2. Maintain image quality: When cropping an image, it’s important to keep in mind that reducing the size may decrease its quality. To avoid pixelation or distortion, make sure to start with a high-resolution image. Additionally, Procreate offers the option to constrain the proportions while cropping, which helps maintain the image’s original dimensions and quality.
3. Experiment with different aspect ratios: Procreate offers a variety of aspect ratio presets, such as square, portrait, and landscape. Don’t be afraid to explore different ratios to find the one that best suits your artistic vision. Remember, each aspect ratio can evoke different emotions and convey different storytelling elements.
4. Fine-tune your crop: The Crop tool not only allows you to adjust the boundaries but also provides additional controls to refine your composition. You can rotate the crop, change the perspective, or even flip the image within the crop area. These advanced features give you the flexibility to create unique and dynamic visuals.
5. Undo and redo: If you’re not satisfied with your crop, don’t worry! Procreate allows you to undo and redo your actions, so you can experiment and make changes until you achieve the desired result. Simply use the undo and redo buttons or swipe left with two fingers to undo and swipe right to redo.
6. Crop non-destructively: Procreate’s Crop tool works in a non-destructive manner, which means you can always revert back to the original image or make further adjustments later on. This gives you the freedom to explore different cropping options without permanently altering your artwork.
7. Utilize the QuickMenu: To streamline your workflow, take advantage of Procreate’s QuickMenu feature. You can customize the QuickMenu to include the Crop tool, making it easily accessible with just a few taps. This will save you time and allow you to focus more on your creative process.
8. Experiment with the Transform tool: While the Crop tool is specifically designed for cropping images, don’t be afraid to combine it with other tools to achieve more complex effects. For example, you can use the Transform tool to resize, distort, or warp your cropped image, adding an extra layer of creativity to your artwork.
9. Save and export your cropped image: Once you are satisfied with your crop, it’s time to save and export your artwork. Procreate allows you to save your cropped image as a Procreate file or export it as a JPEG, PNG, or TIFF. Choose the file format that best suits your needs and share your masterpiece with the world.
With these tips and tricks, you can take your image cropping skills in Procreate to the next level. Remember to experiment, play around with different options, and trust your artistic instincts. The Crop tool is a versatile tool that can enhance the composition and storytelling elements of your artwork. Happy cropping!
Conclusion
In conclusion, Procreate is an incredibly powerful tool for cropping images on your mobile device. Its intuitive interface, extensive selection of editing tools, and seamless integration with the Apple Pencil make it a top choice for digital artists, illustrators, and designers.
By following the steps outlined in this article, you can easily crop images on Procreate and achieve the desired composition for your artwork. Whether you want to create a square-cropped profile picture for social media or crop a photo to remove unwanted elements, Procreate offers the flexibility and precision you need to achieve your vision.
Remember to experiment with different cropping techniques, aspect ratios, and composition rules to find the best approach for each specific image. With practice and creativity, you’ll be able to take your digital art and photo editing skills to new heights with Procreate. Enjoy the freedom and endless possibilities that this innovative app provides!
FAQs
1. How do I crop an image on Procreate?
2. Can I adjust the size of the cropped area?
3. Is there a way to rotate the cropped image?
4. Can I undo a crop in Procreate?
5. Will cropping an image reduce its resolution or quality?