
Welcome to the world of Procreate, the innovative drawing and painting app that has taken the digital art community by storm. With its wide array of powerful tools and intuitive interface, Procreate has become a go-to software for artists, illustrators, and designers looking to bring their creations to life on their mobile devices. One of the key features that make Procreate stand out is its ability to erase mistakes effortlessly and effectively. In this article, we will guide you on how to utilize the eraser tool in Procreate, providing you with step-by-step instructions and helpful tips to ensure seamless and precise erasing. Whether you’re a beginner exploring the world of digital art or an experienced artist looking to enhance your workflow, this article will equip you with the knowledge to erase in Procreate like a pro.
Inside This Article
Overview
Erasing mistakes or unwanted elements is an essential part of any digital art process. And when it comes to digital art creation, Procreate has emerged as one of the top choices for artists, designers, and even hobbyists. In this article, we will explore the various methods and techniques to erase in Procreate, ensuring you have the knowledge to create clean and polished artwork.
Procreate is a powerful and feature-rich drawing and illustration app available exclusively for iOS devices. It offers a wide range of tools and features that allow artists to create stunning artworks with ease. Whether you’re using Procreate for professional purposes or simply for fun, understanding how to erase effectively is crucial for achieving the desired results.
With Procreate, erasing is a straightforward process that can be done using the Eraser tool. This tool works similarly to a physical eraser, allowing you to remove unwanted lines, shapes, or color from your artwork. However, Procreate takes erasing a step further by offering various features and settings to enhance your erasing experience.
Whether you need to make small precise erasures or remove larger sections of your artwork, Procreate’s Eraser tool provides the flexibility to cater to your needs. It allows you to adjust the brush size, opacity, and hardness, giving you complete control over the erasing process. This level of customization enables you to achieve the perfect balance between accuracy and speed.
Furthermore, Procreate offers several other advanced erasing techniques, such as using the selection tools to isolate specific areas for erasing or using layer masks to preserve parts of your artwork while erasing the rest. These techniques come in handy when working on complex and intricate pieces, allowing you to make precise adjustments without affecting the entire artwork.
With its intuitive interface, extensive brush library, and powerful erasing capabilities, Procreate has become a favorite tool among digital artists worldwide. Whether you’re a beginner or an experienced artist, mastering the art of erasing in Procreate will elevate your creative process and ensure your artworks are polished and professional-looking.
Now that we have provided an overview of erasing in Procreate, let’s dive deeper into the specific steps involved in creating a new canvas, using the eraser tool effectively, and adjusting eraser settings accurately.
Creating a New Canvas
Procreate is a powerful digital art app that allows artists to unleash their creativity on a blank canvas. Whether you’re a professional artist or just getting started, creating a new canvas in Procreate is a fundamental step in the artistic process. In this section, we’ll walk you through the steps of creating a new canvas in Procreate.
To create a new canvas, open the Procreate app on your device. Once the app loads, you’ll be greeted with the Gallery screen. Here, you can see all of your existing artworks and access various options for creating new ones. Tap on the ‘+’ icon located at the top right corner of the screen to begin creating a new canvas.
A menu will pop up with different canvas options. You can choose from pre-defined sizes or customize the dimensions according to your preferences. Procreate offers a wide range of standard canvas sizes, including those specifically designed for different devices like the iPhone, iPad, or print formats. Select the size that suits your needs by tapping on it.
After selecting the canvas size, you’ll be taken to the Canvas Editor screen. This is where you can further customize various aspects of your canvas before you start your artwork. Procreate provides options to adjust the canvas resolution, color profile, and orientation.
If you want a higher level of detail in your artwork, you can increase the canvas resolution. However, keep in mind that higher resolutions may require more device resources and may affect performance. The color profile determines how colors are displayed on your canvas. You can choose from options like sRGB or P3, depending on your preferences. Finally, you can select the canvas orientation, such as landscape or portrait mode.
Once you’ve made all the necessary adjustments to your canvas settings, you’re ready to start creating! Tap the ‘Create’ button at the top right corner of the screen to finalize the creation of your new canvas. You’ll then be taken back to the Gallery screen with your new canvas displayed among your other artworks.
Creating a new canvas in Procreate is quick and simple, allowing you to dive into your artistic journey without any barriers. So, go ahead and unleash your creativity on a fresh digital canvas in Procreate!
Using the Eraser Tool
When working in Procreate, the Eraser Tool can be a powerful ally in your digital art journey. Whether you want to fix a small mistake or completely erase a section of your artwork, the Eraser Tool is there to help. Here’s a step-by-step guide on how to make the most out of this handy tool:
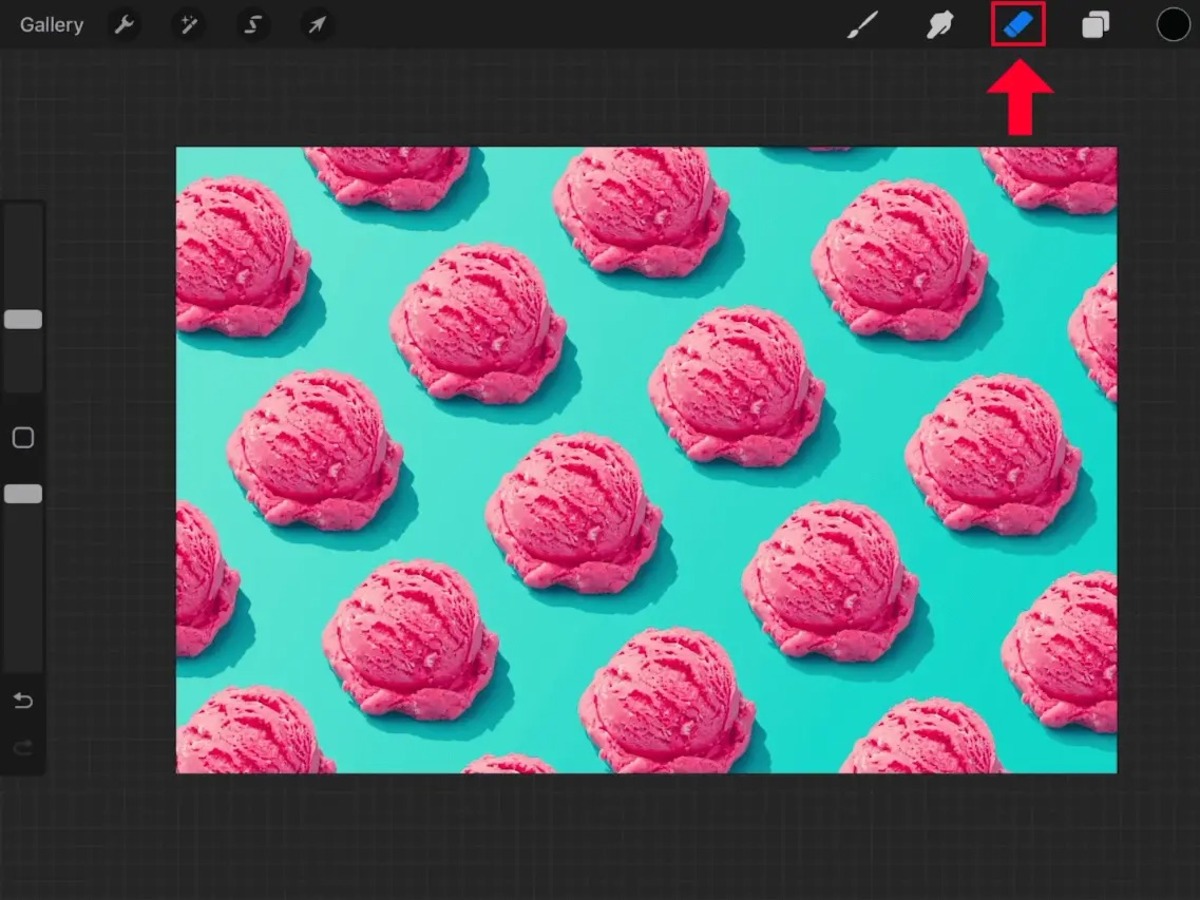
- Select the Eraser Tool: To start using the Eraser Tool, first, select it from the toolbar. It is usually represented by an icon resembling an eraser.
- Choose the brush size and opacity: Before you start erasing, it’s important to adjust the brush size and opacity according to your needs. You can do this by tapping the brush icon and adjusting the sliders or using the shortcuts.
- Erase with precision: Once you’ve set the brush size and opacity, you can begin erasing unwanted areas or mistakes in your artwork. Simply swipe or tap on the canvas to remove the selected portions.
- Try different eraser types: Procreate offers a variety of eraser types, including the standard, airbrush, and smudge erasers. Each type gives a different effect, so don’t hesitate to experiment and find the one that suits your needs.
- Undo and redo: Made a mistake while erasing? No worries! Procreate allows you to undo and redo your actions with ease. Simply tap the respective icons in the toolbar or use the two-finger swipe gesture on the canvas.
- Blend and soften edges: Sometimes, you may want to blend or soften the edges of the erased area. Procreate provides blending options for the eraser tool, allowing you to achieve a seamless and natural look.
- Layer masks: If you’re working with layers, utilizing layer masks can be a game-changer. Layer masks let you erase parts of a layer without permanently deleting them. This non-destructive editing technique enables you to make adjustments later if needed.
- Experiment with opacity and blend modes: Don’t be afraid to experiment with different opacity levels and blend modes for the eraser tool. These settings can add depth and texture to your artwork, allowing you to achieve unique effects.
With a bit of practice and exploration, you’ll soon become a pro at using the Eraser Tool in Procreate. Remember to save your work frequently and don’t be afraid to experiment and make mistakes. After all, that’s how you grow as an artist!
Adjusting Eraser Settings
When working with the eraser tool in Procreate, it’s important to familiarize yourself with the different eraser settings. These settings allow you to customize how the eraser behaves and can greatly enhance your editing workflow. Here are some key options you can adjust:
1. Size: The size setting allows you to control the diameter of the eraser brush. You can increase or decrease the size to match your desired level of precision. Larger sizes are ideal for erasing large areas, while smaller sizes are better for detailed work.
2. Opacity: The opacity setting determines how transparent or opaque the eraser will be. A higher opacity results in a more solid erasure, while a lower opacity creates a softer, more gradual effect. Adjusting the opacity can help you achieve different levels of blending and subtlety.
3. Hardness: The hardness setting controls the hardness or softness of the edges of the eraser brush. A high hardness value will create sharp, defined edges, while a low hardness value will produce softer, more feathered edges. This setting is particularly useful when you want to blend or smudge parts of your artwork.
4. Shape: Procreate offers a range of customizable eraser shapes, including round, square, and textured brushes. Depending on your preference and the type of effect you want to achieve, you can experiment with different shapes to find the one that suits your needs.
5. Pressure sensitivity: If you’re using a stylus or a tablet that supports pressure sensitivity, Procreate allows you to take advantage of this feature with the eraser tool. By adjusting the pressure sensitivity settings, you can control how the strength of the eraser varies based on the pressure you apply. This can provide you with more control and a more natural erasing experience.
By understanding and utilizing these eraser settings in Procreate, you can take your editing capabilities to the next level. Experiment with different combinations and adjustments to find the perfect eraser setup for your artistic style and preferences.
Conclusion
In conclusion, Procreate is a powerful and versatile app that allows artists to create stunning digital artwork on their iPads. With its wide array of brushes, customizable features, and intuitive interface, Procreate offers endless possibilities for artistic expression. Whether you’re a professional artist looking to take your skills to the next level or a beginner wanting to explore the world of digital art, Procreate provides the tools and resources you need to bring your imagination to life.
By following the step-by-step guide we provided in this article, you can easily erase mistakes or unwanted elements in your Procreate artwork. Remember to experiment with different brush types, opacity levels, and layer settings to achieve the desired results. Don’t be afraid to make mistakes, as the Undo and Redo features in Procreate make it easy to backtrack and correct any errors.
So, grab your iPad, download Procreate, and start creating amazing artwork with the confidence that you can easily erase any imperfections along the way. Unleash your creativity and explore the endless possibilities that Procreate has to offer!
FAQs
1. What is Procreate?
Procreate is a powerful and popular digital illustration app available exclusively for iOS devices. It offers a wide range of creative tools and features that allow artists to create stunning artworks, illustrations, and designs directly on their iPads or iPhones.
2. How do I erase in Procreate?
To erase in Procreate, you can use the eraser tool, which is located in the toolbar on the left side of the screen. Simply select the eraser tool and begin erasing by swiping it over the parts of the artwork you wish to remove. You can adjust the size, opacity, and hardness of the eraser in the brush settings for more precise erasing.
3. Can I undo my erasing in Procreate?
Yes, Procreate has a built-in undo feature that allows you to easily revert any changes or mistakes you have made, including erasing. To undo your erasing, you can tap the “Undo” button located at the top of the screen or use the two-finger tap gesture on the canvas.
4. Is there a way to selectively erase in Procreate?
Yes, Procreate provides various tools and features to help you selectively erase parts of your artwork. One popular method is to use the selection tools, such as the lasso or magic wand, to create a selection around the area you want to erase. Once you have the selection, you can use the eraser tool to erase within the selected area only.
5. Can I change the eraser brush in Procreate?
Absolutely! Procreate offers a wide range of customizable brushes, including eraser brushes. You can access the brush library, choose the eraser category, and select from different eraser brush presets. Additionally, you can adjust the settings of the eraser brush, such as size, opacity, and shape, to achieve the desired erasing effect.