
The iPhone 13 is an advanced and highly sought-after smartphone that offers a plethora of features and functionalities. One handy feature that many users find incredibly useful is the ability to set alarms. Whether you want to wake up on time, keep track of important appointments, or use reminders as a helpful tool throughout your day, learning how to set the alarm on your iPhone 13 is essential.
In this article, we will guide you through the step-by-step process of setting an alarm on your iPhone 13, ensuring that you never miss an important event or oversleep again. From accessing the Clock app to customizing alarm settings, we will provide you with all the information you need to become a pro at setting alarms on your iPhone 13. So, let’s dive in and learn how to effectively use this convenient feature on your iPhone 13!
Inside This Article
- Overview
- Step 1: Accessing the Clock App
- Step 2: Setting the Alarm
- Step 3: Customizing Alarm Options
- Step 4: Saving and Activating the Alarm
- Conclusion
- FAQs
Overview
Setting an alarm on your iPhone 13 is a simple and convenient way to ensure you wake up on time or keep track of important tasks throughout the day. Whether you’re a heavy sleeper or just need a reminder, the Alarm feature on your iPhone 13 is designed to meet your needs. In this article, we’ll guide you through the steps to set an alarm and customize its options to suit your preferences.
Follow these straightforward instructions to set the alarm on your iPhone 13:
Step 1: Accessing the Clock App
First, locate the Clock app on your iPhone 13. It’s a pre-installed app that comes with your device. The Clock app typically has an icon depicting a white clock on a black background. Tap on the Clock app icon to open it.
Step 2: Setting the Alarm
Once you’ve opened the Clock app, you’ll see different options at the bottom of the screen. Tap on the “Alarm” tab to access the alarm settings.
Next, tap on the “+” icon in the top right corner of the screen. This will create a new alarm for you to customize.
Use the scroll wheel to set the desired time for your alarm. You can adjust the hours and minutes separately by swiping your finger up or down on the corresponding number. When you’ve set the desired time, tap “Save” in the top right corner to proceed.
Step 3: Customizing Alarm Options
After saving the alarm, you’ll have the option to customize its settings. Tap on the alarm you want to modify.
You can now customize various options such as the alarm label, sound, snooze, and vibration. To change the label, tap on the “Label” field and enter a name for your alarm (e.g., “Wake up” or “Meeting Reminder”).
To select a different alarm sound, tap on “Sound” and choose from the list of available options. You can preview each sound by tapping on its name, making it easier to find the one that suits your preferences.
Toggle the “Snooze” switch to enable or disable the snooze function. When the snooze function is enabled, you’ll have the option to snooze the alarm for a few minutes after it goes off.
If you want your iPhone 13 to vibrate when the alarm goes off, toggle the “Vibration” switch to the “On” position. This can be useful in scenarios where you need a discreet reminder.
Once you’ve customized the alarm to your liking, tap “Back” or “Done” to save the changes.
Step 4: Saving and Activating the Alarm
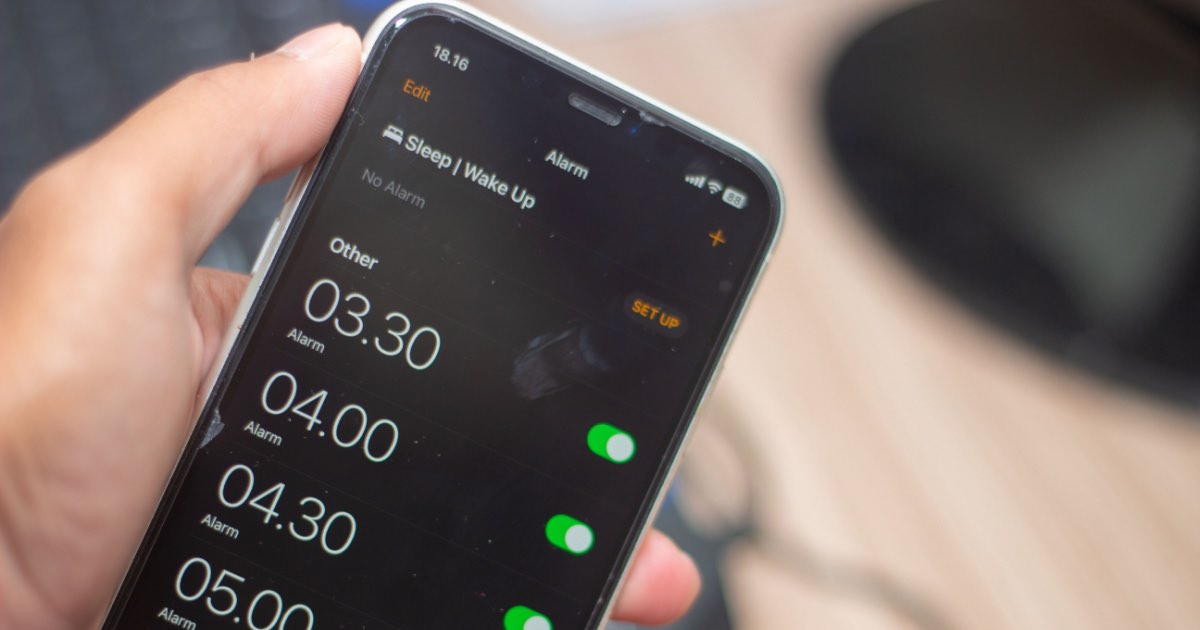
To activate the alarm, simply tap the switch next to the alarm you’ve just set. Once the switch turns green, the alarm is active and will go off at the designated time.
It’s important to note that your iPhone 13 must be turned on and not in silent or Do Not Disturb mode for the alarm to sound. Additionally, make sure the volume is set to an audible level so you can hear the alarm go off.
That’s it! You’ve successfully set the alarm on your iPhone 13. Now you can enjoy the convenience of waking up or staying on schedule with ease.
Step 1: Accessing the Clock App
Setting the alarm on your iPhone 13 is a breeze with the Clock app. To get started, simply follow these steps:
1. Locate the Clock app icon on your iPhone’s home screen. It looks like a white clock face on a black background.
2. Tap on the Clock app icon to launch the app. Once opened, you’ll be greeted with the Clock interface, which includes several tabs at the bottom of the screen.
3. Look for the “Alarm” tab, usually located towards the bottom of the screen. Tap on it to access the alarm settings.
4. You will now see a list of existing alarms, if any are already set. If this is your first time setting an alarm, the list will be empty.
5. To create a new alarm, tap on the “+” icon or the “Add” button, both of which are usually located in the top-right corner of the screen. This will allow you to start customizing your alarm.
And there you have it! You have successfully accessed the Clock app on your iPhone 13 and are ready to move on to the next step of setting your alarm.
Step 2: Setting the Alarm
Now that you have accessed the Clock app on your iPhone 13, it’s time to set the alarm. Setting the alarm is a straightforward process that can be done in just a few simple steps. Follow the instructions below:
1. Once you are in the Clock app, tap on the “Alarm” tab located at the bottom of the screen. This will take you to the Alarm section.
2. To create a new alarm, tap on the “+” button at the top right corner of the screen. This will open the New Alarm menu.
3. In the New Alarm menu, you will see a digital clock face where you can set the time for your alarm. Tap on the hour and minute digits to adjust the alarm time. You can either scroll up or down or use the “+” and “-” buttons to set the desired time.
4. As you set the alarm time, pay attention to whether it is AM or PM. The clock face will display a small AM or PM indicator to indicate the time of day.
5. Once you have set the desired alarm time, tap on the “Back” button at the top left corner of the screen to return to the Alarm section.
6. You will now see the alarm you just created listed in the Alarm section. The time you set will be displayed next to the alarm label. You can customize the label by tapping on the alarm and entering a new name or leaving it as the default “Alarm”.
7. Repeat these steps to create multiple alarms if desired. You can have different alarms set for different days, giving you the flexibility to customize your alarm schedule.
8. To delete an alarm, simply swipe left on the alarm in the Alarm section and tap on the “Delete” button that appears. This will remove the alarm from your list.
9. To activate an alarm, toggle the switch next to the alarm in the Alarm section. When the switch turns green, it means the alarm is active and will go off at the set time.
That’s it! You have successfully set the alarm on your iPhone 13. Now you can rest assured knowing that your phone will wake you up at the desired time.
Step 3: Customizing Alarm Options
Once you have accessed the Clock app and set the desired time for your alarm, you can further customize the alarm options to suit your preferences. The iPhone offers various features and settings that allow you to personalize your alarms. Here’s how you can customize your alarm options:
1. Repeat: If you want your alarm to repeat on specific days, tap on the “Repeat” option. You can select the days of the week when you want the alarm to go off. This is especially useful if you have a routine and want to set different alarms for weekdays and weekends.
2. Label: Adding a label to your alarm can help you remember the purpose of the alarm. To add a label, tap on the “Label” option and enter a descriptive name for your alarm. For example, you can label an alarm as “Workout” or “Medication” to remind you of specific tasks.
3. Sound: By default, the iPhone offers a range of built-in alarm sounds. To select a different sound, tap on the “Sound” option. You can preview the available sounds and choose the one that you find most appealing or suitable for your needs. Additionally, if you prefer waking up to your favorite song, you can select “Pick a Song” to choose from your music library.
4. Snooze: The snooze feature allows you to temporarily silence the alarm for a few minutes and then have it go off again. To enable the snooze option, toggle the switch next to “Snooze” to the on position. You can also adjust the snooze duration by tapping on “Snooze Duration” and selecting the desired time interval.
5. Bedtime Mode: If you use the Bedtime feature in the Clock app, you can toggle on the “Bedtime Mode” option for your alarm. Enabling Bedtime Mode ensures that your alarm gradually increases in volume, simulating a natural waking experience. This can be particularly helpful for those who prefer a gentler wake-up process.
6. Vibration: If you want your iPhone to vibrate along with the alarm sound, tap on “Vibration.” You can choose from various vibration patterns or create custom vibrations using the “Create New Vibration” option. This can be useful in scenarios where you want to rely on vibrations instead of sound alone.
7. Volume: To adjust the volume of the alarm, tap on “Volume.” You can slide the volume control to increase or decrease the alarm volume to a level that suits your preferences. This allows you to ensure that the alarm is loud enough to wake you up without being too disruptive.
Once you have customized the alarm options according to your liking, you can proceed to the next step of saving and activating the alarm.
Step 4: Saving and Activating the Alarm
Once you have set all the desired options for your alarm on your iPhone 13, it’s time to save and activate it. Saving and activating the alarm ensures that it will go off at the designated time and wake you up or remind you of important tasks or events.
To save the alarm, tap on the “Save” button located at the top right corner of the screen. This will save your alarm settings and add it to your list of alarms.
After saving the alarm, you will see it listed in the Alarm tab of the Clock app. Here, you can see the time, label, and other details associated with the alarm.
To activate the alarm, toggle the switch next to the alarm to the “On” position. When the switch turns green, it means that the alarm is activated and will go off at the set time.
It’s important to keep in mind that if you have multiple alarms set, only the ones that are activated will trigger. The inactive alarms will not go off, so make sure to double-check the status of each alarm before relying on them.
If you ever need to deactivate an alarm, simply toggle the switch next to it to the “Off” position. The switch will turn gray, indicating that the alarm is deactivated and will not go off until you activate it again.
Activating or deactivating alarms on your iPhone 13 is a straightforward process that ensures your alarm functions as intended. It gives you the peace of mind knowing that you will be alerted at the designated time, helping you stay on schedule and accomplish your tasks.
Conclusion
Setting the alarm on your iPhone 13 is a simple and convenient way to ensure you start your day on time or stay on top of important reminders. With the easy-to-use Clock app, you can customize your alarms to suit your needs and preferences.
Whether you prefer a gentle melody or a loud, attention-grabbing sound, the iPhone 13 offers a wide range of alarm tones to choose from. Additionally, the ability to set multiple alarms allows you to schedule different wake-up times or create alarms for various tasks throughout the day.
By utilizing the snooze function, you can enjoy a few extra minutes of sleep without worrying about oversleeping. And with the added option to label your alarms, you can easily differentiate between different alerts and stay organized.
The iPhone 13’s alarm feature is just one of the many ways this device enhances your daily life and keeps you on track. So, start maximizing your iPhone experience by setting up alarms that work for you.
FAQs
1. How do I set the alarm on iPhone 13?
Setting an alarm on your iPhone 13 is a straightforward process. First, open the Clock app, which you can find on your home screen or by swiping down on the Control Center. Then, tap the “Alarm” tab at the bottom of the screen. To add a new alarm, click the “+” button located in the upper-right corner. Adjust the time by scrolling up and down on the hours and minutes, and select the AM or PM option. You can also customize the alarm sound, snooze duration, and other settings according to your preferences. Finally, tap the “Save” button to set the alarm.
2. Can I set multiple alarms on my iPhone 13?
Yes, of course! iPhone 13 allows you to set multiple alarms according to your needs. To add another alarm, simply go to the Alarm tab in the Clock app and click the “+” button again. You can repeat this process as many times as needed to set different alarms at various times throughout the day.
3. Can I customize the alarm sound on my iPhone 13?
Absolutely! iPhone 13 offers a range of alarm sounds to choose from, allowing you to personalize your wake-up experience. When setting an alarm, tap the “Sound” option and browse through the available options or tap “Pick a Song” to select a specific song from your music library. Whether you prefer a gentle melody or an upbeat tune, you can find the perfect alarm sound that suits your style.
4. Is it possible to snooze the alarm on iPhone 13?
Yes, the snooze feature is available on iPhone 13. When your alarm goes off, you will see the option to snooze at the bottom of the screen. Simply tap the “Snooze” button, and your alarm will temporarily stop ringing for the duration set in your snooze settings. The default snooze duration is 9 minutes, but you can customize this in the Clock app settings if desired.
5. Can I delete an alarm on my iPhone 13?
Certainly! If you no longer need an alarm that you’ve set, you can easily delete it. Open the Clock app, go to the Alarm tab, and find the alarm you want to delete. Swipe left on the alarm, and a red “Delete” button will appear. Tap on it, and the alarm will be removed from your list of alarms. This way, you can keep your alarm settings tidy and only have the ones you need at any given time.