
Are you tired of capturing stunning photos, only to find that the subjects' eyes appear red in the final images? Fear not, as Lightroom Mobile offers a simple yet effective solution to this common issue. With the right tools and techniques, you can effortlessly eliminate red eyes and restore the natural beauty of your portraits.
In this comprehensive guide, we will delve into the step-by-step process of fixing red eyes in Lightroom Mobile. Whether you're a seasoned photographer or a novice enthusiast, mastering this skill will undoubtedly elevate the quality of your photographs. So, grab your mobile device, open up Lightroom, and let's embark on a journey to transform those red eyes into captivating, natural-looking gazes.
Inside This Article
- Understanding Red Eyes in Photography
- Using the Red Eye Correction Tool in Lightroom Mobile
- Adjusting the Red Eye Correction Tool Settings
- Finalizing the Red Eye Correction
- Conclusion
- FAQs
Understanding Red Eyes in Photography
Red eyes in photographs can be a common occurrence, often resulting from the camera's flash reflecting off the subject's retinas. This phenomenon is particularly prevalent when capturing images in low-light conditions, causing the subject's eyes to appear red or sometimes even a glowing shade of pink. While this occurrence may seem trivial, it can significantly detract from the overall quality of the image.
The scientific explanation behind red eyes in photography lies in the anatomy of the human eye. The retina, located at the back of the eye, contains numerous blood vessels that supply oxygen and nutrients to the surrounding tissues. When a camera flash is used in dimly lit environments, the pupils dilate to allow more light to enter the eye. As a result, the camera's flash reflects off the retina, capturing the red color of the blood vessels and producing the characteristic red eye effect in the photograph.
Understanding the root cause of red eyes in photography is crucial for effectively addressing this issue. It is not merely a matter of aesthetics but also a technical challenge that photographers and photo editors need to overcome to ensure the visual integrity of their images. In the past, red eyes were often considered an unavoidable consequence of using flash photography, but with advancements in digital editing tools, such as Adobe Lightroom Mobile, it is now possible to rectify this issue with precision and ease.
By comprehending the underlying reasons for red eyes in photography, photographers and photo editors can approach the correction process with a deeper understanding of the problem at hand. This knowledge empowers them to utilize the available tools and techniques to effectively eliminate red eyes from their images, thereby enhancing the overall quality and visual appeal of their photography.
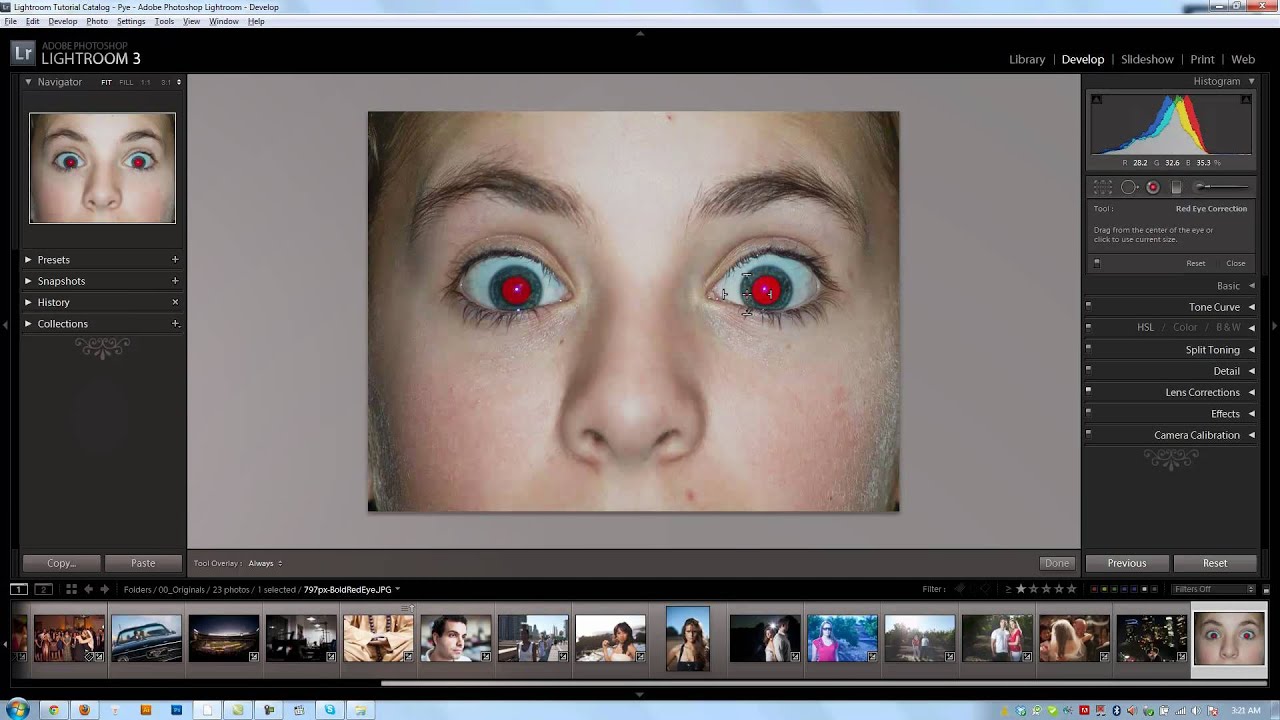
Using the Red Eye Correction Tool in Lightroom Mobile
In the realm of digital photo editing, Adobe Lightroom Mobile stands out as a powerful and versatile tool for enhancing the visual quality of images. One of its notable features is the Red Eye Correction Tool, which provides photographers and photo editors with an effective solution for addressing the common issue of red eyes in photographs. This tool offers a user-friendly interface and intuitive functionality, making it accessible to both amateur and professional users.
To initiate the red eye correction process in Lightroom Mobile, users can start by selecting the specific image containing the red eye effect. Once the image is loaded into the editing interface, the Red Eye Correction Tool can be accessed from the toolbar or the designated editing menu. This tool is designed to identify and target the areas of the image where red eyes are present, allowing users to apply precise adjustments to eliminate this unwanted visual artifact.
Upon selecting the Red Eye Correction Tool, users can then proceed to pinpoint the affected areas within the image. Lightroom Mobile provides a seamless and interactive method for identifying and marking the red eyes, enabling users to accurately define the regions that require correction. This intuitive approach streamlines the editing process, ensuring that users can efficiently isolate and address the red eye effect without unnecessary complexity.
Once the red eyes have been identified and marked using the Red Eye Correction Tool, users can proceed to apply the necessary adjustments to rectify this issue. Lightroom Mobile offers a range of customizable settings and parameters that empower users to fine-tune the correction process according to their specific preferences. By leveraging these controls, users can achieve precise and natural-looking results, effectively restoring the original appearance of the subject's eyes without any remnants of the red eye effect.
The Red Eye Correction Tool in Lightroom Mobile operates with a high degree of accuracy and flexibility, enabling users to achieve seamless corrections while preserving the natural characteristics of the eyes. This level of precision is essential for maintaining the authenticity and visual integrity of the image, ensuring that the corrected eyes appear natural and lifelike without any artificial alterations.
In essence, the Red Eye Correction Tool in Lightroom Mobile serves as a valuable asset for photographers and photo editors, offering a straightforward yet powerful solution for addressing red eyes in photographs. Its intuitive interface, coupled with customizable adjustments, empowers users to effectively eliminate the red eye effect, thereby enhancing the overall quality and visual appeal of their images. With this tool at their disposal, users can confidently tackle the challenge of red eyes in photography, knowing that they have a reliable and efficient solution within the capabilities of Lightroom Mobile.
Adjusting the Red Eye Correction Tool Settings
When it comes to effectively addressing red eyes in photographs using Lightroom Mobile's Red Eye Correction Tool, the ability to adjust the tool's settings plays a pivotal role in achieving precise and natural-looking results. This section delves into the various settings and parameters that can be customized within the tool, empowering users to fine-tune their corrections with a high degree of control and accuracy.
1. Size and Feathering
The Red Eye Correction Tool in Lightroom Mobile offers the flexibility to adjust the size of the correction brush, allowing users to precisely define the area of the red eye effect. By modifying the brush size, users can ensure that the correction is applied with the appropriate level of granularity, effectively targeting the affected regions without encroaching on the surrounding areas. Additionally, the tool provides feathering options, enabling users to control the softness of the correction brush's edges. This feature is instrumental in seamlessly blending the corrected areas with the natural texture of the eyes, ensuring a smooth and natural transition without any harsh or abrupt alterations.
2. Tint and Darkness
Lightroom Mobile's Red Eye Correction Tool offers the capability to adjust the tint and darkness of the corrected areas, allowing users to precisely match the color and tonal characteristics of the subject's eyes. By fine-tuning the tint, users can ensure that the corrected areas seamlessly blend with the original eye color, eliminating any discrepancies that may arise from the correction process. Similarly, the darkness parameter enables users to control the luminance of the corrected regions, ensuring that the red eye effect is effectively neutralized without compromising the natural appearance of the eyes.
3. Opacity and Blend Mode
In addition to the fundamental adjustments, the Red Eye Correction Tool provides options to modify the opacity and blend mode of the correction brush. These settings empower users to control the intensity and transparency of the correction, allowing for subtle and nuanced adjustments that seamlessly integrate with the original image. By leveraging the opacity and blend mode parameters, users can achieve a harmonious balance between the corrected areas and the surrounding eye structure, ensuring that the red eye effect is effectively eliminated while preserving the natural characteristics of the eyes.
4. Preview and Fine-Tuning
Throughout the adjustment process, Lightroom Mobile offers a real-time preview of the corrections, enabling users to assess the impact of their adjustments with precision. This dynamic preview functionality allows for iterative fine-tuning, empowering users to make informed decisions regarding the correction settings. By observing the real-time preview, users can refine their adjustments to achieve optimal results, ensuring that the red eye effect is effectively addressed while maintaining the authentic appearance of the subject's eyes.
In essence, the ability to adjust the settings of the Red Eye Correction Tool in Lightroom Mobile provides users with a comprehensive toolkit for achieving seamless and natural-looking corrections. By customizing the size, feathering, tint, darkness, opacity, and blend mode, users can effectively eliminate the red eye effect while preserving the genuine characteristics of the eyes. This level of control and precision empowers users to deliver visually compelling images that are free from the distractions of red eyes, enhancing the overall quality and impact of their photography.
Finalizing the Red Eye Correction
Once the adjustments have been meticulously applied using Lightroom Mobile's Red Eye Correction Tool, the finalization stage plays a crucial role in ensuring that the red eye effect is effectively eliminated while preserving the natural appearance of the subject's eyes. This phase involves a comprehensive review of the corrections, as well as additional refinements to guarantee that the final result meets the desired visual standards.
1. Detailed Examination
Before concluding the red eye correction process, it is essential to conduct a detailed examination of the corrected areas within the image. This involves zooming in on the eyes to assess the precision and natural blending of the corrections. By closely scrutinizing the corrected regions, users can identify any potential anomalies or discrepancies that may require further adjustments. This meticulous examination serves as a proactive measure to address any lingering traces of the red eye effect, ensuring that the final result reflects a seamless and natural appearance.
2. Natural Integration
During the finalization stage, particular attention should be given to the integration of the corrected areas with the original eye structure. It is imperative to ensure that the corrections seamlessly blend with the natural texture and tonal variations of the eyes. By refining the feathering and blend mode settings, users can achieve a harmonious integration that eliminates any perceptible demarcation between the corrected and uncorrected areas. This meticulous approach contributes to the overall authenticity of the image, presenting the subject's eyes in a natural and unaltered manner.
3. Comparative Analysis
Conducting a comparative analysis between the original image and the corrected version is instrumental in evaluating the efficacy of the red eye correction. By juxtaposing the two versions side by side, users can discern the tangible improvements resulting from the correction process. This comparative analysis serves as a validation of the corrections, affirming that the red eye effect has been effectively addressed without compromising the genuine characteristics of the eyes. Additionally, this comparative assessment provides a valuable perspective on the visual enhancements achieved through the correction process.
4. Fine-Tuning Iterations
In some instances, the finalization stage may necessitate iterative fine-tuning to achieve optimal results. This iterative approach involves making subtle adjustments to the correction settings based on the outcomes of the detailed examination and comparative analysis. By iteratively refining the correction parameters, users can address any residual traces of the red eye effect and further enhance the natural appearance of the eyes. This iterative fine-tuning process underscores the commitment to delivering visually compelling and authentic results, ensuring that the red eye correction is executed with precision and finesse.
In essence, the finalization stage of the red eye correction process in Lightroom Mobile represents the culmination of meticulous adjustments and critical evaluations. By conducting a detailed examination, prioritizing natural integration, performing comparative analyses, and engaging in iterative fine-tuning, users can confidently conclude the correction process with the assurance of achieving visually captivating and authentic results. This comprehensive approach underscores the dedication to preserving the visual integrity of the image while effectively eliminating the distractions of red eyes, ultimately enhancing the overall quality and impact of the photography.
In conclusion, addressing red eyes in Lightroom Mobile is a simple yet crucial aspect of photo editing. By following the steps outlined in this article, you can effortlessly eliminate red-eye effects and enhance the overall quality of your images. With the convenience of mobile editing, you have the power to refine your photos on the go, ensuring that every image reflects the true beauty of the moment captured. Embracing the tools and techniques available in Lightroom Mobile empowers you to produce stunning, professional-looking photographs that resonate with clarity and visual appeal. So, go ahead and apply these tips to banish red eyes from your mobile photos, elevating your photography to new heights.
FAQs
-
What causes red eyes in photos taken with a mobile phone?
Red eyes in photos are caused by the reflection of light off the blood vessels in the back of the eye. When the camera flash is too close to the lens, it can cause this reflection, resulting in the appearance of red eyes in the photo. -
Can red eyes be fixed in Lightroom Mobile?
Yes, Lightroom Mobile offers a simple and effective red eye correction tool that allows you to easily remove red eyes from your photos. -
Is it possible to fix red eyes in multiple photos at once in Lightroom Mobile?
Lightroom Mobile provides the option to apply red eye correction to multiple photos simultaneously, saving time and effort when editing a series of photos with red eye issues. -
Does correcting red eyes in Lightroom Mobile affect the overall quality of the photo?
When using the red eye correction tool in Lightroom Mobile, the overall quality of the photo is preserved, ensuring that the correction seamlessly integrates with the original image. -
Are there any additional tips for preventing red eyes in mobile photography?
To minimize the occurrence of red eyes in your mobile photos, consider adjusting the flash settings, using natural lighting whenever possible, and ensuring that the camera flash is not too close to the lens.