Do you really know how to delete all photos from iPhone? Perhaps the only way you know is to go to the Photos app, then delete them one at a time. That’s one tedious way of deleting your photos. Maybe, you’ve also resorted to doing a factory reset on your iPhone just to get rid of those unwanted photos and files. Obviously, that is not a practical way of deleting your photos.
Fret not, though. There are ways on how to delete all your photos instantly from your iPhone. Now, you don’t have to tap, swipe, and tap again just to delete these photos.
Why Delete All Photos on Your iPhone?

Maybe you got those selfies that you don’t want to upload on Instagram. Or you snapped a million photos in the past minute because you just love the great rear camera of your iPhone. As a result, your memory is all crammed up with unnecessary selfies and photos.
The prime purpose of why you might need to delete your photos is to allot more space for your phone. You cannot just cram all your important files on your phone’s memory, so better back up your photos on your iCloud. You may also use a third-party cloud app like Dropbox Mobile so you won’t just save your files but also safely share this with your family and friends.
Actually, there is little need to wipe out all your photos on your photo album. Your iPhone automatically optimizes your storage for your photos. It deletes old files and photos automatically, therefore, giving more space for your phone. Before your photos are deleted, make sure that you back these up so you won’t need to scurry on your files again finding that precious photo that was suddenly deleted.
How to Delete All Photos From iPhone?
Now, how do you delete all your photos without breaking a sweat? You really want to know this for sure. Here are some of the ways you can delete your photos on your iPhone easily.
Use Swipe Gestures

You might not know this, but iOS has made a way to delete pictures just by using some swipe gestures. This way, all you have to do is to slide your fingers on what to select and delete. To do this, follow these steps:
- Choose and tap the album/s where you want to delete your photos.
- Tap “Select” in the upper-right corner.
- Select a photo you want to delete by tapping on its thumbnail.
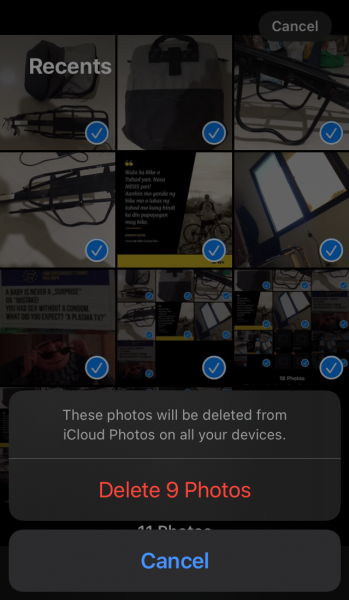
- Hold and slide towards the other pictures you want to delete. The selected photos are indicated by a blue checkmark at the bottom-right of each thumbnail.
- Press the “Delete” icon located at the lower-right.
- Once prompted, press the “Delete [number] Photos.”
This procedure only deletes your photos on your iCloud. It does not completely erase your deleted photos on your phone. If you want to permanently delete your photos, do the following steps:
- Go on “Albums,” scroll down a bit, then select “Recently Deleted.”
- Select the photos you want to permanently delete.
- Select the “Delete” icon.
- When the prompt appears, select “Delete [number] Photos.”
This is perhaps the most accessible way of deleting your pictures since you are doing it on an iPhone. However, you might select some of your important photos while you are swiping. So better double-check your selections before completely deleting it.
Delete Your Albums

When you want to delete all photos stored on your iPhone, there is a more convenient way of doing this. You can delete albums on your iPhone. This way, you can wipe out all those unwanted photos on your phone.
Here are the steps on how to do this:
- Go to the “Albums” section of the Photo app.
- Tap on “See All.” You will see all your created albums.
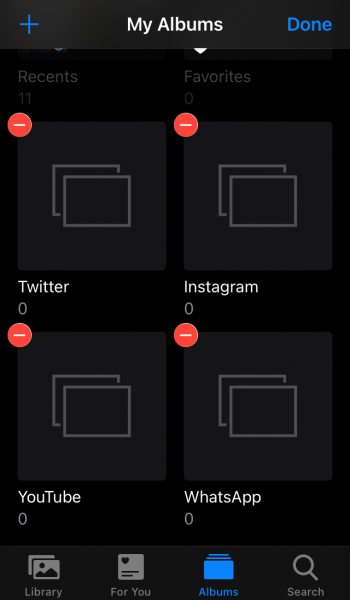
- Select “Edit.” You will see a red dash icon at the top-left corner of the album thumbnails.
- Lastly, tap on the said icon. Once a popup message appears, select “Delete Album.”
Take note that this option only applies to created albums. When you or your apps did not create any albums, you will need to access your “Recents” album. Then you have to delete the photos using the abovementioned method.
Delete Photos Using Your Mac

If for some reason you cannot delete all your photos on your iPhone, there is another way of doing this. You can go to your Mac and connect your iPhone to it.
Here is the step-by-step procedure on how to do it:
- Connect your iPhone to your Mac via your charging cable.
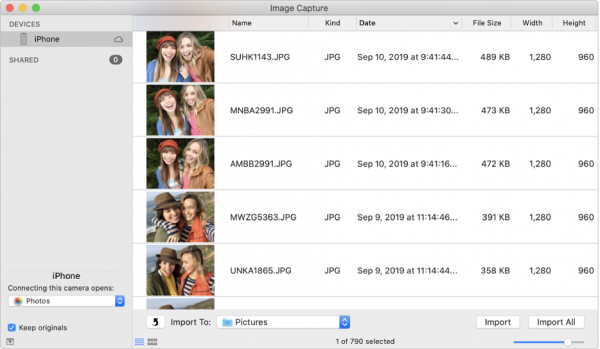
- Open “Image Capture” on your Mac. Check first if your iPhone is already registered as a trusted device by your Mac. If it is your first time doing this, a popup message on your iPhone will appear. Either add your iPhone as a trusted device or enter a passcode that will enable your Mac to access your iPhone.
- Wait until your Mac displays all your pictures.
- Once it is all displayed, hit the Command + A then select the red circular icon beside the “Import To” button.
- A popup message will appear. Press “Delete.” This process is irreversible, so take a look at your pictures first before doing this.
As with every deleting process, it is a rule of thumb to back up your files and photos before doing so. You may choose to back up your photos with cloud storage. Or you may opt to back up your iPhone using an external hard drive. This way, you can save on monthly costs by saving your files on an external hard drive.
Final Word
With the emergence of iPhones with better and bigger storage options, you want to store all your photos and files on your device’s memory. But watch out, for you might be running out of storage. So better skim on your photo album, back up those precious ones, and delete all your photos. This way, you can install more apps and store more important files on your phone. Now, you don’t have to worry about saving your photos and running out of space.
Erased all your photos but still struggling with a slowing iPhone? Check out our article on why your phone is slowing down and how to fix it.
FAQs on Deleting iPhone Photos
Perhaps you still have fears of losing your precious memories captured by your phone. So before you dive into deleting all your photos, here are some of the frequently asked questions (FAQs) on managing your photos on your iPhone.
