
In today’s fast-paced world, meetings are an essential part of our professional lives. They provide a platform for collaboration, decision-making, and brainstorming. However, keeping track of all the valuable discussions and ideas that arise during a meeting can be a challenge. Thankfully, with the advent of mobile phone technology, recording a meeting has become easier than ever before. By using the built-in features and applications on your smartphone, you can effortlessly capture and preserve every important detail of a meeting. In this article, we will explore the step-by-step process of how to record a meeting on your phone, ensuring that you never miss out on any crucial information. Whether it’s for future reference or sharing with absent colleagues, recording a meeting on your phone is a game-changer in boosting productivity and efficiency. So, let’s dive in and unlock this valuable feature of our mobile devices.
Inside This Article
- Choosing the Right App
- Preparing Your Phone for Recording
- Positioning Your Phone for Optimal Audio Quality
- Starting and Stopping the Recording
- Managing and Sharing the Recorded Meeting
- Conclusion
- FAQs
Choosing the Right App
When it comes to recording a meeting on your phone, one of the first considerations is selecting the right app for the task. With a plethora of options available on the app stores, it can be a bit overwhelming to make a choice. However, by considering a few key factors, you can easily narrow down your options and find the perfect app for your needs.
The first thing to consider is the compatibility of the app with your phone’s operating system. Whether you’re using an iPhone or an Android device, ensure that the app you choose is compatible with your specific system. This will ensure smooth functionality and a seamless recording experience.
Another important factor to consider is the features offered by the app. Different apps come with varying functionalities, so it’s crucial to determine what features are essential for your meeting recording. Look for options such as audio quality adjustment, background recording, and the ability to save recordings in different formats.
Furthermore, user reviews and ratings can give you valuable insights into the performance and reliability of the app. Take the time to read reviews and assess other users’ experiences to get an idea of how well the app works in real-world scenarios.
Lastly, consider the pricing model of the app. Some apps are free to use but may have limitations on recording time or extra features that can only be unlocked with a paid version. Evaluate your budget and determine if the features provided by the paid version are worth the investment for your recording needs.
By considering these factors, you can choose an app that meets your requirements in terms of compatibility, features, user experience, and budget. Remember to read the app’s description and check its user ratings to ensure you’re making an informed decision.
Preparing Your Phone for Recording
Before you start recording a meeting on your phone, there are a few important steps you should take to ensure optimal audio quality and a seamless recording experience. Here’s what you need to do:
1. Clear Your Phone’s Memory: Recording a meeting can take up a significant amount of storage space on your phone. To prevent any interruptions or storage-related issues during the recording, it’s a good idea to clear out unnecessary files, photos, and apps from your phone’s memory.
2. Enable Airplane Mode: To avoid any distractions or interruptions, it is recommended to enable Airplane Mode on your phone before starting the recording. This will ensure that no incoming calls, messages, or notifications disrupt the audio recording.
3. Adjust the Phone’s Settings: Take a moment to review and adjust the settings on your phone. Ensure that the volume is set to an appropriate level for capturing the meeting’s sound clearly. You may also want to disable any screen lock or auto-sleep settings to keep the recording uninterrupted.
4. External Microphone (Optional): If you anticipate capturing a larger meeting or if the room has poor acoustics, consider using an external microphone. This can significantly enhance the audio quality and ensure that all participants’ voices are captured without distortion or interference.
5. Test the Recording App: If you are using a dedicated recording app, it’s essential to test it beforehand. Make sure you are familiar with its features, settings, and functionality. Perform a test recording to ensure everything is working correctly and that the app is capturing the audio clearly.
By preparing your phone in advance, you can help ensure a smooth recording process and obtain a high-quality audio recording of your meeting. With these steps in place, you’re ready to move on to the next phase – positioning your phone for optimal audio quality.
Positioning Your Phone for Optimal Audio Quality
Once you have selected the appropriate app and prepared your phone for recording, it’s essential to position your phone correctly to ensure optimal audio quality during the meeting. The way you position your phone can greatly impact the clarity and volume of the recorded audio.
Here are some tips to help you position your phone for the best audio quality:
- Place your phone close to the center of the meeting area: Find a stable surface, such as a table or desk, and position your phone close to the center of the meeting area. This will help capture the voices of all participants evenly and reduce the chances of one person dominating the audio.
- Avoid placing your phone too close to any individual: While it’s important to have your phone in the center, make sure it is not too close to any one person. Placing it too close to someone may result in their voice being amplified while others sound distant or muffled.
- Consider using a phone stand or tripod: To ensure a steady position for your phone, you can use a phone stand or tripod. These accessories provide stability and allow you to adjust the angle and height, providing flexibility to capture the audio from a wider range of directions.
- Minimize background noise: When positioning your phone, pay attention to the surrounding environment. Try to minimize any potential sources of background noise, such as air conditioners, fans, or other devices, as they can interfere with the audio quality and make it harder to understand the meeting discussion.
- Test the audio quality beforehand: Before starting the official recording, conduct a quick test to ensure the audio quality is clear and balanced. This will allow you to make any necessary adjustments to the positioning of your phone and address any issues that may affect the recording.
Remember, the goal is to capture the audio from all participants in the meeting as accurately as possible. By following these positioning tips, you can enhance the clarity and quality of the recorded audio, ensuring you capture all the important details and discussions during the meeting.
Starting and Stopping the Recording
Once you have chosen the right app and positioned your phone for optimal audio quality, it’s time to start and stop the recording. Follow these steps to ensure a smooth recording experience:
1. Open the recording app on your phone. Look for the app icon on your home screen or in the app drawer. Tap on it to launch the app.
2. Before starting the meeting, make sure to adjust the recording settings in the app. You may have options to adjust the recording quality, file format, and storage location. Take a moment to customize these settings according to your preferences.
3. When the meeting begins, tap the “record” button in the recording app to start capturing the audio. Some apps may also offer video recording options if you wish to record the visuals along with the audio. Ensure that the app is actively recording by looking for a timer or recording indicator on your screen.
4. As the meeting progresses, make sure to keep your phone in a stable position to avoid any disturbance in the audio quality. Avoid touching the microphone or covering it with your hand to maintain clear and crisp sound.
5. If there are any breaks or pauses during the meeting, you can pause the recording temporarily by tapping the “pause” or “stop” button in the app. This is helpful if you want to skip unrelated or confidential discussions. Remember to resume recording when the meeting resumes.
6. Once the meeting is concluded or you no longer wish to continue recording, tap the “stop” button in the recording app. This will finalize the recording and save it as a separate file on your phone.
7. After stopping the recording, take a moment to review the audio file in the app. You can listen to a playback of the recording to ensure that the audio is clear and audible. If there are any issues with the recording, you may need to adjust the app settings or reposition your phone for future meetings.
8. Finally, remember to save and store the recorded file in a secure location. You can choose to keep it on your phone, transfer it to a computer or cloud storage service, or even share it with colleagues using file sharing options provided by the recording app.
By following these steps, you can easily start and stop the recording of your meetings on your phone. Ensure that you are familiar with the recording app’s features and settings to make the most out of your recording experience.
Managing and Sharing the Recorded Meeting
Once you have successfully recorded a meeting on your phone, you will need to know how to effectively manage and share the recorded file. Here are some steps to help you through the process:
1. Organize your recordings: Create a designated folder or directory on your phone to keep all your recorded meetings in one place. This will make it easier for you to access them later.
2. Rename your files: Give your recordings descriptive and identifiable names. Avoid generic names like “Recording 1” or “Meeting 2”, and instead use titles that accurately reflect the content or purpose of the meeting.
3. Transcribe important sections: If you have the time and resources, transcribing important sections of the recorded meeting can be incredibly beneficial. This allows you to easily refer back to specific points without having to listen to the entire recording.
4. Edit if necessary: If there are any confidential or unnecessary parts in the recording, consider editing them out to maintain privacy and focus on the essential content. There are various audio editing apps available that can help you accomplish this.
5. Back up your recordings: It’s crucial to ensure that your recorded meetings are backed up regularly to avoid the risk of losing them. You can save them to your computer, cloud storage services, or an external hard drive for extra security.
6. Share with colleagues: If you need to share the recorded meeting with your colleagues or team members, there are a few options available. You can send the file through email, use file-sharing platforms like Dropbox or Google Drive, or even utilize internal communication tools like Slack or Microsoft Teams.
7. Consider transcription services: If you require highly accurate and professional transcriptions of your recorded meetings, you may want to consider using transcription services. These services can provide you with accurate and well-formatted text versions of your recordings.
8. Respect privacy and confidentiality: It’s important to respect the privacy and confidentiality of the recorded meetings. Make sure you have the necessary permissions from all participants before sharing the recording, and be mindful of any sensitive information that may be discussed.
By following these steps, you will be able to effectively manage and share your recorded meetings, ensuring easy access, organization, and privacy of the valuable information captured.
Conclusion
Recording a meeting on your phone can be a convenient and valuable tool for capturing important discussions and preserving valuable information. Whether you’re in a professional setting or attending a personal gathering, having the ability to record audio or video can help you stay organized and refer back to key points.
By following the steps outlined in this article, you can easily record meetings on your phone using built-in features or third-party apps. Remember to be mindful of any legal and ethical considerations when recording conversations, and always seek permission if necessary.
With the advancements in mobile phone technology, it has become increasingly convenient to document important moments and discussions right from the palm of your hand. Take advantage of this feature and make the most of your phone’s capabilities to ensure you never miss out on important information again.
FAQs
1. Can I record a meeting on my phone?
Yes, you can definitely record a meeting on your phone. Most smartphones come with a built-in voice recording feature that allows you to capture audio using the device’s microphone. Additionally, there are several apps available for both Android and iOS platforms that offer advanced recording functionalities specifically designed for meetings.
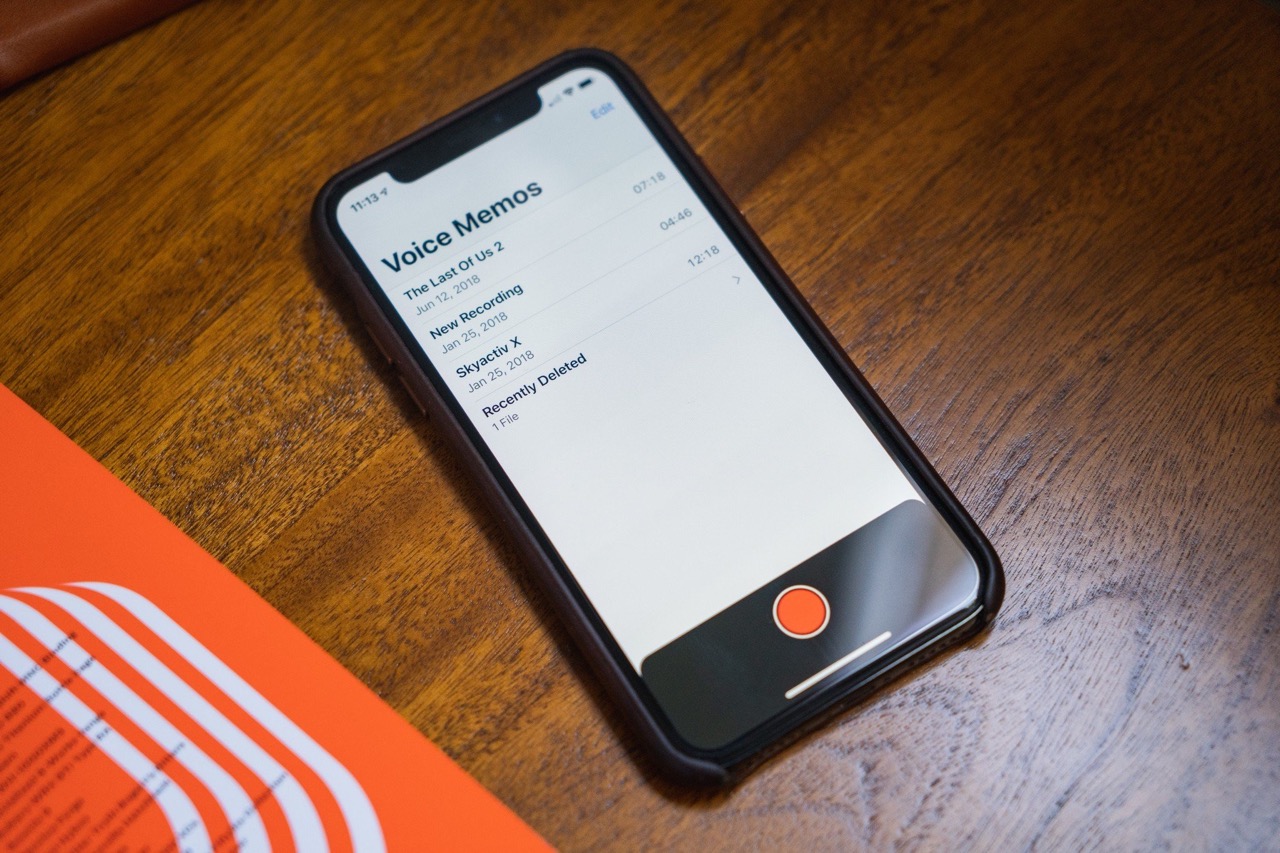
2. How do I record a meeting on my iPhone?
To record a meeting on your iPhone, you can use the built-in Voice Memos app. Simply open the app, tap the red record button, and start capturing the audio. It is important to inform all participants that the meeting is being recorded to ensure compliance with privacy and legal regulations.
3. Is it legal to record a meeting on my phone?
The legality of recording a meeting on your phone may vary depending on your location and local laws. In some jurisdictions, it is necessary to obtain the consent of all parties involved before recording. It is crucial to familiarize yourself with the specific laws and regulations in your area before recording any meeting or conversation.
4. What is the best app to record meetings on Android?
There are several great apps available for recording meetings on Android devices. One highly recommended app is “Smart Voice Recorder.” This app offers features like automatic gain control, noise reduction, and cloud backup, allowing you to capture high-quality audio recordings of your meetings.
5. How can I ensure good audio quality when recording a meeting on my phone?
To ensure good audio quality when recording a meeting on your phone, follow these tips:
- Choose a quiet, well-lit location for the meeting.
- Position your phone close to the speaker(s) or use an external microphone for better audio pickup.
- Minimize background noise by closing windows, turning off fans, or using a noise-canceling app.
- Speak clearly and directly into the microphone to ensure clear and crisp sound.
- Test the recording levels and adjust as necessary to avoid distortion or muffled audio.