
Having a reliable and fast internet connection is essential in today’s digital age. To ensure seamless connectivity throughout your home or office, it is crucial to have a wireless router connected to your modem. The wireless router acts as a network gateway, allowing multiple devices to connect and access the internet wirelessly.
However, the process of connecting a wireless router to a modem can be a bit daunting, especially for those who are new to networking. In this article, we will guide you through simple steps to connect your wireless router to your modem effectively. Whether you are setting up a new router or replacing an old one, following these steps will help you establish a stable and secure wireless network connection.
Inside This Article
- Connecting the Wireless Router and Modem
- Step 1: Gather the necessary equipment
- Step 2: Power off and unplug the modem and router
- Step 3: Connect the modem to the router
- Step 4: Power on the modem and router
- Step 5: Configure the wireless router
- Step 6: Test the connection
- Troubleshooting tips
- Conclusion
- FAQs
Connecting the Wireless Router and Modem
Setting up a wireless network involves connecting your wireless router to the modem. This step is crucial in order to establish a stable and secure internet connection for your devices. In this section, we will guide you through the process of connecting a wireless router to a modem.
Before you begin, make sure you have the necessary equipment. You will need a wireless router, a modem, Ethernet cables, and a power source. Once you have everything ready, follow these steps:
- Position the modem and router: Choose a location where you can easily access both the modem and the router. Ideally, they should be placed in an open area away from obstructions such as walls or other electronic devices that may interfere with the wireless signal.
- Power off the modem and router: Before making any connections, turn off both the modem and the router. This ensures a clean start and prevents any potential issues during the setup process.
- Connect the modem to the router: Take one end of the Ethernet cable and insert it into the modem’s Ethernet port. Then, take the other end and connect it to the WAN or Internet port on the wireless router. This establishes the physical connection between the modem and the router.
- Power on the modem and router: After connecting the modem and router, plug them both into a power source and turn them on. Allow a few moments for the devices to boot up and establish a connection.
Once the modem and router are powered on, they will start communicating with each other. The router will receive the internet signal from the modem and distribute it wirelessly to your devices. However, before you can start using your wireless network, you need to configure the router settings.
Access the router’s settings by typing the router’s IP address into a web browser. The IP address is usually printed on the router or provided in the user manual. Once you are in the router’s settings interface, you can configure the wireless network name (SSID) and password, set up security settings, and customize other network preferences.
After setting up and saving the changes, your wireless network should be ready to use. You can now connect your devices, such as smartphones, laptops, or tablets, to the wireless network using the provided SSID and password.
Step 1: Gather the necessary equipment
Before you begin setting up your wireless router, it’s important to gather all the necessary equipment. Here’s a checklist of what you’ll need:
1. Wireless Router: Ensure that you have a wireless router. Choose a router that suits your needs, taking into consideration factors such as range, speed, and security features.
2. Modem: You’ll also need a modem to connect to your internet service provider (ISP). Make sure you have a compatible modem that supports the type of internet connection you have.
3. Ethernet Cable: An Ethernet cable will be necessary to establish a wired connection between your modem and router. This cable should be included with your modem or router, but if not, make sure to have one readily available.
4. Power Adapters: Check if both your modem and router require power adapters. Ensure that you have the correct adapters and that they are in working condition.
5. User Manuals: It’s always helpful to have the user manuals for both your wireless router and modem. These manuals provide step-by-step instructions on installation, troubleshooting, and configuring your devices.
By gathering all the necessary equipment beforehand, you can proceed to the next steps of setting up your wireless router with ease.
Step 2: Power off and unplug the modem and router
Before proceeding with the connection process, it’s essential to ensure that both your modem and router are powered off and unplugged. This step is necessary to avoid any electrical conflicts and to ensure a smooth and secure connection between the two devices.
To begin, locate your modem and router. The modem is usually provided by your internet service provider and is responsible for establishing the internet connection. The router, on the other hand, is the device that distributes the internet signal wirelessly to your devices.
Once you have identified the devices, locate the power cords connected to them. These cords usually have an AC adapter that plugs into a power outlet. Make sure to switch off both the modem and router by pressing the power button or flipping the power switch, if available. This step will prevent any potential damage or interference during the setup process.
After switching off the devices, unplug the power cords from the electrical outlet. This step will ensure a complete disconnection from the power source and prevent any residual power from interfering with the setup process.
It’s important to note that some modem-router combos may have a single device that performs both functions. In such cases, power off and unplug the device as a whole. If you are uncertain about the configuration, consult the user manual or contact your internet service provider for guidance.
Once the modem and router are powered off and unplugged, you can move on to the next step in the connection process with confidence, knowing that you have taken the necessary precautions for a successful setup.
Step 3: Connect the modem to the router
Connecting your modem to the router is a crucial step in setting up your wireless network. This allows the router to receive the internet signal from the modem and distribute it wirelessly to your devices.
Follow these simple steps to seamlessly connect your modem to the router:
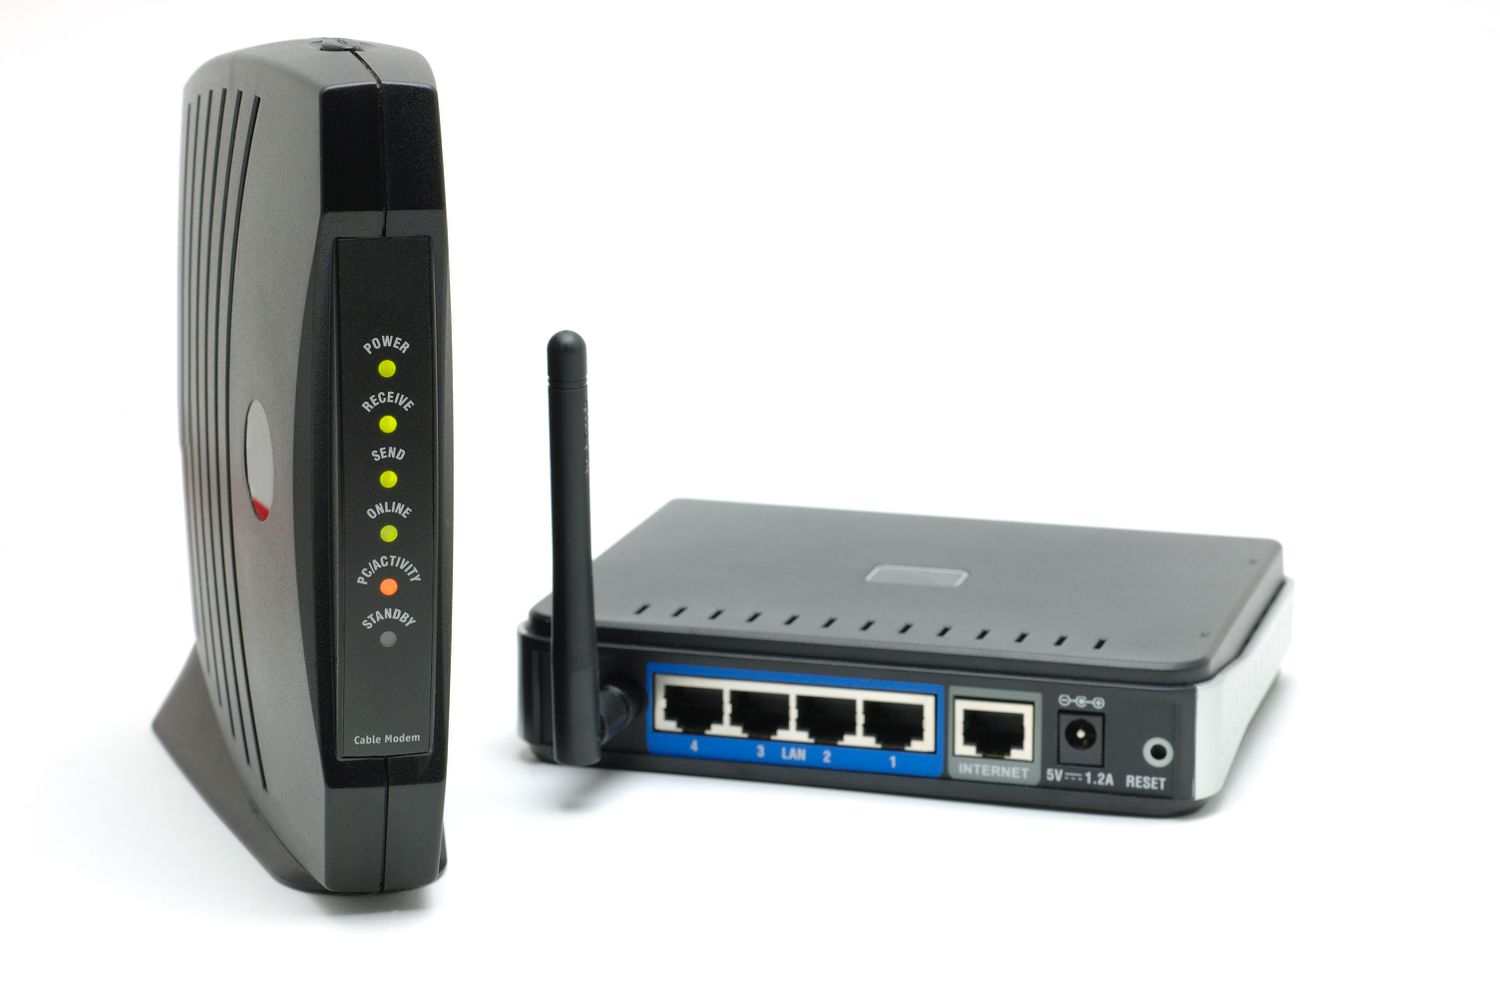
- Locate the Ethernet port on the back of your modem. This port is usually labeled as “Ethernet” or “Internet”.
- Take an Ethernet cable and insert one end into the Ethernet port on the modem.
- Locate the WAN or Internet port on the back of your wireless router. This port is often labeled differently than the other ports and may be indicated by a different color or label.
- Insert the other end of the Ethernet cable into the WAN or Internet port on the router.
- Make sure the connections are secure by gently tugging on the cable.
- Power on both the modem and the router.
- Wait for a few moments while the router establishes a connection with the modem. This process may take a couple of minutes.
Once the modem and the router are connected, the router will start broadcasting a wireless signal that you can connect to with your devices. Remember to keep the router and the modem powered on at all times to maintain a stable internet connection.
If you are experiencing any issues with the connection, try restarting both the modem and the router and ensure all cables are securely plugged in. Also, check the user manual provided with your specific router model for any additional troubleshooting tips or instructions.
Step 4: Power on the modem and router
After successfully connecting the modem to the router, the next step is to power on both devices. This ensures that the modem and router establish a connection and start communicating with each other.
Start by plugging in the power adapter of your modem into an electrical outlet. The modem will take a few moments to initialize and establish a connection with your internet service provider (ISP). You may see a series of lights on the modem indicating the status of the connection.
Next, locate the power adapter for the wireless router. Plug it into another electrical outlet, preferably in close proximity to the modem. The router will also take some time to boot up and establish a connection with the modem.
Once the modem and router are powered on, you should see lights indicating the connection status on both devices. These lights may vary depending on the model and manufacturer. Refer to the user manual for specific information on the meaning of each light.
It’s important to note that the lights on the modem and router may blink or change colors during the initial startup process. This is normal and signifies that the devices are syncing and establishing a connection.
Wait for a few minutes to allow the modem and router to complete the startup process. During this time, the devices will communicate and configure the necessary settings to establish a stable and secure wireless network.
Once the modem and router have finished booting up, you can proceed to the next step of configuring the wireless network settings.
Step 5: Configure the wireless router
Now that your wireless router and modem are connected, it’s time to configure the router settings. Configuring the wireless router is an important step to ensure a secure and reliable wireless network connection for your devices.
To begin, you will need to access the router’s web-based interface. Open a web browser on your computer or mobile device and enter the router’s default IP address in the address bar. Typically, the default IP address is 192.168.1.1 or 192.168.0.1, but it may vary depending on the router brand and model. Refer to the router’s user manual or manufacturer’s website for the correct IP address.
Once you have accessed the router’s web-based interface, you will be prompted to enter the username and password. The default username and password are usually “admin” or blank. However, for security reasons, it is recommended to change these default login credentials to prevent unauthorized access to your router settings.
After successfully logging in to the router’s interface, you will be presented with a dashboard or configuration page. Here, you can make various adjustments and customizations to optimize your wireless network’s performance and security.
Some important settings to consider configuring include:
- Wireless Network Name (SSID): Change the default SSID to a unique and easily recognizable name. This will make it easier for you to identify your network among other available networks.
- Wireless Security: Enable wireless security and choose a strong password to protect your network from unauthorized access. Use WPA2 or WPA3 encryption for the highest level of security.
- Channel Selection: Select the appropriate Wi-Fi channel to minimize interference from other nearby networks. You can choose to use the auto-channel selection feature or manually select a less congested channel.
- Guest Network: Consider setting up a separate guest network to provide internet access to your visitors without compromising the security of your main network.
- Quality of Service (QoS): Enable QoS settings to prioritize bandwidth for certain applications or devices, ensuring a smooth and uninterrupted experience for activities such as streaming or gaming.
Once you have made the necessary changes, don’t forget to save your settings. The router will usually prompt you to apply the changes and reboot for them to take effect.
After the router has rebooted, your wireless network should be up and running with the new settings. You can now connect your devices to the newly configured wireless network using the updated SSID and password.
Remember to periodically check and update your router’s firmware to benefit from any security or performance enhancements provided by the manufacturer.
Now that you have successfully configured your wireless router, you can enjoy a secure and reliable wireless network connection for all your devices. Happy surfing!
Step 6: Test the connection
Now that you have successfully connected your wireless router to the modem and configured the network, it’s time to test the connection and ensure everything is working as expected. Follow the steps below to verify the connectivity:
1. Connect a device, such as a laptop, smartphone, or tablet, to the Wi-Fi network you just set up. Make sure the device is within the range of the router.
2. Open a web browser on the connected device and try to access a website. If the website loads successfully, it means that the internet connection is working properly.
3. Test the speed of your internet connection using an online speed test tool. This will give you an idea of the upload and download speeds you are getting. Compare the results with the expected speeds from your internet service provider.
4. If you’re experiencing any connection issues or slow speeds, try restarting both the modem and the wireless router. Power them off, wait for a few seconds, and then turn them back on. Wait for them to reconnect and try accessing the internet again.
5. If the issue persists, double-check the settings on your router and ensure that the firmware is up to date. You can usually access the router’s settings by typing its IP address into the address bar of your web browser.
6. If you’re still having trouble, contact your internet service provider for assistance. They may be able to troubleshoot the issue remotely or send a technician to your location if necessary.
By following these steps, you can ensure that the connection between your wireless router and modem is working properly. This will allow you to enjoy a stable and reliable internet connection for all your devices.
Troubleshooting tips
Connecting a wireless router to a modem can sometimes be a bit tricky, and you may encounter some issues along the way. Here are some troubleshooting tips to help you resolve common connection problems:
1. Check the physical connections: Ensure that all cables are securely connected to both the modem and the router. Make sure the power cables are plugged in and that there are no loose connections.
2. Restart the devices: A simple restart can often fix many connectivity issues. Power off both the modem and the router, wait for a few seconds, and then turn them back on. This can help to clear any temporary glitches in the devices.
3. Confirm the internet access: Connect a computer directly to the modem using an Ethernet cable. If you can access the internet, it indicates that the issue lies with the router. If not, contact your internet service provider (ISP) to ensure your internet connection is active.
4. Check the router settings: Log in to the router’s admin interface and ensure that the settings are correctly configured. Check the wireless network name (SSID), password, and security settings. Make sure they match the information provided by your ISP.
5. Update the firmware: Router manufacturers often release firmware updates to fix bugs and improve performance. Visit the manufacturer’s website and download the latest firmware for your router model. Follow the instructions provided to update the firmware.
6. Reset the router: If none of the above steps resolve the issue, you can try resetting the router to its factory settings. Keep in mind that this will erase all the customized settings and configurations. Refer to the router’s user manual for instructions on how to perform a factory reset.
7. Contact technical support: If you have exhausted all troubleshooting options and are still unable to connect the router to the modem, it may be beneficial to reach out to the router’s manufacturer or your ISP’s technical support for further assistance.
By following these troubleshooting tips, you should be able to resolve most common connection problems when setting up a wireless router with a modem.
Conclusion
Connecting a wireless router to a modem is a relatively simple and essential process for setting up a home network. By following the steps outlined in this article, you can enjoy the benefits of a secure and reliable wireless connection in no time.
Remember to start by gathering the necessary equipment, including a wireless router and a modem. Next, power off and disconnect any existing networking devices before proceeding. Connect the modem to the wireless router using an Ethernet cable and power on both devices. Finally, configure the wireless router settings and secure your network with a strong password.
By properly connecting your wireless router to your modem, you can enjoy seamless internet connectivity for all your devices, from smartphones to laptops and smart home devices. With a reliable and secure home network, you can now stream, browse, and connect with confidence.
FAQs
Q: How do I connect a wireless router to a modem?
A: To connect a wireless router to a modem, follow these steps:
1. Power off your modem and the router.
2. Connect an Ethernet cable from the modem to the router’s WAN or Internet port.
3. Power on your modem and wait for it to establish a connection.
4. Power on the router and wait for it to boot up.
5. Connect your computer or device to the router’s network using a Wi-Fi connection or another Ethernet cable.
6. Open a web browser and enter the router’s default IP address into the URL bar.
7. Log in to the router’s admin interface using the default username and password.
8. Configure the wireless settings, including SSID, security type, and password.
9. Save the changes and restart the router.
10. Your wireless router is now successfully connected to the modem!
Q: What is the difference between a modem and a wireless router?
A: A modem is a device that connects your home network to the internet service provider (ISP). It translates the signals from your ISP into data that your devices can understand. On the other hand, a wireless router allows you to create a local network within your home or office, enabling multiple devices to connect to the internet wirelessly. It acts as a central hub for your devices, providing network connectivity and managing internet traffic.
Q: Do I need a wireless router if I already have a modem?
A: Yes, you will need a wireless router if you want to connect multiple devices to the internet wirelessly. While a modem allows you to establish a connection with your ISP, it typically only provides a single wired internet connection. A wireless router adds Wi-Fi capabilities to your network, allowing multiple devices to connect to the internet simultaneously and wirelessly. It also provides additional features such as network security and device management.
Q: Can I use any wireless router with my modem?
A: In most cases, you can use any wireless router with your modem. However, it is important to ensure compatibility between the two devices. Check the specifications and connection requirements of your modem and the wireless router to make sure they are compatible. Additionally, consider factors such as speed, range, and features when choosing a wireless router to ensure it meets your specific needs and preferences.
Q: How can I improve the wireless signal strength from my router?
A: There are several methods to improve the wireless signal strength from your router:
– Position the router in a central location, away from obstructions.
– Ensure the router is placed at an elevated position, such as on a shelf or mounted on a wall.
– Minimize interference from other electronic devices by avoiding proximity to cordless phones, microwaves, or baby monitors.
– Extend the range of your wireless network using range extenders or mesh Wi-Fi systems.
– Update the firmware of your router to the latest version to ensure optimal performance.
– Adjust the channel settings of your router to avoid interference from neighboring networks.
– Consider using an external antenna or a high-gain antenna to enhance the signal range and strength.