
Are you struggling to connect your wireless router to your Time Warner Cable modem? Don’t worry, we’ve got you covered. In this article, we will guide you through the step-by-step process of connecting your wireless router to your Time Warner Cable modem, ensuring a seamless and reliable internet connection for all your devices. Whether you’re a tech-savvy individual looking to optimize your home network or a beginner who needs some assistance, this article will provide you with the necessary knowledge to get your wireless router up and running in no time. So grab your modem, router, and a strong cup of coffee, and let’s dive into the world of wireless connectivity!
Inside This Article
- Overview of Wireless Router and Time Warner Cable Modem
- Step 1: Gather the Necessary Equipment
- Step 2: Connect the Modem to the Router
- Step 3: Power On the Devices
- Step 4: Access the Router’s Configuration Interface
- Step 5: Configure the Router Settings
- Step 6: Test the Wireless Connection
- Troubleshooting Tips
- Conclusion
- FAQs
Overview of Wireless Router and Time Warner Cable Modem
A wireless router and a Time Warner Cable modem are two essential devices that allow you to establish a high-speed internet connection in your home or office. Understanding how these devices work together is crucial for setting up your internet network and enjoying seamless internet connectivity.
A wireless router acts as a central hub that enables multiple devices, such as smartphones, laptops, and smart TVs, to connect to the internet wirelessly. It creates a local area network (LAN) within your premises, allowing devices to communicate with each other and access the internet simultaneously.
A Time Warner Cable modem, on the other hand, is the device that connects you to your internet service provider’s network. It receives the internet signal from the provider and translates it into a format that can be used by your devices. Without a modem, you wouldn’t be able to access the internet.
When you combine a wireless router and a Time Warner Cable modem, you can enjoy wireless internet connectivity throughout your home or office. The router connects to the modem, which in turn connects to the Time Warner Cable network, providing you with internet access.
Setting up your wireless router and Time Warner Cable modem involves a series of steps to ensure proper configuration and connection. In the next sections, we will walk you through the process, providing you with easy-to-follow instructions and troubleshooting tips to help you along the way. Let’s get started!
Step 1: Gather the Necessary Equipment
Before you can connect your wireless router to the Time Warner Cable modem, it’s important to gather all the necessary equipment. By having everything you need on hand, you’ll be able to smoothly complete the setup process without any delays. Here’s a checklist of the essential items:
- A wireless router: Make sure you choose a router that is compatible with your Time Warner Cable modem and meets your specific needs.
- A Time Warner Cable modem: This is the device that connects your home to the internet. Ensure that you have a properly functioning modem.
- An Ethernet cable: You’ll need this cable to establish a wired connection between the modem and the router during the setup process.
- A power adapter: This is required to provide power to both the modem and the router.
- A computer or mobile device: You’ll need a device with Wi-Fi capability to access the router’s configuration interface and complete the setup process.
Once you have all the necessary equipment, you’re ready to move on to the next step.
Step 2: Connect the Modem to the Router
Once you have gathered all the necessary equipment, the next step is to connect the modem to the router. This process involves establishing a physical connection between the two devices to ensure a smooth flow of internet connectivity throughout your home or office.
To begin, locate the Ethernet port on the back of your modem. This port is typically labeled as “Ethernet” or “LAN.” Take one end of the Ethernet cable and insert it into this port. Ensure that the cable is securely plugged in to avoid any potential connection issues.
Next, find the corresponding Ethernet port on the back of your wireless router. This port is usually labeled as “WAN.” Take the other end of the Ethernet cable and plug it into this port. Again, ensure that the cable is securely inserted to ensure a stable connection.
Once both ends of the Ethernet cable are securely connected to the modem and router, you can proceed to power on the devices. This will allow them to establish a connection and communicate with each other.
It’s important to note that some routers may have multiple Ethernet ports labeled as “LAN” instead of a dedicated “WAN” port. In this case, you can choose any of the LAN ports to connect the modem. Just ensure that you are using an Ethernet cable that is compatible with the device.
Now that your modem and router are connected, you are one step closer to setting up your wireless network. The next step is to power on the devices and access the router’s configuration interface.
Step 3: Power On the Devices
Once you have successfully connected your wireless router to the Time Warner Cable modem, it’s time to power on the devices. This step is crucial as it ensures that both the modem and router are up and running, allowing you to establish a stable internet connection.
To power on the devices, locate the power cords that came with your modem and router. Plug one end of the power cord into the designated power port on the modem, and then connect the other end to a power outlet. Make sure the connection is secure.
Next, do the same for your wireless router. Connect one end of its power cord to the appropriate port on the router, and plug the other end into a power outlet. It’s essential to ensure that both the modem and router are receiving power, as this enables them to function properly.
After plugging in the power cords, switch on the power buttons of both the modem and router if they have one. Most devices will automatically power on once they are connected to a power source, but some may require manual activation.
Wait for a few moments to allow the devices to fully power on. You may notice indicator lights on both the modem and router illuminating or flashing. These lights indicate that the devices are receiving power and initiating their startup process.
During the startup process, the modem establishes a connection with your internet service provider (ISP) and obtains the necessary network information. The router, on the other hand, configures its settings and prepares to deliver a wireless signal to your connected devices.
Once the devices have powered on completely, you’re one step closer to enjoying a seamless wireless internet connection. It’s now time to move on to the next step and access the configuration interface of your router to make any necessary adjustments to its settings.
Step 4: Access the Router’s Configuration Interface
Once you have physically connected your router to the modem, the next step is to access the router’s configuration interface. This interface allows you to make changes to your router’s settings, such as network name (SSID), password, and security settings.
To access the router’s configuration interface, you will need to open a web browser on your computer or mobile device that is connected to the router. You can use any web browser, such as Google Chrome, Mozilla Firefox, or Safari.
Next, type the default IP address of your router into the address bar of your web browser. The default IP address is usually printed on a label on the router itself or can be found in the user manual. Common default IP addresses for routers are 192.168.1.1 or 192.168.0.1.
After entering the IP address, press Enter on your keyboard. This will take you to the router’s login page, where you will be prompted to enter a username and password. Again, the default username and password are typically listed on the router or in the user manual. If you have changed the default login credentials, enter the new username and password to proceed.
Once you have successfully logged in, you will be able to access the router’s configuration interface. This interface may vary depending on the make and model of your router, but it will generally have options for wireless settings, network settings, security settings, and more.
Take the time to explore the different settings and make any necessary changes to suit your needs. For example, you can change the network name (SSID) to something more personalized, enable WPA2 security for a more secure wireless connection, or adjust the channel settings to minimize interference.
Remember to save any changes you make in the configuration interface before exiting. Your router will typically have a “Save” or “Apply” button that you can click to save your settings. Once saved, your router will apply the new settings and your wireless network will be ready to use.
Step 5: Configure the Router Settings
Once you have successfully connected your wireless router to the Time Warner Cable modem, it’s time to configure the router settings. This step is crucial as it allows you to personalize your network and ensure optimal performance. Here’s how you can do it:
1. Open a web browser on your computer and enter the default IP address of your router in the address bar. The IP address is usually mentioned in the router’s manual or can be found on the manufacturer’s website. Common default IP addresses for routers are 192.168.0.1 or 192.168.1.1.
2. Press Enter after entering the router’s IP address. This will take you to the router’s login page. Enter the default username and password provided with your router or check the documentation for the correct credentials. If you have changed the login details in the past, use the updated information.
3. Once logged in, you will be presented with the router’s configuration interface. The layout and options may vary depending on the make and model of your router. Take some time to explore the different settings available to you. Here are a few key settings to consider:
- Network Name (SSID): This is the name of your wireless network that will be visible to other devices. Choose a unique and easily identifiable name.
- Wireless Security: Set up a strong password to protect your network from unauthorized access. Use WPA2 encryption for the highest level of security.
- Channel Selection: Wi-Fi networks operate on different channels. Select a channel that is less congested to minimize interference and improve performance.
- Guest Network: Some routers offer the option to create a separate network for guests. This allows you to provide internet access without giving them access to your main network.
4. Make the desired changes to the router settings and save the changes. It’s important to remember that different routers have different interfaces, so the options may be named differently. If you’re unsure about any setting, refer to the router’s documentation or seek assistance from the manufacturer’s support team.
5. Once the changes have been saved, restart the router. This will apply the new settings and ensure they take effect. Allow the router a few moments to boot up and establish a stable connection with the modem.
6. Connect your devices to the newly configured wireless network by selecting the network name (SSID) and entering the wireless password you set earlier. Enjoy the convenience of wireless internet access throughout your home or office!
It’s worth noting that periodically reviewing and updating your router settings is a good practice. This ensures your network remains secure and optimized for the best performance. Make sure to keep your router firmware up to date to benefit from the latest features and security enhancements.
With these simple steps, you can easily configure the settings of your wireless router after connecting it to your Time Warner Cable modem. Enjoy seamless connectivity and get ready to explore the endless possibilities of the internet!
Step 6: Test the Wireless Connection
Once you have successfully connected your wireless router to the Time Warner Cable modem and configured the router settings, it’s time to test the wireless connection. Testing the connection will ensure that your devices can connect to the internet wirelessly without any issues. Here are a few steps to follow to test the wireless connection:
1. On your computer or mobile device, go to the list of available Wi-Fi networks. You can usually find this option in the settings menu of your device.
2. Look for the name of your wireless network (SSID) that you set up during the router configuration process. It should be visible in the list of available networks.
3. Select your network from the list and enter the password that you set during the configuration process. If you did not set a password, it is highly recommended to do so for security reasons.
4. Once you have entered the password, click on the “Connect” or “Join” button, depending on your device.
5. Wait for a few moments while your device connects to the wireless network. Once connected, you should see the Wi-Fi signal strength indicator on your device’s screen.
6. Open a web browser on your device and try accessing a website to test the internet connection. If the website loads successfully, it means that your wireless connection is working properly.
7. Repeat the testing process on other devices such as smartphones, tablets, or smart TVs to ensure that they can also connect to the wireless network and access the internet.
By following these steps, you can verify that your wireless connection is functional and all your devices are able to connect to the internet. If you encounter any issues during the testing process, you may need to revisit the router configuration settings or seek assistance from your wireless service provider.
Troubleshooting Tips
Even with the best of intentions, sometimes things may not go as smoothly as planned when connecting a wireless router to a Time Warner Cable modem. Don’t worry, though – we have you covered with these troubleshooting tips to help you resolve any issues you may encounter.
1. Restart your modem and router: Sometimes, the simplest solution is the most effective. Start by turning off your modem and router, and then power them back on after a minute or two. This can help resolve any temporary glitches that may be causing connectivity problems.
2. Check the cable connections: Ensure that all the cables connecting your modem and router are securely plugged in. Sometimes, a loose or disconnected cable can result in a lack of internet connectivity.
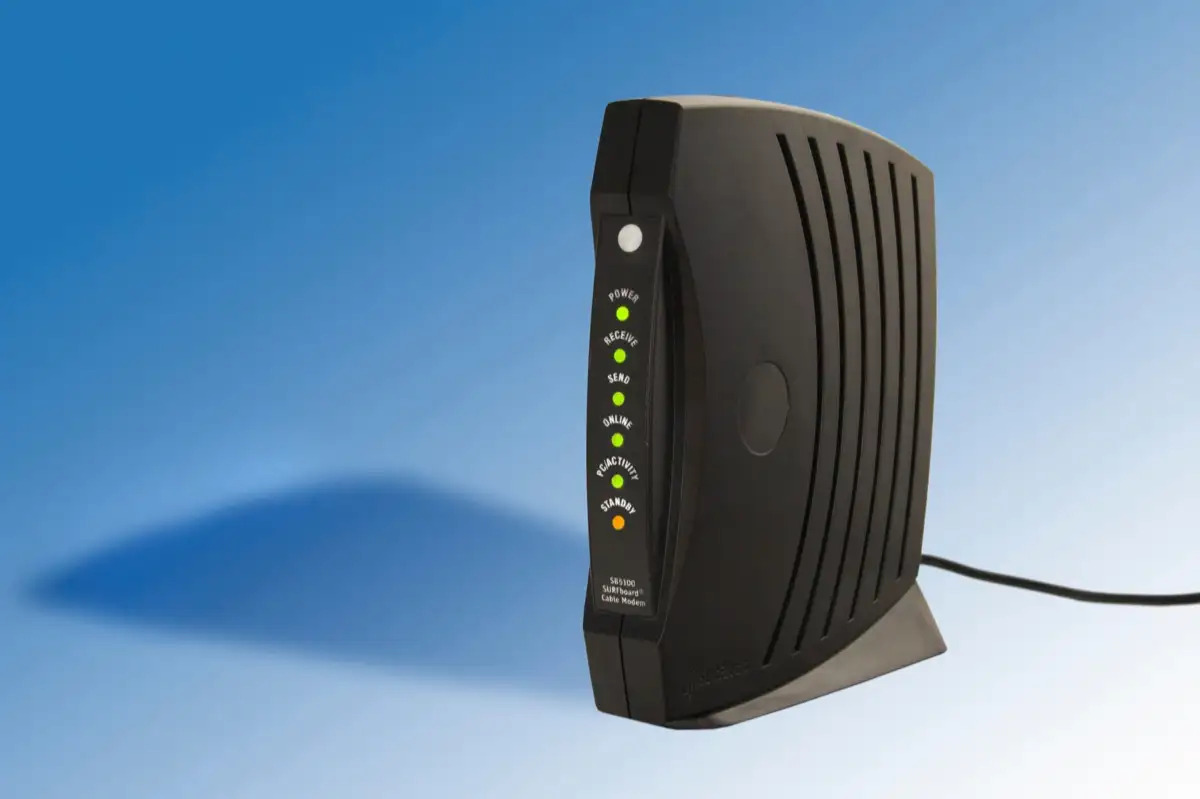
3. Confirm the modem is working: Make sure the modem provided by Time Warner Cable is functioning correctly. You can do this by checking the lights on the front of the modem to see if they are in the normal operational state. If any lights indicate an issue, consult the modem’s user manual or contact your service provider for assistance.
4. Adjust the wireless channel: Interference from nearby Wi-Fi networks can impact the performance of your wireless connection. Access your router’s configuration interface and try changing the wireless channel to avoid any potential conflicts. Experiment with different channels to find the one that provides the best signal strength and stability.
5. Update firmware and drivers: Outdated firmware or drivers can sometimes cause compatibility issues or performance problems. Visit the manufacturer’s website to check for any available firmware updates for your router. Additionally, ensure that your computer’s network drivers are up to date.
6. Reset the router: If you’ve tried everything else and still can’t establish a stable connection, a factory reset may be the way to go. This will restore the router to its default settings and can often resolve stubborn issues. Keep in mind that resetting the router will erase any custom settings, so be prepared to reconfigure it afterward.
7. Contact your ISP: If you’ve exhausted all troubleshooting options and are still experiencing connection problems, it may be time to reach out to your Internet Service Provider (ISP). They can provide assistance in diagnosing and resolving any issues that are specific to your internet service or modem.
Remember, troubleshooting can be a trial-and-error process, but with patience and persistence, you can overcome any obstacles you encounter when connecting your wireless router to your Time Warner Cable modem.
Conclusion
Connecting a wireless router to a Time Warner Cable modem is a relatively simple process that allows you to enjoy reliable and high-speed internet access throughout your home or office. By following the steps outlined in this article, you can ensure a seamless and hassle-free setup that will enable multiple devices to connect to the internet wirelessly.
Remember to choose a router that meets your specific needs in terms of speed, range, and security. Research different models and read customer reviews to find the best option for you. Once you have your router in hand, just follow the step-by-step instructions provided in this guide to establish a secure and efficient wireless connection.
By connecting your wireless router to a Time Warner Cable modem, you can expand your internet connectivity and enjoy the convenience of wireless access throughout your home or office. Stay connected, stream videos, play online games, and browse the web with ease, knowing that your internet connection is stable and secure.
So, what are you waiting for? Get started and unleash the full potential of your Time Warner Cable internet connection by setting up a wireless router today!
FAQs
1. Can I connect a wireless router to my Time Warner Cable modem?
Yes, you can connect a wireless router to your Time Warner Cable modem. This will allow you to create a Wi-Fi network in your home or office and connect multiple devices wirelessly.
2. How do I connect a wireless router to my Time Warner Cable modem?
To connect a wireless router to your Time Warner Cable modem, follow these steps:
a. Turn off your modem and router.
b. Connect an Ethernet cable from the modem to the WAN or Internet port of the router.
c. Power on the modem and wait for it to establish a connection.
d. Power on the router and wait for it to initialize.
e. Connect your computer or devices to the Wi-Fi network created by the router.
3. Do I need any additional equipment to connect a wireless router to my Time Warner Cable modem?
In most cases, you do not need any additional equipment to connect a wireless router to your Time Warner Cable modem. The modem and the router should have the necessary ports and cables to establish the connection. However, it is always a good idea to check the specifications of your specific modem and router to ensure compatibility.
4. What should I do if I cannot establish a connection between my wireless router and Time Warner Cable modem?
If you are having trouble establishing a connection between your wireless router and Time Warner Cable modem, try the following:
a. Ensure that all cables are properly connected and securely plugged in.
b. Power cycle both the modem and the router by turning them off, waiting for a few seconds, and then turning them back on.
c. Check the compatibility between your modem and router. If they are not compatible, consider upgrading one or both devices.
d. Consult the user manual or contact the manufacturer’s customer support for further assistance.
5. Can I use any wireless router with my Time Warner Cable modem?
In general, you can use any wireless router with your Time Warner Cable modem. However, it is recommended to check the compatibility and technical specifications of your modem and router to ensure they are compatible and will work optimally together. Additionally, it is advisable to choose a router that meets your specific needs in terms of range, speed, and features.