
Are you looking to take your digital artwork to the next level with Procreate? Well, you’re in luck! In this article, we will explore how you can add more layers in Procreate and unleash your creativity like never before. Layers are an essential feature in digital art software that allow you to work on individual elements of your artwork without affecting the rest. With Procreate, you have the flexibility to create multiple layers, each containing different elements, effects, and details. Whether you want to add depth to your illustrations or experiment with different color schemes, adding more layers in Procreate gives you endless possibilities to bring your artistic vision to life. So, let’s dive in and learn how to make the most of Procreate’s layering capabilities!
Inside This Article
- Importing Additional Brushes
- Adding New Brush Libraries
- Working with Layer Masks
- Utilizing Blending Modes
- Conclusion
- FAQs
Importing Additional Brushes
Procreate is a powerful digital art software that offers a wide range of brushes to enhance your artistic creations. However, if you want to further expand your brush library and explore new artistic possibilities, you can easily import additional brushes into Procreate. This allows you to experiment with different textures, effects, and styles, giving your artwork a unique touch.
To import additional brushes, you’ll need to have the brush files in the .brush format. There are numerous online platforms and marketplaces where you can find a variety of brush sets created by talented artists. Once you’ve acquired the brush files, follow these simple steps to import them into Procreate:
- Open Procreate on your device and open a new or existing canvas.
- Tap on the brush icon located in the top toolbar to access the brush library.
- In the brush library, locate the folder icon at the top-right corner and tap on it. This will open the “Brush Library” panel.
- Within the Brush Library panel, tap on the “+” button at the top right to create a new brush set.
- Name your new brush set and tap “Add” to confirm.
- With your newly created brush set selected, tap on the “+” icon again, but this time choose “Import” from the menu.
- Navigate to the location where you saved the brush files (e.g., iCloud Drive, Files app) and select the desired brush files.
- Procreate will automatically import the selected brushes into your newly created brush set.
Once imported, you can access and use your new brushes by selecting your custom brush set from the brush library. Procreate allows you to organize your brushes into sets, making it easy to navigate and find the perfect brush for your project.
Importing additional brushes into Procreate provides endless creative possibilities. It allows you to expand your artistic toolkit and experiment with different brush styles and effects. So, don’t hesitate to explore the vast collection of brushes available online and add a new dimension to your digital artwork in Procreate.
Adding New Brush Libraries
If you’re an avid Procreate user, you’re probably familiar with the vast selection of brushes available in the app. However, did you know that you can expand your brush library even further by adding new brush libraries? This allows you to access a whole new collection of brushes and unleash your creativity in unique ways.
Adding new brush libraries in Procreate is a straightforward process. Let’s walk through the steps:
- Start by finding a brush library that you’d like to add. There are numerous sources online where you can find free and premium brush libraries.
- Download the brush library file to your device. It’s often in a .brushset format.
- Next, open Procreate and go to the Brushes menu.
- Tap on the “+” button in the top-right corner of the menu.
- A pop-up menu will appear, giving you the option to create a new brush or import brushes. Select “Import” to proceed.
- Locate the downloaded brush library file on your device and select it.
- Procreate will then import the brush library, and you will see a notification confirming the successful import.
- To access your newly imported brushes, go back to the Brushes menu and scroll down to the Imported section. The added brush library will be there, ready to be used.
With your expanded brush library, you can now explore an array of new brush styles, textures, and effects. Experiment with different brushes to create unique artworks and add depth to your illustrations.
Remember to organize your brush libraries within Procreate by creating custom sets and folders. This way, you can easily navigate through your brushes and find the perfect one for your project.
Adding new brush libraries is not only a great way to diversify your artistic options but also an opportunity to discover new brush creators and support their work. So don’t hesitate to explore the Procreate community and find brush libraries that resonate with your style.
Now that you know how to add new brush libraries in Procreate, unleash your creativity and take your digital art to the next level!
Working with Layer Masks
Layer masks are powerful tools in Procreate that allow you to control the transparency of different parts of an image. With layer masks, you can easily hide or reveal specific portions of a layer without permanently erasing any pixels. Here’s a step-by-step guide on how to work with layer masks in Procreate:
1. Start by opening your artwork in Procreate and adding a new layer. You can do this by tapping on the “+” icon at the top right corner of the Layers panel.
2. Once you have your new layer, tap on the layer thumbnail to bring up the layer options. From there, select “Mask” to create a layer mask linked to the current layer.
3. With the layer mask selected, you can now start painting on it to hide or reveal parts of the layer. Use the brush tool and choose a color to paint with. Black conceals, while white reveals.
4. To hide a part of the layer, simply paint over it with a black brush. If you make a mistake, switch to a white brush to reveal the hidden area again. You can also adjust the opacity of your brush for more subtle effects.
5. If you want to fine-tune your layer mask, you can use various tools in Procreate. The selection tool allows you to create precise selections to paint on. The blur tool can be used to soften the edges of your mask, creating a smoother transition.
6. You can also make adjustments to the layer mask itself by tapping on the layer thumbnail and selecting “Edit Mask.” This will bring up additional options such as inverting the mask or adjusting its density.
7. When you’re done working with the layer mask, you can merge it with the layer by tapping on the layer options and selecting “Merge Down.” This will combine the layer and its mask into a single layer.
Working with layer masks in Procreate gives you a great deal of control over your artwork. Whether you want to selectively apply effects, create seamless blends, or make precise edits, layer masks are an essential tool in your artistic arsenal.
Utilizing Blending Modes
Blending modes in Procreate are a powerful tool that allows you to create unique and eye-catching effects by manipulating how different layers interact with each other. By applying blending modes to your layers, you can control how colors, textures, and elements blend together, resulting in stunning visual compositions.
Blending modes work by changing the way in which pixels from one layer interact with pixels from the layer(s) below it. There are various blending modes available in Procreate, each with its own distinct effect.
One popular blending mode is ‘Multiply’. When you apply this mode to a layer, it multiplies the colors of that layer with the colors beneath it, creating a darker result. This blending mode is often used to create shadows or to add depth to an image.
Another commonly used blending mode is ‘Screen’. When this mode is applied, it multiplies the inverse of the colors of the layer with the colors beneath it, resulting in a lighter and more vibrant effect. The ‘Screen’ blending mode is often used to create highlights or to enhance the overall brightness of an image.
The ‘Overlay’ blending mode is perfect for adding contrast and saturation to your artwork. It combines the ‘Multiply’ and ‘Screen’ blending modes, resulting in a high-contrast and intense effect. This blending mode can be particularly useful when you want to make certain elements stand out or add a dramatic touch to your composition.
Procreate also offers blending modes like ‘Color’, ‘Luminosity’, ‘Soft Light’, ‘Hard Light’ and many more. Each blending mode has its own unique characteristics and can be utilized to achieve specific visual results.
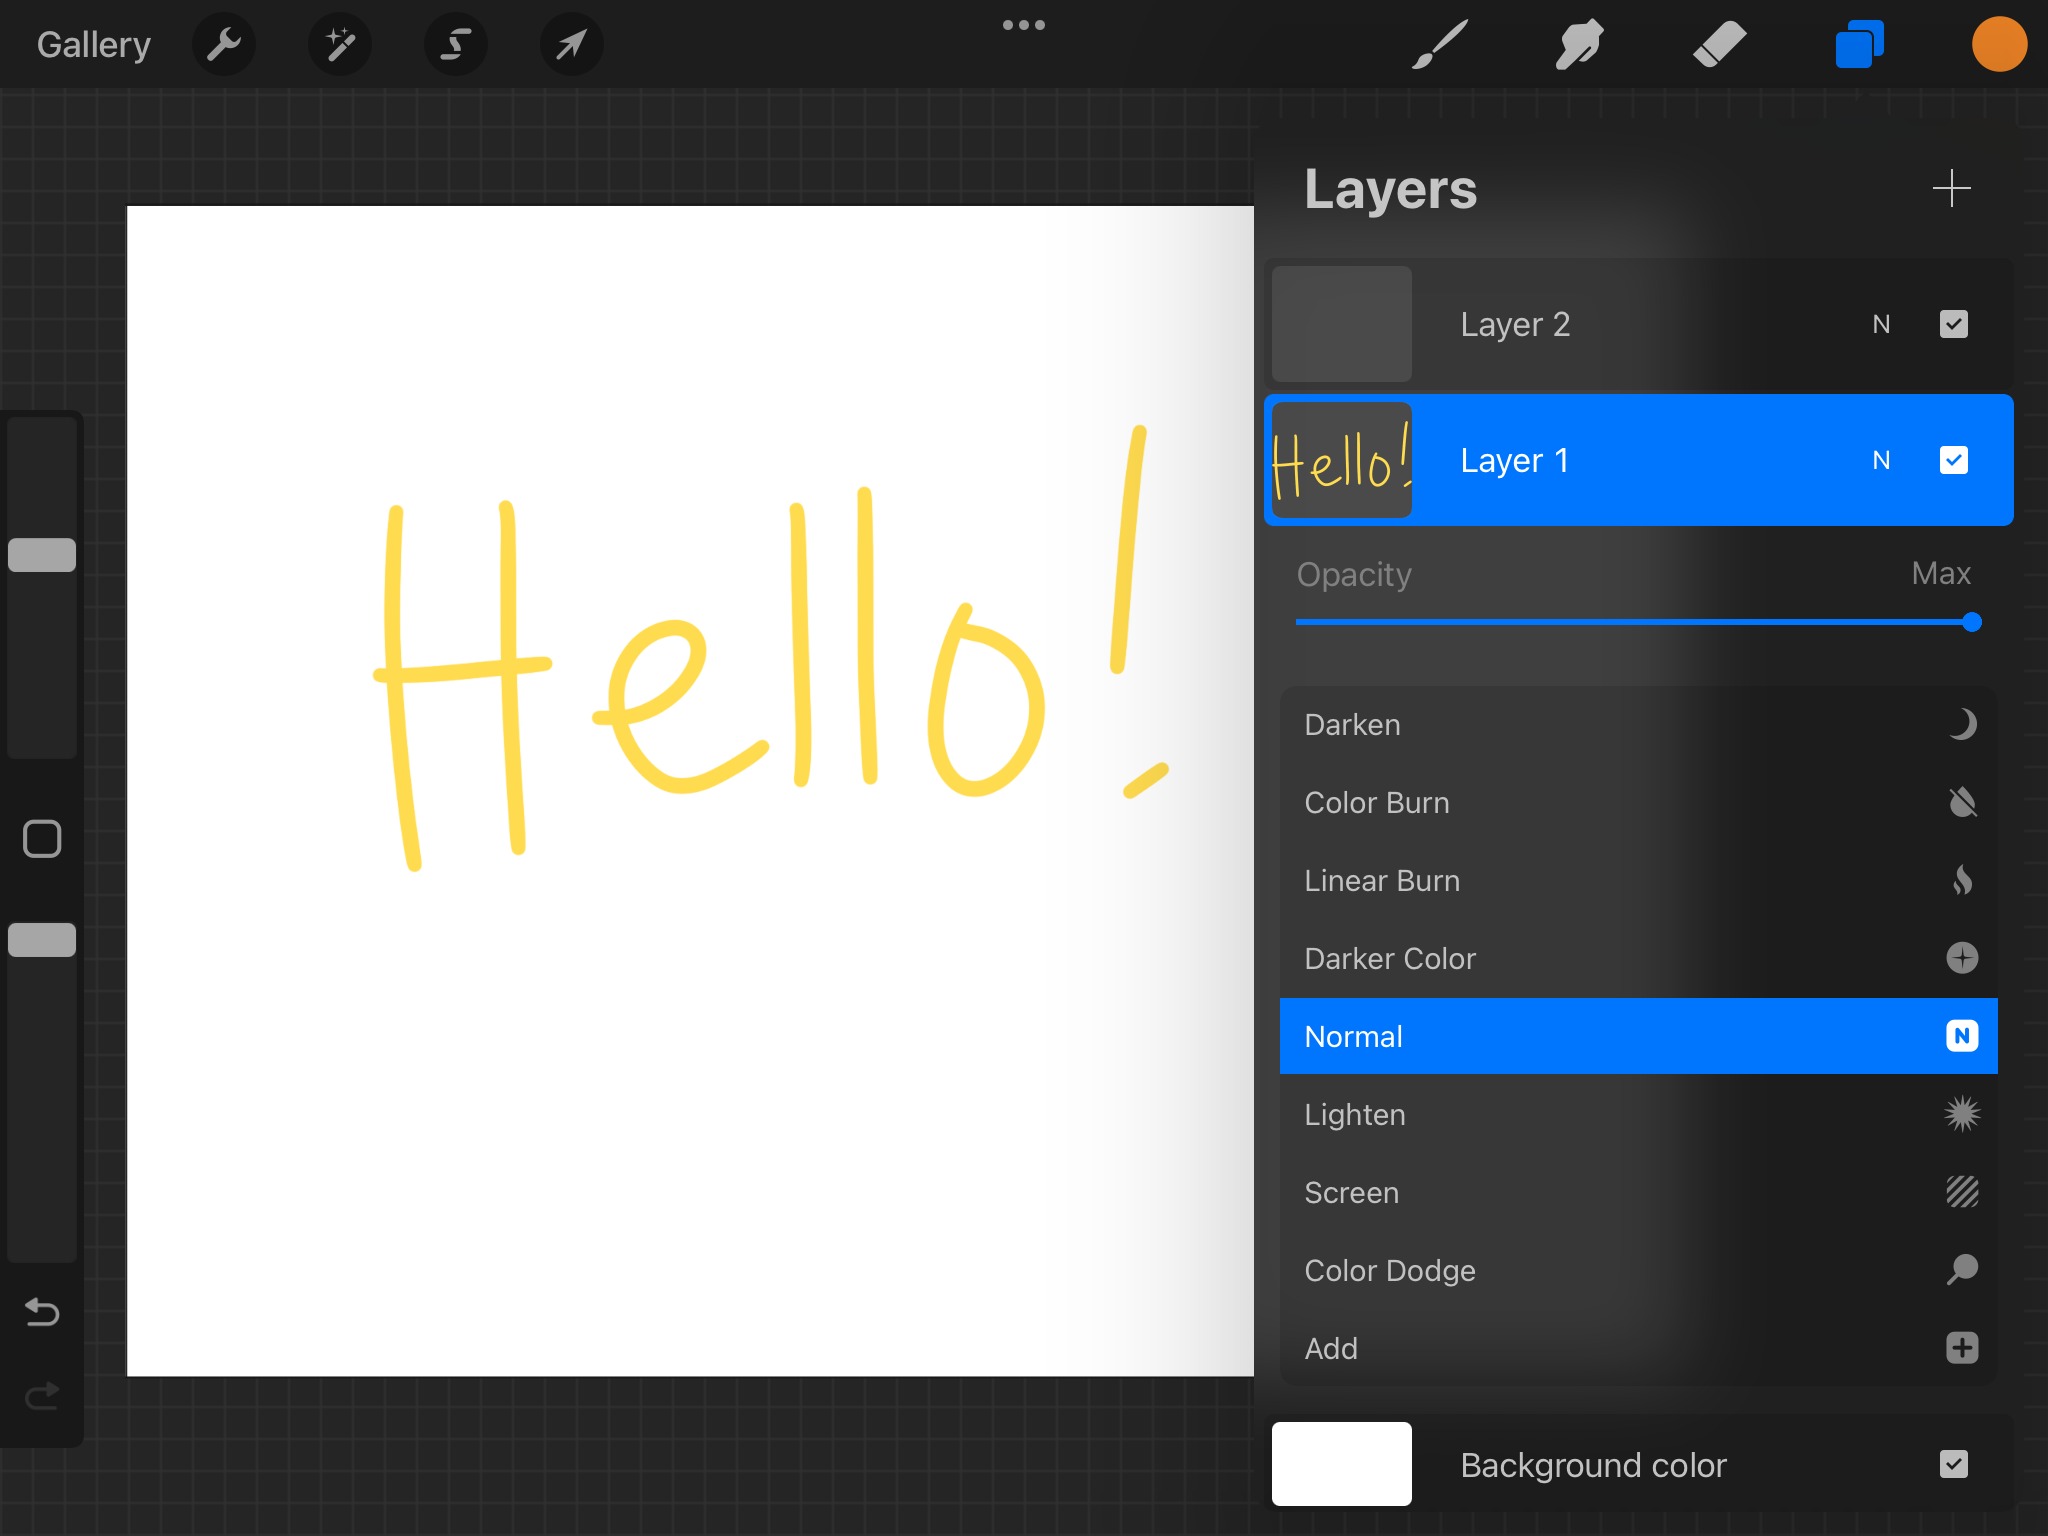
To utilize blending modes in Procreate, simply select the layer you want to apply the blending mode to, tap on the ‘N’ symbol on the layer panel, and choose the desired blending mode from the dropdown menu. You can experiment with different blending modes and adjust the opacity of the layer to fine-tune the effect.
Blending modes are a fantastic tool for adding depth, dimension, and creativity to your digital artworks. Don’t be afraid to experiment and explore different blending modes in Procreate to unlock endless possibilities and create stunning visuals.
In conclusion, adding more layers in Procreate can greatly enhance your digital artwork. By utilizing the layering feature, you have the flexibility to experiment with different elements, make revisions, and create complex compositions. Layers allow you to work on individual elements without affecting the rest of your artwork, providing maximum control and artistic freedom.
With Procreate’s intuitive interface and powerful tools, you can easily manage and organize your layers, adjusting their opacity, blending modes, and visibility. Whether you’re a beginner or an experienced artist, understanding how to add and utilize layers will take your artwork to the next level.
So, unleash your creativity, add depth and dimension to your artwork, and explore the endless possibilities that layering has to offer in Procreate.
FAQs
1. Can I add more layers in Procreate?
Yes, absolutely! Procreate gives you the flexibility to add as many layers as you need in your artwork. You can easily create new layers and organize them to your liking.
2. How do I add a new layer in Procreate?
To add a new layer in Procreate, simply tap on the “Layers” icon on the top right corner of the screen. Then, tap on the “+” button at the bottom of the Layers panel. A new layer will be added on top of the existing layers.
3. Can I rearrange the order of the layers in Procreate?
Yes, you can easily rearrange the layers in Procreate. Just tap and hold on a layer in the Layers panel, then drag it up or down to the desired position. This allows you to control the visibility and stacking order of the layers within your artwork.
4. How many layers can I have in a Procreate artwork?
Procreate doesn’t have a predefined limit to the number of layers you can have in your artwork. However, keep in mind that adding too many layers may impact the performance of the app, especially on older devices. It’s always a good practice to merge or flatten layers when necessary to optimize the file size and performance.
5. Can I adjust the opacity and blending modes of the layers in Procreate?
Yes, you have full control over the opacity and blending modes of each layer in Procreate. You can adjust the opacity by tapping on the layer and using the Opacity slider in the Layer Options panel. To change the blending mode, tap on the “N” icon beside the layer thumbnail and choose from a variety of blending modes to achieve different effects.