
Are you looking to add a personal touch to your digital artwork? Want to create custom stickers on Procreate? Look no further! In this article, we will guide you on how to make a sticker on Procreate, a popular digital drawing and painting app. Whether you want to design a sticker for your favorite messaging app or simply add some fun elements to your digital illustrations, Procreate offers a range of tools and features to make your sticker-making process a breeze. From sketching and coloring to adding details and exporting your sticker, we will cover everything you need to know to bring your sticker ideas to life. So, let’s dive into the world of artistic expression and learn how to make those eye-catching stickers on Procreate!
Inside This Article
- Materials Needed
- Step 1: Creating a New Canvas
- Step 2: Sketching your Sticker Design
- Step 3: Adding Colors and Details
- Step 4: Fine-tuning and Refining
- Step 5: Exporting Your Sticker
- Conclusion
- FAQs
Materials Needed
To create your own sticker on Procreate, you will need the following materials:
- An iPad or iPhone that supports Procreate
- The Procreate app downloaded and installed on your device
- An Apple Pencil or a compatible stylus
- A stable surface or stand to place your device on
- A creative mind and some design ideas!
The first essential material you will need is an iPad or iPhone that supports the Procreate app. Procreate is an exclusive app available on iOS devices, providing a versatile platform for digital art creation. Ensure that your device is compatible with the app to unleash your creativity.
Next, you will need to download and install the Procreate app from the App Store. This app offers a wide range of tools, brushes, and features specifically designed for digital art, making it the perfect choice for creating unique and personalized stickers.
An Apple Pencil or a compatible stylus is another essential material you will need. These tools allow for precise and controlled drawing on the iPad screen. The pressure sensitivity and responsiveness of the Apple Pencil or stylus play a crucial role in achieving the desired effects and details in your sticker design.
To ensure comfort and stability while creating your sticker, you should have a stable surface or stand to place your device on. This will prevent any accidental movements or shaking that can affect the accuracy of your drawing. A solid surface or a stand also promotes better control and reduces strain on your hand during the design process.
Lastly, you will need a creative mind and some design ideas! Procreate offers a diverse range of brushes, colors, and effects to bring your sticker to life. Whether you prefer a hand-drawn look, vibrant colors, or intricate details, let your imagination guide you in designing a sticker that reflects your unique style and personality.
With these materials at hand, you are ready to jump into the world of digital art and create your own stunning stickers using Procreate!
Step 1: Creating a New Canvas
The first step in making a sticker on Procreate is creating a new canvas. Creating a new canvas allows you to set the size and resolution of the image you will be working on. This is an important step as it determines the quality and dimensions of your sticker.
To create a new canvas, open Procreate and click on the “+” button on the top right corner of the screen. This will open a menu where you can choose the canvas size and dimensions. Procreate offers a wide range of predefined sizes, including options for various devices and custom dimensions.
Once you have selected the canvas size, you can also adjust the resolution. Higher resolutions are ideal if you plan on printing your sticker or using it for professional purposes.
Additionally, you can choose the orientation of your canvas, whether it is portrait or landscape. Consider the shape and design of your sticker when deciding on the orientation.
After setting the canvas size and resolution, you can give your canvas a name. This is helpful for organizing your artwork, especially if you plan on making multiple stickers.
Once you have chosen the canvas settings and named your canvas, click on “Create” to start working on your sticker.
By creating a new canvas, you have laid the foundation for your sticker design. Now, it’s time to move on to the next step and start sketching your sticker design.
Step 2: Sketching your Sticker Design
Once you have your canvas set up in Procreate, it’s time to start sketching out your sticker design. This step is crucial as it lays the foundation for the final product. Here’s how you can go about it:
1. Begin by envisioning what you want your sticker to look like. Whether it’s a cute character, a trendy icon, or a funky pattern, having a clear idea will make the sketching process much easier.
2. Start with a rough outline of your design using a pencil brush. Don’t worry about perfection at this stage; focus on capturing the basic shapes and forms of your sticker.
3. Refine the outlines and add more details to your sketch. Use various brush sizes and opacity levels to create depth and dimension in your design. This is the stage where you can experiment and make adjustments as needed.
4. Pay attention to the composition and balance of your sticker. Consider the placement of elements and how they interact with each other. This will ensure that your sticker looks visually appealing and cohesive.
5. Don’t be afraid to make mistakes or try out different approaches. Sketching is a creative process, and sometimes the best ideas emerge from unexpected places. Embrace the freedom to explore and let your imagination run wild.
6. Take breaks and step away from your sketch to gain a fresh perspective. This will help you identify any areas that need improvement or fine-tuning.
By the end of this step, you should have a well-defined sketch of your sticker design. Remember, this is just the beginning, and there is still plenty of room for refining and adding details in the next steps.
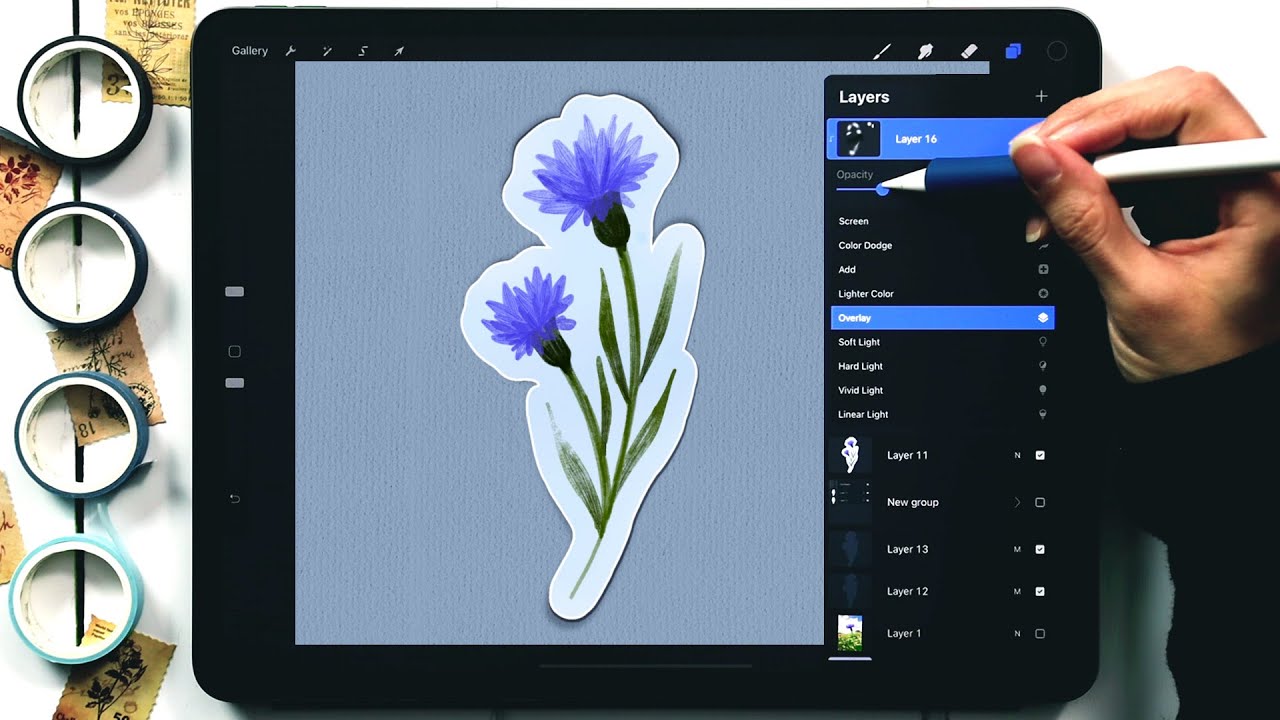
Step 3: Adding Colors and Details
Now that you have sketched out your sticker design, it’s time to bring it to life by adding colors and details. This step is where your creativity can truly shine!
Start by selecting the color palette that you want to use for your sticker. Procreate offers a wide range of colors to choose from, or you can create custom color swatches to suit your design. Keep in mind that the colors you choose will play a significant role in the overall impact of your sticker.
Once you have your colors ready, it’s time to start filling in your design. You can use the brush tool to apply the base colors to different elements of your sticker. Experiment with different brush sizes and opacities to achieve the desired effect.
After applying the base colors, it’s time to add depth and dimension to your design. Use the shading and highlighting techniques to create realistic shadows and highlights. This will give your sticker a three-dimensional appearance and make it visually appealing.
Don’t be afraid to add small details and textures to your sticker. These details can include highlights, gradients, patterns, or even tiny embellishments. They help to make your sticker more interesting and visually engaging.
Remember to step back and assess your design from time to time. This will help you identify any areas that may need additional refinement or adjustments. You can always go back and make changes until you are satisfied with the final result.
Once you are happy with the colors and details of your sticker, it’s time to move on to the next step, which is fine-tuning and refining.
Step 4: Fine-tuning and Refining
Once you have sketched your sticker design and added colors and details, it’s time to fine-tune and refine your creation. This step is crucial in enhancing the overall look and feel of your sticker. Here are some tips to help you achieve the best results:
1. Zoom in for Precision: Use the zoom feature in Procreate to get a closer look at your design. This will allow you to work on smaller details and make intricate adjustments with greater precision.
2. Adjust Line Thickness: Take some time to review the thickness of your lines. Sometimes, certain areas may need thicker or thinner lines to achieve the desired effect. Use the brush settings to make the necessary adjustments.
3. Refine Colors: Pay attention to the color palette you have chosen for your sticker. Sometimes, certain colors may appear too vibrant or dull. Make subtle adjustments to the hue, saturation, or brightness to achieve the perfect balance.
4. Add Shadows and Highlights: Shadows and highlights can add depth and dimension to your sticker design. Use a darker shade to create shadows and a lighter shade to add highlights. This technique can make your sticker look more realistic and eye-catching.
5. Eliminate Imperfections: Take a close look at your design and identify any imperfections or inconsistencies that need to be addressed. It could be a tiny smudge, a stray line, or an uneven edge. Use the eraser tool or the selection tool to fix these issues and make your sticker look polished.
6. Test on Different Backgrounds: Before finalizing your design, it’s a good idea to test how it looks on different backgrounds. This will give you a better understanding of how your sticker will appear in various settings. Play around with different background colors or patterns to ensure your sticker stands out.
7. Seek Feedback: If you’re unsure about certain aspects of your design, don’t hesitate to ask for feedback from others. Share your work with friends, fellow artists, or online communities and gather their opinions. Constructive feedback can help you identify areas for improvement and take your sticker to the next level.
With these tips in mind, you can now fine-tune and refine your sticker design to perfection. Don’t rush through this step as it can make a significant difference in the overall quality and appeal of your sticker.
Step 5: Exporting Your Sticker
Once you have completed your sticker design on Procreate, the final step is to export it so you can use it in various ways. Here’s how you can export your sticker:
1. Tap on the wrench icon located at the top toolbar of the Procreate interface. This will open the Actions menu.
2. From the Actions menu, select “Share” to open the Share Sheet.
3. You will see several sharing options available. Choose the one that suits your needs. If you want to use the sticker in other apps, select “Export as a PNG” or “Export as a JPEG” to save it to your device’s Photos app.
4. If you want to share the sticker directly, you can select “Share to…” and choose various platforms such as Messages, Mail, or social media apps.
5. If you prefer to save the sticker as a Procreate file, which allows you to make further edits in the future, select “Procreate” from the Share Sheet options.
6. Follow the prompts to select the desired location and save the file.
7. Congratulations! You have successfully exported your sticker.
You can now use your sticker in messaging apps, social media posts, or even print it out and use it as a physical sticker.
Remember, the exporting options may vary depending on the version of Procreate you are using and the capabilities of your device. Make sure to explore and experiment with different settings to find the best export format for your sticker.
Now that you have mastered the art of creating and exporting stickers on Procreate, the possibilities are endless. Get creative, have fun, and share your amazing sticker creations with the world!
Creating stickers on Procreate is a fun and creative way to personalize your digital artwork. With the wide range of tools and features available in this powerful software, you can unleash your imagination and design unique stickers that express your style and personality.
Throughout this article, we’ve explored the step-by-step process of making a sticker on Procreate. From choosing the right canvas size to sketching, coloring, and exporting your artwork, we’ve covered it all. Remember to experiment with different brushes and effects to add depth and texture to your stickers.
Whether you’re an experienced artist or just starting out, Procreate offers a user-friendly interface that allows you to bring your ideas to life. So, grab your iPad, open Procreate, and start creating amazing stickers that you can use for digital scrapbooking, social media, or even printing.
So, what are you waiting for? Let your creativity flourish and make stunning stickers on Procreate!
FAQs
1. Can I make a sticker on Procreate?
Yes, Procreate is a powerful digital art app that allows you to create various types of artwork, including stickers. With its extensive tools and features, you can easily design and create custom stickers on Procreate.
2. What do I need to make a sticker on Procreate?
To make a sticker on Procreate, you will need an iPad or iPhone running Procreate app, an Apple Pencil (for iPad), and your creativity. Additionally, having a good understanding of Procreate’s tools and features will greatly enhance your sticker-making process.
3. How do I start making a sticker on Procreate?
To start making a sticker on Procreate, open the Procreate app on your device. Create a new canvas with the desired dimensions for your sticker. Then, use the various drawing and painting tools in Procreate to design your sticker. You can add colors, textures, and even use different brush strokes to bring your sticker to life.
4. Can I import images or graphics into Procreate for my stickers?
Yes, Procreate allows you to import images or graphics into your artwork. You can either use the “Import” function in the app to bring in pre-existing images or use the “Add” feature to merge multiple layers together. This gives you the flexibility to incorporate existing images or graphics into your sticker design.
5. How do I export my sticker from Procreate?
Once you have finished creating your sticker on Procreate, you can export it in various formats. In Procreate, go to the “Actions” menu and select “Share”. From there, you can choose to save your sticker as a PNG or JPEG file. You can also select the resolution and quality settings based on your requirements. Once exported, your sticker is ready to be used and shared in various digital platforms or printed as physical stickers.