
If you’re an artist or designer, chances are you’ve heard of Procreate. It’s a powerful digital illustration app that has taken the creative world by storm. With its advanced features and intuitive interface, Procreate has become a go-to tool for many professionals seeking to create stunning digital art.
However, as much as we love Procreate, it’s no secret that it comes with a price tag. The app itself is a one-time purchase, but it’s still an investment that may not be feasible for everyone. If you’re looking to save some money on Procreate or find a more cost-effective alternative, you’ve come to the right place.
Inside This Article
- Choosing the Right Version of Procreate
- Utilizing Procreate’s Built-in Brushes and Tools
- Exploring Procreate’s Layer Functions
- Maximizing Efficiency in Procreate with Shortcuts and Gestures
- Conclusion
- FAQs
Choosing the Right Version of Procreate
Procreate is a powerful digital art app that has gained immense popularity among artists and designers. With its wide range of features and intuitive interface, Procreate offers a versatile platform for creating stunning artwork on your mobile device. However, choosing the right version of Procreate can be a bit overwhelming, as there are different options available. In this article, we will help you navigate through the options and choose the version that best suits your needs.
The first thing to consider is whether you are an iOS or an Android user. Procreate is exclusively available on iOS devices, which include iPhones and iPads. If you are an Android user, you will need to explore alternative digital art apps that are compatible with your device.
Once you have determined that you are an iOS user, you need to decide whether you want to go for the full version of Procreate or its pocket-sized counterpart, Procreate Pocket.
Procreate is the full-fledged version of the app and offers a robust set of tools and features. It is ideal for professional artists or enthusiasts who want to take their digital artwork to the next level. Procreate provides advanced features like layer masks, custom brush creation, and support for larger canvas sizes. It is available for purchase on the App Store for a one-time fee.
On the other hand, Procreate Pocket is designed specifically for iPhone users who want a more portable and streamlined experience. Although it does not have as many features as the full version, Procreate Pocket still offers a plethora of tools and functions. It is perfect for artists on the go or beginners who want to explore digital art. Procreate Pocket is available at a lower cost compared to Procreate.
Ultimately, the decision between Procreate and Procreate Pocket boils down to your personal preferences and needs. If you are a professional artist looking for advanced features and a comprehensive digital art experience, Procreate is the way to go. However, if you primarily use your iPhone for creating art and want a more compact option, Procreate Pocket will serve you well.
Remember, both versions of Procreate have a strong community of users who create and share resources, tutorials, and brushes. This means you will have access to a wealth of learning materials and support regardless of the version you choose.
So, take the time to assess your requirements and weigh the options before deciding on the version of Procreate that best suits your needs. Whether you choose Procreate or Procreate Pocket, you can look forward to immersing yourself in a world of digital art creation and unleashing your creativity.
Utilizing Procreate’s Built-in Brushes and Tools
Procreate offers an extensive range of built-in brushes and tools that allow you to unleash your creativity and bring your artistic visions to life. Whether you are a professional artist or a beginner, understanding the various brushes and tools available in Procreate can greatly enhance your digital art experience. In this section, we will explore some of the key brushes and tools that Procreate has to offer, and how you can make the most of them.
1. Brush Library: Procreate provides a vast library of brushes for different artistic purposes. From realistic brushes that mimic traditional media to digital-specific brushes that offer unique effects, the Brush Library has something for every artist. Take some time to experiment with different brushes and find the ones that suit your style and needs.
2. Customizing Brushes: Want to add your personal touch to a brush? Procreate allows you to customize existing brushes or create your own from scratch. Adjust the brush size, opacity, blending mode, and other settings to create unique effects. You can even import brushes created by other artists to expand your creative possibilities.
3. Brush Strokes: The pressure sensitivity of Apple Pencil combined with Procreate’s advanced brush engine allows for precise and expressive brush strokes. Play around with the pressure settings to create varying line widths and textures. Experiment with different strokes to add depth and dimension to your artwork.
4. Selection Tools: Procreate offers a range of selection tools to help you refine and manipulate your artwork. Use the selection tools to isolate specific areas or objects, apply adjustments or effects to selected parts, or move and resize elements within your composition. These tools give you great control over your artwork.
5. Transform and Warp: Procreate’s transform and warp tools enable you to resize, rotate, and distort elements within your artwork. Whether you want to make subtle adjustments or completely transform your composition, these tools make it easy to achieve the desired effects. Experiment with different transformations to explore new creative possibilities.
6. Symmetry and Assisted Drawing: Procreate offers symmetry and assisted drawing features that can be incredibly useful for creating balanced and precise artwork. Use the symmetry tool to mirror your brush strokes and create symmetrical designs effortlessly. The assisted drawing feature helps you maintain smooth lines by automatically correcting wobbly strokes.
7. Blending and Smudging: Procreate allows you to blend and smudge colors seamlessly, giving your artwork a realistic and painterly look. Experiment with different blending modes and brush settings to achieve various blending effects. This feature is particularly handy for creating smooth gradients and soft transitions.
8. Erasing and Undoing: Mistakes happen, but fear not! Procreate offers an eraser tool to fix errors or remove unwanted parts of your artwork. Additionally, the undo and redo buttons allow you to easily revert any changes you made. These tools give you the freedom to experiment and make corrections without worrying about permanent consequences.
Utilizing Procreate’s built-in brushes and tools is a game-changer when it comes to digital art creation. With a wide array of brushes, customization options, selection tools, and transformative capabilities, Procreate empowers artists to unleash their creativity and produce stunning artworks. So go ahead, explore the brushes and tools, experiment with different techniques, and let your imagination run wild in the world of Procreate!
Exploring Procreate’s Layer Functions
When it comes to digital art creation, Procreate is known for its powerful and versatile layer functions. Layers allow artists to work on different elements of their artwork independently, making it easier to edit and make adjustments. In this section, we will dive into the various layer functions in Procreate and how to make the most of them.
1. Creating and Organizing Layers: Procreate offers multiple ways to create and organize layers. You can create a new layer by tapping the ‘+’ icon in the Layers panel, or by swiping right with three fingers on the canvas. To organize your layers, you can group them by tapping the ‘Layer’ menu and selecting ‘Group.’ This helps to keep your artwork organized, especially when working on complex projects.
2. Adjusting Layer Opacity and Blend Modes: One of the key benefits of working with layers in Procreate is the ability to adjust layer opacity and blend modes. Opacity determines how transparent or opaque a layer is, allowing you to control the intensity of overlapping elements. Blend modes, on the other hand, determine how multiple layers interact with each other, giving you endless possibilities for blending colors and textures.
3. Masking and Clipping Layers: Procreate’s layer functions also include masking and clipping, which are powerful tools for creating precise and detailed artwork. With masking, you can hide or reveal certain areas of a layer, allowing for seamless blending and smooth transitions. Clipping, on the other hand, allows you to limit the visibility of a layer to the shape of another layer, making it easier to add intricate details or effects to specific areas.
4. Using Adjustment Layers: Adjustment layers are another handy feature in Procreate that allow you to make non-destructive edits to your artwork. With adjustment layers, you can apply various adjustments like brightness, contrast, hue, and saturation to specific layers without permanently altering the original artwork. This provides flexibility and freedom to experiment with different effects and styles.
5. Understanding Layer Blending Options: Procreate also offers a range of blending options for layers, allowing you to create unique and captivating effects. Some popular blending options include Multiply, Screen, Overlay, and Soft Light. Each blending mode combines colors and pixels in different ways, giving your artwork depth, dimension, and texture.
6. Layer Masks for Non-Destructive Editing: Layer masks are a useful tool for non-destructive editing in Procreate. Instead of erasing parts of a layer permanently, you can use layer masks to hide or reveal certain areas of a layer. This provides more flexibility and allows you to make changes without worrying about losing any details or elements of your artwork.
By exploring and mastering Procreate’s layer functions, you can unlock a whole new level of creativity and control in your digital art. Whether you’re a beginner or an experienced digital artist, understanding how to use layers effectively will greatly enhance your artistic process and help you create stunning and professional-looking artwork.
Maximizing Efficiency in Procreate with Shortcuts and Gestures
When it comes to digital art and design, time is of the essence. That’s why finding ways to maximize efficiency in Procreate, the popular digital art software, is crucial for artists looking to save time and streamline their workflow. One of the most effective ways to achieve this is by utilizing the various shortcuts and gestures that Procreate offers. These shortcuts and gestures can significantly speed up your navigation and execution of tasks within the software, allowing you to focus more on your creative process. Let’s explore some of these valuable shortcuts and gestures.
Firstly, familiarize yourself with the Procreate keyboard shortcuts. These shortcuts can save you countless clicks and menu navigation. From basic actions like undo and redo to more advanced functions like changing brush size or blending modes, knowing and utilizing these shortcuts can make a significant difference in your productivity. Take the time to learn and practice them until they become second nature.
In addition to keyboard shortcuts, Procreate also offers a range of gestures that can further enhance your efficiency. For example, you can use a two-finger tap to undo or a three-finger tap to redo. Swiping left or right with three fingers allows you to cycle through your different layers quickly. These gestures provide a quick and intuitive way to navigate and perform essential actions within the software.
Another tip for maximizing efficiency in Procreate is to customize your gestures and shortcuts. Procreate gives you the flexibility to assign specific functions to gestures or create your own custom shortcuts. This way, you can tailor the software to your preferred workflow and eliminate any unnecessary steps. Experiment with different combinations and see which gestures and shortcuts work best for you.
Additionally, utilizing Procreate’s quick menu feature can significantly speed up your workflow. The quick menu allows you to access frequently used tools and actions with a simple tap and hold gesture. You can customize the quick menu to include the tools you use the most, ensuring they are always within easy reach. This eliminates the need to navigate through various menus, saving you precious time and allowing you to stay in the creative zone.
Lastly, take advantage of Procreate’s assistive touch feature. This feature allows you to create your own virtual buttons and controls, which can be particularly useful for repetitive tasks or actions that require multiple steps. By setting up custom assistive touch buttons, you can automate certain actions and streamline your workflow even further.
After exploring the various strategies and tips to save on Procreate, it is clear that there are several effective ways to make the most out of this powerful software without breaking the bank. By taking advantage of discounts, promotions, and bundle deals, users can save a significant amount of money on their Procreate purchase. Additionally, optimizing Procreate’s settings and utilizing free resources, such as brushes and tutorials, can enhance the overall experience without any additional cost. It’s important to remember that while Procreate is a worthwhile investment for artists and creatives, there are ways to make it more budget-friendly. By implementing these cost-saving techniques, users can fully enjoy all the features and benefits of Procreate while keeping their wallets happy.
FAQs
1. Can I save on Procreate?
Yes, you can save your artwork and projects on Procreate. Procreate allows users to save their work as individual files or in different formats such as PNG, JPEG, and PSD. Saving your work regularly ensures that you don’t lose any progress or edits.
2. How do I save my artwork on Procreate?
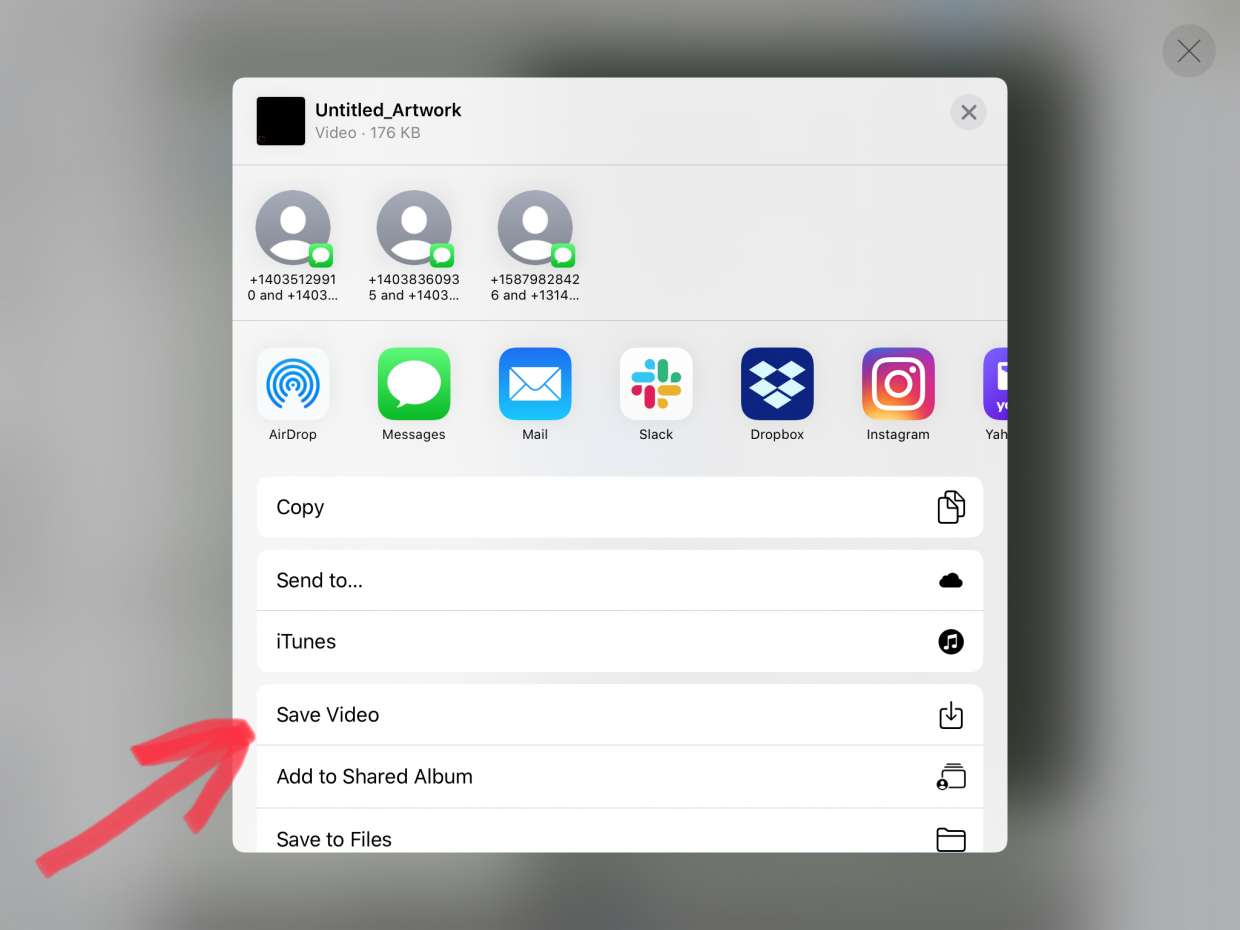
To save your artwork on Procreate, simply tap the wrench icon located at the top-right corner of the screen. Then, tap on the “Share” option and choose the format you want to save your work in. You can rename the file and select the location where you want to save it.
3. Can I export my projects from Procreate to other software?
Yes, Procreate allows you to export your projects in various file formats like PSD, PDF, TIFF, and more. This enables you to seamlessly transfer your artwork to other software or devices for further editing or sharing with others.
4. Are there any tips for optimizing file sizes in Procreate?
Yes, if you want to optimize file sizes in Procreate, you can follow these tips:
– Merge layers whenever possible to reduce the overall number of layers in your artwork.
– Flatten your artwork before saving it. This combines all visible layers into a single layer, reducing the file size.
– Choose the appropriate DPI (dots per inch) for your artwork. Higher DPI results in larger file sizes.
– Use Procreate’s “Reduce File Size” option when exporting your artwork.
5. Can I back up my Procreate files?
Absolutely! It is highly recommended to back up your Procreate files to ensure the safety of your work. You can back up your files by exporting them to cloud storage services like iCloud, Dropbox, or Google Drive. Additionally, you can also transfer your files to your computer or external storage devices for extra backup.