
Are you an aspiring digital artist looking to take your creativity to new heights? Look no further than Procreate, a powerful and intuitive drawing app designed specifically for iPad. With its extensive array of tools and features, Procreate allows artists to create stunning digital artwork with ease.
In this article, we will guide you through the process of outlining on Procreate, a fundamental step in digital art creation. Whether you’re a beginner or an experienced artist, this step-by-step guide will help you master the art of outlining and unlock your full artistic potential. From selecting the right brush to refining your lines, we’ll cover all the tips and tricks to ensure your outlines are precise, clean, and visually impactful.
So, grab your iPad and stylus, open up Procreate, and let’s dive into the world of outlining on Procreate!
Inside This Article
- Overview
- Choosing a Canvas Size
- Setting Up Layers
- Creating an Outline Layer
- Drawing the Outline
- Refining the Outline
- Exporting the Outline
- Conclusion
- FAQs
Overview
Welcome to the wonderful world of Procreate, a powerful digital art app that is revolutionizing the way artists create. In this article, we will take you through the process of outlining in Procreate, an essential technique for creating precise and defined artwork. Whether you’re a beginner or an experienced artist, mastering the art of outlining will greatly enhance your creative process.
Creating an outline is the initial step in any artwork. It helps to define the shapes and structure of your subject, providing a roadmap for the rest of your drawing. With Procreate, you have a wide range of tools and features at your disposal to facilitate the outlining process. From choosing the canvas size to refining the final outline, we will cover it all.
So let’s dive in and discover the various steps involved in creating captivating outlines using Procreate. By the end of this guide, you will have a solid understanding of how to outline on Procreate and be ready to unleash your creativity.
Choosing a Canvas Size
When it comes to creating a captivating outline on Procreate, choosing the right canvas size plays a crucial role. The canvas size determines the dimensions and proportions of your artwork, which can greatly impact the overall composition and readability of your outline.
Procreate offers a wide range of pre-defined canvas sizes to choose from, catering to various artistic needs and preferences. To select the most suitable canvas size for your outline, consider the purpose and intended use of your artwork.
If you’re planning to create a detailed outline for a digital illustration or concept art, a larger canvas size would be ideal. This allows for more intricate details and a higher level of precision. On the other hand, if you’re designing a simple outline for a social media post or a quick sketch, a smaller canvas size might be more appropriate.
Another factor to consider is the aspect ratio of your canvas. The aspect ratio refers to the relationship between the width and height of your canvas. Different aspect ratios can evoke different visual effects and create a specific mood or atmosphere.
For example, a square canvas (1:1 aspect ratio) can give your outline a balanced and symmetrical look, while a wide canvas (16:9 aspect ratio) can provide a more cinematic and expansive feel. Choosing the right aspect ratio depends on the style and aesthetic you want to achieve with your outline.
Additionally, it’s crucial to keep in mind the device or platform where your outline will be displayed. If you’re creating an outline for a specific device, such as a smartphone or a tablet, it’s worth considering the screen size and resolution of that device. This ensures that your outline will scale properly and maintain its quality across different screens.
Setting Up Layers
When working with Procreate, it’s essential to understand how to set up layers to organize your artwork efficiently. Layers allow you to work on different elements of your drawing separately, making it easier to make changes or add details later on. Here’s a step-by-step guide on setting up layers in Procreate:
1. Open a new canvas: Begin by opening a new canvas in Procreate. You can choose the canvas size that suits your needs.
2. Access the Layers panel: To access the Layers panel, tap the icon on the top right corner of your screen. This will bring up a sidebar displaying all the layers in your artwork.
3. Create a new layer: To create a new layer, tap the “+” button at the bottom of the Layers panel. This will add a new layer above the existing one.
4. Rename the layers: It’s a good practice to rename your layers to easily identify their contents. To do this, tap on the layer’s name and enter your desired name.
5. Arrange the layers: You can rearrange the order of your layers by dragging and dropping them in the Layers panel. This allows you to determine the stacking order of your elements.
6. Adjust layer opacity: You can adjust the opacity of a layer to make it more transparent or less visible. Simply tap on the layer you want to adjust and use the Opacity slider to achieve the desired effect.
7. Merge or group layers: If you want to combine multiple layers into one or group them together, you can do so by selecting the layers and tapping the “Merge” or “Group” option in the Layers panel.
8. Lock layers: Locking a layer prevents any accidental modifications to its content. To lock a layer, swipe right on the layer and tap the lock icon.
9. Duplicate layers: If you want to create multiple copies of a layer, you can duplicate it by swiping right on the layer and tapping the duplicate icon.
10. Delete layers: If you no longer need a layer, you can delete it by swiping right on the layer and tapping the trash bin icon. Make sure to double-check before deleting, as this action is irreversible.
By following these steps, you’ll be able to set up and manage layers effectively in Procreate. Organizing your artwork using layers not only streamlines your workflow but also gives you the flexibility to make adjustments and edits without affecting the rest of your artwork.
Creating an Outline Layer
When it comes to creating digital artwork on Procreate, having a well-defined outline can make all the difference. Creating an outline layer allows you to separate the outline from the rest of your artwork, making it easier to edit, refine, and customize.
To create an outline layer in Procreate, follow these simple steps:
- Open your artwork in Procreate and make sure you have the appropriate canvas size selected.
- In the Layers panel, tap the “Add” button at the top right corner to create a new layer.
- Choose “Add” as the layer type, and name it something like “Outline” to easily identify it.
- Make sure the new layer is positioned above the other layers that make up your artwork.
- Select a suitable brush or pen tool from the Brush Library to start creating your outline.
When drawing your outline, be intentional and precise. You can adjust the brush settings, such as opacity and size, to achieve the desired effect. It’s important to pay attention to the details and ensure that the outline complements the subject of your artwork.
As you work on the outline layer, remember that you can always make adjustments and corrections. Procreate gives you the flexibility and freedom to refine your outline as you go. You can use the eraser tool to clean up any mistakes or make changes to the shape.
Additionally, you can experiment with different techniques to add depth and dimension to your outline. For example, you can vary the line thickness or use different colors to create a dynamic effect.
Creating an outline layer in Procreate not only allows you to have more control over your artwork, but it also makes it easier to experiment with different styles and effects. By separating the outline from the rest of your artwork, you can make edits without affecting the underlying layers, giving you the freedom to explore and iterate.
Once you are satisfied with the outline, you can continue working on the other layers to add colors, shading, and textures to bring your artwork to life.
Now that you know how to create an outline layer in Procreate, you can take your digital artwork to the next level with beautifully defined outlines. Experiment, explore, and let your creativity flourish!
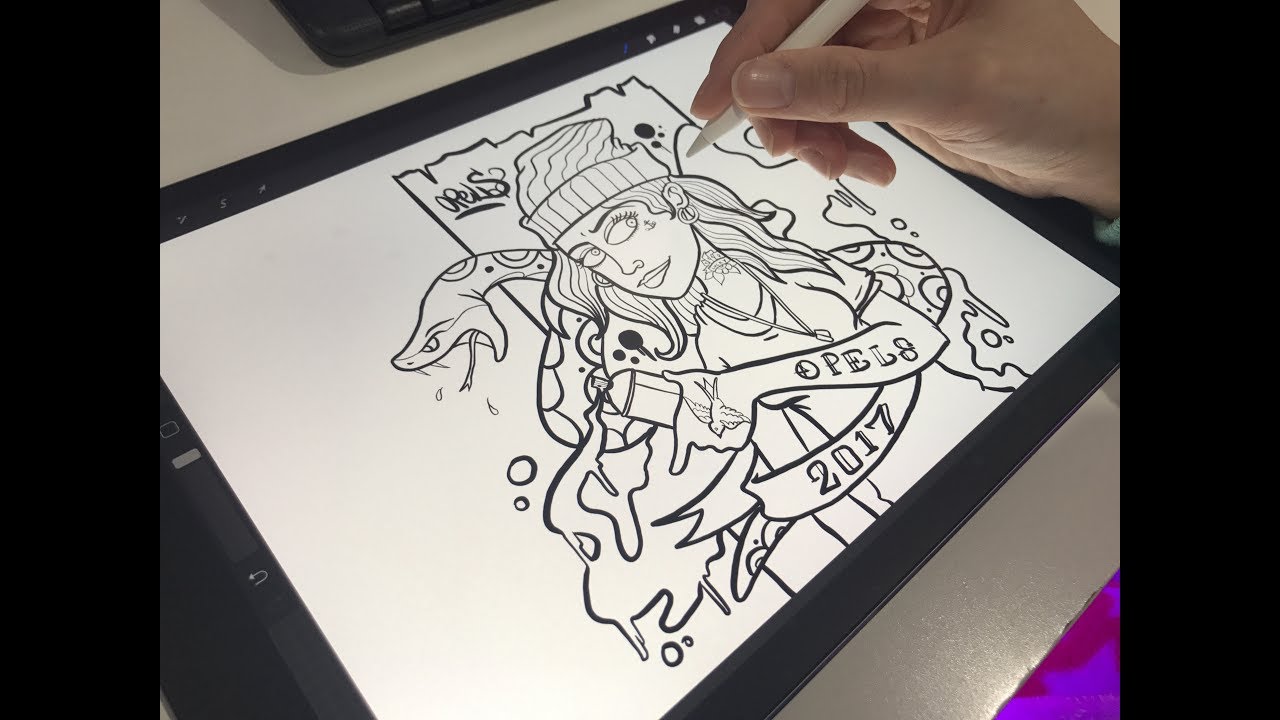
Drawing the Outline
Now that you have set up your canvas and created an outline layer, it’s time to start drawing the outline of your artwork on Procreate. Follow these simple steps to bring your creative vision to life:
- Choose the right brush: Select a brush that suits your style and the type of outline you want to create. Procreate offers a wide range of brushes, from soft and smooth to bold and textured. Experiment with different brushes to find the one that best captures the essence of your artwork.
- Adjust the brush settings: Before you start drawing, take a moment to customize the brush settings. Play around with the size, opacity, and pressure sensitivity settings to achieve the desired thickness and texture for your outline. This will give your artwork a unique and personalized touch.
- Start outlining: With your brush selected and settings adjusted, begin tracing the main shapes and contours of your artwork. Focus on creating clean and smooth lines that define the key features of your subject. Take your time and be patient, as accuracy is crucial in this step.
- Add details: Once you have the basic outline in place, it’s time to add finer details. Pay attention to small elements such as facial features, intricate patterns, or delicate textures. This is where your artistic skill and attention to detail can shine, bringing more depth and realism to your artwork.
- Refine and clean up: After completing the initial outline and adding details, take a step back and evaluate your work. Look for any areas that may need refinement or cleanup. Use the eraser tool or create a new layer to make adjustments without affecting the underlying outline. This stage allows you to perfect the overall look of your artwork.
Remember, the outline serves as the foundation for your artwork, so it’s important to take your time and refine it until you are satisfied with the result. Don’t be afraid to experiment and make changes along the way. Procreate offers a flexible and intuitive interface that allows you to easily edit and modify your outline until it meets your creative vision.
With your outline complete, you’re ready to move on to the next step in your artistic process. Whether you plan to color, shade, or further refine your artwork, having a well-defined outline sets the stage for a successful and visually appealing piece.
Refining the Outline
Once you have created the initial outline of your artwork on Procreate, it’s time to refine it and add more details. This step is crucial in giving your artwork a polished and professional look.
Here are some tips to help you refine your outline:
- Zoom in and work on smaller sections: To ensure precision and accuracy, zoom in on specific areas of your outline. This allows you to focus on each detail and make necessary adjustments.
- Use different brush sizes: Experiment with different brush sizes to add variations and depth to your outline. A smaller brush can be used for intricate details, while a larger brush can be used for broader strokes.
- Clean up rough edges: Smooth out any rough edges or uneven lines in your outline. You can do this by using the eraser tool or the selection tool to refine the shape of your outline.
- Add shading and highlights: To give your outline a three-dimensional look, consider adding shading and highlights. This can be done by using different shades of color to create depth and add dimension to your artwork.
- Pay attention to composition: Check if your outline is well-balanced and visually appealing. Ensure that the proportions are accurate and the elements are placed in a cohesive and pleasing manner.
- Adjust line thickness: Experiment with varying line thickness to add visual interest and emphasis to specific areas of your outline. Thicker lines can help create focal points, while thinner lines can be used for finer details.
Remember, refining the outline is an iterative process. Don’t be afraid to make adjustments and keep experimenting until you achieve the desired effect. Take breaks in between to get fresh eyes and come back with a new perspective.
Once you are satisfied with the refined outline, you can move on to the next steps of your artwork, such as adding colors or shading.
Exporting the Outline
Once you have finished creating and refining your outline in Procreate, it’s time to export it and use it for your desired purposes. Procreate offers several options for exporting your outline, allowing you to save it in different formats and share it with others. Here’s how you can export your outline in Procreate:
1. To begin, make sure you have the outline layer selected in the Layers panel. This ensures that only the outline will be exported, without any other elements.
2. Next, go to the Actions menu in the top toolbar and tap on the “Share” button. This will open a new window with various export options.
3. In the export options window, you can choose the file format for your outline. Procreate supports a range of formats, including JPEG, PNG, TIFF, PSD, and Procreate file format (PROCREATE).
4. Select the desired file format by tapping on it. Each format has its own advantages and uses. For example, JPEG is a widely accepted image format suitable for sharing online, while TIFF provides higher quality and is typically used for professional printing.
5. After selecting the file format, you can adjust the quality and size settings according to your preferences. This allows you to control the file size and resolution of the exported outline.
6. Once you have chosen the file format and adjusted the settings, tap on the “Export” button. Procreate will generate the outline file and present you with options to save it or share it directly.
7. To save the outline file, choose a location on your device or iCloud Drive and tap on the “Save” button. Alternatively, you can choose to share the outline file directly via email, messaging apps, or other platforms.
8. Congratulations! You have successfully exported your outline from Procreate. You can now use it for various purposes such as printing, incorporating it into other projects, or sharing it with others.
Remember to keep a copy of your original Procreate file (PROCREATE format) in case you need to make further changes or adjustments to the outline in the future. This ensures that you have the flexibility to modify the outline as needed without losing any details.
Exporting your outline from Procreate is a straightforward process that allows you to utilize your artwork in different ways. Whether you’re creating illustrations, digital paintings, or design mockups, exporting the outline gives you the freedom to continue working with your artwork outside of the Procreate app.
So go ahead, explore the various export options in Procreate, and share your beautifully crafted outlines with others!
Procreate is a powerful and popular digital illustration app that offers a wide range of features for creating stunning artworks. With its intuitive interface, extensive brush library, and versatile tools, artists of all levels can enjoy a seamless and productive drawing experience.
By following the steps outlined in this article, you can master the art of outlining on Procreate. From setting up your canvas to selecting the right brush and applying various techniques, you have everything you need to bring your artistic visions to life.
Whether you’re a professional illustrator or an aspiring artist, Procreate provides a robust platform to unleash your creativity and elevate your digital artwork to new heights. So grab your stylus, unleash your imagination, and let Procreate be your digital canvas for creating stunning outlines.
FAQs
1. Can I outline on Procreate?
Yes, Procreate is a versatile digital art app that allows you to easily outline your artwork. With its powerful brush tools and intuitive interface, you can create clean and precise outlines with ease.
2. How do I start outlining on Procreate?
To start outlining on Procreate, open the app and create a new canvas or open an existing artwork. Select a brush that suits your outlining needs. You can choose from a variety of brush types, such as pencils, pens, or markers. Adjust the brush settings, such as size, opacity, and pressure sensitivity, to achieve the desired effect. Then, simply trace over the edges of your artwork to create an outline.
3. Can I customize the outline color on Procreate?
Absolutely! Procreate offers a wide range of color options to customize your outline. You can either choose a color from the existing color palettes or create a custom color using the color wheel. Experiment with different colors to find the perfect outline that complements your artwork.
4. Are there any additional features to enhance my outlines on Procreate?
Yes, Procreate provides several additional features to enhance your outlines. For example, you can adjust the opacity and blending modes of the outline to create different effects. You can also experiment with different brush textures or add special effects to make your outlines stand out. Procreate also offers layers, allowing you to separate your outline from the rest of the artwork for easier editing.
5. Can I import and export my outlined artwork from Procreate?
Absolutely! Procreate allows you to import and export your outlined artwork with ease. You can import images or reference materials to trace over, or you can export your outlines as separate files in various formats, such as PNG or JPG, for further editing or sharing on other platforms.