
Welcome to our comprehensive guide on how to print on Procreate! Procreate has become one of the most popular digital art platforms for artists, designers, and illustrators. With its powerful features and user-friendly interface, it offers a wide range of creative possibilities. However, despite being primarily designed for digital work, you may find yourself needing to print your Procreate creations at some point. Whether you want to create physical copies of your artwork, sell prints, or simply want to have a hard copy for personal use, knowing how to print on Procreate is essential. In this article, we will walk you through the step-by-step process of printing your Procreate artwork and provide you with some helpful tips and tricks along the way. So, let’s dive in and learn how to bring your digital creations to life on paper!
Inside This Article
- Choosing the Right Image Resolution
- Setting Up Your Canvas
- Importing and Adjusting Your Image
- Printing Your Artwork
- Conclusion
- FAQs
Choosing the Right Image Resolution
When it comes to printing your artwork on Procreate, one of the most crucial factors to consider is the image resolution. The image resolution plays a significant role in determining the quality and clarity of your printed piece. To ensure that your artwork looks its best in print, follow these guidelines for choosing the right image resolution:
1. Understand the concept of resolution: Resolution refers to the number of pixels per unit of measurement in your image. A pixel is the smallest element in a digital image. The resolution directly affects the sharpness and detail of your artwork.
2. Determine the print size: Think about the size at which you will be printing your artwork. If you’re planning to print a large poster, you’ll need a higher resolution compared to a smaller print like a postcard. The larger the print, the higher the resolution required to maintain image quality.
3. Consider the viewing distance: Another important aspect to consider when choosing the right resolution is the viewing distance. If your print will be viewed from a distance, like a billboard, you can use a lower resolution. However, if your artwork will be viewed up close, like a framed print, a higher resolution is necessary to ensure crisp details.
4. Check the print requirements: Different printing methods have specific resolution requirements. Check with your print provider to determine the preferred resolution for the printing method you’ll be using. This way, you can ensure optimal results and avoid any potential issues with the final print.
5. Balance file size and resolution: While it’s important to have a high-resolution image for printing, you must also consider the file size. Larger files may take longer to process and might be challenging to store or share. Finding the balance between resolution and file size is key.
By taking these factors into account and selecting the appropriate image resolution, you can ensure that your artwork looks stunning when printed from Procreate. Remember, if you’re unsure about the right resolution to use, consult with a professional printer or seek guidance from fellow artists familiar with the printing process.
Setting Up Your Canvas
When it comes to printing your artwork on Procreate, one of the crucial steps is setting up your canvas correctly. By ensuring the right canvas dimensions and settings, you can optimize your artwork for print and achieve the desired results. Here are some important factors to consider when setting up your canvas:
1. Canvas size: Begin by determining the size of the canvas. Consider the final output size you want for your printed artwork. Whether it’s a small postcard or a large poster, knowing the dimensions in advance will help you create your artwork in the correct proportions.
2. Resolution: The resolution of your canvas is essential for producing high-quality prints. For printing purposes, it is recommended to set your canvas resolution to 300 pixels per inch (PPI). This ensures a sharp and detailed print without any pixelation.
3. Color profile: Selecting the appropriate color profile is crucial to maintain color accuracy and consistency across different devices and printers. It is generally recommended to use the sRGB color profile, which is widely supported and produces vibrant and true-to-life colors.
4. Bleed area: The bleed area is the margin around your artwork that extends beyond the trim size. It allows for slight variations in printing and ensures that no important elements are cut off. Adding a bleed area of around 0.125 inches to your canvas dimensions is often sufficient.
5. Margins: Consider leaving some margin space within your canvas to avoid placing important details too close to the edge. Leaving a small margin ensures that no essential elements are accidentally trimmed during the printing process.
Setting up your canvas correctly is essential for achieving professional-quality prints. By considering the canvas size, resolution, color profile, bleed area, and margins, you can ensure that your artwork is optimized for printing and delivers the intended impact.
Importing and Adjusting Your Image
Once you have set up your canvas in Procreate, the next step is to import and adjust the image you want to print. Procreate offers various options and tools to help you manipulate and fine-tune your image before sending it to the printer. Let’s explore how you can import and adjust your image seamlessly.
The first thing you need to do is import your image into Procreate. To do this, click on the wrench icon at the top left corner of the screen to open the Actions menu. From there, select the Add option and choose Import. You can then navigate to the location where your image is stored and select it to import it into Procreate.
Once your image is imported, you may need to make some adjustments to optimize it for printing. Procreate provides a range of editing tools that allow you to modify elements such as brightness, contrast, saturation, and hue. To access these tools, tap on the Adjustments icon in the top toolbar.
When adjusting your image, it’s crucial to keep in mind the printing process. Colors can appear differently on screen compared to the printed output. To ensure that your image looks as intended when printed, you can use Procreate’s Color Balance and Color Harmony features. These tools allow you to make precise adjustments to the colors in your image, making sure they will translate accurately in print.
In addition to color adjustments, Procreate also offers resizing and cropping tools. These can be useful if you need to change the dimensions or composition of your image to fit your desired print size. To access these tools, tap on the Transform icon in the top toolbar. From there, you can resize, rotate, and crop your image to your liking.
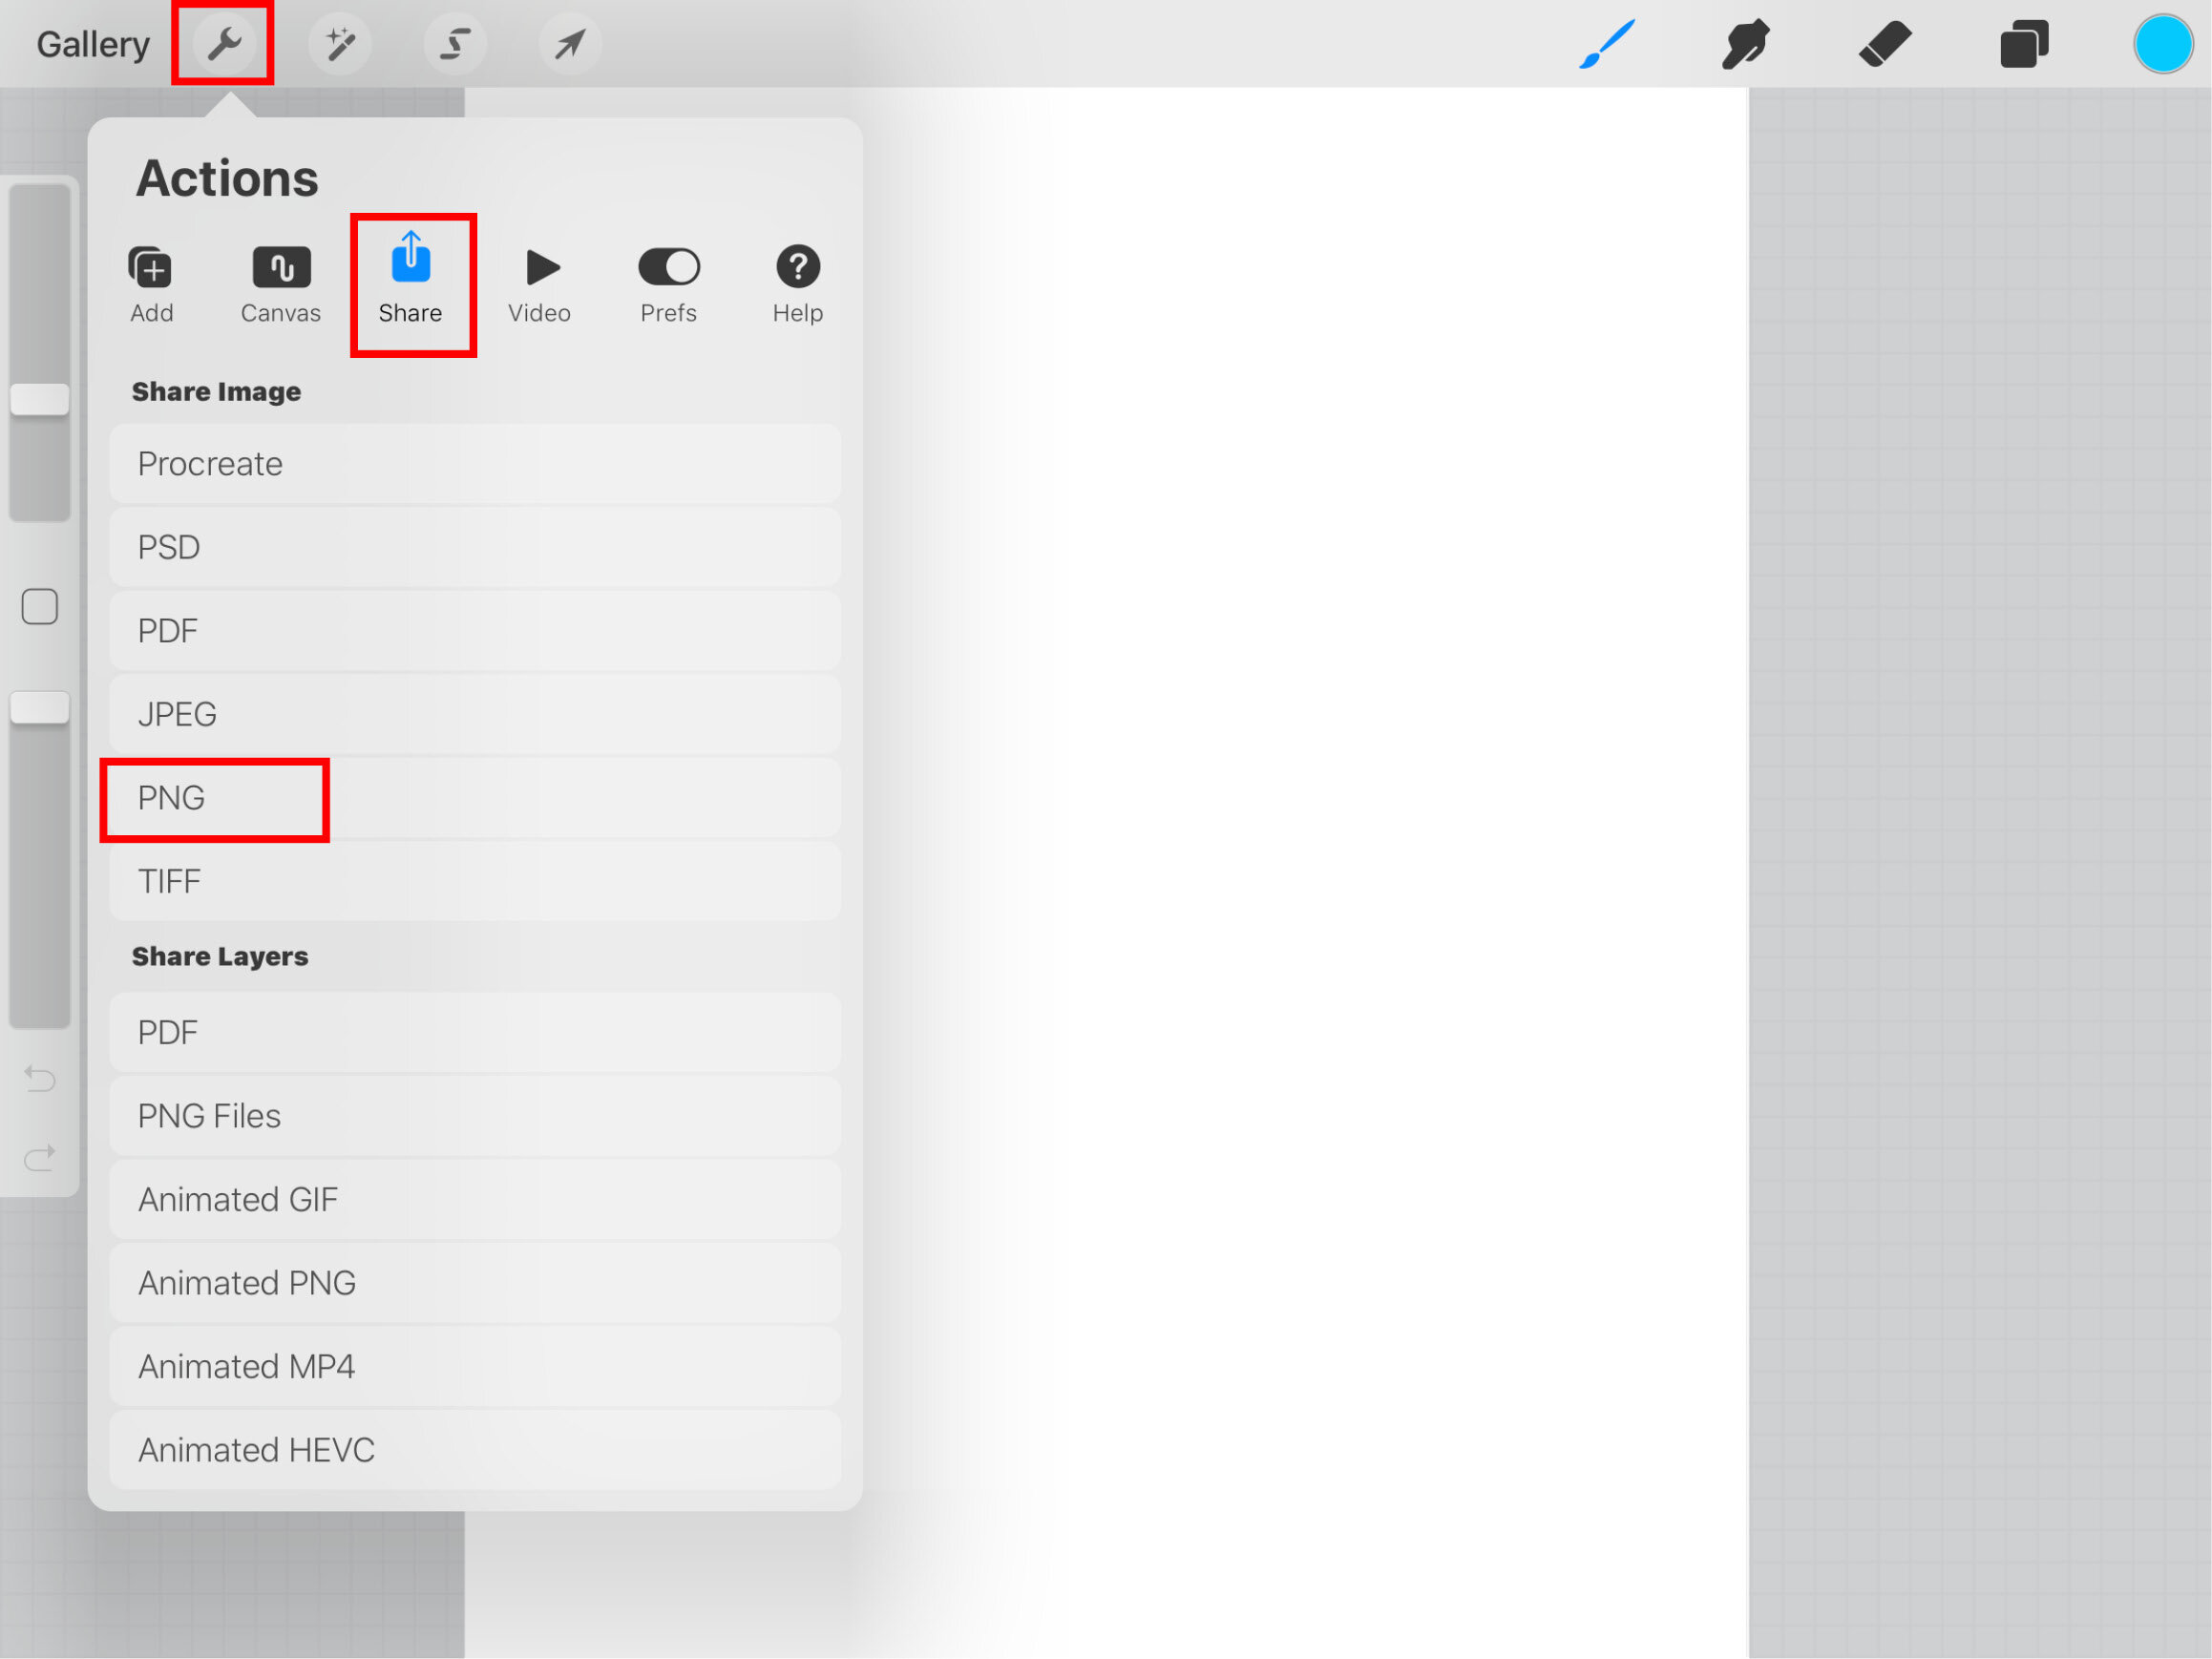
Once you are satisfied with the adjustments made to your image, it’s time to prepare it for printing. Procreate allows you to export your artwork in various formats, including JPEG and PNG. To export your image, tap on the wrench icon in the top toolbar, then select the Share option. From there, choose the format you prefer and save your image to your device or send it directly to a printer.
Remember to select the appropriate image resolution and color profile settings when exporting your image for printing. This will ensure that the printed result is of high quality and matches your expectations.
With Procreate’s powerful editing tools and flexibility, importing and adjusting your image for printing becomes a seamless and enjoyable process. Take advantage of the numerous options and features available in Procreate to bring your artwork to life on paper.
Printing Your Artwork
Once you’ve completed your artwork in Procreate, the next step is to bring it to life by printing it. Printing your artwork allows you to share and display your creations in a physical form. Here are a few steps to guide you through the process of printing your Procreate artwork.
Step 1: Choose the Right Printer
To achieve high-quality prints of your artwork, it’s important to choose the right printer. Look for a printer that supports a wide color gamut and high resolution. Inkjet printers are a popular choice among artists as they can produce vibrant colors and fine details. Consider the size of prints you want to make and choose a printer that can accommodate your desired dimensions.
Step 2: Select the Paper Type
The type of paper you choose can greatly impact the appearance and longevity of your printed artwork. Matte and glossy papers are the most commonly used options. Matte papers are known for their smooth and non-reflective finish, making them ideal for artwork with subtle details and textures. Glossy papers, on the other hand, provide a shiny and vibrant look that can enhance color saturation.
Step 3: Calibrate Your Monitor
For accurate color reproduction, it’s important to calibrate your monitor. This ensures that the colors you see on your screen closely match the printed output. Use a monitor calibration tool or software to adjust the settings of your display. By calibrating your monitor, you can avoid any unexpected color variations in your printed artwork.
Step 4: Set Up the Print Settings
Before printing, you need to configure the print settings according to your preferences. Pay attention to parameters like paper size, orientation (portrait or landscape), and print quality. Experiment with different settings and make test prints if necessary to achieve the desired results. Keep in mind that the settings may vary depending on your printer model and paper type.
Step 5: Print a Test Page
Before printing your final artwork, it’s always a good idea to print a test page. This allows you to check the colors, sharpness, and overall quality of the printed output. Make any necessary adjustments to your artwork or print settings based on the test print. It’s better to catch any issues early on rather than wasting paper and ink on multiple failed prints.
Step 6: Print Your Artwork
Once you’re satisfied with the test print, it’s time to print your final artwork. Ensure that you have enough ink and paper before starting the print job. Place the desired paper size in the printer, select the correct file, and hit the print button. Be patient while the printer works its magic and carefully collect the printed artwork once the job is completed.
Printing your Procreate artwork can be a rewarding experience. It allows you to showcase your talent and creativity in a tangible form. By following these steps and paying attention to detail, you can bring your digital artwork to life and create stunning prints to be admired and enjoyed by others.
In conclusion, printing on Procreate is a valuable skill for digital artists and designers. With its advanced features and intuitive interface, Procreate offers a seamless printing process that allows users to bring their digital creations to life on paper. From exporting high-resolution files to selecting the right paper and printer settings, Procreate provides the tools necessary to achieve stunning print results. By following the steps outlined in this article, users can ensure that their artwork is accurately translated from screen to print, with vibrant colors, crisp details, and professional-quality output. So whether you’re an aspiring artist or a seasoned professional, mastering the art of printing on Procreate is a worthwhile endeavor that will elevate your digital creations to new heights.
FAQs
Q: Can you print directly from Procreate?
A: No, Procreate does not have a built-in print function. However, you can export your artwork as a high-resolution image and then print it from another application or send it to a printer.
Q: How do I export my artwork from Procreate?
A: To export your artwork from Procreate, open the artwork you want to export and go to the Actions menu (wrench icon) in the top toolbar. From there, select “Share” and choose the file format you prefer, such as JPEG or PNG. You can save the exported file to your device or share it via email or other apps.
Q: What is the recommended resolution for printing Procreate artwork?
A: For optimal print quality, it is recommended to export your Procreate artwork at a resolution of 300 pixels per inch (PPI). This ensures that the printed image will have crisp details and sharp colors.
Q: Can I print my Procreate artwork on different surfaces, such as canvas or fabric?
A: Yes, you can print your Procreate artwork on various surfaces. After exporting the artwork, you can take it to a professional print shop or use a home printer compatible with the desired surface. Keep in mind that the texture and material of the surface may affect the final appearance of the print.
Q: How do I ensure accurate colors when printing from Procreate?
A: To ensure accurate colors when printing from Procreate, it’s important to calibrate your screen and use color profiles. Calibrating your screen helps ensure that the colors you see on your device match the colors in your artwork. Additionally, using color profiles specific to the printer and paper you are using can help maintain color accuracy throughout the printing process.