
Procreate is a powerful digital art and illustration app that has gained immense popularity among artists and designers. One crucial aspect of digital artwork is DPI (dots per inch), which determines the resolution and quality of your artwork. Being able to change the DPI in Procreate gives you more control over the final output, whether it’s for print or digital display. In this article, we will explore the step-by-step process of changing the DPI on Procreate, allowing you to optimize your artwork for different mediums with ease. So, whether you’re a seasoned Procreate user looking to fine-tune your artwork or a beginner getting started, let’s dive in and discover how to adjust the DPI within the Procreate app.
Inside This Article
What is DPI and why is it important in Procreate?
DPI stands for “dots per inch” and refers to the measure of pixel density in an image. In the context of Procreate, DPI determines the resolution and quality of your artwork. When you create a digital illustration or design in Procreate, the DPI setting determines how sharp and detailed your final output will be.
Higher DPI values result in more pixels per inch, which translates to a greater level of detail and clarity in your artwork. This is particularly important if you plan to print your creations or display them on high-resolution screens.
Procreate allows you to adjust the DPI setting to fit your specific needs. By controlling the DPI, you have control over the print size, pixel size, and level of detail in your artwork. Whether you’re creating illustrations for a physical product like a book cover or simply want to ensure the best visual experience on various digital platforms, knowing how to change the DPI in Procreate is essential.
So, in summary, DPI is important in Procreate because it affects the quality and resolution of your digital artwork. By understanding and utilizing the DPI setting, you can ensure your creations are optimized for both digital and physical displays.
How to change DPI in Procreate?
When working on digital art in Procreate, it’s important to consider the DPI (dots per inch) settings to ensure optimal print quality. DPI refers to the number of pixels per inch in a digital image, and adjusting it can impact the sharpness and clarity of your artwork. Fortunately, changing the DPI in Procreate is a simple process. In this guide, we will walk you through the steps to adjust the DPI setting in Procreate, allowing you to create high-quality prints of your digital masterpieces.
To change the DPI in Procreate, follow these steps:
- Open Procreate on your device.
- Create a new canvas or open an existing one by tapping on the “+” symbol or selecting a project from the gallery.
- Once you’re on the canvas, tap on the wrench icon located at the top left corner of the screen to access the “Actions” menu.
- In the “Actions” menu, select “Canvas” from the list of options.
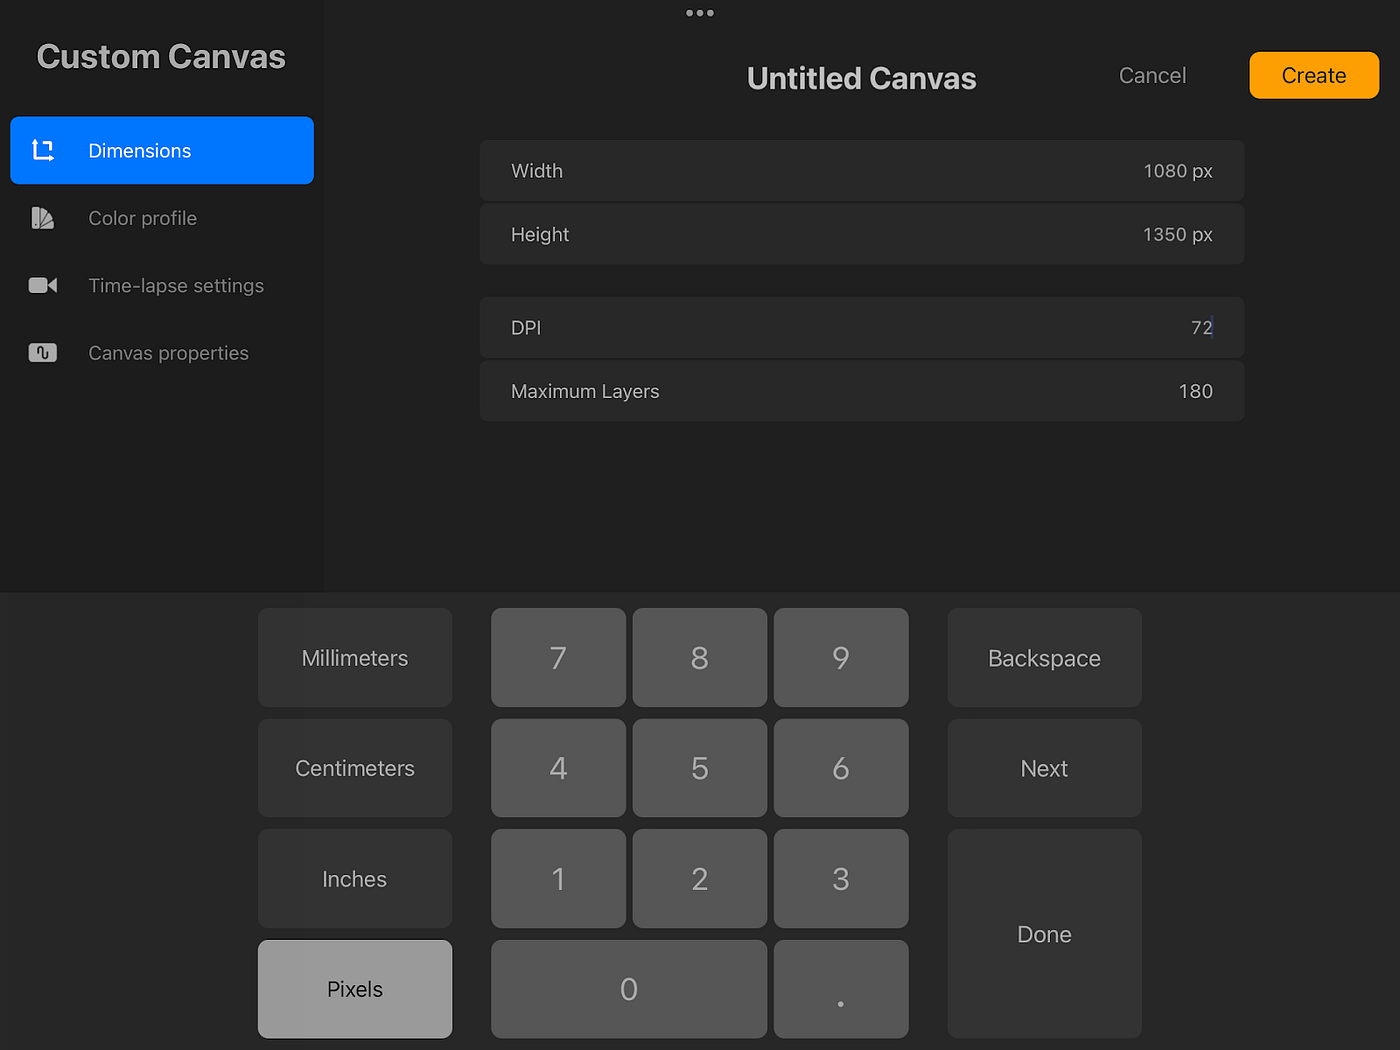
- Under the “Canvas Information” section, you will find the DPI setting. By default, it is usually set to 72 DPI.
- To change the DPI, tap on the value next to the “DPI” label.
- A pop-up window will appear, allowing you to enter a new value for the DPI. Simply input the desired DPI value using the on-screen keyboard.
- After entering the new value, tap on the “Done” button to apply the changes.
That’s it! You have successfully changed the DPI setting in Procreate. Keep in mind that altering the DPI will affect the overall dimensions and file size of your artwork. Higher DPI values result in larger file sizes but offer more detail and crispness for printing.
When changing the DPI, it’s essential to consider the intended use of your artwork. Higher DPI settings are ideal for prints, while lower DPI settings are suitable for web-based or digital use. Make sure to select an appropriate DPI value that aligns with your project’s requirements.
Now that you know how to change the DPI in Procreate, you can confidently create digital artwork with the right settings for printing. Experiment with different DPI values to find the perfect balance between file size and print quality. Happy creating!
Conclusion
Changing the DPI on Procreate can be a useful tool for digital artists looking to have more control over their artwork’s resolution. By adjusting the DPI, you can ensure that your creations are optimized for various purposes, whether it’s printing high-quality physical copies or sharing online.
By following the steps outlined in this guide, you’ll be able to easily change the DPI setting in Procreate and take your artistic experience to the next level. Remember, having a higher DPI doesn’t necessarily mean better quality in all cases, so it’s essential to consider your intended use before making any adjustments.
Experiment with different DPI settings, explore the impact on image quality and file size, and find what works best for your specific needs. With Procreate’s flexibility and versatility, you’re empowered to create stunning digital art that truly showcases your talent. So dive in, get creative, and take full advantage of the DPI options available in Procreate!
FAQs
-
What is DPI and why is it important in Procreate?
DPI stands for Dots Per Inch, and it measures the resolution or clarity of an image. In Procreate, DPI determines the level of detail your artwork will have when printed. A higher DPI value means more dots per inch, resulting in a sharper and more detailed image. It is important to set the correct DPI for your artwork to ensure optimal printing quality. -
How can I change the DPI in Procreate?
To change the DPI in Procreate, follow these steps:- Open Procreate and tap on the wrench icon to access the Actions menu.
- Tap on “Canvas” to modify canvas settings.
- Under the “Canvas Information” section, you will find the DPI option.
- Adjust the DPI value to your desired resolution.
- Tap “Done” to save the changes.
-
What DPI should I set for my Procreate artwork?
The ideal DPI for your Procreate artwork depends on the intended use. For digital sharing on social media or online platforms, a DPI of 72 is usually sufficient. However, if you plan to print your artwork, it is recommended to set the DPI between 300-600 for a high-quality print. Consider the size of the print and the printing equipment being used to determine the appropriate DPI value. -
Can I change the DPI of an existing artwork in Procreate?
Yes, you can change the DPI of an existing artwork in Procreate. Simply open the artwork, follow the steps mentioned above to modify the DPI value, and save the changes. Keep in mind that changing the DPI after starting your artwork may affect its overall quality, so it’s best to set the desired DPI before beginning your project. -
Will changing the DPI in Procreate affect the size of my artwork?
No, changing the DPI in Procreate will not directly affect the size of your artwork. The DPI setting only determines the resolution of the image. However, if you have specific size requirements for your artwork, you can adjust the canvas dimensions in Procreate accordingly while keeping the desired DPI intact. This way, you can ensure that your artwork meets both the size and resolution requirements.