
Are you tired of the default ringtone on your iPhone and want to personalize it? Good news! You can create your own unique ringtones for free without the need for a computer. In this article, we will guide you through the simple steps to create custom ringtones for your iPhone, allowing you to add a personal touch to your device. Whether you want to use your favorite song, a funny sound effect, or even a recording of your pet, we’ve got you covered. Say goodbye to generic ringtones and hello to a more personalized iPhone experience. Get ready to stand out from the crowd and let your phone ring with style! So, grab your iPhone and let’s get started on creating your very own ringtone masterpiece!
Inside This Article
- Method 1: Using GarageBand
- Method 2: Using the Ringtone Maker App
- Method 3: Using the Zedge App
- Method 4: Using iTunes File Sharing
- Conclusion
- FAQs
Method 1: Using GarageBand
If you’re looking to create custom ringtones for your iPhone without the need for a computer, GarageBand is a powerful tool that can help you achieve just that. Developed by Apple, GarageBand is a versatile app that allows users to create and edit music right on their iPhone. Follow the steps below to create your own unique ringtones using GarageBand.
- Step 1: Launch the GarageBand app on your iPhone.
- Step 2: Tap on the Audio Recorder option on the main screen.
- Step 3: On the Audio Recorder screen, tap on the View/Edit button, represented by three horizontal lines with dots.
- Step 4: Tap on the Loop Browser button on the top-left corner of the screen.
- Step 5: In the Loop Browser, navigate to the Music or Sound Effects section and select the desired instrument or sound.
- Step 6: Once you’ve selected the instrument or sound, tap on the Down Arrow button to add it to the timeline.
- Step 7: You can adjust the length of the ringtone by tapping and dragging the edges of the sound clip in the timeline.
- Step 8: To make any adjustments to the sound, tap on the sound clip in the timeline and use the available controls.
- Step 9: Once you’re satisfied with your ringtone, tap on the My Songs button in the top-left corner.
- Step 10: Tap and hold on your newly created ringtone, then select the Share option.
- Step 11: Choose the Ringtone option from the sharing menu.
- Step 12: Customize the name and length of the ringtone if desired, then tap on the Export button.
- Step 13: GarageBand will export the ringtone and make it available in the Sounds & Haptics settings on your iPhone.
Tip: You can assign your newly created ringtone to a specific contact by going to the Contacts app, selecting the contact, and editing their ringtone option.
With GarageBand, creating custom ringtones for your iPhone is a breeze. From selecting instruments and sounds to editing the length and exporting the ringtone, you have full control over the customization process. Give it a try and add a personal touch to your iPhone’s ringtone collection.
Method 2: Using the Ringtone Maker App
If you’re an iPhone user looking for a hassle-free way to create custom ringtones, look no further than the Ringtone Maker app. This user-friendly app allows you to easily turn your favorite songs or audio files into personalized ringtones without the need for a computer. Here’s how you can use the Ringtone Maker app to create your own unique ringtones in just a few simple steps:
1. First, start by downloading the Ringtone Maker app from the App Store and install it on your iPhone. Once installed, open the app and grant it the necessary permissions it requires to access your music library.
2. Once the app is launched, you’ll be presented with a list of songs from your music library. Choose the song you want to turn into a ringtone by tapping on it. You can also search for a specific song by using the search bar at the top.
3. After selecting the desired song, the Ringtone Maker app will provide you with an editing screen. Here, you can customize the starting and ending points of your ringtone by adjusting the sliders or manually entering the desired time values. You can preview the changes by tapping the play button.
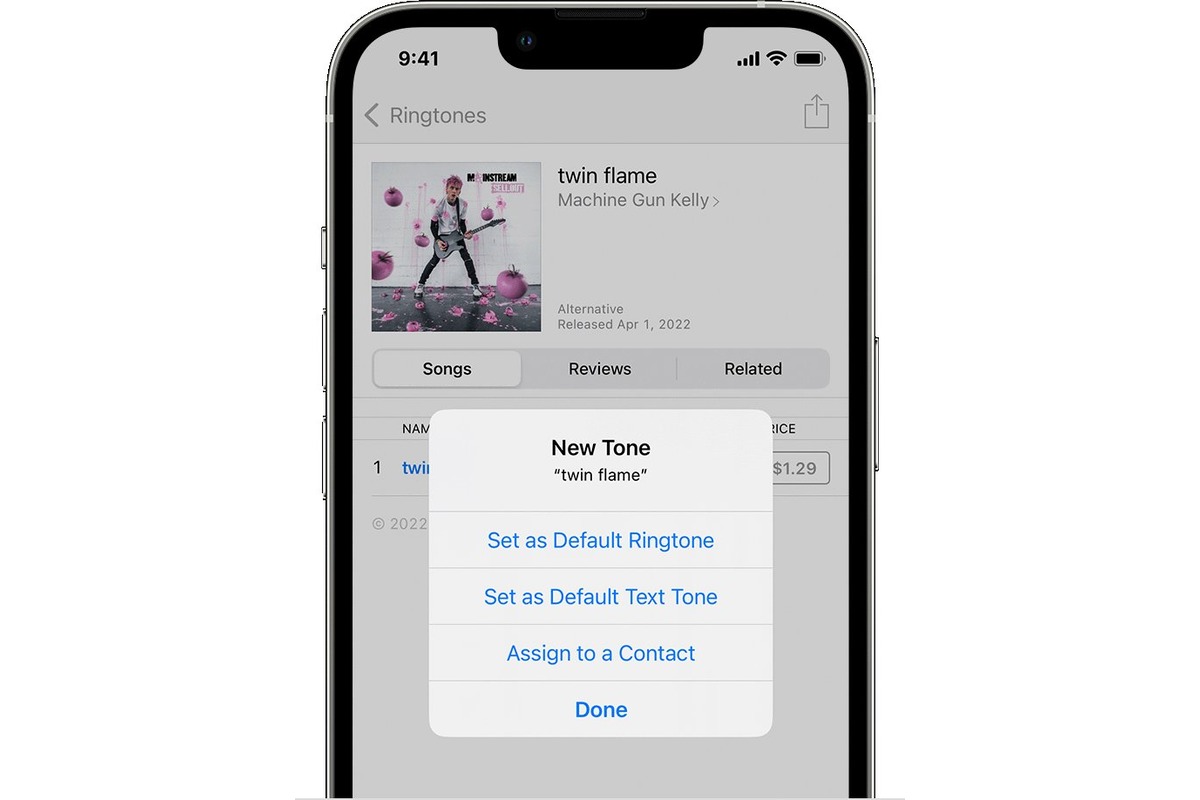
4. Once you’re satisfied with the editing, tap on the “Save” or “Export” button to save your newly created ringtone. The app will ask you to name the ringtone and choose whether you want it to be set as a standard ringtone, text tone, or assign it to a specific contact.
5. Finally, head over to your iPhone’s settings and navigate to the “Sounds & Haptics” section. From there, you can select your custom ringtone under the “Ringtone” or “Text Tone” options. Your newly created ringtone will now be ready to use!
The Ringtone Maker app provides a seamless and convenient solution for iPhone users who want to add a personal touch to their device. It eliminates the need for complex software or the use of a computer, making it accessible to users of all technical levels. With just a few taps, you can transform any song into a unique ringtone that reflects your personal style.
So why settle for generic ringtones when you can have one that truly stands out? Give the Ringtone Maker app a try and start customizing your iPhone’s soundscape today!
Method 3: Using the Zedge App
If you’re looking for an easy and convenient way to create free ringtones for your iPhone without the need for a computer, the Zedge app is a great option to consider. Zedge is a popular app that offers a wide range of free ringtones, wallpapers, and other customized content for your mobile device. With just a few simple steps, you can find and set unique and personalized ringtones on your iPhone.
To get started, follow these steps:
- First, download the Zedge app from the App Store and install it on your iPhone.
- Once installed, open the Zedge app and navigate to the “Ringtones” section.
- Browse through the vast collection of ringtones available. You can use the search bar to find specific genres or artists.
- Once you’ve found a ringtone you like, tap on it to preview it.
- If you’re satisfied with the ringtone, tap on the “Download” button next to it. This will download the ringtone to your iPhone.
- After the download is complete, the Zedge app will guide you to the Settings app on your iPhone.
- In the Settings app, select “Sounds & Haptics” and then tap on “Ringtone”.
- You should now see the downloaded Zedge ringtone listed at the top of the ringtone options. Tap on it to set it as your default ringtone.
That’s it! You’ve successfully created a free iPhone ringtone using the Zedge app. Now, whenever you receive a call, your custom ringtone will play, adding a personal touch to your iPhone experience.
It’s worth mentioning that Zedge also offers the option to customize other notification sounds such as text tones and alarms. Simply follow the same steps above, selecting the appropriate sound category in the Zedge app and setting it as your preferred notification sound in the iPhone settings.
The Zedge app provides a user-friendly interface and an extensive library of ringtones, making it a convenient choice for creating personalized ringtones on your iPhone. Give it a try and add some personality to your device!
Method 4: Using iTunes File Sharing
If you’re an iPhone user, you may already be familiar with iTunes, the popular media player and management software developed by Apple. However, did you know that you can also use iTunes to create and transfer custom ringtones to your iPhone? With iTunes File Sharing, you can easily sync your favorite tunes and convert them into personalized ringtones, all without the need for a computer.
To get started, make sure you have the latest version of iTunes installed on your computer. Connect your iPhone to your computer using a USB cable, and launch iTunes if it doesn’t open automatically. Once connected, select your iPhone from the list of devices in iTunes.
Next, navigate to the “Apps” tab in the left sidebar of the iTunes window. Scroll down until you find the “File Sharing” section. Here, you’ll see a list of compatible apps that support file sharing.
Find the app you want to use for creating ringtones and click on it. In the app’s file sharing section, you may find a “Documents” or “File” folder. This is where you can add and manage your audio files.
Now, locate the audio file on your computer that you want to convert into a ringtone. It could be an MP3, AAC, or M4A file. Simply drag and drop the file into the “Documents” or “File” folder within the app’s file sharing section.
Once the file is successfully transferred, you can disconnect your iPhone from the computer. On your iPhone, go to the Settings app, then tap on “Sounds & Haptics”, and select “Ringtone”. You should now see your newly added audio file listed under the Custom section of ringtones.
Tapping on the custom ringtone will play a preview of it. If you’re satisfied with the choice, simply select it as your default ringtone or assign it to specific contacts.
Using iTunes File Sharing to create custom ringtones is a convenient and straightforward solution for iPhone users. It allows you to personalize your device with your favorite tunes and stand out from the crowd. Give it a try and enjoy a unique ringtone experience on your iPhone!
Conclusion
Creating free ringtones for your iPhone without the need for a computer is a convenient and cost-effective way to personalize your device. With the abundance of online tools and apps available, you can easily convert your favorite songs into custom ringtones that reflect your unique style and taste.
By following the step-by-step instructions outlined in this guide, you can easily trim and customize any audio file to create the perfect ringtone for your iPhone. From catchy melodies to memorable movie quotes, the possibilities are endless.
Remember to take note of any legal restrictions and respect copyright laws when using copyrighted material. Additionally, double-check the compatibility of the ringtones with your specific iPhone model and software version to ensure seamless functionality.
So why settle for the generic ringtones that come pre-installed on your iPhone? Get creative, express yourself, and make your iPhone truly unique with custom-made ringtones.
FAQs
1. Can I create free ringtones for my iPhone without using a computer?
Yes, you can! There are several apps available on the App Store that allow you to create ringtones directly on your iPhone without the need for a computer. These apps provide user-friendly interfaces and a wide range of audio editing tools, making it easy for you to customize and create personalized ringtones right from your device.
2. Are these apps safe to use?
Yes, the apps available in the App Store are vetted and reviewed by Apple to ensure they meet strict safety and security guidelines. However, it’s always a good idea to read user reviews and check the app’s ratings before downloading and installing it on your iPhone.
3. Can I use any song from my iPhone’s music library as a ringtone?
Yes, you can use any song from your iPhone’s music library as a ringtone, provided that you have the necessary permissions to use that song. Some apps even allow you to select a specific part of a song to use as a ringtone, giving you more control over the audio you want to set as your ringtone.
4. Will creating a custom ringtone affect my iPhone’s performance or battery life?
Creating a custom ringtone using these apps should not have any significant impact on your iPhone’s performance or battery life. However, it is recommended to not set excessively long or complex ringtones that might consume more resources while playing. It is generally advisable to keep your custom ringtones within a reasonable duration to ensure optimal performance.
5. Can I share the custom ringtones I create with others?
Yes, you can share the custom ringtones you create with others. Once you have created a customized ringtone using one of these apps, you can easily share it with your friends and family through various methods, such as email or messaging apps. Additionally, some apps provide direct integration with social media platforms, allowing you to share your creations with a wider audience.