
Are you tired of using the same old default ringtones on your iPhone? Do you want to add a personal touch to your device by turning your favorite voice memo into a custom ringtone? Look no further, as we have the perfect solution for you!
In this article, we will guide you through the simple steps to transform a voice memo into an iPhone ringtone. Whether it’s a funny recording of your friends, a memorable quote from a movie, or even your own voice singing a melody, you can now make it your unique ringtone.
By following our easy-to-understand instructions, you will be able to bring a personalized touch to your iPhone and make it stand out from the crowd. So let’s get started and create a one-of-a-kind ringtone that will make you smile every time your phone rings!
Inside This Article
- Step 1: Record a Voice Memo
- Step 2: Trim the Voice Memo
- Step 3: Convert the Voice Memo to AAC Format
- Step 4: Rename the File Extension
- Step 5: Add the Ringtone to iTunes
- Step 6: Sync the Ringtone to Your iPhone
- Step 7: Set the Ringtone on Your iPhone
- Conclusion
- FAQs
Step 1: Record a Voice Memo
Recording a voice memo on your iPhone is a simple and convenient way to capture any audio, whether it’s a quick reminder or an important idea. To record a voice memo, follow these steps:
- Unlock your iPhone by entering your passcode or using Face ID or Touch ID.
- Locate the Voice Memos app on your home screen. It’s a simple microphone icon, often found in the “Utilities” folder.
- Open the Voice Memos app by tapping on its icon.
- Once the app opens, you’ll see a large red record button at the bottom center of the screen. Tap on it to start recording your voice memo.
- Hold your iPhone close to your mouth or the source of the audio you want to capture. Speak clearly and directly into the microphone for the best quality recording.
- While recording, you’ll see a timer indicating the duration of the voice memo. You can also see the audio levels displayed on the screen to ensure that your voice is being picked up properly.
- To pause the recording, tap the red record button again. You can resume the recording later by tapping the same button.
- When you’re finished with the voice memo, tap the square stop button located in the same position as the record button.
- Your voice memo will be saved automatically with a timestamp and a title based on the date and time of the recording. You can customize the title later if you prefer.
That’s it! You’ve successfully recorded a voice memo on your iPhone. Now, let’s move on to the next step to learn how to trim the voice memo and turn it into a custom iPhone ringtone.
Step 2: Trim the Voice Memo
After recording a voice memo, you may find that it’s a bit too long for your desired ringtone. That’s where the trimming step comes in. Trimming allows you to select and keep only the portion of the voice memo that you want to use as your ringtone.
To trim the voice memo, follow these simple steps:
- Open the Voice Memos app on your iPhone.
- Select the voice memo that you want to trim.
- Tap the “Edit” button located at the bottom left corner of the screen.
- A waveform view of the voice memo will appear. You can see the entire length of the recording.
- Tap and drag the left and right sidebars of the waveform to select the specific portion of the voice memo you want to keep. You can preview the selected portion by tapping the “Play” button.
- Once you are satisfied with the selected portion, tap the “Trim” button at the bottom right corner of the screen.
After trimming the voice memo, you will notice that the selected portion is now separated from the rest of the recording. This trimmed portion will be used as your ringtone.
It’s important to note that you should choose a section of the voice memo that is short enough to work well as a ringtone. Ideally, you should aim for a snippet that is no longer than 30 seconds, as this is the maximum length allowed for iPhone ringtones. If the selected portion exceeds this limit, you may need to further trim it down or choose a different voice memo.
Once you have successfully trimmed the voice memo, you can proceed to the next step: converting it to the appropriate format and renaming it as a ringtone.
Step 3: Convert the Voice Memo to AAC Format
Once you have trimmed your voice memo to the desired length, the next step is to convert it to the AAC format, which is the required format for iPhone ringtones. The AAC (Advanced Audio Coding) format provides excellent audio quality while keeping the file size relatively small.
To convert the voice memo to AAC format, you will need to use a media conversion tool. There are several software options available that can perform this task. One popular choice is iTunes, which is a free media player and management tool developed by Apple.
To begin the conversion process, open iTunes on your computer and select “File” from the top menu. Then, click on “Add File to Library” or “Add Folder to Library” depending on the location of your voice memo file. Alternatively, you can also directly drag and drop the voice memo file into the iTunes library.
Once the voice memo is added to the iTunes library, locate it by going to the “Songs” tab in the iTunes library. Right-click on the voice memo file and select “Create AAC Version” from the drop-down menu. iTunes will convert the file to AAC format, creating a new shorter version of the voice memo.
After the conversion is complete, you will see the new AAC version of the voice memo listed alongside the original file. The AAC version will have the same name as the original, but with a shorter duration.
It’s worth mentioning that you can adjust the settings for the AAC format conversion in iTunes preferences. Simply go to the “Edit” menu, select “Preferences,” and then click on the “Import Settings” button. From there, you can choose the quality settings for the AAC conversion, such as the bitrate and the codec.
Once you have successfully converted the voice memo to AAC format, you are now ready to proceed to the next step and rename the file extension to .m4r, which is the recognized format for iPhone ringtones.
Step 4: Rename the File Extension
Once you have successfully converted the voice memo to the required AAC format, the next step is to rename the file extension to .m4r. This is important as .m4r is the file extension used for iPhone ringtones.
To rename the file extension, follow the steps below:
- Locate the converted AAC file in your file explorer or Finder.
- Right-click on the file and select “Rename” from the menu.
- Replace the existing file extension with .m4r. For example, if the file is currently named “voice_memo.aac”, change it to “voice_memo.m4r”.
- Press Enter or click outside the file name to save the changes.
Renaming the file extension is a crucial step to ensure that your iPhone recognizes the file as a ringtone. By changing the extension to .m4r, you are indicating to the device that it is a custom ringtone that can be used for incoming calls, text messages, and other notifications.
It’s important to note that if you don’t see the file extensions in your file explorer or Finder, you may need to enable the option to show file extensions. This can typically be done through the settings or preferences of your operating system.
Once you have renamed the file extension, you are one step closer to having your voice memo turned into an iPhone ringtone. The next step is to add the ringtone to iTunes so that you can sync it with your iPhone.
Step 5: Add the Ringtone to iTunes
Once you have successfully converted your voice memo into an AAC file format, the next step is to add the ringtone to iTunes. This will enable you to sync it with your iPhone and use it as a customized ringtone for incoming calls or notifications.
To add the ringtone to iTunes, follow these simple steps:
- Launch iTunes on your computer. Make sure you have the latest version of iTunes installed to ensure compatibility.
- Click on the “File” tab located at the top left corner of the iTunes window.
- From the dropdown menu, select “Add File to Library” if you want to add a single ringtone, or select “Add Folder to Library” if you have multiple ringtones to add.
- A file explorer window will appear. Navigate to the location where your converted ringtone file is saved.
- Select the file(s) you want to add to iTunes and click on the “Open” button.
- The selected ringtone(s) will be added to your iTunes library. You can find them under the “Tones” section in the left sidebar.
- Now, connect your iPhone to your computer using a USB cable.
- Once your iPhone is connected, it will appear as a small device icon in the upper left corner of the iTunes window.
- Click on the device icon to access your iPhone’s settings in iTunes.
That’s it! You have successfully added the ringtone to iTunes. Now you are ready to sync it with your iPhone and set it as your custom ringtone.
Step 6: Sync the Ringtone to Your iPhone
After successfully adding the custom ringtone to iTunes, the next step is to sync it to your iPhone. Syncing the ringtone will make it available for selection in the Sounds settings on your device. Follow the steps below to complete the process:
1. Connect your iPhone to your computer using a lightning cable. Launch iTunes if it doesn’t open automatically.
2. Click on the device icon located at the top left corner of the iTunes window.
3. In the left sidebar, click on “Tones” under the “On My Device” section.
4. Check the box next to “Sync Tones” if it is not already selected.
5. Choose whether you want to sync all tones or selected tones. If you select “Selected tones,” make sure the custom ringtone you created is checked.
6. Click on the “Sync” button at the bottom right corner of the iTunes window.
7. Wait for the sync process to complete. This may take a few moments depending on the size of the ringtone file.
8. Once the sync is finished, disconnect your iPhone from the computer.
9. On your iPhone, go to “Settings” and tap on “Sounds & Haptics.”
10. Tap on “Ringtone” and you should see your newly added custom ringtone listed at the top of the list.
11. Tap on the ringtone to set it as your default or assign it to specific contacts as desired.
That’s it! You have successfully synced the custom ringtone to your iPhone and can now enjoy a personalized ringtone whenever someone calls you.
Step 7: Set the Ringtone on Your iPhone
Now that you have successfully created a custom ringtone from a voice memo and synced it to your iPhone, it’s time to set it as your ringtone. Follow these simple steps to complete the process:
1. Open the Settings app – Locate the Settings app on your iPhone’s home screen and tap on it to open.
2. Tap on ‘Sounds & Haptics’ – Within the Settings app, scroll down until you find the “Sounds & Haptics” option. Tap on it to access the sound settings.
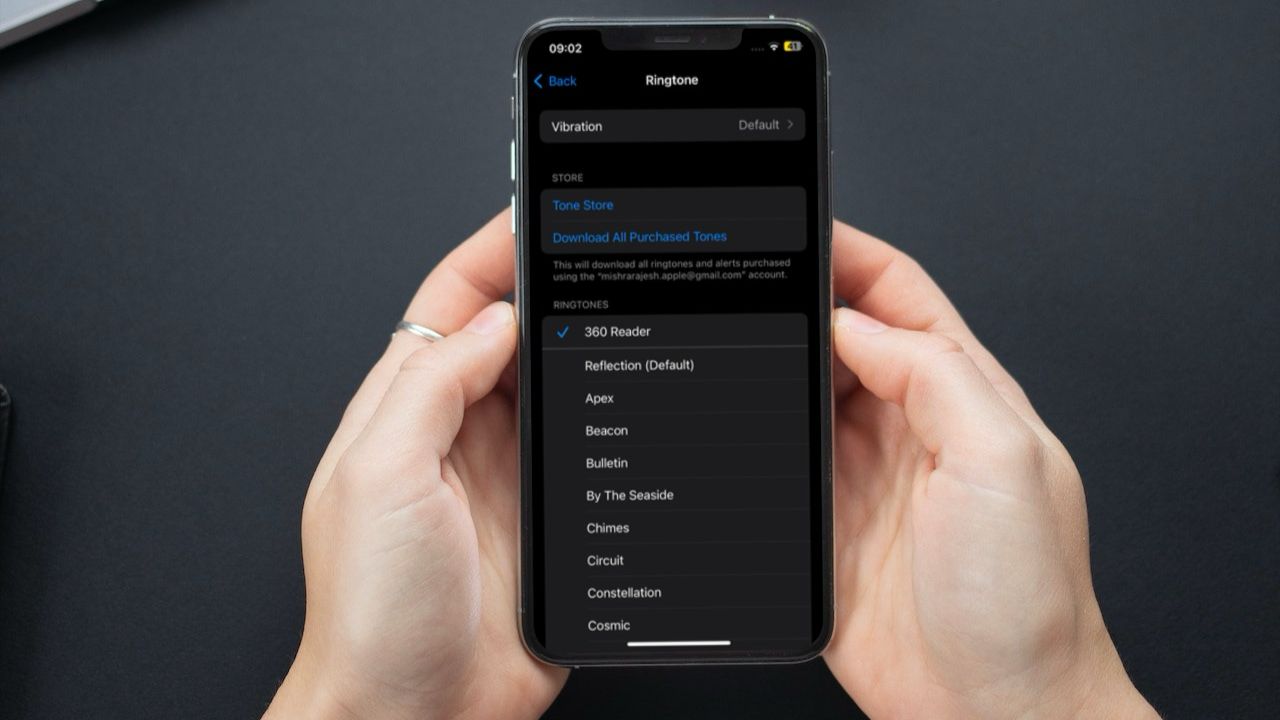
3. Select ‘Ringtone’ – In the “Sounds & Haptics” menu, you will see a list of different sound options. Look for the “Ringtone” option and tap on it.
4. Find your custom ringtone – In the “Ringtone” menu, you will see a list of pre-installed ringtones. Scroll down until you find the section titled “Custom.” Your newly created ringtone should appear here.
5. Tap on your custom ringtone – Once you have located your custom ringtone, tap on it to select it as your default ringtone. You can also listen to the ringtone by tapping on the play icon next to it.
6. Test your ringtone – To make sure your custom ringtone is set correctly, you can test it by asking someone to call your iPhone. If you hear your custom ringtone, then it has been successfully set.
7. Enjoy your personalized ringtone! – Congratulations! You have now successfully set your custom ringtone on your iPhone. Enjoy the unique sound that represents your personal style and preference.
By following these simple steps, you can easily set a custom ringtone created from a voice memo on your iPhone. Remember, you can always repeat the process and create new custom ringtones to add variety and personalization to your device.
Conclusion
In conclusion, turning a voice memo into an iPhone ringtone is a simple and convenient process that allows you to personalize your device with your favorite sound. By following the steps outlined in this article, you are able to convert your voice memo into a compatible format, transfer it to your iPhone, and set it as your ringtone.
This feature allows you to add a touch of uniqueness to your iPhone, making it stand out from the crowd. Whether it’s your favorite song, a funny sound byte, or a recorded message from a loved one, turning a voice memo into an iPhone ringtone allows you to unleash your creativity and customize your device to truly reflect your personality.
So, get ready to impress your friends and add a personalized touch to your iPhone by transforming your voice memo into a ringtone. Enjoy the process and have fun exploring the various sounds and options available to you. Let your imagination run wild and turn your iPhone into a device that not only looks good but sounds great too!
FAQs
Q: Can I turn a voice memo into an iPhone ringtone?
Yes, you can turn a voice memo into an iPhone ringtone with a few simple steps. This allows you to personalize your device by using your favorite recorded voice memos as ringtones.
Q: How do I convert a voice memo into an iPhone ringtone?
To convert a voice memo into an iPhone ringtone, follow these steps:
1. Open the voice memo application on your iPhone.
2. Select the voice memo you want to convert into a ringtone.
3. Tap on the “Share” button, usually represented by an arrow pointing upwards.
4. From the sharing options, select “Ringtone.”
5. Trim the voice memo to the desired length for your ringtone.
6. Tap on “Save” to save the ringtone to your iPhone.
Q: What file format does the voice memo need to be in for converting into a ringtone?
The voice memo needs to be in the M4A file format to convert it into an iPhone ringtone. Most voice memo applications save memos in this format by default, making it compatible for converting into ringtones.
Q: Can I edit the voice memo before converting it into a ringtone?
Yes, you can edit the voice memo before converting it into a ringtone. Most voice memo applications offer editing options like trimming, adjusting the volume, or adding effects. Make sure to edit the voice memo to the desired length and quality before converting it into a ringtone.
Q: How long can the iPhone ringtone be?
The maximum length for an iPhone ringtone is 40 seconds. When converting a voice memo into a ringtone, you can trim it down to the desired length as long as it does not exceed this limit.
Q: Can I use third-party apps to convert a voice memo into an iPhone ringtone?
Yes, there are several third-party apps available on the App Store that can help you convert a voice memo into an iPhone ringtone. These apps may offer additional features and customization options compared to the built-in voice memo app on your iPhone.