If your Android device is starting to drag its feet with the slow loads and lag times, it could be because of the trash folder. It’s a great feature for recovering deleted files temporarily, but leaving too many items in the bin can slow down your device and take up vital storage space. This article will give you helpful tips on how to empty out this area quickly so your phone will have its speed optimized.
Key Takeaways
- Deleted files are stored in the trash until you permanently remove them, but leaving too much there can impact performance and take up precious storage space.
- Overstuffed trash not only takes up valuable storage space but can also open any deleted confidential data to potential exploitation by malicious actors.
- You can keep your trash tidy and optimized by routinely cleaning out its contents or using third-party apps like SD Maid, CCleaner, and Files by Google. And if you happen to delete a crucial file, you can rely on data recovery solutions such as DiskDigger or Dumpster for help with salvaging whatever was lost. However, the quicker you take action increases your possibility of success in recovering those files.
Inside This Article
Why Is It Important to Empty Your Trash?
Many Android users may not know that their device contains a useful recycle bin, also known as the Trash Folder. It is where all deleted files – including photos, videos, and documents – are temporarily kept until they are permanently removed once you empty them out.
The performance of your phone can suffer and your security be compromised if you don’t manage your trash. Storing too many files in it not only takes up precious storage space but also puts any sensitive data that may have been deleted at risk of being accessed by someone else.
How to Empty Trash on Your Android Device
Get rid of unwanted files and make room for what matters. Cleaning up your Android device’s trash is easy when you follow these simple steps:
Step 1: Open the Gallery App
You should be able to find the Gallery app on your Android phone easily as it’s one of the pre-installed Google apps displayed on the screen by default.
Step 2: Access the Trash
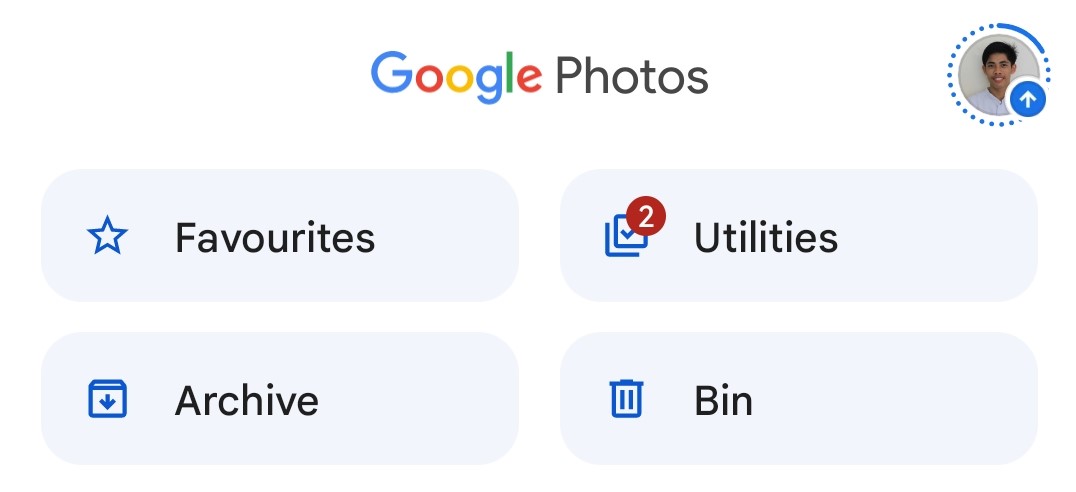
At the bottom, tap “Library” and select “Bin”.
Step 3: Select All Files
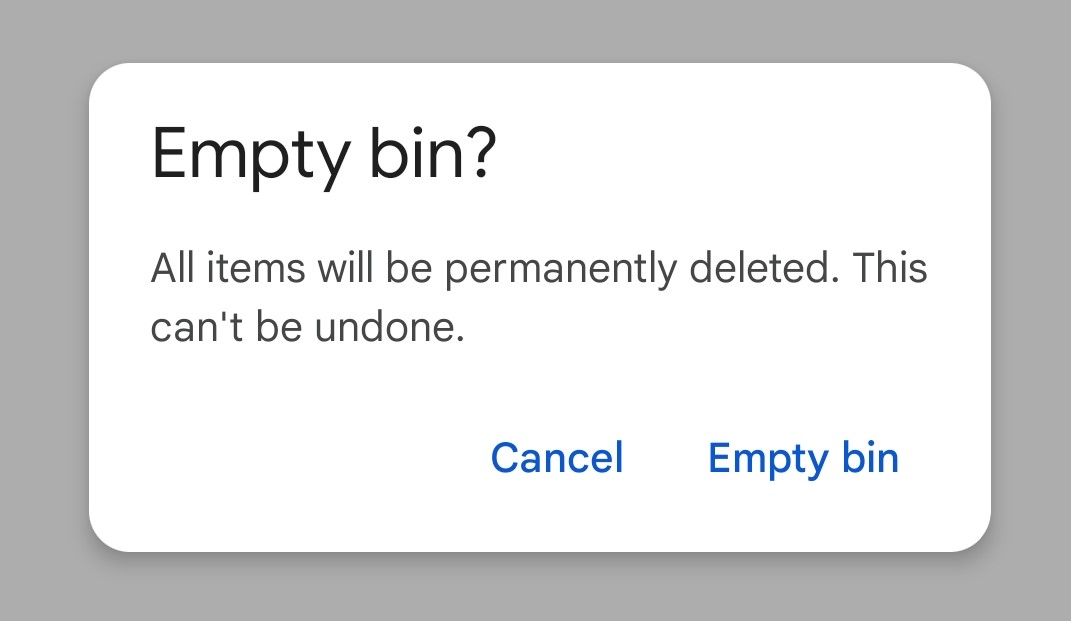
If you want to delete a specific file, click on “Select” on the upper right and tick the photos you want to delete. If you want to want all junk files to be permanently deleted, click on the three-dot icon on the upper right and select “Empty bin”.
Step 4: Empty the Trash
A pop-up will appear. Select “Empty bin” and those items will be permanently wiped away.
Step 5: Confirm That the Trash Is Empty
To double-check that everything’s gone, head to the Gallery app and access your trash. If it’s completely empty, then you’ve successfully emptied out all unnecessary junk.
Tips for Managing Your Trash on Android
Keeping your Android device in tip-top shape is easy with these simple tips for managing your trash:
- Don’t let your digital trash build-up – be sure to regularly clean out the contents of your Trash folder and keep those files in check.
- A file manager app can help you find those resource-hogging media files that are taking too much of your precious memory.
- You can unchain the weight of your files from physical storage space by opting for cloud-based services like Google Drive and Dropbox. These powerful solutions make it easy to organize, store, access & share data anytime, anywhere.
Common Issues When Emptying Trash and How to Troubleshoot Them
Many Android phone users find themselves in a pickle when trying to remove trash from their devices. You may have experienced issues like the trash folder not opening or emptying properly. Sometimes, you may even realize deleted files still appear in your trash folder. Here are some steps you can follow:
1. Restart Your Phone
Power cycling or restarting is the most basic troubleshooting step that any electronic or electrical device undergoes. From a humble electric egg beater to Android phones, it is the go-to solution for any technical glitch. Restarting your phone can help clear even the toughest of tech troubles. Give this simple solution a shot and see if it solves the problem.
2. Clear the Android App Cache and Data for the Trash App
If your trash app still isn’t running as it should even after restarting the phone, shake things up by clearing its cache and data. Head to Settings > Apps > Trash then Storage. You can select “Clear Cache” or “Clear Data” from there. This wipes out any temporary files that might be causing trouble and sets the app back to its default condition for a fresh start.
3. Check for App Updates
Keeping your trash app current is essential for optimal performance. Take a few moments to check the Google Play Store, and see if any updates are available. With just one tap of the Update button, you can ensure that your experience remains free from hiccups.
4. Use a Third-Party App
If your device’s trash bin is still full and you still can’t delete downloaded files that are junk and app data files that have been recently thrown in there, don’t despair. There are several apps available on the Google Play Store that can help you manage and optimize your trash to make more room. Popular recommendations include SD Maid, CCleaner, and Files by Google for a speedy cleanup of unnecessary files with just one tap.
5. Factory Reset Your Android Phone
If you’ve exhausted all of your options, consider a factory reset on your device. Not only will this restore it to its original settings, but it’s also an opportunity for a fresh start – just make sure to back up any valuable data first.
How to Recover Files
Data recovery apps like DiskDigger and Dumpster could come to the rescue in cases like these. These clever programs can scan your phone’s storage for potentially recoverable files – even those you thought were gone forever. However, act fast; the longer you wait to try and retrieve deleted data, the lower its chances of being recovered successfully.
FAQs
Conclusion
Keeping your Android phone running optimally isn’t difficult; just take a few minutes to empty out that trash every now and then. By following the steps outlined in this article, you’ll have more free storage space for other important apps – giving your Android device an overall performance boost.


