
Are you struggling to manage the overwhelming influx of emails on your iPhone 12? Deleting multiple emails can be a tedious task, especially when dealing with a cluttered inbox. Fear not, as I'm here to guide you through the process of efficiently decluttering your email collection. In this comprehensive guide, you'll learn the most effective methods to delete multiple emails on your iPhone 12, streamlining your digital communication experience. Whether you're a busy professional, a student, or simply inundated with promotional messages, these techniques will help you regain control of your inbox in no time. Let's dive into the step-by-step process and reclaim your digital organization.
Inside This Article
- Step 1: Open the Mail App – Accessing the Mail app on your iPhone 12
- Step 2: Select Multiple Emails – Choosing multiple emails for deletion
- Step 3: Delete the Selected Emails – Permanently removing the selected emails
- Step 4: Empty the Trash- Clearing out the deleted emails from the Trash folder
- Conclusion
- FAQs
Step 1: Open the Mail App – Accessing the Mail app on your iPhone 12
Accessing the Mail app on your iPhone 12 is a straightforward process that allows you to manage your emails with ease. The Mail app is a vital tool for staying connected and organized, providing quick access to your email accounts and messages.
To begin, locate the Mail app icon on your iPhone 12’s home screen. The icon features a white envelope on a blue background and is typically found in the lower row of icons. Once you’ve located the Mail app, tap on the icon to open the application.
Upon opening the Mail app, you’ll be greeted with your inbox, where you can view all your received emails. From here, you can navigate to different folders, compose new emails, and perform various email management tasks. The Mail app’s intuitive interface makes it easy to access and manage your emails on the go.
Step 2: Select Multiple Emails – Choosing multiple emails for deletion
After opening the Mail app and accessing your inbox, it’s time to select multiple emails for deletion. To do this, tap the “Edit” option located at the top-right corner of the screen. This action enables you to choose multiple emails at once, streamlining the deletion process.
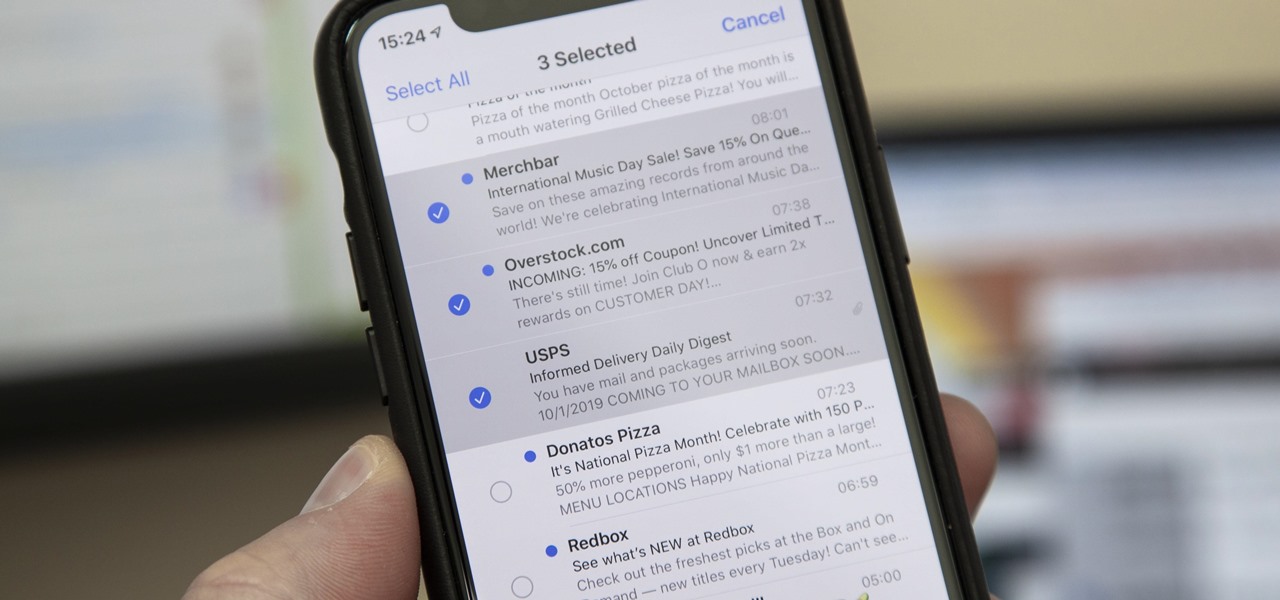
Once in edit mode, you can select individual emails by tapping the circular icon beside each message. As you tap on the icons, a checkmark will appear, indicating that the email has been selected for deletion. This intuitive interface allows you to easily identify the emails you want to remove from your inbox.
If you wish to delete all emails within a specific category, such as promotions or social, you can do so by tapping “Select All” at the bottom of the screen. This convenient feature expedites the deletion process, especially when dealing with a large volume of emails.
Step 3: Delete the Selected Emails – Permanently removing the selected emails
Once you have selected the emails you want to delete, it’s time to bid them farewell for good. Deleting the selected emails from your iPhone 12 is a straightforward process that ensures you can free up valuable space and keep your inbox tidy.
To delete the selected emails, tap the trash can icon located at the bottom right corner of the screen. This action will prompt a confirmation message to appear, ensuring that you intend to delete the selected emails. Tap “Delete” to confirm and permanently remove the emails from your iPhone 12.
It’s important to note that once you delete the selected emails, they will be moved to the Trash folder. However, they are not completely removed from your device until you proceed to empty the Trash. This additional step helps prevent accidental deletions and provides an opportunity to recover any mistakenly discarded emails.
By following these simple steps, you can efficiently manage your email correspondence on your iPhone 12, keeping your inbox organized and clutter-free. Deleting unwanted emails not only optimizes storage space but also streamlines your digital communication experience.
Step 4: Empty the Trash- Clearing out the deleted emails from the Trash folder
After you’ve deleted the unwanted emails, they are moved to the Trash folder. To ensure that they are completely removed from your iPhone 12, you need to empty the Trash. This step prevents the deleted emails from taking up unnecessary storage space on your device.
To empty the Trash folder, open the Mail app on your iPhone 12 and navigate to the Mailboxes screen. From there, select the Trash folder to view all the deleted emails that are awaiting permanent removal.
Once you’re in the Trash folder, tap the “Edit” button located at the top-right corner of the screen. This action enables you to select multiple emails for deletion or choose the “Delete All” option to remove all the emails in the Trash folder at once.
After selecting the emails you want to permanently delete, tap the “Delete” button. A confirmation prompt will appear to ensure that you want to permanently remove the selected emails. Confirm the action by tapping “Delete” once more.
By following these steps, you can effectively clear out the deleted emails from the Trash folder on your iPhone 12, freeing up storage space and ensuring that your mailbox remains organized and clutter-free.
Conclusion
Deleting multiple emails on your iPhone 12 is a simple yet essential task that can help you manage your inbox more efficiently. By using the Mail app’s built-in features, you can quickly declutter your inbox and stay organized. Whether you prefer to swipe, select, and delete or use the edit mode to mass-delete emails, the process is straightforward and can save you valuable time. With these methods at your disposal, you can keep your email correspondence streamlined and ensure that your inbox remains tidy and easy to navigate. Mastering the art of deleting multiple emails on your iPhone 12 will undoubtedly contribute to a more seamless and enjoyable email management experience.
FAQs
Q: How do I delete multiple emails on iPhone 12?
A: To delete multiple emails on iPhone 12, open the Mail app, tap “Edit” at the top right corner, select the emails you want to delete, then tap the trash icon to delete them.
Q: Can I delete all emails at once on iPhone 12?
A: Yes, you can delete all emails at once on iPhone 12. In the Mail app, tap “Edit” at the top right corner, then tap “Select All” and finally, tap the trash icon to delete all the selected emails.
Q: Will deleting emails on iPhone 12 also delete them from the server?
A: It depends on the email account settings. If your iPhone 12 is set to delete emails from the server when removed from the device, then deleting emails on your iPhone 12 will also remove them from the server. However, if it’s set to archive emails, they will remain on the server.
Q: Can I recover deleted emails on iPhone 12?
A: Yes, you can recover deleted emails on iPhone 12 if they are still in the “Trash” folder. Simply open the “Trash” folder in the Mail app, find the email you want to recover, then move it back to the desired folder.
Q: How can I prevent deleted emails from being recovered on iPhone 12?
A: To prevent deleted emails from being recovered on iPhone 12, you can enable the “Delete from server” option in the email account settings. This will ensure that deleted emails are permanently removed from the server.